Refrigerator Single Water Inlet Valve Specifications
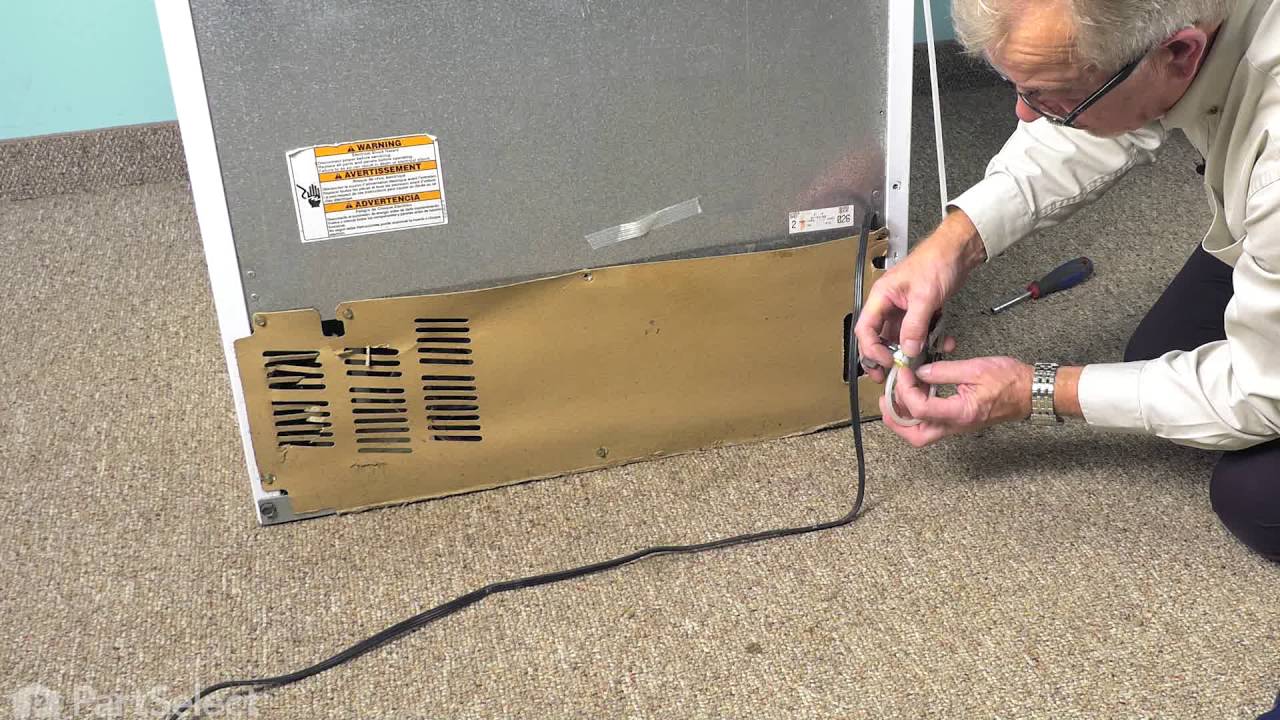
The single water inlet valve, also known as a water solenoid valve, is used for refrigerators. This part is a solenoid-operated switch that releases water from the supply line to the water valve and into the icemaker mold when activated. If your icemaker is making small cubes, does not dispense ice or water, or leaks, this replacement could solve the issue. The tools needed for this repair are a 1/4 inch nut driver and a utility knife. Refer to the diagram provided by the manufacturer for further instructions. As a safety precaution, remember to unplug your dryer from the power source.
How Buying OEM Parts Can Save You Time and Money
Troubleshooting
This part fixes the following symptoms:
Ice maker not making ice | Leaking | Ice maker won’t dispense ice | Not dispensing water
Keep searches simple. Use keywords, e.g. "leaking", "pump", "broken" or "fit".
Sorry, we couldn't find any existing reviews that matched. Try using some different or simpler keywords.
★★★★★
★★★★★
Robert Lund J - March 13, 2024
Verified Purchase
Worked great
Perfect fit problem solved
★★★★★
★★★★★
Tim V - March 8, 2024
Verified Purchase
Very Pleased
Quick delivery and easy to install!!
Works great ??
★★★★★
★★★★★
C B - October 21, 2023
Verified Purchase
Expectations were met.
All worked great. Thankyou, Connie
★★★★★
★★★★★
Larry C - July 13, 2023
Verified Purchase
Water Valve Replacement
Repair was simple and straightforward. Part was exact match and installed with no problems whatsoever.
★★★★★
★★★★★
Werner R - January 16, 2023
Verified Purchase
as expected
Easy peasy
★★★★★
★★★★★
Roy W - May 20, 2022
Verified Purchase
Great part & and easy to install.
Great having the ice maker working again. Thank you!!
★★★★★
★★★★★
Karen M - April 28, 2022
Verified Purchase
Perfect fit
This was the correct part and works beautifully !
★★★★★
★★★★★
Debra F - August 12, 2021
Verified Purchase
Refrigerator Ice Maker Repair
The part I ordered was a perfect fit, my ice maker is back in business.
★★★★★
★★★★★
Bonnie S - June 24, 2021
Verified Purchase
Exact part
Part was as described - worked perfectly. We now have an ice maker that is working! Prompt delivery - thanks!
★★★★★
★★★★★
Steven L - June 4, 2021
Verified Purchase
Fast Shipping
the exact part I needed, easy install, ca.e the day after ordered. Thanks
< Prev
1
2
3
Next >
Customer Repair Stories
Average Repair Rating: 3.8 / 5.0, 17 reviews.
What's this?
Sort by:
< Prev
1
2
Next >
Search filter:
Clear Filter
Your search term must have 3 or more characters.
Keep searches simple. Use keywords, e.g. "leaking", "pump", "broken" or "fit".
Sorry, we couldn't find any existing installation instruction that matched.
Ice maker stopped working
Our ice maker had been overfilling and causing a big block of ice in the bin for some time, but it finally stopped working completely. In trying to determine the problem, I read the comments on the PartSelect website from other customers and thought I needed either a new valve or a new ice maker. I replaced both because when I took the
... Read moreold ice maker out, it had a lot of mineral deposits in it and looked very unappetizing. The videos on how to replace the valve and ice maker were very helpful. Other customers comments on replacing the valve were also great. The only thing I would add is that after getting the parts installed and the water line and electricity reconnected, it takes an hour or so for the ice maker to to fill. I suppose there is a temperature sensor that won't fill it until gets down to a certain point. I am very pleased with the outcome of this project on our 28 year old refrigerator.
Icemaker not working. Water inlet valve not supplying water.
I first replaced the icemaker assembly but that didn't fix it so I bought and installed a new inlet valve and that fixed it. This video shows exactly what I did. https://www.youtube.com/watch?v=VdHG_6LpdL4 The icemaker didn't start right up so I jumpstarted it by shorting out terminals T and H as shown here. https://www
... Read more.applianceaid.com/icemaker-module.php The wheel should start to turn. Just make sure to remove the jumper wire when the wheel has turned between 1/4 and 1/2 rotation.
Read less
Fred from ORINDA, CA
Difficulty Level:
Easy
Total Repair Time:
30 - 60 mins
Tools:
Nutdriver, Wrench (Adjustable)
1 personfound this instruction helpful.
Was this instruction helpful to you?
Thank you for voting!
Ice Maker was overflowing with water
I could not determine if the solenoid water inlet valve or the ice maker unit was bad, so I replaced both. In this model of the refrigerator, the freezer is a drawer on the bottom, so this makes access to the ice maker mounting a little tricky. The need to contort to reach into the back made this take longer and was more uncomfort
... Read moreable than expected. I needed to completely remove the screws for the top brackets, even though most instructions indicate you can loosen these and lift the ice maker off. Be careful to properly re-seat the water guide that directs the water from the inlet tube to the ice maker. That tended to interfere with re-connecting the wiring harness to the back of the freezer. Again, this was likely difficult because of having to bend over into the freezer. The ice maker needs to be in the freezer for about 12 hours before the sensor in the black wire is cool enough to allow operation. I did not know this at first, so I was initially worried that there was a bigger problem. If you want to use the test functions with a jumper wire, be sure the door switch that controls the freezer light is depressed. The solenoid value replacement was fairly straightforward. I found it useful to use a small open wrench to push the compression lock for the value-to-ice maker water tube to remove the old solenoid. Otherwise, replacing the water valve was simple.
Watched the video from whirlpool and it seemed to be relatively straightforward - but as I am afraid of electricity and not much of a DIY guy I had a friend over to supervise - initially diagnosed a leak at the water inlet valve - but after ordering the part online ($75) and before it arrived about 6 days later I started to investigate
... Read morethe valve - initially I could not release the plastic tube from the valve (output to the ice-maker) but I pushed a part or two and managed to release it - when the part arrived I bought 6ft of tubing from a local store who sold it by the foot as opposed to HD who sold a 25ft tube - I also decided to buy new braided stainless steel to go from faucet to the inlet valve ($10) - put together everything when the valve arrived and did not take long to put everything together - time mainly spent after checking leaks - tea towels and small towels around fridge - to my dismay after few days discovered fridge was still leaking at front - so checked a few videos and thought origin of leak must be evaporation tray - so placed a bowl under the overflow on inside at the back of fridge and it seemed to catch the water and no leaks - so I tried to get existing evap. tray out - not easy - clipped into a slot at back of fridge and released that but still struggled to get tray out - eventually forced it out but in doing that I split the tray - so I was not sure that was issue as I had split the tray forcing it out - however looking at the base of fridge where the tray was the surface was v rusty and rust was there on foot of tray - so I assumed that was issue - ordered a new tray ($20 I think) - looking under fridge after I forced out the tray I noticed there were two clips that held the tray in place - but could not see them when tray was in place - so I took some pliers and forced the end of clips up to make it easier to get the new tray in place - so when I received new tray only went in easily - then tested a few days - found a little leak at faucet so tightened the water line nut - so now just testing that water in evap tray does in fact evaporate- so far so good - I'll leave a few more days then attach back cover of fridge and push back fridge to where it should be -I will always wonder if I needed to replace the inlet valve but the experience was worth it as it gives me confidence to attack other jobs - most of my time spent testing for leaks after replacing parts
Read less
DOUGLAS from WAYNE, NJ
Difficulty Level:
Easy
Total Repair Time:
30 - 60 mins
Tools:
Socket set, Wrench set
1 personfound this instruction helpful.
Was this instruction helpful to you?
Thank you for voting!
Water inlet valve failed to close, flooded kitchen.
Only two possible failures can cause this problem. The valve itself could fail electronically/mechanically, or the ice maker controller on the ice maker itself failed to tell the valve to close. To cover all the bases I bought both parts. $196.00 To change the ice maker, three screws, one electrical plug, remove and reinstall face cover p
... Read morelate from old ice maker to new one, and remove and reinstall the metal bar that indicated when the ice bin is full, and tells the controller to stop making ice. It’s on YouTube and takes 10 to 15 minutes to complete the change. To change the inlet valve, there is a little bit more to it then YouTube shows, ESPECIALLY SPECIAL TOOLING I PERSONALLY RECOMMEND. IF YOU DON’T HAVE IT YOU COULD DAMAGE NEW PARTS DURING INSTALLATION. Pull the fridge out, disconnect power and turn off the water. Have towels/ water catch tray/pan handy. Remove screws on the back cover plate as required to access inlet valve. Remove the water inlet line, (mine was 1/4 inch compression fitting, copper tubing.) remove 2 screws that hold valve in place. Pull valve out to full extension of electrical plug. Here is the part that YouTube DOES NOT COVER, take note of how many wires of go to each prong of the connector and its orientation while removing. I’m not a electrician/spark chaser, my guess it is a solenoid/relay type valve, when energized, it will open or close the valve. This is an AC circuit, and I will be honest, I don’t think polarity is a concern, but don’t quote me on that. It’s just easier to take note and put it back the way it was. It worked for 20 plus years, it should to the same if you put it back the way you found it, given you removed and replaced an identical part or a suitable substitute. Depending what valve you receive your water supply line from the valve to the ice maker can vary. It could be a Nylon compression fitting, (which could require additional parts,) or a quick disconnect. That is covered in YouTube, and its exact. Mine was a QD, cut 1/4 inch off nylon tubing and insert, pull back on line to insure security. Done. Very simple. Reconnect electrical plug, IN ITS PROPER ORIENTATION. Reattach valve with two screws. The next step IS NOT COVERED IN YOUTUBE. Before you reinstall cover plate, and push the fridge back, turn on water supply to the valve and perform a leak check. I would recommend applying power and make sure the valve cycles, and the line between the valve and ice maker doesn’t leak. I was good on the line between the valve and ice maker, that did not leak. My copper inlet tubing compression fitting failed at the valve attach point, and required special tooling to repair. A compression fitting to fix a leak you tighten till leak stops. So they say. This fitting was over torqued at one time or another, and leaked, so I spliced in about 6 inches of new copper tubing added a union, and 3 new compression fittings. The bad part, I had to go to hardware store, buy 10 feet of tubing (only needed 6 inches), the B-nuts, and the brass sleeves. To make the new attach point at the valve and new line, since the valve is mostly made of plastic, I used the union to fabricate the new end going to the valve, removed the union and attached the line to the valve. Here is where the special tool comes in, the fitting on the valve, is a very low profile hex head fitting, made of brass which is a soft material, very easy to strip if the wrench slips, and a back up wrench is near impossible to install as a back up with out fouling the B-nut while tightening the fitting. So I ground down a 1/2 or 9/16 open end wrench to fit, (check your fittings size before grinding or buying a wrench, yours could be metric), made it a thin wrench, so I can tighten compression fitting and back up the valve side WITH OUT DAMAGING THE VALVE I just paid 70 bucks for. If you own expensive tools Harbor Freight is your friend for a wrench to grind down or buy a thin wrench. Snap-On makes thin wrenches, but I think they cost more then the valve. Once my splice was installed, I performed another leak check, all was good, I reinstalled, back cover panel, and pushed the fridge back. Since the ice maker was changed, the longest time took was adjusting ice cube size. You have to wait a complete cycle to see what size is dumped, then make the adjustment, and wait another complete cycle to see results. And do that until you get desired results. Those adjustments are on YouTube, and are fairly accurate. I ended up doing more then 1/2 turn at a time. More like 4 complete turns counter clockwise for larger ice. But it works! To change the valve actually takes about 15-20 minutes, very easy, I had complications. My luck, with any kind of plumbing, I make many trips to the hardware store. That is a given and completely unavoidable. Hope this helps. Ron O.
Took cardboard cover off rear of refrigerator, five screws. Turned water off and unplugged fridge. Took out two screws holding inlet valve, pulled off quick release power wires and changed out water supplies in and out. Rebooked power and replaces cardboard cover. With power and water back on, ice maker was supplied with water.
Thomas from ZEPHYRHILLS, FL
Difficulty Level:
Really Easy
Total Repair Time:
30 - 60 mins
Tools:
Nutdriver, Screw drivers, Wrench (Adjustable)
2 of 2 peoplefound this instruction helpful.
Was this instruction helpful to you?
Thank you for voting!
old valve was not shutting off fully, flooding ice-maker, creating a glacier
Shut off water supply, removed old valve (two screws, 1/4' nut driver), disconnect electrical plug, remove water lines (adjustable wrench). Cut fitting off tube to ice-maker (new unit has a push-to-connect fitting). Replace water lines and electrical connector. Mount valve back on cabinet. Turn water back on.
duncan from HOWELL, NJ
Difficulty Level:
Very Easy
Total Repair Time:
Less than 15 mins
Tools:
Nutdriver, Wrench (Adjustable)
6 of 6 peoplefound this instruction helpful.
Was this instruction helpful to you?
Thank you for voting!
Water was overflowing into ice bin.
First I ascertained that valve was faulty. Ordered replacement and installed without issue. Water now overflowed only during fill and found that filler neck had ice in it as a result of initial leakage. Defrosted with a hair dryer, removed ice plug and it now works as advertised.
Russell E from Rome, PA
Difficulty Level:
Really Easy
Total Repair Time:
1- 2 hours
Tools:
Nutdriver, Pliers
22 of 31 peoplefound this instruction helpful.
Was this instruction helpful to you?
Thank you for voting!
water outlet on the back of ref leaked
took old one off and put new on now the ice maker makes a noise but, doen't fill with water, I am going to turn off freezer and see if it is froze up.
Deb from maceo, KY
Difficulty Level:
Really Easy
Total Repair Time:
15 - 30 mins
Tools:
Pliers, Wrench set
4 of 13 peoplefound this instruction helpful.
Was this instruction helpful to you?
Thank you for voting!
Icemaker just stopped making ice one night
I pulled the refrigerator out from the wali slowly so not to damage the water line to the ice maker. Then with a nut driver I removed all the screws holding the back plate on. Being careful not to kink the water line, I used the adjustable wrench to losen the water line feed nut and the nut that goes to the line to the icemaker. Then I re
... Read moremoved the screws holding the valve in place finished unhooking the water lines with my fingers. I then got the new valve and finger tightend the main water supply nut to the inlet side, then I pushed the plastic supply tube going to the icemaker into the valve. The new valve does not use a nut to attach the tubing it is a presure fit very easy.
Read less
Robert from Center Moriches, NY
Difficulty Level:
Really Easy
Total Repair Time:
15 - 30 mins
Tools:
Nutdriver, Wrench (Adjustable)
8 of 15 peoplefound this instruction helpful.
Was this instruction helpful to you?
Thank you for voting!
< Prev
1
2
Next >
Questions and Answers
Ask our experts a question about this part and we'll get back to you as soon as possible!
26 questions answered by our experts.
Sort by:
< Prev
1
2
3
Next >
Search filter:
Clear Filter
Your search term must have 3 or more characters.
Keep searches simple. Use keywords, e.g. "leaking", "pump", "broken" or "fit".
Sorry, we couldn't find any existing answers that matched.Try using some different or simpler keywords, or submit your new question by using the "Ask a Question" button above!
Rob Grant
August 17, 2017
When testing my ice maker water-inlet valve for continuity, i get a reading of 175 to 180. Does this mean the valve is bad and needs to be replaced or is it in the acceptable range?
For model number 2182104
Hello Rob,
Thank you for contacting us.
You would need to see if it is receiving the proper voltage of 120VAC. For continuity you are really only concerned that it reads a closed circuit.
I hope this helps
13 people found this helpful.
Was this helpful?
Thank you for voting!
Ginette
December 12, 2017
Water leaks out of the ice maker when making ice cubes in 2 spots leaving frozen globs of ice cubes stuck together in the tray.
For model number MFF2258VEM5
Hi Ginette, Thank you for the question. If the icemaker is leaking I suggest removing it from the appliance to see if there is crack somewhere the leak can be coming from. It is possible the Ice Mold may be damaged and needs to be replaced. If there are no cracks or damage you can see, you may need to replace the ice maker. Hope this helps!
6 people found this helpful.
Was this helpful?
Thank you for voting!
Don
January 21, 2018
The valve doesn't allow water to the maker
For model number MITXEMMWS03
Hi Don,
Thank you for your question. If the water inlet valve is not allowing water to go to the ice maker it may need to be replaced. Also check the tubing between the ice maker and water inlet valve to see if there are any blockages. I hope this helps. Thank you and have a great day!
6 people found this helpful.
Was this helpful?
Thank you for voting!
Jim
December 6, 2022
My ice maker stopped making ice. I then followed some of the suggestions in this Q&A forum: I manually filled the ice tray and the ice maker did make ice as well as added the cubes to the ice bin. I did this a couple of times to confirm that the ice maker was indeed working. I then checked the ohms reading on the water inlet valve and it read approximately 188ohms (I had read that an acceptable range was 200 - 500ohms). Based on this I purchased and installed a new water inlet valve. It has been 2hrs and I am not seeing any water being added to the ice maker. Do I need to give it more time for the ice maker to initiate a harvest cycle? Did shutting off the power during the water inlet valve installation automatically initiate a restart of the ice maker harvest cycle (which I read could take up to 24hrs for ice to be made)?
For model number ET8GHMXLQ02
Hello Jim, Thank you for your inquiry. Turning off the power to the refrigerator should restart the harvest cycle, but we have also included a link to our video on how to test the valve and ice maker. We would also recommend checking the lines for any clogs or leaks to make sure water is getting to the ice maker. Good luck with your repair.
6 people found this helpful.
Was this helpful?
Thank you for voting!
Emile
January 2, 2018
Water is dripping in the rear of my refrigerator from the freezer level down into the refrigerator section. It accumulates in the bottom of the refrigerator and eventually will reach a level where it overflows out of the front of the refrigerator onto our floor.
For model number ET8GHMXLQ00
Hi Emile,
Thank you for your question. If there is water leaking from the freezer section into the refrigerator, then you may have a clogged or frozen drain line. If this is the case you will need to either clean the line of debris or if there is ice, you will need to clear the drain with some warm water. Also make sure the refrigerator is level. This will allow the water in the refrigerator to drain correctly. I hope this helps. Thank you and have a great day!
3 people found this helpful.
Was this helpful?
Thank you for voting!
Dave
May 13, 2019
Why does water leak into ice tray before freezing but still makes ice cubes
For model number MBF2256KEB
Hi Dave,
Thank you for your question. If water is leaking into the ice tray, there may be an issue with the water inlet valve or the water lines. You will need to check the parts to see which one is causing the issue. I hope this helps. Thank you and have a great day!
2 people found this helpful.
Was this helpful?
Thank you for voting!
Greg
July 25, 2021
Hi. Do you just push the white plastic water line into this part? What holds it in there? Thank you
Greg
For model number WP2315576
Hello Greg, Thank you for your inquiry. Yes, the plastic water line fits into the yellow quick connect on the valve, which locks onto the line and holds it in place. Good luck with your repair.
2 people found this helpful.
Was this helpful?
Thank you for voting!
Ken
February 14, 2023
HOW DOES THE OUTLET TUBE ATTACH TO THE WATER INLET VALVE. DOES NOT APPEAR TO HAVE ANY COUPLIN.
For model number GX55HDXVQ01
Hello Ken, thank you for reaching out. We have found a video to help you out. The inlet valve in this video is the same, but the refrigerator model is different. The procedure for attaching the outlet tube to the inlet valve is also the same. We hope this helps!
1 person found this helpful.
Was this helpful?
Thank you for voting!
Alice
May 21, 2019
I see the part listed above is available. Where would it come from and how long for delivery. I am in canada
For model number 2315576 part #
Hello Alice, Thank you for the question. The shipping is usually 3-5 business days. Once the order is shipped we email you a link to track the package and it will show the ship from location. Hope this helps!
1 person found this helpful.
Was this helpful?
Thank you for voting!
Don
June 26, 2019
My ice maker is making ice, but it isn't working to get a glass of water. Ice side works, water side doesn't.
Hello Don, thank you for contacting us, In order for us to locate the correct parts and repair information we will require the model number of the unit. Once you have located the model number please feel free to resubmit the question and we will be happy to help you. Look forward to hearing from you!
1 person found this helpful.
Was this helpful?
Thank you for voting!
< Prev
1
2
3
Next >
✖
Ask a Question
Ask our experts a question on this part and we'll respond as soon as we can.