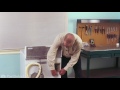
This washing machine water inlet valve has two ports for water to enter. It comes with its own anti syphon and wire guide.
How Buying OEM Parts Can Save You Time and Money
Part Videos
Replacing your Maytag Washer Water Inlet Valve
Troubleshooting
This part fixes the following symptoms:
Leaking | No hot or cold water
This part works with the following products:
Washer, Washer Dryer Combo.
This part works with the following products:
Maytag.
Part# WP22002360 replaces these:
AP6006289, 22002360
Customer Reviews
Average Rating:
★★★★★
★★★★★
14 Reviews
4.6
Filter By Rating:
5 Stars
12
4 Stars
1
3 Stars
0
2 Stars
0
1 Star
1
Sort by:
< Prev
1
2
Next >
Search filter:
Clear Filter
Your search term must have 3 or more characters.
Keep searches simple. Use keywords, e.g. "leaking", "pump", "broken" or "fit".
Sorry, we couldn't find any existing reviews that matched. Try using some different or simpler keywords.
★★★★★
★★★★★
David C - October 8, 2022
Verified Purchase
Washing machine inlet valve
The part fit and worked perfectly. No issues at all. Only downside is that it is a bit expensive.
★★★★★
★★★★★
Steven H - May 15, 2021
Verified Purchase
Water inlet valve, perfect replacement part, thanks .
Part came very well packed, on schedule and I installed it in about 10 minutes.
Youtube instructions very helpful.
★★★★★
★★★★★
Benjamin P - May 6, 2020
Verified Purchase
Leaking washer
The part was exact and the instructions simple !!
Easy DIY
★★★★★
★★★★★
Calvin M - April 23, 2020
Verified Purchase
The part was exact fit. Went very well
The part came very fast. Was a exact fit. The site is easy to use.
★★★★★
★★★★★
Ronald B - February 20, 2019
Verified Purchase
Easy repair. Corrected our problem.
It was great to have your diagnostic tool. Easy to find part we needed and order it. Thanks.
★★★★★
★★★★★
Don L - February 2, 2019
Verified Purchase
Water Inlet Valve for Maytag Washing Machine
Part was exact one I needed and was easy to install. Wife happy and no dripping in machine.
★★★★★
★★★★★
Sam Y - January 30, 2019
Verified Purchase
Great part, fit and works perfect.
Old valve was broken didnt have hot water and very low flow of cold water. After replacing we now have cold and hot water in the washing machine.
★★★★★
★★★★★
Robert B - October 9, 2018
Verified Purchase
did not fit without modification
My Maytag washing (LAT9605AAE) machine's Bracket-V (22002361) did not fit your Water Inlet Valve without a bracket I had to buy from another supplier
★★★★★
★★★★★
Jim F - October 6, 2018
Verified Purchase
replace water inlet valve
Good service, part fit exactly. no problems. online videos sure help
★★★★★
★★★★★
Kyle D - June 20, 2018
Verified Purchase
worked on my maytag performa washing machine
slight differences in electrical making on brass face, but seems to work
< Prev
1
2
Next >
Customer Repair Stories
Average Repair Rating: 4.1 / 5.0, 15 reviews.
What's this?
Sort by:
< Prev
1
2
Next >
Search filter:
Clear Filter
Your search term must have 3 or more characters.
Keep searches simple. Use keywords, e.g. "leaking", "pump", "broken" or "fit".
Sorry, we couldn't find any existing installation instruction that matched.
Water leaking into drum
Watched youtube presentation so that I knew what to do.
Steven from BAYSIDE, WI
Difficulty Level:
Really Easy
Total Repair Time:
Less than 15 mins
Tools:
Nutdriver, Pliers, Screw drivers, Socket set
1 personfound this instruction helpful.
Was this instruction helpful to you?
Thank you for voting!
H and C water valve on Maytag washer
Unhooked H and C water lines. Removed cover plate with control valves. Pulled power wires off solenoid valves. Remove exit water hose clamp then hose. Put new valves on in reverse process. Checked washer through cycle to see it worked all OK. Had to make new mount ro install valves.
Charles from SIDNEY, MT
Difficulty Level:
Really Easy
Total Repair Time:
15 - 30 mins
Tools:
Nutdriver, Pliers, Screw drivers
7 of 7 peoplefound this instruction helpful.
Was this instruction helpful to you?
Thank you for voting!
No Hot Water
I checked out the reason why it was not providing hot water then went to this site and found out that it was most likely a water intake valve. I am hardly a do-it-yourselfer, but after watching the "how to" video, I figured why not? The valve arrived in two days, and it was quite easy to do. We now have hot water again.
Kenn from Oshkosh, WI
Difficulty Level:
Easy
Total Repair Time:
15 - 30 mins
Tools:
Nutdriver, Pliers
6 of 7 peoplefound this instruction helpful.
Was this instruction helpful to you?
Thank you for voting!
machine very slow filling with water
After making sure the lines and screens are clean, and there is good water flow thru the hoses to the valves, and there is power to the valve solenoids, (which can be detected by setting to fill and pulling out on the start knob), and hearing a "click" at the valve, you can summize that the valve is weak, or partially blocked internally.<
... Read morebr /> Replace the valve by unpluging the power cord to the machine. Remove the hoses. Remove the screw that attaches the valve mounting plate. Pull the plate and valve out and remove the screw that attaches the valve to the plate. Unplug the wires from the solenoides,[IMPORTANT] noting which wires go to each valve. Remove the rubber hose on top of the valve by squeezing the hose clamp with a pair of pliers, and sliding the clamp up the hose. Now you can pull the hose off. Install the new valve in the reverse order.
Read less
William from McLeansboro, IL
Difficulty Level:
Easy
Total Repair Time:
15 - 30 mins
Tools:
Pliers, Screw drivers
43 of 49 peoplefound this instruction helpful.
Was this instruction helpful to you?
Thank you for voting!
Leaking Water inlet valve
Received the part in two days. Very easy instalation as the part is the exact replacement.
Charles from Lewisburg, WV
Difficulty Level:
Easy
Total Repair Time:
30 - 60 mins
Tools:
Nutdriver, Pliers, Screw drivers
3 of 7 peoplefound this instruction helpful.
Was this instruction helpful to you?
Thank you for voting!
My washer kept pumping in water and would not shut off when hitting the off button on the washer.
All I had to do was to shut off the water supply and unplug the washer. Then removed the two water hoses. Then unscrew the cover to the water inlet area and remove it. I removed the electrode wires. then attached new part and put back together the way it came off and presto! It worked great.
Penni from Limington, ME
Difficulty Level:
Really Easy
Total Repair Time:
Less than 15 mins
Tools:
Pliers, Screw drivers
0 of 2 peoplefound this instruction helpful.
Was this instruction helpful to you?
Thank you for voting!
Cold water would not shut off.
Take off door at valve which holds valve in place removed with three screws. Replace valve rehook hoses easy.
Paula from Essex, IL
Difficulty Level:
Really Easy
Total Repair Time:
15 - 30 mins
Tools:
Screw drivers
2 of 4 peoplefound this instruction helpful.
Was this instruction helpful to you?
Thank you for voting!
Washer was overfilling.
1. Disconnected washer from power outlet. 2. Slid washer out from wall to allow access to rear. 3. Isolated water supply and removed both hot and cold water supply hoses from solenoid valve assembly. 4. Removed one screw holding angled metal bracket with water solenoid valves attached. 5. Rotated bracket to get it to c
... Read morelear back of washer and expose wiring and fill hose. 6. Removed hose clamp on fill hose with pliers and then removed hose from valve assembly.. 7. Removed wires from each solenoid. 8. Removed one screw that attaches solenoid valve assembly to angled metal bracket. 9. Slid valve assembly to allow it to be released from angled metal bracket. 10. Reversed procedure to install new valve assembly.
Read less
Glenn from Lewisport, KY
Difficulty Level:
Really Easy
Total Repair Time:
15 - 30 mins
Tools:
Pliers, Screw drivers
3 of 4 peoplefound this instruction helpful.
Was this instruction helpful to you?
Thank you for voting!
No cold water
I removed the one screw on the plate which exposes the water inlet lines. Disconnected the two leads to the inlet valve. Replaced the defective inlet valve and re-connected the leads. Replaced the plate covering the new inlet valve. Done.
Washer tub would fill with water when not in use and hot water would fill slowly when in use
I turned off the water at the main water inlet. I then removed the hose connections to the valve inlet. I removed the one screw on the plate pulling allowing me to pull the plate out from the washer body. I then removed the wires connected to the old valve placing them on the new valve (so not to be confused). I took off the small hose cl
... Read moreamp attached to the valve. I removed the valve from the plate and attached the new valve placing the a new hose lamp on the hose (wires were already attached) screwed back to the plate in the washer body connecting the water lines and turned the water on at the main valve. I did have to run to the hardware store for the small hose clamp but that was my choice to replace the one that was existing. The washer now works like it is new.
Read less
David from Universal City, TX
Difficulty Level:
Easy
Total Repair Time:
1- 2 hours
Tools:
Nutdriver
10 of 11 peoplefound this instruction helpful.
Was this instruction helpful to you?
Thank you for voting!
< Prev
1
2
Next >
Questions and Answers
Ask our experts a question about this part and we'll get back to you as soon as possible!
3 questions answered by our experts.
Sort by:
< Prev
1
Next >
Search filter:
Clear Filter
Your search term must have 3 or more characters.
Keep searches simple. Use keywords, e.g. "leaking", "pump", "broken" or "fit".
Sorry, we couldn't find any existing answers that matched.Try using some different or simpler keywords, or submit your new question by using the "Ask a Question" button above!
Tom
October 28, 2017
Water drips into tub after cycle is complete. What part do i need?
For model number LAT9416AAE
Hi Tom,
Thank you for your inquiry. If you washer is filling with water after the cycle has stopped there may be an issue with the water inlet valve. The Water Inlet Valve on your washing machine is used to fill the tub with cold, warm or hot water for the wash and rinse cycles. The valve is operated by electric solenoids that are controlled by the timer or electronic control board and the water level control/water level selector switch or pressure switch. If your washer continues to fill during a cycle, the water inlet valve could be at fault. To verify that the valve is at fault, unplug the washer when the symptom occurs. If the washer continues to fill, then the water inlet valve is defective. If the washer stops filling, then the problem is related to the electrical circuit that controls the valve. I hope this helps. Thank you and have a great day!
12 people found this helpful.
Was this helpful?
Thank you for voting!
Anna
April 22, 2018
Do i need to buy the whole kit or can i replace just the metal screens? I’f so how do i change those?
For model number LAT2600AAE
Hello Anna, Thank you for your inquiry. The metal screens are sold separately for your model, the part number is WP96160. Remove the fill hoses from the back of the washer with a pair of pliers, you may want to put a towel down to catch any water. You also may want to label the hoses so you don't get the hot and cold water hoses mixed up. Use a flat head screw driver to remove the old screens from the water inlet valve. Line up the new screen with the opening on the water inlet valve, and get it started inside the opening. Then carefully use a pair of needle nose pliers to gently push both sides of the screen into place. Use a flat head screw driver to make sure that the new screen is firmly in place. You can now replace the fill hoses. Hope this helps!
3 people found this helpful.
Was this helpful?
Thank you for voting!
Mark
March 12, 2018
Hi, would a defective water valve cause the washer to stop before going into the rinse and spin portions of the cycle? My washer needs to be manually set to continue with the rinse and spin have to be set manually. You can hear the washer making a ring sound as if its waiting for something to activate so it can continue on. I replaced the timer, but it continues to do the same thing. Any feedback will be greatly appreciated
For model number LAT9360AAE
Hello Mark, Thank you for your inquiry. It can be one of the causes. We would also recommend checking the lid switch, and the brake assembly as well. Hope this helps!
Was this helpful?
Thank you for voting!
< Prev
1
Next >
✖
Ask a Question
Ask our experts a question on this part and we'll respond as soon as we can.