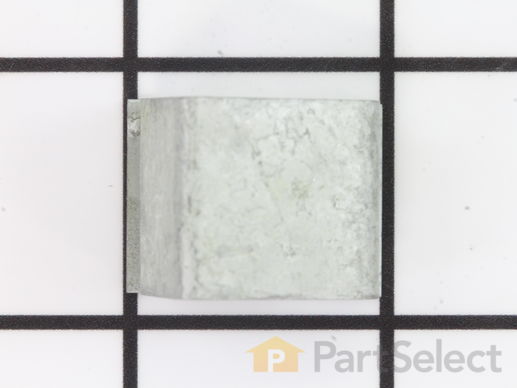
Part Location Diagram of WP22001650 Whirlpool Spring Retaining Clip
See part 27 in the diagram
( Grid squares measure 1x1 inch )
Customer Service Representative

Get in touch, we're here to help!

Daily 8am - 9pm EST

customerservice@partselect.com

Spring Retaining Clip WP22001650

 Fits your LW3303W!
★★★★★
★★★★★
3 Reviews

Rated by 8 customers 

Easy 

1- 2 hours 

Ratings submitted by customers like you who bought this part.

$ 11.10
  In Stock
Get FREE EconoShip on orders over $100! T&C apply

Get this part fast! Average delivery time for in-stock parts via standard shipping: 1.8 days.

 Fits your LW3303W!
PartSelect Number PS11739294
Manufacturer Part Number WP22001650
Manufactured by Whirlpool
Product Description

Spring Retaining Clip Specifications

This spring retaining clip is just under 1 inch long. The clip is made entirely of metal and is attached to the back wall of the washer, under the console. If your washer is vibrating and louder than usual during the wash cycle, your spring retaining clip could be faulty or damaged. Check the clip for visible damage, wear, and rust. If you notice any signs of damage, the part should be replaced. Remember to disconnect the power from your washing machine before starting this repair.
How Buying OEM Parts Can Save You Time and Money

How Buying OEM Parts Can Save You Time and Money

Troubleshooting
This part works with the following products:
Dryer, Washer, Washer Dryer Combo.
This part works with the following products:
Maytag, Amana, Speed Queen, International.
Part# WP22001650 replaces these:
AP6006227, 2-12982, 212982, 22001650, 28835, 56080, R0601520
Back to Top
Customer Reviews
Average Rating:
★★★★★
★★★★★
3 Reviews
4.7
Filter By Rating:
  • 5 Stars
    2
  • 4 Stars
    1
  • 3 Stars
    0
  • 2 Stars
    0
  • 1 Star
    0
Sort by:
  • 1
Sorry, we couldn't find any existing reviews that matched. Try using some different or simpler keywords.
  • 1
Customer Repair Stories
 Average Repair Rating: 2.8 / 5.0, 8 reviews. What's this?
Sort by:
  • 1
Sorry, we couldn't find any existing installation instruction that matched.
Tub gasket leaking because of age.
Top came off quickly with socket wrench. Removed gasket in about a minute. Spent 45 minutes getting grime ( soap and lime) off of top. Took five minutes to replace gasket.

Haven't been able to get front back on. Clips go on side rather than top. Found missing clip for which new one was purchased in transmission. Still haven't gotten front to stay on. Clips keep springing out.
Other Parts Used:
Spring Retaining Clip Tub Gasket
  • Donald from GROSSE PT PK, MI
  • Difficulty Level:
    Really Easy
  • Total Repair Time:
    1- 2 hours
  • Tools:
    Screw drivers, Wrench set
2 of 2 people found this instruction helpful.
Was this instruction helpful to you?
Thank you for voting!
Water leak at bottom of tub, leaking onto floor.
Repair not that complicated. Remove front, lean top back, remove agitator, remove special nut, remove inner tub, remove seal. Clean shaft and seal surfaces. It is highly recommended to the spanner wrench to remove the special nut. It appears one can do it with a punch and hammer, but the nut is too tight, and corroded from years of water exposure. I believe part number is TJ90TB123A, about $15. Watch the video on this web site, very good.
Other Parts Used:
Mounting Stem/Tub Seal Kit Spring Retaining Clip
  • Brian from Allentown, PA
  • Difficulty Level:
    A Bit Difficult
  • Total Repair Time:
    1- 2 hours
  • Tools:
    Nutdriver, Screw drivers
2 of 3 people found this instruction helpful.
Was this instruction helpful to you?
Thank you for voting!
noise coming from dryer and low air flow
Remove front panel, front drum support, remove belt, drum, blower cover, spring clip, blower cover, blower wheel assy.
Ordered new parts on line, came in two days, good service. Cleaned out all lint and installed new parts in reverse order.
Other Parts Used:
Tumbler and Motor Belt Blower Wheel with Clamp Spring Retaining Clip
  • Ronald from Aliquippa, PA
  • Difficulty Level:
    Easy
  • Total Repair Time:
    15 - 30 mins
  • Tools:
    Nutdriver, Pliers, Screw drivers, Socket set, Wrench (Adjustable)
1 of 4 people found this instruction helpful.
Was this instruction helpful to you?
Thank you for voting!
30 year old washer started to leak on left side
Noticed small pool of water on left side. Diagnosed it was injector tube. Ordered parts.

Removed front panel by removing two phillips screws and then pushed down to disengage spring clips.

Used nutdriver to remover two bolts holding top cover and then undid bleach dispenser hose.

Lifted top cover and removed clamps holding injector and fill. Replaced using 1 1/16" Stainless steel screw clamps.

THIS WAS THE FIRST REPAIR EVER ON THIS WASHER!! SIMPLY AMAZING PERFORMANCE. STILL SPINS AT HIGH RPM AND IS QUIET. Bought for my folks as a gift in 1979.

This is the reason I bought the last Maytag top loaders made in '05. Also had another one 24 years with only one repair.

Parts Select, thank you! Parts arrived in three days.
Other Parts Used:
Injector Sleeve Bracket - Side Mounting Spring Retaining Clip Rubber Injector Valve Plastic Injector Nozzle
  • Richard from Ridgefield, CT
  • Difficulty Level:
    Easy
  • Total Repair Time:
    30 - 60 mins
  • Tools:
    Nutdriver, Screw drivers, Wrench set
1 of 2 people found this instruction helpful.
Was this instruction helpful to you?
Thank you for voting!
Agitator action was slow/weak; Bleach tube kinked
UNPLUG THE MACHINE FIRST!
a) Remove the front panel (use a putty knife to release clips)
b) Fashion a small hook-end out of a coat hanger
c) Install an additional glide spring (2 + 1 = 3) to get extra retraction of vee-belt around drive pulley as follows.
d) Hook end of of the new spring onto rear (back) hole of moving motor mount (observe orientation of existing springs to be sure that you're hooking up spring into hole correctly).
e) Lie on your right side, hold the spring in place with your left hand (go around back of the motor with your left hand).
f) Have someone hold the flashlight as you take a coat hanger and fish for the front end of the spring under the motor glide.
g) With front - end of spring held by coat hanger hook, pull spring towards you and slip spring into front hole of stationary motor mount.
h) Lightly spray in and around glide area with Teflon non-stick dry lube (DuPont or Liquid Wrench dri-lube product line).
Machine agitates like-new now.
Bleach Tube:
a) Remove hose clamps at both ends using a screwdriver.
b) Remove and discard old tube.
c) Slip on the hose clamps and slicker-up the ends of new tube with palmolive liquid detergent and slip onto tub and bleach dispenser.
d)Tighten clamps.
Other Parts Used:
Spring Retaining Clip Bleach Tube Glide and Spring Kit
  • Robert from Marlboro, NJ
  • Difficulty Level:
    Easy
  • Total Repair Time:
    15 - 30 mins
  • Tools:
    Screw drivers
25 of 37 people found this instruction helpful.
Was this instruction helpful to you?
Thank you for voting!
unusually loud rumbling in spin mode, no spin out
removed outer enclosure to expose inside workings. removed all retaining springs to tub and transmission housing. Inverted tub to access agitator pulley and belt. Removed pulley and cut belt off.(I knew I was replacing it, anyway.)Had to remove large tub bracket to exchange new pulley for old. Disconnect bleach reservoir filler tubing on tub assembly. Disconnect power connector to drive motor. Removed water pump to access drive pulley where new belt belongs. Aligned belt to pulleys and checked idler pulley tension which was acceptable. Replace helix drive lug against spin/agitator and tightened retaining bolt. Assembled components in reverse order and conducted test run. Success. Smooth running machine and saved about $200 on professional labor costs. I had no repair manual but you should have a personal confidence in general repair work. Something like a history of taking things apart and putting them back together successfully. I had an independent appliance repair guy examine the washer and he said it was too complicated for him. Once I had it apart, it seemed fairly basic. Good luck!
Other Parts Used:
Plastic Helix Drive Lug Agitator Pulley V-Style Spin and Agitate Belt - 28-3/4 inches long Spring Retaining Clip
  • Ralph from Moreno Valley, CA
  • Difficulty Level:
    Easy
  • Total Repair Time:
    1- 2 hours
  • Tools:
    Nutdriver, Pliers, Screw drivers, Socket set, Wrench set
37 of 45 people found this instruction helpful.
Was this instruction helpful to you?
Thank you for voting!
Dryer was making a loud screeching noise
Once I determined where the noise was coming from I took the front cover off, two screws at the bottom and clipped at the top. Then I removed the lint screen shroud . Instructions said to remove belt and drum, but I was able to pull the drum forward enough to get to the roller without removing the belt. I removed the snap ring from the shaft holding the roller...cleaned up the shaft and installed new roller with fiber washers. Slid the drum back in place and put shroud and front cover back on. I also replaced a front panel clip that I had broken on a previous repair. It just snapped into place.
Other Parts Used:
Spring Retaining Clip Drum Support Roller Kit
  • Andy from York, PA
  • Difficulty Level:
    Easy
  • Total Repair Time:
    30 - 60 mins
  • Tools:
    Screw drivers
1 of 3 people found this instruction helpful.
Was this instruction helpful to you?
Thank you for voting!
Many problems
It would seem that my unhappy washer decided to
have a multiple component breakdown. after replacing one part after another, my baby runs like new. parts arrived quickly and installed easily, it was all the diagnostic that took the most time. the forums were quite helpful.
Other Parts Used:
Spring Retaining Clip Lid Check Switch
  • Deanna from Fort Lauderdale, FL
  • Difficulty Level:
    Difficult
  • Total Repair Time:
    More than 2 hours
  • Tools:
    Screw drivers, Wrench set
8 of 19 people found this instruction helpful.
Was this instruction helpful to you?
Thank you for voting!
  • 1
Questions and Answers

Ask our experts a question about this part and we'll get back to you as soon as possible!

3 questions answered by our experts.
Sort by:
  • 1
Sorry, we couldn't find any existing answers that matched.Try using some different or simpler keywords, or submit your new question by using the "Ask a Question" button above!
Charles
November 30, 2017
How do you install a metal clip that holds the front to the top of this Maytag dryer?
For model number LDE9304ACE
PartSelect logo
Hi Charles,Thank you for the question. To install the new clips you will need to remove the front panel. At the bottom of the panel there are 2 Philips head screws that will need to be removed.Once the panel is removed you will be able to see the Spring Retainers. With a large pair of pliers and compress the retainer and release it from the panel. Next you will need to compress the new retainer with the pliers and slip the long tab in the hole pointing towards the front of the panel and then the smaller towards the back. Next reinstall the panel and screws. Hope this helps!

12 people found this helpful.

Was this helpful?
Thank you for voting!
Lisamae
July 15, 2019
Dear Sir, Do you have the following parts for the Whirlpool Maytag washer? 22001441, pulley, and WP22001650, fastener.
For model number 22001441 PULLEY WP22001650 FASTENER
PartSelect logo
Hi Lisamae, Thank you for your question. We do have the spring retaining clip or fastener available for you, but the pulley has been discontinued by Whirlpool and you will need to contact them for information on a replacement part. Their telephone number is 1-866-698-2538. If they provide you with a part number for the replacement part, you may call us back with it and we can verify if we have it available for you. You may also be able to locate the part you need by trying the following: Using a search engine to type your part number and see if other retailers still have this part in stock. Visiting online stores such as eBay and finding sellers that have this part. Trying retailers and repair stores in your local area to see if they have the part in their inventory. Talking to a local repair technician, who may have the part you need, or may be able to repair your existing part. I hope this helps. Thank you and have a great day!

2 people found this helpful.

Was this helpful?
Thank you for voting!
Joseph
July 12, 2019
Trying to take off the bottom that has clip to clean it out from lint
For model number MEDX700XW0
PartSelect logo
Hello Joseph, Thank you for the question. Once the top clips are depressed it should release the top and you can tilt it out then lift it off the bottom clips. Hope this helps!

1 person found this helpful.

Was this helpful?
Thank you for voting!
  • 1
You May Also Need ?
Model Cross Reference
This part works with the following models:
PartSelect Number: PS11739294
Manufacturer Part Number: WP22001650
Brand
Model Number
Description
Maytag
6329
Washer - MAYTAG AUTOMATIC WASHER
Maytag
6349
Washer - MAYTAG AUTOMATIC WASHER
Maytag
6359
Washer - MAYTAG AUTOMATIC WASHER
Amana
7493-LEM437
Dryer - DRYER
Maytag
A104
Washer - Top Loading
Maytag
A105
Washer - Top Loading
Maytag
A106
Washer - Top Loading
Maytag
A106S
Washer - Residential
Maytag
A107
Washer - Top Loading
Maytag
A107S
Washer - Residential
Maytag
A108
Washer - Top Loading
Maytag
A108S
Washer - Residential
Maytag
A110
Washer - Top Loading
Maytag
A112
Washer - Top Loading
Maytag
A15CA
Washer
Maytag
A15CM
Washer
Maytag
A15CT
Washer
Maytag
A16CA
Washer
Maytag
A16CM
Washer
Maytag
A16CT
Washer
Maytag
A17CA
Washer
Maytag
A17CM
Washer
Maytag
A17CT
Washer
Maytag
A180
Washer - Top Loading
Maytag
A181
Washer - Top Loading
Maytag
A182
Washer - Top Loading
Maytag
A183
Washer - Top Loading
Maytag
A18CA
Washer
Maytag
A18CM
Washer
Maytag
A18CT
Washer
Customer Service Representative

Get in touch, we're here to help!

Daily 8am - 9pm EST

Contact Customer Service