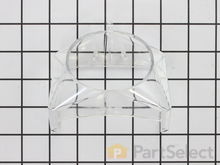
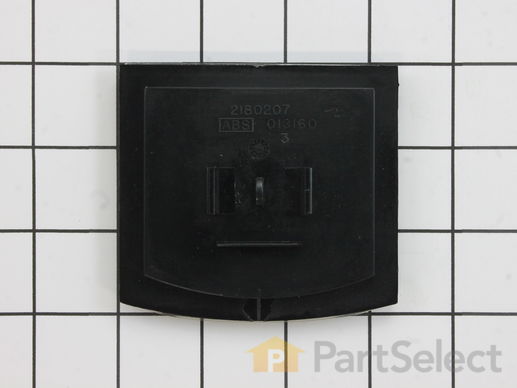
Part Location Diagram of WP2180353 Whirlpool Ice Dispenser Door Chute
See part 6 in the diagram
Replacing your Whirlpool Refrigerator Ice Dispenser Door Chute
( Grid squares measure 1x1 inch )
Customer Service Representative

Get in touch, we're here to help!

Daily 8am - 9pm EST

customerservice@partselect.com

Ice Dispenser Door Chute WP2180353

★★★★★
★★★★★
7 Reviews

Rated by 6 customers 

Easy 

30 - 60 mins 

Ratings submitted by customers like you who bought this part.

$ 15.94
  In Stock
Get FREE EconoShip on orders over $100! T&C apply

Get this part fast! Average delivery time for in-stock parts via standard shipping: 1.8 days.

PartSelect Number PS11739035
Manufacturer Part Number WP2180353
Manufactured by Whirlpool
Product Description

Ice Dispenser Door Chute Specifications

*Please note, this door chute is no longer being manufactured with a heater.
How Buying OEM Parts Can Save You Time and Money

How Buying OEM Parts Can Save You Time and Money

Part Videos

Replacing your Whirlpool Refrigerator Ice Dispenser Door Chute

Replacing your Whirlpool Refrigerator Ice Dispenser Door Chute
Troubleshooting
This part fixes the following symptoms:
Ice maker won’t dispense ice | Leaking | Door Sweating | Frost buildup
This part works with the following products:
Refrigerator.
This part works with the following products:
Whirlpool, Kenmore, KitchenAid, Estate.
Part# WP2180353 replaces these:
AP6005973, 2157651, 2167269, 2177296, 2179993, 2180351, 2180352, 2180353, 2203886, 2252076, 2261464, WP2180353VP
Back to Top
Customer Reviews
Average Rating:
★★★★★
★★★★★
7 Reviews
4.9
Filter By Rating:
  • 5 Stars
    6
  • 4 Stars
    1
  • 3 Stars
    0
  • 2 Stars
    0
  • 1 Star
    0
Sort by:
  • 1
Sorry, we couldn't find any existing reviews that matched. Try using some different or simpler keywords.
  • 1
Customer Repair Stories
 Average Repair Rating: 3.3 / 5.0, 6 reviews. What's this?
Sort by:
  • 1
Sorry, we couldn't find any existing installation instruction that matched.
Rubber cover seal old and sticking to the plastic opening - may cause the arm to break
Starting at the bottom, with a flat blade screwdriver pry the front cover off the opening. Unplug the wire connector from the back, remove the cover plate holding the switches and light socket by pushing out on the plastic clips on each side. Use something like a bungie cord to hold it up out of the way. Carefully unsnap the clear plastic ice shoot from the push arm, next carefully unsnap the cover door from the push arm. Clean anything that needs cleaning (CLR works great on hard water deposits)
Install everything in reverse order, the cover door first, ice shoot next, switch plate, plug in the wire connector and snap the outside cover in place.
  • Maynard5514 from WATERTOWN, WI
  • Difficulty Level:
    A Bit Difficult
  • Total Repair Time:
    30 - 60 mins
  • Tools:
    Screw drivers
2 of 2 people found this instruction helpful.
Was this instruction helpful to you?
Thank you for voting!
Condensation around door chute.
Simply replaced the chute flap (door) To seal from cold air escaping. Cleaned dust collection from coil. Refrigerator is much more efficient and compressor lasts longer if coil is kept clean. 12 year old fridge runs like new. Suggestion, remove front kick plate. Shine light. If you can't see coil clean it. I made a crevis tool to hook on the vacuum to reach under and in coil. Much cheaper than a burned out compressor or new fridge.
Other Parts Used:
Ice Dispenser Door Chute Ice Guide
  • Wesley from WAKE FOREST, NC
  • Difficulty Level:
    Very Easy
  • Total Repair Time:
    Less than 15 mins
2 of 3 people found this instruction helpful.
Was this instruction helpful to you?
Thank you for voting!
Ice Dispenser worked poorly causing frequent frost buildups and poor dispenser operation
This built-in model requires complete removal of stainless steel door "Cover". A trim piece that covers the screws on the left side of the door requires lowering the refrigerator on to the rolling legs and moving it forward for access. The tipover strap on top of the refrigerator must be removed first. One the door is slowly lowered and then pulled out you need to remove the trim piece then remove the screws on the bottom, top, and lft side. Then remove the four screws from the internal side of the dispenser. With assistance slowly pull the entire front cover from the door which gives access to the internal electronic pad. Be very careful with the door cover as the edges are razor sharp stainless steel. Remove the electronic pad (4 socket screws) and move it to provide access to the motor bracket assembly. Remove assembly (2 screws) and replace with new. This includes removing the connector plug which came off easily. The replacement assembly was a new design from the original which appeared to be much better design. This was very simple to replace. Now the hardest part is "popping" the front door cover back on the front which is a two person job. I taped the trim attachment strips to the inside of the cover (left and bottom sides had the strip) so the screw holes would line up when the cover is replaced. All four sides must slide on at the same time with a slight advantage to the side with the handle. Note: this can be dangerous because of the sharp edges and very precise fit...a blood donation was required because of an errant hand and the quick snap in popping the door in place. Once its back on, reverse the process of replacing the screws and carefully moving back in to position and raising back up to previous height. I had very little information on how to do this so I did it slowly and deliberately so it took me about two hours. The dispenser now works better then ever and I have had no frost build up....I wish I had done it 4 years ago.
Other Parts Used:
Ice Door Motor & Bracket Assembly Ice Dispenser Door Chute
  • Robert from SAN DIEGO, CA
  • Difficulty Level:
    A Bit Difficult
  • Total Repair Time:
    30 - 60 mins
  • Tools:
    Screw drivers, Socket set, Wrench (Adjustable)
8 of 9 people found this instruction helpful.
Was this instruction helpful to you?
Thank you for voting!
Water dispenser not working, Ice dispenser chute icing up
I removed the outer ice/water dispenser cover following directions I found on-line (push down and gently pry out at the bottom). I then removed several nut-head screws which were holding a plastic plate which had the door light and electric control wiring mounted in it. Behind that I found a broken tab on the Control Bracket which was why my water dispencer was not working and I found the chute door for the ice maker was chewed up which allowed warm air into the chute and was causing my ice build up problem. Replacing the Control Bracket was easy. Just note how things come apart. Putting the chute door in was a little more complicated, but again, note how things come apart and you should not have a problem putting it back together.
Other Parts Used:
Ice Dispenser Door Chute Control Bracket
  • Jeff from Parchment, MI
  • Difficulty Level:
    Easy
  • Total Repair Time:
    1- 2 hours
  • Tools:
    Nutdriver, Pliers, Screw drivers
27 of 33 people found this instruction helpful.
Was this instruction helpful to you?
Thank you for voting!
Worn out door chute
Pry open the front dispenser outer cover. Remove a screw holding ice door dispenser unit, remove old door chute, remove and place coil kind of stuff (connecting to panel) old chute to new one and reinstall.
  • Murali from Rochester, MN
  • Difficulty Level:
    A Bit Difficult
  • Total Repair Time:
    30 - 60 mins
  • Tools:
    Screw drivers
14 of 25 people found this instruction helpful.
Was this instruction helpful to you?
Thank you for voting!
Ice Door Leaking
Remove the unit cover by unsnapping from the bottom. Remove the face plate on the switches. The ice door simply snaps off the closing mechanism. The problem I have is that the original door included a heat trace element (keeps the back of the door warm to limit condensation). The new part was simply a new seal. I clipped the leads to the het trace (turn off the fridge before you do that) and put in the new door. When the heat ids on in the house there is no problem with condensation but on warmer days its pretty bad. I cannot find a replacement part with the heating element and have contacted Whirpool. THey haven't responded as of yet.
  • Steve from Metairie, LA
  • Difficulty Level:
    Easy
  • Total Repair Time:
    15 - 30 mins
  • Tools:
    Nutdriver, Screw drivers
12 of 18 people found this instruction helpful.
Was this instruction helpful to you?
Thank you for voting!
  • 1
Questions and Answers

Ask our experts a question about this part and we'll get back to you as soon as possible!

10 questions answered by our experts.
Sort by:
  • 1
Sorry, we couldn't find any existing answers that matched.Try using some different or simpler keywords, or submit your new question by using the "Ask a Question" button above!
Roger
December 7, 2017
Problem is leaking water from the ice dispenser door chute. It was said not to be closing properly. Replaced it but leak continues. Now am told the board must be replaced so that the flap will shut tightly and stay shut. Does this sound correct? Is there a dispenser control board? Will it fix this problem? Thanks for your help!
For model number Kssc48qvs02
PartSelect logo
Hi Roger, Thank you for the question. Yes, if the door is not closing properly it can cause leaking. The board you need is Part Number: PS11740442. Good luck with the repair!

4 people found this helpful.

Was this helpful?
Thank you for voting!
Related Parts:
Jeff
September 2, 2019
I need part #1 shown in the dispenser front schematic. Do you sell that part? The plastic broke where the ice dispenser door hinge attaches.
PartSelect logo
Hello Jeff, Thank you for the question. I looked up the part and it is listed as No Longer Available/Discontinued sorry. There are no part substitutions listed. My suggestion here would be to call the manufacturer and see if they can provide you with a substitution for these part numbers. Hope this helps!

3 people found this helpful.

Was this helpful?
Thank you for voting!
Larry
January 22, 2020
Ice despencer door doesn't close flops back and forth
For model number ED5VHEXVQ00
PartSelect logo
Hello Larry, Thank you for contacting us. I have researched the model you have provided and have found the part you are looking for is PartSelect Number PS11739035. We hope this helps!

2 people found this helpful.

Was this helpful?
Thank you for voting!
Aaron
January 26, 2020
I have a Whirlpool gold refrigerator model gd5nvaxsa01 . The ice maker chute is not closing. Allowing air in to melt the ice in the chute. Do they have a kit for this repair and video?
For model number GD5NVAXSA01
PartSelect logo
Hello Aaron, Thank you for your question. Our sources suggest that it is more likely the ice dispenser door motor for your model under part PS11749796 that would fix the issue rather than the door itself. If you needed installation help for installing the motor, we suggest checking the repair story at the bottom of the part page for the motor for help. We hope this helps.

1 person found this helpful.

Was this helpful?
Thank you for voting!
Related Parts:
Clark
February 7, 2023
Hi - I have a KitchenAid model KSSC42QTS03 and the ice dispenser door does not close properly causing leaking etc. Do you have a video showing the replacement of dispenser door and board/motor for my model refrigerator? Thanks
For model number KSSC42QTS03
PartSelect logo
Hello Clark, thank you for your question. Yes, there is a video for the Ice Dispenser Door Chute PS11739035, The Motor PS11750315 does not have a video but we can tell you that you first remove the outer door skin ( 12 screws) and then remove the Control Panel (4 screws) and then just two more to remove the motor itself. And then reverse to reinstall. We hope this helps.

1 person found this helpful.

Was this helpful?
Thank you for voting!
Related Parts:
Grady
August 23, 2023
The ice maker dispenser chute in the door frosts up and prevents ice from being dispensed
For model number 10654536400!
PartSelect logo
Hello Grady, thank you for contacting us. Sometimes a small mound of frost, snow, or ice will form at the door or flap in the ice chute. This condition is usually normal and typically occurs when you have dispensed crushed ice repeatedly. It will eventually evaporate. You can clean frost from the dispensing chute by using a warm damp sponge. If this does not help, you may need the ice door kit, part number PS11723180 to fix the issue. Glad to be of assistance!

1 person found this helpful.

Was this helpful?
Thank you for voting!
Related Parts:
Mickey
December 7, 2019
Ice door does not close all the way and allows air into the ice bin then the ice melts and water leaks onto the floor. Your video does not show the repair for my model. Do you have a repair video or manual for my model?
For model number kssc42qts00
PartSelect logo
Hello Mickey and thanks for writing. For your convenience, we have attached the link to our repair video. We hope this helps. Good luck with your repair https://www.youtube.com/watch?v=TWzumOd6_20

1 person found this helpful.

Was this helpful?
Thank you for voting!
Nancy
July 23, 2019
I am not sure if i need the ice guide or the ice door kit for my repair. If i order both, can i return the one i do not use?
For model number ED2FHEXNS00 Whirlpool refridgerator
PartSelect logo
Hello Nancy, thank you for your question. Yes, we have a 30 day return policy that states that any unused item can be returned for a refund within that 30 days. I hope this helps!

1 person found this helpful.

Was this helpful?
Thank you for voting!
DOUG
August 30, 2019
Why would the ice chute cause the ice dispenser not to work
For model number 106.53632300
PartSelect logo
Hi Doug, thank you fro your question. If it is broken and causing a blockage, it will not allow your ice to fall out. Good luck with your repair.

Was this helpful?
Thank you for voting!
Shakti
February 29, 2024
I have a Kenmore Coldspot refrigerator Model #106.58529700 (purchased in 2007). The door chute on my ice dispenser was not closing properly. I took a look inside of the front panel and found some loose springs connected to the door chute that ultimately detached entirely. I think there are some broken bits of plastic, as well. Is it possible to buy the entire front dispenser panel already assembled and just replace it as a whole?
For model number 10658529700
PartSelect logo
Hi Shakti, thank you for your question! Dispenser is not sold as a whole assembly for your model. You may need to order the parts separately. Ice dispenser door chute for your model is part number PS11739035, and the torsion spring is part number PS11750653. Glad to be of assistance!

Was this helpful?
Thank you for voting!
Related Parts:
  • 1
You May Also Need ?
Model Cross Reference
This part works with the following models:
PartSelect Number: PS11739035
Manufacturer Part Number: WP2180353
Brand
Model Number
Description
Kenmore
10641522500
Refrigerator
Kenmore
10641523500
Refrigerator
Kenmore
10641524500
Refrigerator
Kenmore
10641529500
Refrigerator
Kenmore
10644022600
Refrigerator
Kenmore
10644022601
Refrigerator
Kenmore
10644022602
Refrigerator
Kenmore
10644022603
Refrigerator
Kenmore
10644023600
Refrigerator
Kenmore
10644023601
Refrigerator
Kenmore
10644023602
Refrigerator
Kenmore
10644023603
Refrigerator
Kenmore
10644024600
Refrigerator
Kenmore
10644029600
Refrigerator
Kenmore
10644029601
Refrigerator
Kenmore
10644029602
Refrigerator
Kenmore
10644029603
Refrigerator
Kenmore
10644032600
Refrigerator
Kenmore
10644032601
Refrigerator
Kenmore
10644032602
Refrigerator
Kenmore
10644032603
Refrigerator
Kenmore
10644033600
Refrigerator
Kenmore
10644033601
Refrigerator
Kenmore
10644033602
Refrigerator
Kenmore
10644033603
Refrigerator
Kenmore
10644034600
Refrigerator
Kenmore
10644039600
Refrigerator
Kenmore
10644039601
Refrigerator
Kenmore
10644039602
Refrigerator
Kenmore
10644039603
Refrigerator
Customer Service Representative

Get in touch, we're here to help!

Daily 8am - 9pm EST

Contact Customer Service