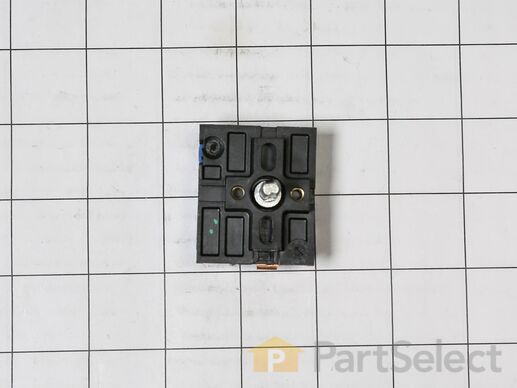
Part Location Diagram of WB24X25013 GE Range Surface Element Control Switch
See part 24 in the diagram
( Grid squares measure 1x1 inch )
Customer Service Representative

Get in touch, we're here to help!

Daily 8am - 9pm EST

customerservice@partselect.com

Range Surface Element Control Switch WB24X25013

★★★★★
★★★★★
43 Reviews

Rated by 16 customers 

Really Easy 

15 - 30 mins 

Ratings submitted by customers like you who bought this part.

$ 37.85
  In Stock
Get FREE EconoShip on orders over $100! T&C apply

Get this part fast! Average delivery time for in-stock parts via standard shipping: 1.8 days.

PartSelect Number PS11729102
Manufacturer Part Number WB24X25013
Manufactured by GE
Product Description

Range Surface Element Control Switch Specifications

The control switch turns the surface element on and off and controls how much heat the element produces.
How Buying OEM Parts Can Save You Time and Money

How Buying OEM Parts Can Save You Time and Money

Troubleshooting
This part fixes the following symptoms:
Element will not heat
This part works with the following products:
Range.
This part works with the following products:
General Electric.
Part# WB24X25013 replaces these:
AP5999509
Back to Top
Customer Reviews
Average Rating:
★★★★★
★★★★★
43 Reviews
5.0
Filter By Rating:
  • 5 Stars
    43
  • 4 Stars
    0
  • 3 Stars
    0
  • 2 Stars
    0
  • 1 Star
    0
Sort by:
  • 1
  • 2
  • 3
Sorry, we couldn't find any existing reviews that matched. Try using some different or simpler keywords.
  • 1
  • 2
  • 3
Customer Repair Stories
 Average Repair Rating: 4.3 / 5.0, 16 reviews. What's this?
Sort by:
  • 1
  • 2
Sorry, we couldn't find any existing installation instruction that matched.
The double burner would not regulate, stuck on high
Unplug range, pull out to access back panel. Remove enough screws to access the burner switch. Remove knob, 2 screws hold the switch, remove them. You can now pull the switch out the back. It had 2 electrical plugs remove them. Install on new switch and put back together. The switch I got was exact replacement, thanks partselect
  • daniel from ANN ARBOR, MI
  • Difficulty Level:
    Really Easy
  • Total Repair Time:
    15 - 30 mins
  • Tools:
    Nutdriver, Screw drivers
2 of 2 people found this instruction helpful.
Was this instruction helpful to you?
Thank you for voting!
Burner would run on high at all settings
Remove cover on back remove two screws for switch and take picture of wire placement install new switch put all back together
U. Plug stove first . Was really easy to do now have room do a other burner
  • Chris from ARANSAS PASS, TX
  • Difficulty Level:
    Very Easy
  • Total Repair Time:
    Less than 15 mins
  • Tools:
    Socket set
1 person found this instruction helpful.
Was this instruction helpful to you?
Thank you for voting!
One of the burners on my glass top range stopped working
After the volunteer experts at partselect told us which part we would likely need, once it came we found a diagram of the back of the stove and a video showing us how to do it. We turned off the circuit breaker, unscrewed the top of the back and replaced the part.
  • Brigid from JERSEY CITY, NJ
  • Difficulty Level:
    Really Easy
  • Total Repair Time:
    15 - 30 mins
  • Tools:
    Screw drivers, Wrench set
3 of 3 people found this instruction helpful.
Was this instruction helpful to you?
Thank you for voting!
Heating element always went high, even when controller was set low.
Unplug the range, remove the screws on the top third of the rear cover, remove two screws from the controller on the front side of the range, hold the rear cover open and pull the controller out of the back of the range, then unplug the two connectors from old controller. Plug the connectors into new controller, secure controller with screws on the front of the range, replace the screws on the rear cover, plug the range in.
  • M from DOUGLAS, MA
  • Difficulty Level:
    Easy
  • Total Repair Time:
    15 - 30 mins
  • Tools:
    Screw drivers, Socket set
2 of 2 people found this instruction helpful.
Was this instruction helpful to you?
Thank you for voting!
Improper control of heating element
Disconnected power supply, removed control panel mounting screws with 1/4 inch nut driver, removed small phillips screws under control panel, pulled off control knob, then removed two phillips screws holding control switch to control panel. Verified replacement switch was identical to malfunctioning switch. Removed wires attached to old switch, one at a time, and attached to new switch as each removed. Wires don’t appear to be labeled or color coded so be sure to relocate wires one at a time. Reassembly was reverse of disassembly.
  • John from WESTHAMPTON, MA
  • Difficulty Level:
    Really Easy
  • Total Repair Time:
    15 - 30 mins
  • Tools:
    Nutdriver, Screw drivers
2 of 2 people found this instruction helpful.
Was this instruction helpful to you?
Thank you for voting!
The right side Large/Small burner control failed.
The burner remained on high regardless of the position of the control. 1. Unplug the range. 2. From the back of the range control panel, remove the top-plate that covers the controls. (4 screws) 3. Remove the two screws that hold the control knob in place. 4. Move ONE WIRE AT A TIME from the old control knob to the new gripping the connector only (do NOT pull the wire). 5. Remount the controller and reassemble the back cover with four screws. 6. reconnect the range and test.
  • JAMES from ORMOND BEACH, FL
  • Difficulty Level:
    Really Easy
  • Total Repair Time:
    30 - 60 mins
  • Tools:
    Screw drivers
2 of 2 people found this instruction helpful.
Was this instruction helpful to you?
Thank you for voting!
One burner would not go on low.
I looked everywhere for this part before I came upo9n this site. I found the part from their very well done website. Even had a picture so you could compare to what you have. It was an easy repair. I had been quoted over $200 to repair by a local repair place. Instead it was around $25 and 15 minutes to repair. This is the right site for any part you may need. I have a magnetic card they sent so in the future, if I need anything (and I will !) I can go right to the right place . Thanks also for a very prompt delivery.
  • Lee from POLSON, MT
  • Difficulty Level:
    Really Easy
  • Total Repair Time:
    15 - 30 mins
  • Tools:
    Nutdriver, Screw drivers
3 of 3 people found this instruction helpful.
Was this instruction helpful to you?
Thank you for voting!
Burner stayed on high even when set on low.
Replaced infinity switch: unplugged stove;. Removed upper back panel (4 small screws using socket wrench. Appropriate size box wrench would be fine, too); pulled off burner control dial. Removed 2 small screws with phillips screwdriver. From back of stove noted position of infinity switch . Replaced wires, 1 at a time, onto new switch. Pushed new switch
into same position as old switch. Secured with the previously removed screws. Replaced the control dial. Replaced upper back panel of stove.
  • Linda from RAPID CITY, SD
  • Difficulty Level:
    Really Easy
  • Total Repair Time:
    15 - 30 mins
  • Tools:
    Screw drivers, Socket set
5 of 5 people found this instruction helpful.
Was this instruction helpful to you?
Thank you for voting!
Only one Burner was heating
Disconnect plug from outlet from stove.Remove nob from control switch rem 2 small screws to release switch.Go to the back and proceed to rem back panel with 1/4 nut driver.Pull out switch and replace one lead a time.
  • David from RIVERVIEW, FL
  • Difficulty Level:
    Really Easy
  • Total Repair Time:
    15 - 30 mins
  • Tools:
    Nutdriver, Screw drivers
1 person found this instruction helpful.
Was this instruction helpful to you?
Thank you for voting!
The back burner was not providing constant temperature...turn it warmer and it got too hot...turn it down and it would be cold.
I viewed the video available through part-select. The most important thing I learned to do was to change one wire at a time instead of removing the old switch completely and then installing the new one. With 5 wires involved, it was really simple to install and not have to remember which wire went where. I was surprised how easy it was and it works wonderfully!
Other Parts Used:
Range Surface Element Control Switch Range Surface Element Control Switch - 6 Inch - 1560 W
  • James from Merrimac, WI
  • Difficulty Level:
    Really Easy
  • Total Repair Time:
    Less than 15 mins
  • Tools:
    Nutdriver, Pliers
4 of 4 people found this instruction helpful.
Was this instruction helpful to you?
Thank you for voting!
  • 1
  • 2
Questions and Answers

Ask our experts a question about this part and we'll get back to you as soon as possible!

13 questions answered by our experts.
Sort by:
  • 1
  • 2
Sorry, we couldn't find any existing answers that matched.Try using some different or simpler keywords, or submit your new question by using the "Ask a Question" button above!
Mary
February 4, 2019
Hi, would this be the right part to order if the front right burner only comes on high no matter where i set it?
For model number JB645RK2SS
PartSelect logo
Hello Mary, Thank you for contacting us. I suggest checking the following parts: PS11729102 SWITCH INFINITE CONTROL, and PS11729126 ELEMENT RADIANT 9' DUAL. Good luck with your repair!

20 people found this helpful.

Was this helpful?
Thank you for voting!
James
February 11, 2019
My front right large double burner only is working on high heat, is this ps11729102 all i need?
For model number JBG55EK1ES
PartSelect logo
Hi James, thank you for your question. There are a couple of parts that could cause this issue specifically. You will need a multi meter to be able to test the parts. The first part you will want to check is your radiant element. It should be reading between 0 - 120 ohms to be working correctly. The other part to check would be your infinite (or surface burner) switch. When you remove that part from the appliance, connect each probe from your multi meter to the prongs and then turn the switch to an on position. If you get no continuity then the switch is the issue. I hope that helps. Good luck with your repair.

10 people found this helpful.

Was this helpful?
Thank you for voting!
John
November 5, 2018
Is this the correct controller for both inner & outer coils of large left front burner?
For model number JB645DK3BB
PartSelect logo
Hi John, thank you for your question. Yes, this switch would control your larger burner wholly. So it would be able to activate the inner and outer coils. I hope that helps. Good luck with your repair.

4 people found this helpful.

Was this helpful?
Thank you for voting!
Jerry
January 7, 2020
My hot surface light indicator (part ps1018167) is staying on constantly.
For model number JB645DK3WW
PartSelect logo
Hello Jerry, Thank you for the question. This normally indicates the switch Part #: PS236754 for the small element or Part #: PS11729102 for the large will need to be replaced. The switch also controls the indicator light. We hope this helps!

2 people found this helpful.

Was this helpful?
Thank you for voting!
Related Parts:
Tom
August 17, 2023
The two front dual burners turn on high even when set at low. Will control switches PS11729102 do this and what would cause BOTH to fail? The burner(s)? The controller board? Where can I find a schematic?
For model number JB645RK1ss
PartSelect logo
Hi Tom, thank you for your inquiry. Based on the description that you have provided, the problem seems to be with the element switch and you may need to replace it, the part number is PS11729102. It turns the surface element on and off and controls how much heat the element produces. Occasionally, the surface element switch fails if the electrical contacts within the switch fuse together, resulting in continuous voltage flowing from the switch to the surface heating element. Another reason can be the control board also. We have attached the schematic diagram of the control panel parts to help you out. We hope this information is useful!

2 people found this helpful.

Was this helpful?
Thank you for voting!
Additional Links:
Alicia
February 10, 2022
Hello. The 2 big burners of the stove overheat, the technician said that it is better to buy the hole set because the small one will do the same in the future. I don't know name of the parts. What would you recommend? I will appreciate. Thank you
For model number JB860SJ122
PartSelect logo
Hi Alicia, Thank you for your question. The parts the technician are referring to are the surface elements. The part number listed under your model number for the 6 inch rear warming element is PS8754842. The part number listed for the 2 rear 5.5 inch elements is PS2370248. The part number listed for the left front element is PS11729126. The part number listed for the right front element is PS2321564. The elements are sold individually. If you would like to place an order for them, customer service is open 7 days a week and anyone will be happy to assist you. Please feel free to give us a call. We look forward to hearing from you!

Was this helpful?
Thank you for voting!
Related Parts:
Lon
March 9, 2023
My right front burner doesn't regulate, always on high. What part needs replacing?
For model number JB750DJ9BB
PartSelect logo
Hello Ion, thank you for your query. Your range may be facing this issue because the element control switch may be faulty. We would recommend checking the switch, part number PS11729102, to fix the issue. If this does not solve the problem, then you may have to replace the surface element, part number PS2321564. We hope this helps, good luck with this repair!

Was this helpful?
Thank you for voting!
Related Parts:
Terry
April 9, 2023
Is the correct switch for a dual burner large and small in one? Small only works on high. Large burner works fine.
For model number JB700DJ1WW
PartSelect logo
Hello Terry, thank you for your question. For the two small elements at the Rear left and right, the Infinite Switch is PS236754. The Dual ( Front Left ) Infinite switch is PS11729102. Good luck with your question.

Was this helpful?
Thank you for voting!
Related Parts:
Shawn
September 18, 2023
double burner (front) not working good and making sparks from back the switch. also small front burner has problem. I guess I need to replace both switches. Are switches same for both or if i need 2 different type of switches? Tnx
For model number JBS60DK1WW
PartSelect logo
Hello Shawn, thank you for getting in touch. The control switches for both the elements are different. The control switch, part number PS11729102, controls the front large burner. The control switch, part number PS236754, controls the small front burner. We hope this information is useful!

Was this helpful?
Thank you for voting!
Related Parts:
Zendy
February 17, 2024
Both of the front big burners overheat. Even when they’re on low. Is this the part I would need for BOTH front big burners? Thank you
For model number JB655EK3ES
PartSelect logo
Hi Zendy, thank you for reaching out. Yes, the issue is most probably with the infinite control switch, part number PS11729102. It is for both the front burners, but it is sold individually. It turns the surface element on and off and controls how much heat the element produces. We would recommend replacing it to fix the issue. We hope that helps!

Was this helpful?
Thank you for voting!
  • 1
  • 2
Model Cross Reference
This part works with the following models:
PartSelect Number: PS11729102
Manufacturer Part Number: WB24X25013
Brand
Model Number
Description
General Electric
JB630DF5BB
Range - ELECTRIC RANGE
General Electric
JB630DF5WW
Range - ELECTRIC RANGE
General Electric
JB630RF5SS
Range - ELECTRIC RANGE
General Electric
JB640DF6BB
Range - ELECTRIC RANGE
General Electric
JB640DF6CC
Range - ELECTRIC RANGE
General Electric
JB640DF6WW
Range - ELECTRIC RANGE
General Electric
JB640SF6SS
Range - ELECTRIC RANGE
General Electric
JB645DK1BB
Range - ELECTRIC RANGE
General Electric
JB645DK1WW
Range - ELECTRIC RANGE
General Electric
JB645DK2BB
Range
General Electric
JB645DK2WW
Range
General Electric
JB645DK3BB
Range
General Electric
JB645DK3WW
Range
General Electric
JB645DK4BB
Range
General Electric
JB645DK4WW
Range
General Electric
JB645DK5BB
Range
General Electric
JB645DK5WW
Range
General Electric
JB645DK6BB
Range - Electric Range
General Electric
JB645DK6WW
Range - Electric Range
General Electric
JB645DK7BB
Range - Electric Range
General Electric
JB645DK8WW
Range - Electric Range
General Electric
JB645DK9BB
Range - Electric Range
General Electric
JB645DK9WW
Range - Electric Range
General Electric
JB645EK1ES
Range - ELECTRIC RANGE
General Electric
JB645EK2ES
Range
General Electric
JB645EK3ES
Range
General Electric
JB645EK4ES
Range
General Electric
JB645EK5ES
Range
General Electric
JB645EK6ES
Range - GE Electric Range
General Electric
JB645EK8ES
Range - Electric Range
Customer Service Representative

Get in touch, we're here to help!

Daily 8am - 9pm EST

Contact Customer Service