


Models
>
TC507Q
TC507Q Jenn-Air Trash Compactor - Overview
Sections of the TC507Q
[Viewing 5 of 5]


Keep searches simple, eg. "belt" or "pump".

15 Inch Compactor Bags - 15 Pack
PartSelect #: PS1964579
Manufacturer #: W10165295RP
Trash compactor bags are a practical way to discard your waste. Due to the extreme pressure of the compactor, trash compactor bags designed to handle the force are necessary. These bags are made from ...
$26.44
In Stock

Drive Gear Kit
PartSelect #: PS398589
Manufacturer #: 882699
This is the drive gear kit for the ram that compacts the trash inside your compactor. If your compactor ram is getting stuck, there is excess noise during its cycle, or if your compactor does not stop...
$49.23
In Stock

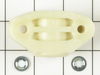
Foot, Front - Single
PartSelect #: PS11747965
Manufacturer #: WPW10001130
The front facing foot is sold individually. It is used on your washing machine and can also be known as an adjustable leveling leg. This specific front facing leveling leg has a rubber foot. It is imp...
$7.45
In Stock

Directional Switch
PartSelect #: PS11744742
Manufacturer #: WP777811
The function of the directional switch on your trash compactor is to ensure the ram lowers to compress your trash, then returns to the top position. If your trash compactor does not complete this task...
$64.14
In Stock

Rotary Switch Kit
PartSelect #: PS382679
Manufacturer #: 675382
The rotary switch kit is also known as the start switch or the on and off switch, and is used to power on your trash compactor. The function of the rotary switch kit is to control the electrical power...
$153.92
In Stock


Drawer Roller
PartSelect #: PS11747573
Manufacturer #: WP9871602
This bearing roller may also be known as the wheel assembly or the container roller bearing, and it is a piece for your trash bin. The function of this bearing is to work in conjunction with your tras...
$16.40
In Stock

Single Metallic Shoulder Screw - Size: 8-32 x 3\8"
PartSelect #: PS11744747
Manufacturer #: WP780263
Sold Individually.
$7.37
In Stock

Power Nut Kit
PartSelect #: PS11747554
Manufacturer #: WP9870163
Includes everything pictured above.
$75.08
In Stock

Wheel Assembly - Kit of 2
PartSelect #: PS398587
Manufacturer #: 882688
This wheel assembly, or roller assembly, is for a trash compactor. The kit includes two wheels that are approximately 1 inch in diameter each. The wheels allow the trash compactor container to roll in...
$26.16
In Stock

Range Screw
PartSelect #: PS11740982
Manufacturer #: WP3196175
This screw is sold individually. 8-18 x 3/8
$8.04
In Stock

Questions And Answers for TC507Q
We're sorry, but our Q&A experts are temporarily unavailable.
Please check back later if you still haven't found the answer you need.
Common Symptoms of the TC507Q
[Viewing 6 of 6]Doesn’t stop at end of compacting cycle
Fixed by
these parts
these parts


Show All
Compactor ram gets stuck
Fixed by
these parts
these parts
Show All
Drawer is hard to open and or close
Fixed by
these parts
these parts


Show All
Noisy
Fixed by
these parts
these parts
Show All
Won’t start
Fixed by
these parts
these parts
Show All
Light not working
Fixed by
these parts
these parts

Show All

Keep searches simple. Use keywords, e.g. "leaking", "pump", "broken" or "fit".
Compactor stuck in lower position
Moved the compactor out from under cabinet and unplugged the powercable.Laid compactor over on its side Removed the top (4 screws) and base plate (3 screws) as well as the coverplate for the motor(3 screws)Found that large drive was broken in half. Used two screwdrivers to start split ring then pliers to pull it off the rest of the way.
... Read more
r />Removed the drive gear and the washer.
Used a nail to drive out the pin for the smaller drive gear kit. Removed and replaced with new, used new pin to lock it on to the shaft. Changed out the bearings and washers on one powerscrew, put chain back on. Then was then a simple matter to put the new gear back on the chain then slide the whole thing back on the drive shaft. Replace the washer then slip the split ring back in place and seat it home with the pliers. Greased chain, gear drive and powerscrew. Put all covers back on with the screws. Pushed button it worked.
Used a nail to drive out the pin for the smaller drive gear kit. Removed and replaced with new, used new pin to lock it on to the shaft. Changed out the bearings and washers on one powerscrew, put chain back on. Then was then a simple matter to put the new gear back on the chain then slide the whole thing back on the drive shaft. Replace the washer then slip the split ring back in place and seat it home with the pliers. Greased chain, gear drive and powerscrew. Put all covers back on with the screws. Pushed button it worked.
Read less
Parts Used:


-
Asbjorn from The Woodlands, TX
-
Difficulty Level:Easy
-
Total Repair Time:1- 2 hours
-
Tools:Nutdriver, Pliers, Screw drivers, Wrench (Adjustable)
67 of 82 people
found this instruction helpful.
Was this instruction helpful to you?
Thank you for voting!
Trash Compactor ram wouldn't lower
I pulled the trash compactor out from under the counter.
I took out the four screws that kept the top cover in place to expose the ram.
The gear shafts were turning but the ram would not lower, at first I though the ram drive bolts were stripped and it wouldn't engage the shaft. Then I realized there was a mechanical ... Read more directional\limit switch at the top that controlled the power and direction the gear shafts were turning, this switch was broken.
Just had to take off the front plate that was held on by a number of screws and replace the switch that was held on by two more screws. It had five wires attached to it, the new switch was clearly labeled as to which color wire went where.
Read less
Parts Used:

-
Scott from Indianapolis, IN
-
Difficulty Level:Easy
-
Total Repair Time:15 - 30 mins
-
Tools:Nutdriver, Screw drivers
41 of 49 people
found this instruction helpful.
Was this instruction helpful to you?
Thank you for voting!
Compactor motor kept running after cycle ran, making alot of noise and unit jumping around.
Pulled the Compactor from underneath cabinet, unplugged power. Removed the top plate off compactor to expose the crush piston. Removed the front control panel by removing two phillips screws, wiring and directional (limit) switch is now exposed. Removed the two screws securing switch, removed wiring one wire at a time and replaced on new
... Read more
switch in same position. Replaced switch in same manner as removed, and followed reverse of above to re-assemble. Plugged back in and tested, problem resolved works like new. Only took possibly 30" to repair and saved an expensive service call.
Read less
Parts Used:
-
Keith from Keller, TX
-
Difficulty Level:Easy
-
Total Repair Time:15 - 30 mins
-
Tools:Screw drivers, Socket set
33 of 39 people
found this instruction helpful.
Was this instruction helpful to you?
Thank you for voting!