Models > RB787WH1WW > Symptoms > Little to no heat when baking

Parts That Fix Hotpoint Range RB787WH1WW Little to no heat when baking

Little to no heat when baking is a commonly reported symptom for the RB787WH1WW Hotpoint Range, and we have put together a full guide on how to fix this. This advice is based on feedback from people who own this exact appliance. We have listed the most common parts for your RB787WH1WW Hotpoint Range that will fix Little to no heat when baking. We have included repair instructions, and helpful step-by-step video tutorials. If you are experiencing this issue, not to worry, DIYers just like you have fixed this, and shared their experience to help you!

Fixes Symptom 88% of time
★★★★★
★★★★★
91 Reviews

Rated by 36 customers 


Really Easy 

15 - 30 mins 

Ratings submitted by customers like you who bought this part.   

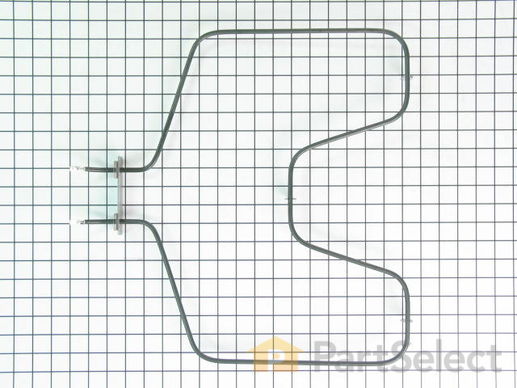
The bake element is located on the bottom of the oven. If your oven will not heat properly it may be due to a faulty or damaged baking element. If you can see that the element has been separated or blistered, you should replace the part immediately. If there is no visible damage, turn the oven on and check to see if the element heats evenly. If the element is not heating evenly, or if it is not heating at all, it will need to be replaced. This element is 19 inches wide x 19 inches long, and has male spade push on terminals.

$ 122.85
  In Stock
PartSelect Number PS249238
Manufacturer Part Number WB44K10005

Replacing your General Electric Range Bake Element - Push On Terminals - 240V

Replacing your Bake Element - Push On Terminals - 240V

Customer Repair Stories

Broken heating element

1)Turn off power to stove
2)remove 2 bolts holding heating element
3)pull element out of the back of the oven about 8" so that the wire connects is visable
4)pull wire clips off of heating element and remove element from the oven
5)put wire clips on the new heating element
6)push new heating element back into the holes in the back of the oven
7)screw botls back into the oven holding the heating element in place
8)Turn power back on
  • Paul from anna, TX
  • Difficulty Level:
    Really Easy
  • Total Repair Time:
    15 - 30 mins
  • Tools:
    Nutdriver, Pliers
73 of 85 people found this instruction helpful.
Was this instruction helpful to you?
Thank you for voting!

Lower bake Element would not heat.

First I slid the stove out and unpluged it, then removed two screws,slid out element, disconected two wires, slid new element in to place, pluged two wires in ,put into place and installed two screws, pluged stove back in, and turned on to try. Works perfect.
  • Ronald from Nassau, NY
  • Difficulty Level:
    Really Easy
  • Total Repair Time:
    Less than 15 mins
  • Tools:
    Nutdriver, Pliers
221 of 244 people found this instruction helpful.
Was this instruction helpful to you?
Thank you for voting!
Fixes Symptom 10% of time
★★★★★
★★★★★
8 Reviews

Rated by 6 customers 


Really Easy 

15 - 30 mins 

Ratings submitted by customers like you who bought this part.   

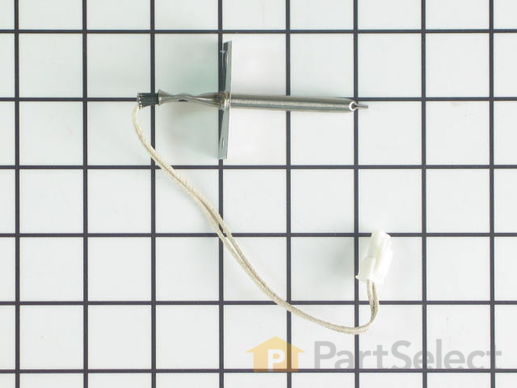
This kit includes the sensor as well as the connectors. NOTE This sensor is 2" long.

$ 208.65
  In Stock
PartSelect Number PS236490
Manufacturer Part Number WB23X5340

Replacing your General Electric Range Temperature Sensor Kit

Replacing your Temperature Sensor Kit

Customer Repair Stories

defective temp. sensor

Removed oven from cabinet. unblug old sensor pluged in new and reinstalled oven. Esay repair though wish oven was designed so did not have to pull itout of cabinet which requires disconect electric cabel
  • Armand from COVENTRY, CT
  • Difficulty Level:
    Easy
  • Total Repair Time:
    30 - 60 mins
  • Tools:
    Screw drivers
19 of 26 people found this instruction helpful.
Was this instruction helpful to you?
Thank you for voting!

Oven sensor was not holding temperature range.

Per the instructions included with part.
  • CHARLA from NEW BRAUNFELS, TX
  • Difficulty Level:
    Really Easy
  • Total Repair Time:
    Less than 15 mins
  • Tools:
    Nutdriver
44 of 75 people found this instruction helpful.
Was this instruction helpful to you?
Thank you for voting!
Fixes Symptom 1% of time
★★★★★
★★★★★
53 Reviews

Rated by 29 customers 


Really Easy 

30 - 60 mins 

Ratings submitted by customers like you who bought this part.   

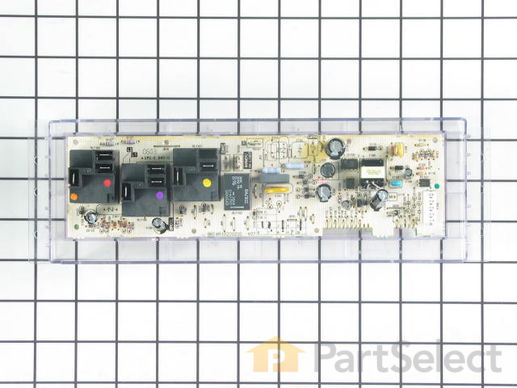
This part is also known as the "brains" of the appliance. ***NOTE: The wiring could be different than the original control. This part may need to be installed by an appliance repair person.

$ 198.44
  On Order
PartSelect Number PS16873547
Manufacturer Part Number WB27X45466

Customer Repair Stories

Range top burners work, but Oven would not. Click flashed and made a clicking noise when trying to turn on the oven, but shut off

My Range had the issue I mentioned here. I put off the repairs for a long time, but Thanksgiving was around the corner and we needed a working oven. I had made a previous call to repair man and was quoted $75.00 for a service call to come and check the issue. Before calling a repair man back, I decided to pull the rear cover off the range to see how complicated it would be to repair. I removed the rear cover and found that everything was connected to this "Oven Electronic Control" except for the top elements (explaining why they still worked and the oven didn't). This made it seem that this part would surely have to be causing the issue. I did a search on Google and found this company and the part that I needed. The cost of the part was less than the service call for a repair man would have been. I ordered the part and paid for next day delivery. The part shipped on Monday and arrived on Tuesday. For the installation, I had to identify the wiring because the connector layout was a little different. When I looked closely I found that the terminals were numbered the same as the old part. I replaced wire for wire, put it all back together and tried it out. It worked like a champ. I was thrilled to have been able to find the part with schematics on this web site and it was the correct part and fixed the problem. I was also thrilled that I saved a couple hundred dollars fixing it myself and that it was so easy. I would highly recommend this company for the ease of use of finding the part on their web site, the reasonable price and their prompt processing and delivery.
  • James from Hope Mills, NC
  • Difficulty Level:
    Really Easy
  • Total Repair Time:
    15 - 30 mins
  • Tools:
    Nutdriver, Pliers, Screw drivers
Was this instruction helpful to you?
Thank you for voting!

after lightning cooktop worked oven did not

called service co. and described problem while i was looking at parts diagram and he agreed with my feeling what part got fried. he told me the part would be 183.00 plus labor and drive time. when i told him i was looking at the part on line for 65 dollars he hung up on me. i recieved the part and was slightly dissapointed to know there was a sepperate adhesive overlay. i saw that it was a sepperate part but if i knew it was adhesive i would have spent the extra 20 dollars for a new one. but, to my surprise the old one peeled off easily and gently re-apllied it to the new conrol board alighning it well seemed to be the trickiest part of the job. took the five wires with connectors out of the old one and inserted them into the same place on the new one. removed the old one from the frame (4 pan phillp sheet metal screws) and then screwed the new wired control board in. plugged in the unit and pressed the bake button and then mixed the brownie batter. replaced the back panel cover. 65 dollars and 15 minutes.

thanks

bob
  • robert from OXFORD, CT
  • Difficulty Level:
    Really Easy
  • Total Repair Time:
    15 - 30 mins
  • Tools:
    Screw drivers
46 of 56 people found this instruction helpful.
Was this instruction helpful to you?
Thank you for voting!