Models > PLFU1778ES2 > Symptoms > Noisy

Parts That Fix Frigidaire Freezer PLFU1778ES2 Noisy

Noisy is a commonly reported symptom for the PLFU1778ES2 Frigidaire Freezer, and we have put together a full guide on how to fix this. This advice is based on feedback from people who own this exact appliance. We have listed the most common parts for your PLFU1778ES2 Frigidaire Freezer that will fix Noisy. We have included repair instructions, and helpful step-by-step video tutorials. If you are experiencing this issue, not to worry, DIYers just like you have fixed this, and shared their experience to help you!

Fixes Symptom 47% of time
★★★★★
★★★★★
15 Reviews

Rated by 9 customers 


Really Easy 

Less than 15 mins 

Ratings submitted by customers like you who bought this part.   

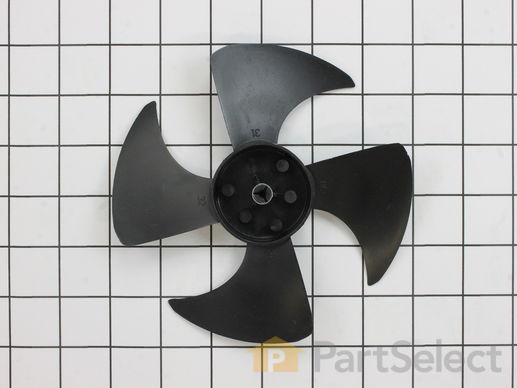
This part blows air over the condenser.

$ 19.97
  In Stock
PartSelect Number PS2361234
Manufacturer Part Number 240524102

Replacing your Frigidaire Refrigerator Fan Blade

Replacing your Fan Blade

Customer Repair Stories

Brand new refrigerator, but evaporator fan blade broken, causing considerable vibration and noise.

Really, really, really easy:
1.Unplug refrigerator (electrical safety).
2.Remove cardboard cover at bottom of refrigerator (two short self-tapping bolts) with a wrench.
3.Pull old fan blade off fan motor shaft (just held on by a compression fitting--no tools needed).
4.Push new fan blade on shaft.
5. Replace cardboard cover.
6. Plug in refrigerator, write nasty letter to Frigidaire.
  • John from Morgantown, WV
  • Difficulty Level:
    Really Easy
  • Total Repair Time:
    Less than 15 mins
  • Tools:
    Wrench (Adjustable)
30 of 34 people found this instruction helpful.
Was this instruction helpful to you?
Thank you for voting!

Broke a blade off of the fan

When cleaning the coils on your refrigerator always remember rule number 1, unplug it first. I was cleaning the coils and hit the fan blade while it was moving with a brush, thus breaking off one of the fan blades. I ordered a new fan and installed it in about 15 minutes. Very easy repair.
  • Milton from Camp Hill, PA
  • Difficulty Level:
    Really Easy
  • Total Repair Time:
    15 - 30 mins
  • Tools:
    Wrench (Adjustable)
78 of 85 people found this instruction helpful.
Was this instruction helpful to you?
Thank you for voting!
Fixes Symptom 25% of time
★★★★★
★★★★★
5 Reviews

Rated by 5 customers 


Easy 

30 - 60 mins 

Ratings submitted by customers like you who bought this part.   

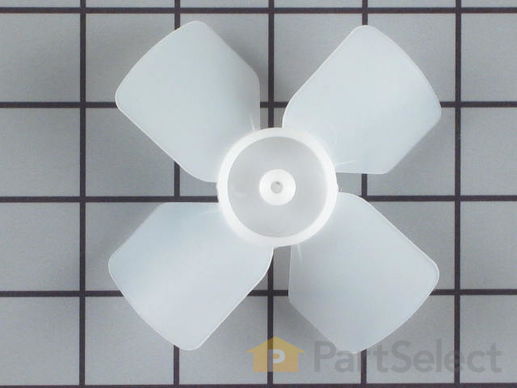
This evaporator fan blade is a genuine OEM part that is sourced directly from the manufacturer. The evaporator fan blade circulates air through the refrigerator to control the amount of cold air goes that goes to internal compartments of the unit. It may need to be replaced if the fridge is noisy or not cold enough. This part is made of plastic and is sold individually. It will be necessary to disconnect power to the refrigerator and empty the freezer compartment of the refrigerator. The tools needed to complete this repair are a 1/4 inch nut driver and a pair of needle nose pliers.

$ 47.83
  In Stock
PartSelect Number PS473177
Manufacturer Part Number 5308000010

Replacing your Frigidaire Refrigerator Evaporator Fan Blade

Replacing your Evaporator Fan Blade

Customer Repair Stories

loud noise fan blade broke,off balance

take 1/4 hex screws out clean out dust ,remove old fan blade replace with new install bolts .
  • EDWIN from ELWOOD, IN
  • Difficulty Level:
    Really Easy
  • Total Repair Time:
    15 - 30 mins
  • Tools:
    Nutdriver
Was this instruction helpful to you?
Thank you for voting!

I had a broken fan blade due to ice build up from a leaking ice maker.

1. I took out one screw on the ice maker and loosened the other two screws and unplugged and removed the ice maker.
2. Next I took out 2 screws from the bottom of the auger drive box and unplugged the wiring harness and removed the box. The wiring harness was a little tricky. The lock on the plug pushes in to unlock even though it looks like it pulls out,.
3.next you must remove 2 screws from the left side bracket that holds the auger box and remove the bracket.
4.Now take out 8 screws that hold the back panel in place and remove the back panel.
5. now your looking at the evaporator fan blade and motor. The simple way to replace the fan blade is to unplug the motor and remove it from the freezer. It just sits in with nothing holding it. The fan requires a little pressure but should pull right off. Install new fan blade and put everything back in the same order it was removed.
  • gary from ARANSAS PASS, TX
  • Difficulty Level:
    Easy
  • Total Repair Time:
    30 - 60 mins
  • Tools:
    Nutdriver
3 of 5 people found this instruction helpful.
Was this instruction helpful to you?
Thank you for voting!
Fixes Symptom 15% of time
★★★★★
★★★★★
13 Reviews

Rated by 6 customers 


Easy 

30 - 60 mins 

Ratings submitted by customers like you who bought this part.   

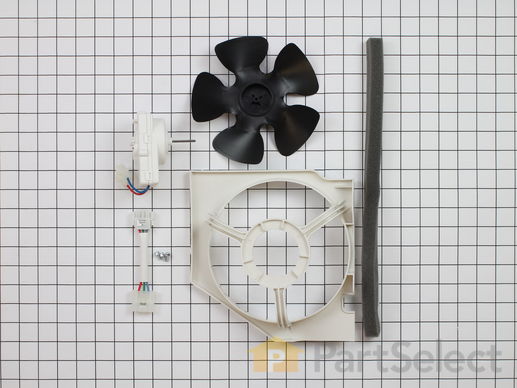
This is a replacement condenser fan motor kit for your refrigerator. This six-piece kit contains foam tape, 2 screws, the fan blade, the new motor mounting bracket, and the condenser fan motor. The condenser fan motor is found in the back of the refrigerator, and it moves air across the compressor and the condenser to keep them cool. If the motor has failed, the condenser and the compressor will run hot, and this can cause the refrigerator not to cool. This is an OEM part from the manufacturer.

$ 132.58
  In Stock
PartSelect Number PS11766772
Manufacturer Part Number 5303918774

Replacing your Frigidaire Refrigerator Refrigerator Condenser Fan Motor Kit

Replacing your Refrigerator Condenser Fan Motor Kit

Customer Repair Stories

Fan motor no longer functioning and needed to be replaced

The most difficult part was the removal of the existing fan and shroud. There is very little room to work between the condenser and the coils where the fan is located. The old shroud had to be removed as it was not compatible with the mounting for the new fan motor and blade. Make sure to unplug the refrigerator and give the coils some time to cool down. The first step was to remove the old fan blade... it simply pulls off. Next you need to remove the two bolts holding the fan shroud to the floor of the refrigerator. Then you need to remove the old fan motor from the shroud... unplug the wire connection and remove two small bolts that hold it on. I was lucky to have a VERY small ratchet to get into these tight spaces. Now is the really hard part, removing the metal fan shroud takes a lot of twisting and turning to get it out. The coils have a little play in them, but you must be very careful of the tubing and connections. Also, the coils are very sharp. Once this is out, IF you can get it out....I had my doubts along the way, you can start to put the new parts in... beginning with the new fan shroud which fortunately is made of plastic and has some give which makes it easier to get in. Then you can mount the new motor to the shroud with the three new screws. Plug in the wire connection, add the foam tape to the shroud and mount the shroud to the floor of the frig with the original two bolts. Lastly, attach the fan blade. This replacement kit is well constructed, fits perfectly and contained all the necessary parts (fan motor with wiring connection, mounting screws, wire connection adapter, fan shroud, foam tape and fan blade), but no detailed instructions come with it. I was lucky to get the old fan shroud out without doing any damage to the surrounding parts, but this part was very difficult for a do it yourself person. I would be interested to know if a professional has some other tips for this part of the replacement process.
  • Amber from SHERMANS DALE, PA
  • Difficulty Level:
    Very Difficult
  • Total Repair Time:
    1- 2 hours
  • Tools:
    Nutdriver, Pliers, Socket set
12 of 12 people found this instruction helpful.
Was this instruction helpful to you?
Thank you for voting!

Replaced the heater-core motor

It was fairly easy. Only had to remove the back cardboard. Remove 3 screws and the power plug.
Replacing the screws took a little time the motor mount didn't seem to be tapped exactly for the screws supplied and it was in a tight area. Its working great now.
  • John from Roanoke, VA
  • Difficulty Level:
    Easy
  • Total Repair Time:
    15 - 30 mins
  • Tools:
    Socket set
17 of 22 people found this instruction helpful.
Was this instruction helpful to you?
Thank you for voting!
Fixes Symptom 13% of time
★★★★★
★★★★★
7 Reviews

Rated by 6 customers 


Really Easy 

15 - 30 mins 

Ratings submitted by customers like you who bought this part.   

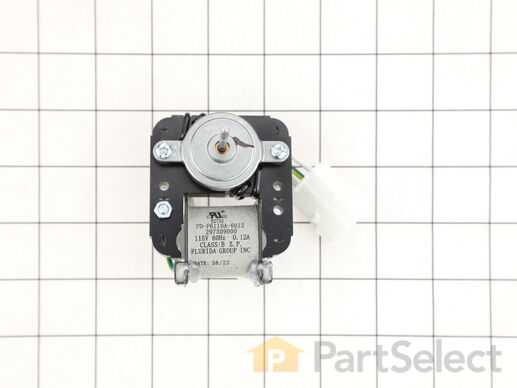
This evaporator fan motor is 115V. If you notice that your freezer is noisy or is too warm, you may need to replace the evaporator fan motor. This package comes with the evaporator fan motor itself, as well as a wire harness. The evaporator fan motor is in the back of the freezer, so you will need to remove your freezer shelves and the back panel before you can access it. The function of the evaporator fan motor is to circulate air over the coils. The coils convert the heat into cool air, which is then circulated. Be sure to remove the power source from the freezer before you begin this repair.

$ 93.37
  On Order
PartSelect Number PS3502361
Manufacturer Part Number 297309000

Replacing your Frigidaire Freezer FAN MOTOR EVAP 115V

Replacing your FAN MOTOR EVAP 115V

Customer Repair Stories

Evap fan motor intermitant

Removed evap cover from Commercial Refrigerator. Removed mounting screws from Evap motor mount. Replaced evap fan motor. Repositioned. Reinstalled evap cover. Tested . This motor was hard to find locally. Glad I called.
  • Mike from Los Banos, CA
  • Difficulty Level:
    Really Easy
  • Total Repair Time:
    15 - 30 mins
  • Tools:
    Nutdriver, Screw drivers
11 of 16 people found this instruction helpful.
Was this instruction helpful to you?
Thank you for voting!

Freezer thawing at about 20 degrees

Turned freezer off at themostat and unplugged freezer. Removed 2 screws at front 2 at the back and 2 at the top. Lowered top cover and removed evaporator fan bracket (2 more screws) removed themostat capulary tube( 1 screw and bracket) then unplug fan motor. Removed motor from bracket (2 screws). Put on new fan motor then removed fan blade from old motor and put on the new motor. Remounted fan motor bracket and thermostat capulary tube. Remounted top cover, plugged freezer in the set the thermostat to 4 and freezer is working fine and doing its job. I orderedmotor on a Sunday and it was shipped on Monday and I received said part at 7:pm on Wednesday.
  • Nathan M. from Bunnell, FL
  • Difficulty Level:
    Easy
  • Total Repair Time:
    15 - 30 mins
  • Tools:
    Screw drivers
21 of 24 people found this instruction helpful.
Was this instruction helpful to you?
Thank you for voting!