Models > MMV4205DS1 > Symptoms > No heat

Parts That Fix Maytag Microwave MMV4205DS1 No heat

No heat is a commonly reported symptom for the MMV4205DS1 Maytag Microwave, and we have put together a full guide on how to fix this. This advice is based on feedback from people who own this exact appliance. We have listed the most common parts for your MMV4205DS1 Maytag Microwave that will fix No heat. We have included repair instructions, and helpful step-by-step video tutorials. If you are experiencing this issue, not to worry, DIYers just like you have fixed this, and shared their experience to help you!

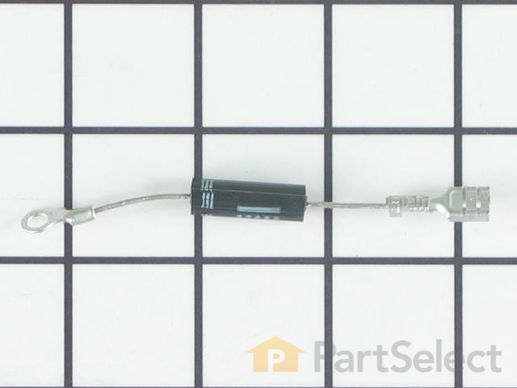
1 DIODE
Fixes Symptom 85% of time
★★★★★
★★★★★
8 Reviews

Rated by 12 customers 


Easy 

30 - 60 mins 

Ratings submitted by customers like you who bought this part.   

This diode, or high voltage diode, is used in microwaves. It is an electrical current control device that ensures power flows in one direction and not the other way. If your microwave produces no heat, heats inconsistently, or gets noisy, replacing this part can be the solution. The tools needed for this replacement are a nutdriver, pliers, and screwdrivers. First remove the microwave cover, then remove the old part by disconnecting the small thermostat. Replace with the new diode. Remember to use the diagram provided by the manufacturer for more instructions.

$ 29.52
  In Stock
PartSelect Number PS12584264
Manufacturer Part Number W11256462

Customer Repair Stories

Humming sound, not heating.

I turn off the income electricity by shutting down the corresponding circuit breaker. Then, I removed the control panel from the microwave which gave me access to the capacitor and adjacent diode. After that i unscrewed the defective diode and replaced it with the new one and BINGO!
  • Fausto from Miramar, FL
  • Difficulty Level:
    Easy
  • Total Repair Time:
    15 - 30 mins
  • Tools:
    Nutdriver, Pliers, Screw drivers
34 of 48 people found this instruction helpful.
Was this instruction helpful to you?
Thank you for voting!

Microwave made very loud noise while on. No heat.

Unless you have a very comfortable background with electronics and electricity, I don't necessarily recommend taking apart a microwave. If you are very handy and are going to be VERY cautious to follow the rules of discharging caps and testing voltages before moving forward, then go for it. That said, I took the microwave off and apart. Not knowing where to find the parts, I was fortunate that the installer put the instruction book for the microwave inside the front vent slot above the touchpad for reference. it details the location of every part and it tells you very clearly what each part you test should show specific to this microwave on your multimeter. Find this guide online if you don't have it. Turn on the microwave for 20 seconds with a glass of water to make sure it's not heating - that with the noise means it's eeither the magnetron, cap, or diode. Read the notes on this site for all of the basic things to look for with the magnetron, diode, and capacitor. Once comfortable with the guide, locations of those devices, and how to test, then take it down and apart. Unfortunately, I didn't do all those things in that order, and it only wasted a lot of time trying to find the parts. Once I found the parts and put all the screws and covers back for all the areas that didn't need to be accessed for the repair, testing went quickly. The diode was bad. Ordered a new one and had it in 3 days or so. That means your microwave will be apart and sitting somewhere for a little while until you get the part and have time to repair it. Putting the diode back isn't too bad. Reassemble the microwave and put it back up again. If i had to do it again, it would take me 20 to 30 minutes once the microwave was down and on a table. Also, I used some bricks with towels over them or you could use some sawhorses to keep the microwave elevated so you can plug it in and run it after installing the new component. Again, make sure you discharge the cap before touching anything again even if you didn't run it, but just plugged it in.
  • Sleiman from Miami, FL
  • Difficulty Level:
    Easy
  • Total Repair Time:
    More than 2 hours
  • Tools:
    Pliers, Screw drivers
38 of 53 people found this instruction helpful.
Was this instruction helpful to you?
Thank you for voting!
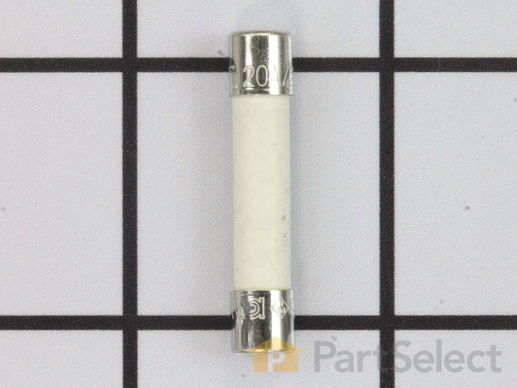
2 Fuse
Fixes Symptom 13% of time
★★★★★
★★★★★
5 Reviews

Rated by 5 customers 


A Bit Difficult 

1- 2 hours 

Ratings submitted by customers like you who bought this part.   

If your microwave is not turning on it could be due to your fuse needing to be replaced. This part protects the microwave by shutting it off if there is an electrical surge. This fuse is just over an inch long, is metallic on both ends and ceramic in the middle. Before beginning this repair, unplug the appliance and wait a few minutes before starting. Remove the outer cabinet which is held in place with two screws. You will then locate the power cord which will lead you to the fuse holder. Determine if the fuse has blown. Using an ohmmeter, you should be able to figure out if it has blown. A proper reading is zero ohms, if it reads as anything else then your fuse has in fact blown. Simply snap the old fuse out of place and place the new one in.

  No Longer Available
PartSelect Number PS1960938
Manufacturer Part Number W10138793

Customer Repair Stories

Microwave had no electrical

I was sent the wrong fuse by you. I had to procure a fuse in another manner. Very disappointing. The repair was simple. It just took longer because of the failure to send the correct fuse.
  • Larry from HARKER HTS, TX
  • Difficulty Level:
    Really Easy
  • Total Repair Time:
    30 - 60 mins
  • Tools:
    Pliers
1 of 2 people found this instruction helpful.
Was this instruction helpful to you?
Thank you for voting!

Microwave wouldn't turn on and found breaker been tripped and then microwave wouldn't turn on at all.

Read some instructions and easily found the fuse. Replaced it. Still didn't work. Took control panel off to check door switches. Nothing I read mentioned a second fuse. Tested and it to had blown. Ordered another one. Popped them in. Done.
  • Daniel from DECATUR, GA
  • Difficulty Level:
    Easy
  • Total Repair Time:
    30 - 60 mins
  • Tools:
    Pliers, Screw drivers
18 of 27 people found this instruction helpful.
Was this instruction helpful to you?
Thank you for voting!
Fixes Symptom 2% of time
★★★★★
★★★★★
11 Reviews

Rated by 6 customers 


Easy 

1- 2 hours 

Ratings submitted by customers like you who bought this part.   

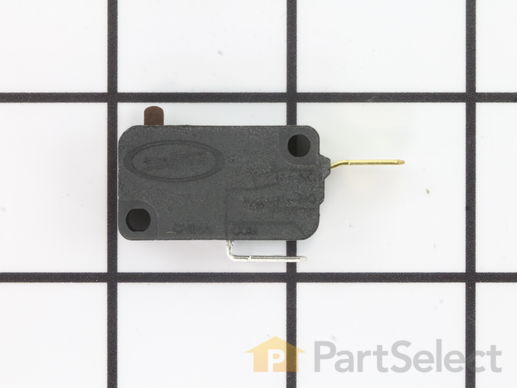
This door interlock switch is for microwaves. Door interlock switch prevents the microwave from starting when the door is open. Because the microwave shielding and interlock switches must be properly tested following the door interlock switch replacement, a service technician should install this part.

$ 33.68
  In Stock
PartSelect Number PS2361111
Manufacturer Part Number W10269458

Customer Repair Stories

The close door warning kept coming on and the microwave would not run

Don't waste your time with other parts stores online. Partselect sells quality parts and they arrived 2 days early. I purchase a door switch from another online store and the switch was defective.
  • Jeffrey from MOUNT ULLA, NC
  • Difficulty Level:
    Really Easy
  • Total Repair Time:
    30 - 60 mins
  • Tools:
    Screw drivers
3 of 3 people found this instruction helpful.
Was this instruction helpful to you?
Thank you for voting!

Door close wasnt registering and the microwave wouldn't turn on.

I looked up a YouTube video of someone with a similar over the oven microwave. That helped me get into the area behind the control panel where the door switches are. I checked the springs and the cam rocker? The thing that actually hits the button on the switch when the door closes. They were in good condition so I assumed the door switch was bad. There are two so I just purchased one figuring (hoping) that only one was bad. And lo and behold only one was bad. Bing bam boom. Put it all back together and I'm set. Not too difficult. Took a week of work because it takes like 50 days to ship. My kitchen looked like a hurricane after image because of all the parts scattered everywhere.
  • Tyler from PARKVILLE, MD
  • Difficulty Level:
    Easy
  • Total Repair Time:
    More than 2 hours
  • Tools:
    Screw drivers
12 of 16 people found this instruction helpful.
Was this instruction helpful to you?
Thank you for voting!