Models > MDG5500AWW > Symptoms > Noisy

Parts That Fix Maytag Dryer MDG5500AWW Noisy

Noisy is a commonly reported symptom for the MDG5500AWW Maytag Dryer, and we have put together a full guide on how to fix this. This advice is based on feedback from people who own this exact appliance. We have listed the most common parts for your MDG5500AWW Maytag Dryer that will fix Noisy. We have included repair instructions, and helpful step-by-step video tutorials. If you are experiencing this issue, not to worry, DIYers just like you have fixed this, and shared their experience to help you!

Fixes Symptom 37% of time
★★★★★
★★★★★
179 Reviews

Rated by 242 customers 


Easy 

1- 2 hours 

Ratings submitted by customers like you who bought this part.   

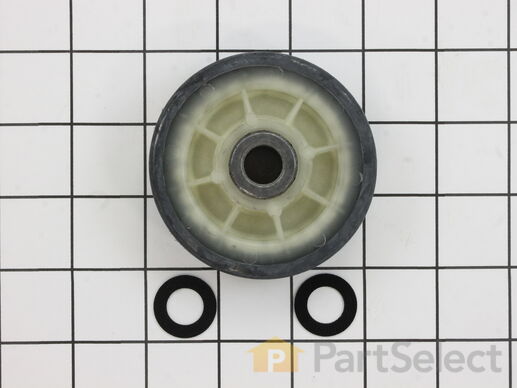
The drum support roller (Dryer Drum Support Roller, Drum Roller and Washer Assembly) holds the drum in the proper position while it spins on the support wheels. This part rotates on the roller shaft which is attached to the rear bulkhead. This part should be replaced whenever it does not rotate easily on the roller shaft. If you’re noticing a thump, scrape, or squeal while your drum is spinning, it may be your drum support rollers. Take a look at your existing drum rollers; if one or both of them are worn or broken, you’ll need to replace them. The drum support roller is subject to constant wearing when your dryer is in use, which causes them to break down over time. This part features 1 roller and 2 small washers, and measures approximately 3 inches in diameter. It is constructed with a combination of plastic, metal and rubber. This model comes in black/beige.

$ 13.50
  In Stock
PartSelect Number PS1570070
Manufacturer Part Number 12001541

Replacing your Maytag Dryer Drum Support Roller Kit

Replacing your Drum Support Roller Kit

Customer Repair Stories

noisy

I watched the video
  • Hazel from CONNERSVILLE, IN
  • Difficulty Level:
    A Bit Difficult
  • Total Repair Time:
    More than 2 hours
  • Tools:
    Nutdriver, Screw drivers, Socket set
7 of 11 people found this instruction helpful.
Was this instruction helpful to you?
Thank you for voting!

Dryer was making awful noise during use

Removed the screws and took the door off then took the front panel off and popped up the top. Then pulled the drum out. Took snap ring pliers and removed rollers and replaced with new rollers then vacuumed all lint from machine and reversed operation to put everything back together. Operation was a total success!
  • Pam from Aberdeen, WA
  • Difficulty Level:
    A Bit Difficult
  • Total Repair Time:
    1- 2 hours
  • Tools:
    Screw drivers
20 of 22 people found this instruction helpful.
Was this instruction helpful to you?
Thank you for voting!
Fixes Symptom 13% of time
★★★★★
★★★★★
3 Reviews

Rated by 92 customers 


Easy 

1- 2 hours 

Ratings submitted by customers like you who bought this part.   

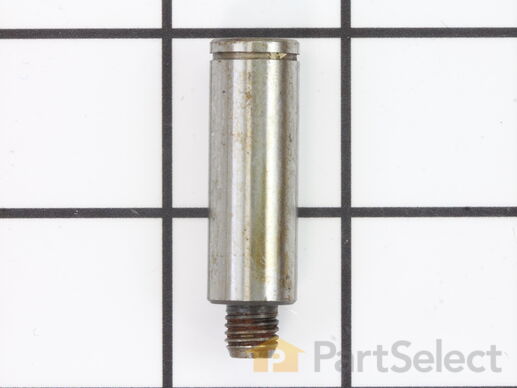
This roller shaft is also known as a support roller shaft or a drum roller axle, and is a part for your dryer. The function of this piece is to act as the axle for the drum roller; it provides a place for the roller to spin. The tools required for this repair are a stubby Phillips screwdriver, a 5/16 nut driver, a pair of snap ring pliers, and a 9/16 wrench. The first step before replacing this part should be to disconnect your dryer from the power source.

$ 9.81
  In Stock
PartSelect Number PS11743031
Manufacturer Part Number WP6-3129480

Replacing your Maytag Dryer Roller Shaft

Replacing your Roller Shaft

Customer Repair Stories

shaft had become worn , making loud noise and also causing drum roller to wear prematurely.

first, i removed two screws at the bottom of front panel. then lifted from the bottom removing it. next, removed drum surround and drum. next , removed right roller and roller shaft. then installed new shaft, slide roller back on shaft. next reinstalled drum, drum surround and front panel. Now so quiet you can hardly hear it run, also my sister says it drys much faster.
  • kenneth from mineral bluff, GA
  • Difficulty Level:
    Easy
  • Total Repair Time:
    15 - 30 mins
  • Tools:
    Pliers, Screw drivers, Socket set
1 person found this instruction helpful.
Was this instruction helpful to you?
Thank you for voting!
Fixes Symptom 11% of time
★★★★★
★★★★★
38 Reviews

Rated by 78 customers 


Easy 

1- 2 hours 

Ratings submitted by customers like you who bought this part.   

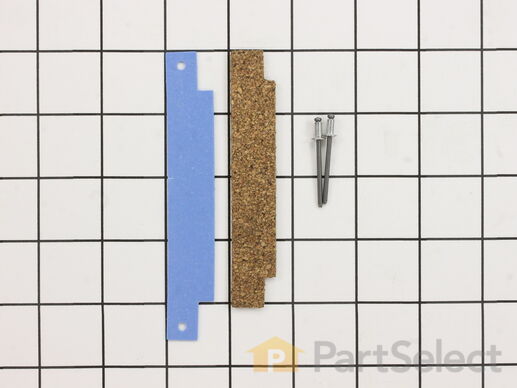
The front glide is located at the front of the dryer, the drum rides along it. If you hear a metal-on-metal noise when your dryer is running, your front glide may be worn out and require replacing. This front glide kit comes with a blue plastic glide, a brown cork pad, and two metallic rivets. Two kits are required per appliance. While you have the front bulkhead removed for this repair, you may want to inspect the felt that lines it. If the felt is damaged, it is recommended that you replace it at the same time. You will need a rivet tool for this installation, as well as a stubby Phillips screwdriver, a 5/16 nut driver, and a drill with a 1/8-inch bit.

$ 14.70
  In Stock
PartSelect Number PS1804752
Manufacturer Part Number 306508

Replacing your Maytag Dryer Front Glide Kit

Replacing your Front Glide Kit

Customer Repair Stories

My dryer - which is about 20 years old - was starting to make some rubbing/scraping sounds from the drum area.

This was pretty much as easy as most other folks had described on this site.
1. Removed the two screws at the front bottom that are holding on the fromt panel, and then lift up and remove the panel.
2. Disconnect the door-open-safety-switch, remembering which color of wire goes on which connection.
3. Remove the four screws (two on each side) on the front bracket that supports the drum and tthat contains the front glides.
4. Remove support bracket and lint trap, letting the drum rest gently on the stuff underneath.
5. Remove the screws holding the lint trap to the support bracket. (My model had five screws.) Remove lint trap from support bracket.
6. Drill out the two pop rivets on each of the two glides, noting the orientation of the teflon pad and mounting strip.
7. Secure - and here is where I had a little problem - new glides in place with pop rivets. (I hadn't use a rivet gun in a while, so I messed up the first pop rivet and had to go to the hardware store to get a replacement. I didn't hold the pop rivet in all the way while I was accuating the gun!)
8. Reverse the process for assembly, and you are all done.

It's simple.
  • Richard from Loretto, MN
  • Difficulty Level:
    Really Easy
  • Total Repair Time:
    1- 2 hours
  • Tools:
    Nutdriver, Screw drivers
7 of 7 people found this instruction helpful.
Was this instruction helpful to you?
Thank you for voting!

Noisy and thumping drum

I set the dryer on its back to make alignment of the front drum guide cover easy to reinstall in the seal after completion. I removed the 2 screws at the bottom front then removed the white and yellow wires to the interlock switch and set the front cover aside. I then removed the 4 nut screws holding the front drum cover and removed. On the back side there are two teflon and cork "bearings". I had ordered two even though only one was worn down to metal. On each one I then removed the two rivets by drilling them out. Then I placed the corks into the bearing slots with a little glue then inserted the teflon into the slots and riveted them into place with the rivets that came with the kit. I replaced the drum cover, connected the switch and screwed the dryer front cover back on. I set the dryer back up. Connected the vent hose and turned the dryer on. Beautiful sweet smooth and quiet operation. I had replaced the front and back drum seals a few months ago and saw the teflon was missing but did not have the kits at that time. With a complete job I would recommend replacing the front and rear drum seals and the two teflon/cork bearing kits at the same time.
  • Barry from League City, TX
  • Difficulty Level:
    Really Easy
  • Total Repair Time:
    1- 2 hours
  • Tools:
    Nutdriver, Screw drivers
7 of 7 people found this instruction helpful.
Was this instruction helpful to you?
Thank you for voting!
Fixes Symptom 9% of time
★★★★★
★★★★★
13 Reviews

Rated by 64 customers 


Easy 

1- 2 hours 

Ratings submitted by customers like you who bought this part.   

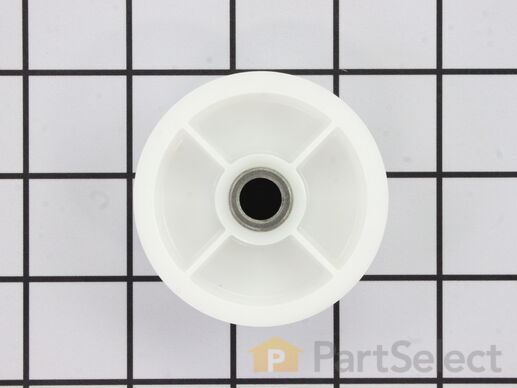
The idler pulley tightens the drive belt to properly spin the dryer drum. It is attached to an idler bracket. This part comes with the idler pulley and center bearing. To replace this part, you will need a Phillips screwdriver, channellock pliers, a 5/16ths nut driver, and a flat blade screwdriver. Make sure to disconnect power to the dryer before beginning this repair.

$ 22.11
  In Stock
PartSelect Number PS11743032
Manufacturer Part Number WP6-3700340

Replacing your Maytag Dryer Idler Pulley Wheel and Bearing

Replacing your Idler Pulley Wheel and Bearing

Replacing your Maytag Dryer Idler Pulley Wheel and Bearing

Replacing your Idler Pulley Wheel and Bearing

Customer Repair Stories

The Idler Wheel and Bearing broke.

I took the front door off, then i took the the front facing off so i could see in where the idler pulley was. Then I took a couple of screws out so i could get the tumbler out so i could put the belt back on track. I replaced the pulley and then started putting everything back together and now the dryer works like a brand new one. I loved buying parts from here. Cause you are showed how to replace the parts you are wanting to replace. I was very satisfied with everything.
  • Dexter from Baxley, GA
  • Difficulty Level:
    Really Easy
  • Total Repair Time:
    Less than 15 mins
  • Tools:
    Nutdriver, Screw drivers
1 person found this instruction helpful.
Was this instruction helpful to you?
Thank you for voting!

belt tensioner pulley seized to shaft

At first I thought I could just replace the pulley, but on closer inspection I found that the pulley had become seized on the shaft. I ended up removing the entire bracket (which I should have purchased also) and cutting the shaft off. I manufactured a new shaft from a bolt of the appropriate size and tack welded it to the bracket. It took a little more time than I anticipated. My advice to anyone doing this would be to spend a little extra money and buy the entire bracket and pulley. That would make this about a 15 minute job.
  • Shane from Heber City, UT
  • Difficulty Level:
    Easy
  • Total Repair Time:
    1- 2 hours
  • Tools:
    Nutdriver, Screw drivers, Wrench set
3 of 3 people found this instruction helpful.
Was this instruction helpful to you?
Thank you for voting!
Fixes Symptom 8% of time
★★★★★
★★★★★
33 Reviews

Rated by 77 customers 


Easy 

1- 2 hours 

Ratings submitted by customers like you who bought this part.   

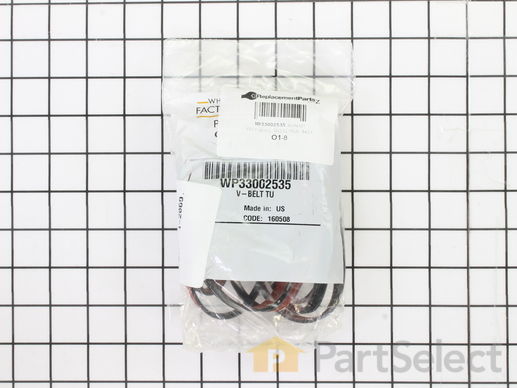
This multi rib belt spins the dryer drum during the drying cycle. This belt is 91-5/8 inches in length, 3/8th of an inch wide and has five ridges. It is black in color and made of rubber. You may need to replace the belt if your dryer is noisy or will not tumble.

$ 28.37
  In Stock
PartSelect Number PS11741110
Manufacturer Part Number WP33002535

Replacing your Maytag Dryer Multi Rib Belt - 91-5/8 Inches

Replacing your Multi Rib Belt - 91-5/8 Inches

Customer Repair Stories

dryer drum not turning well clothes were wrinkled

Took off the front, took thd drum off, removed old belt, placed on new belt ptu everything back together.
  • Cindy from Vincent, OH
  • Difficulty Level:
    Easy
  • Total Repair Time:
    30 - 60 mins
  • Tools:
    Screw drivers
6 of 11 people found this instruction helpful.
Was this instruction helpful to you?
Thank you for voting!

Burning rubber smell during heated dry cycle

Using the pictoral parts diagrams on the PartSelect website, it was a logical process to disassemble the dryer to change the drum drive belt. This was a great opportunity to clean lint from the motor and air passages and inspect all components. Cleaned the belt track, the roller drum wheels and felt seals. Unit now runs like new. BTW - very fast shipping on the replacement belt and it was the right part the first time!
  • Charles from Grass Valley, CA
  • Difficulty Level:
    Easy
  • Total Repair Time:
    1- 2 hours
  • Tools:
    Socket set
5 of 7 people found this instruction helpful.
Was this instruction helpful to you?
Thank you for voting!
Fixes Symptom 5% of time
★★★★★
★★★★★
3 Reviews

Rated by 43 customers 


Easy 

1- 2 hours 

Ratings submitted by customers like you who bought this part.   

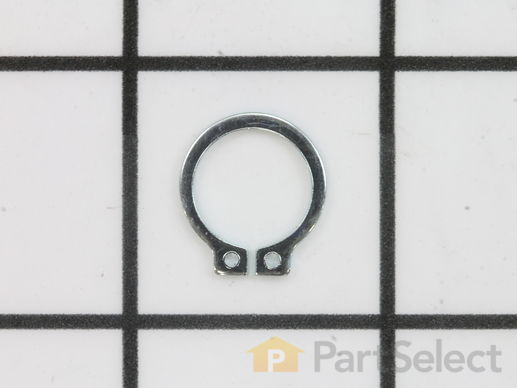
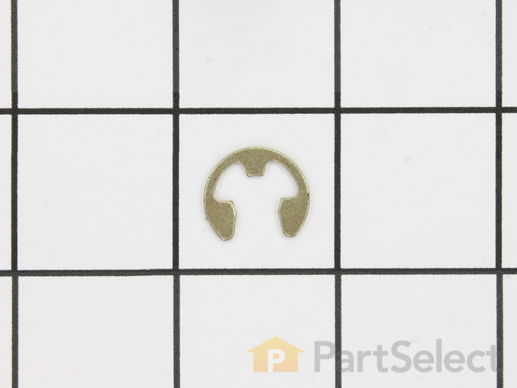
This part is a retaining ring, sometimes called a retaining clip, that holds the drum support roller onto the shaft of a dryer. It is made entirely of metal and measures less than an inch in diameter. The retaining ring is a genuine OEM part sourced directly from the manufacturer. The ring may vary in appearance due to manufacturer substitution, but the function is the same. You may need to replace this part if the dryer is noisy during tumbling, will not tumble, or takes too long to dry. Be sure to check drum support roller kit and shaft before ordering parts.

$ 7.88
  In Stock
PartSelect Number PS11746909
Manufacturer Part Number WP9703438

Replacing your Maytag Mixer Retaining Ring

Replacing your Retaining Ring
Fixes Symptom 3% of time
★★★★★
★★★★★
1 Review

Rated by 33 customers 


Easy 

1- 2 hours 

Ratings submitted by customers like you who bought this part.   

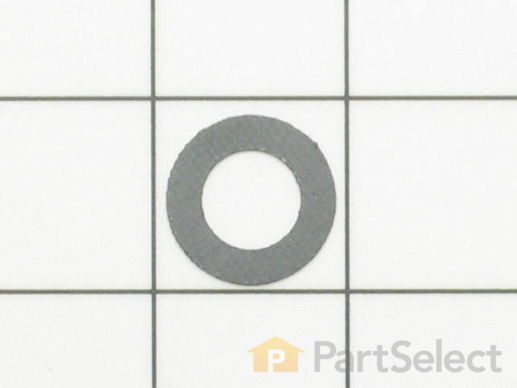
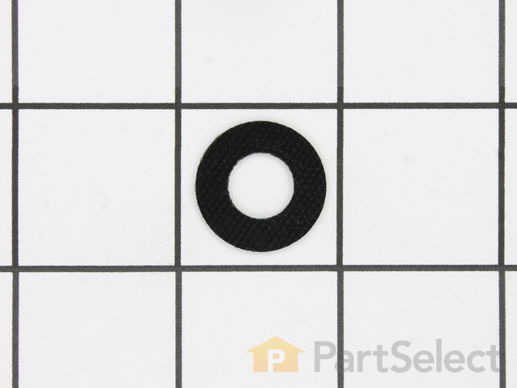
If you notice that your dryer is noisy or will not tumble, then you may need to replace the drum roller shaft washer. This drum roller shaft washer is just under an inch in diameter and is sold individually. It is located on the shaft of the drum roller, in the interior of your dryer. To access the drum roller shaft, you will need to remove the front panel of your dryer, and then remove the drum. Before completing this repair, be sure to disconnect the power source from the dryer. Tools required for this repair include a 5/16 nut driver, a stubby Phillips screwdriver, and a pair of snap ring pliers.

$ 13.79
  In Stock
PartSelect Number PS11740748
Manufacturer Part Number WP312535

Replacing your Maytag Dryer Drum Roller Shaft Washer

Replacing your Drum Roller Shaft Washer

Customer Repair Stories

worn roller wheel and bearing

replaced worn parts
  • David from Chadds Ford, PA
  • Difficulty Level:
    Easy
  • Total Repair Time:
    30 - 60 mins
  • Tools:
    Nutdriver, Screw drivers, Socket set, Wrench set
0 of 1 people found this instruction helpful.
Was this instruction helpful to you?
Thank you for voting!
Fixes Symptom 3% of time
★★★★★
★★★★★
4 Reviews

Rated by 20 customers 


Easy 

1- 2 hours 

Ratings submitted by customers like you who bought this part.   

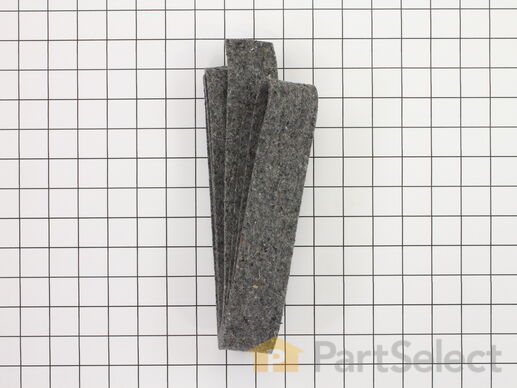
This is a drum felt seal for your dryer. It creates an airtight seal between the dryer rear panel and the back of the drum. It is important that this seal be flexible so it does not interfere with the function of the appliance. This model may be used for the front or the rear of your appliance. Take note that the adhesive is not included. The most common reason for needing to repair this part is if your dryer will not tumble, or there is not enough heat to properly dry your clothing.

$ 15.93
  In Stock
PartSelect Number PS11741074
Manufacturer Part Number WP33001807

Replacing your Maytag Dryer Dryer Drum Felt Seal

Replacing your Dryer Drum Felt Seal

Customer Repair Stories

Drum seal coming apart

Follow instructions on this website and be sure to pull the felt seal fairly tight as you work your way around or you'll be a little short at the end...
  • Kirt from TWIN FALLS, ID
  • Difficulty Level:
    Really Easy
  • Total Repair Time:
    30 - 60 mins
  • Tools:
    Nutdriver, Screw drivers
1 of 2 people found this instruction helpful.
Was this instruction helpful to you?
Thank you for voting!

Rear Felt seal came out, squealing sound when drying

Turned off gas and unplugged dryer
1) Removed bottom front panel
2) lifted top panel up like a car hood
3) Removed door springs
4) disconnected electrial connections to door unit, removed door unit
5) removed drum, scraped old felt from drum
6) glued new felt with a very strong glue (nanoglue or gorilla glue, same thing), let it dry overnight
7) secured back inside panel, replaced drum and put dryer back together.
  • Matthew from Lombard, IL
  • Difficulty Level:
    Easy
  • Total Repair Time:
    1- 2 hours
  • Tools:
    Screw drivers
19 of 24 people found this instruction helpful.
Was this instruction helpful to you?
Thank you for voting!
Fixes Symptom 2% of time
★★★★★
★★★★★
2 Reviews

Rated by 27 customers 


Easy 

30 - 60 mins 

Ratings submitted by customers like you who bought this part.   

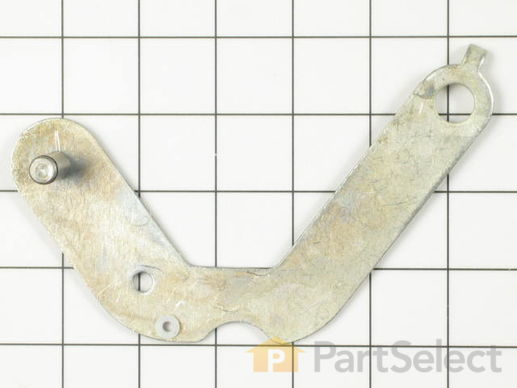
This arm is what attaches to the idler pulley wheel. The grommet no longer comes with the part as it has been updated by the manufacturer.

$ 59.37
  In Stock
PartSelect Number PS11743033
Manufacturer Part Number WP6-3705180

Replacing your Maytag Dryer Idler Arm and Shaft

Replacing your Idler Arm and Shaft
Fixes Symptom 2% of time

Rated by 25 customers 


Easy 

1- 2 hours 

Ratings submitted by customers like you who bought this part.   

This idler pulley shaft washer is used with many clothes dryers. It is less than an inch long, and it is black in color.

$ 13.45
  In Stock
PartSelect Number PS11757538
Manufacturer Part Number WPY312527

Replacing your Maytag Dryer Idler Pulley Shaft Washer

Replacing your Idler Pulley Shaft Washer
Fixes Symptom 2% of time
★★★★★
★★★★★
3 Reviews

Rated by 10 customers 


Easy 

30 - 60 mins 

Ratings submitted by customers like you who bought this part.   

This blower wheel clamp, used in a clothes dryer, is a clamp that holds the blower wheel to the motor shaft. This part helps hold the blower wheel in place to function easily and properly. If your clothes dryer has any of the following symptoms then replacing the clamp can be a solution: making loud noises, not producing enough heat or no heat at all, and/or clothes are taking too long to dry. Make sure to unplug thedryer from power source before installing this part and refer to the installation instructions provided by the manufacturer for further guidance.

$ 13.61
  In Stock
PartSelect Number PS11740752
Manufacturer Part Number WP312967
Fixes Symptom 1% of time

Rated by 18 customers 


Easy 

1- 2 hours 

Ratings submitted by customers like you who bought this part.   

This idler shaft retaining ring is well under an inch long and is made of metal.

$ 14.37
  In Stock
PartSelect Number PS11741848
Manufacturer Part Number WP354987

Replacing your Maytag Dryer Idler Shaft Retaining Ring

Replacing your Idler Shaft Retaining Ring
Fixes Symptom 1% of time
★★★★★
★★★★★
20 Reviews

Rated by 25 customers 


Easy 

30 - 60 mins 

Ratings submitted by customers like you who bought this part.   

This part moves the clothes around inside your dryer and helps to direct the flow of hot air during the drying cycle.

$ 46.00
  In Stock
PartSelect Number PS11741064
Manufacturer Part Number WP33001755

Replacing your Maytag Dryer Short Baffle

Replacing your Short Baffle

Customer Repair Stories

Short Baffle in dryer drum was broke off

This was fairly easy, I have had the dryer front off before. Unplug dryer from electrical outlet. Pull dryer away from wall. Remove the dryer door, open dryer door there are 2 phillips screws on dryer door hing, remove these crews then lift gently and remove door, across from these screws, where dryer door closes into face cover of dryer remove 2 more phillips screws. From top of face cover, pull out front of face cover and lift to remove face cover of dryer. On each side of dryer on the front, after removing the front cover is a 5/16 bolt, remove these and pull off retaining bracket with a twisting motion. You now can lift the top of the dryer up. You can now see the barrel drum. Rotate barrel by hand so the broken baffle is on top. Remove two 5/16 bolts, and replace new baffle in place. Reassemble in reverse order of disassemble.
  • Wade from Lovell, WY
  • Difficulty Level:
    Easy
  • Total Repair Time:
    15 - 30 mins
  • Tools:
    Screw drivers, Socket set
8 of 8 people found this instruction helpful.
Was this instruction helpful to you?
Thank you for voting!

The short baffle came loose and was rattling around in the dryer.

The repair was easy, based on the comments from this website. I used a 6-in-1 screwdriver, and that was the only tool. I removed the two screws holding the hinges, removed the door, then the two screws on the opposite side of the opening. This allowed the front panel to come off. I spun the dryer tumbler until the baffle that was loose was at approximately 5 o'clock. I unscrewed the remaining screw and found the missing screw in the bottom of the dryer. I put those two screws into the new baffle, and popped the front back in place. I reinstalled the four screws (two opposite the hinge, then the two that hold the hinges)...all done in about 20 minutes (including vacuuming the lint out from that lower area).
  • Melissa from Cedar Rapids, IA
  • Difficulty Level:
    Easy
  • Total Repair Time:
    15 - 30 mins
  • Tools:
    Screw drivers
26 of 26 people found this instruction helpful.
Was this instruction helpful to you?
Thank you for voting!
Fixes Symptom 1% of time
★★★★★
★★★★★
4 Reviews

Rated by 5 customers 


Easy 

30 - 60 mins 

Ratings submitted by customers like you who bought this part.   

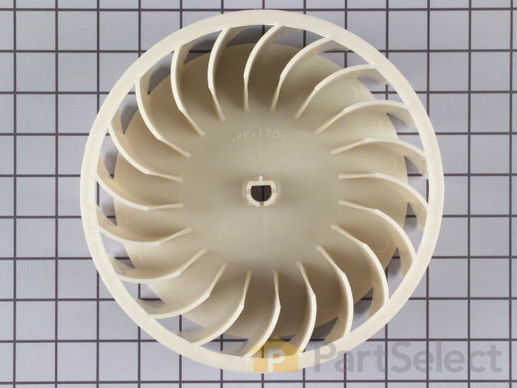
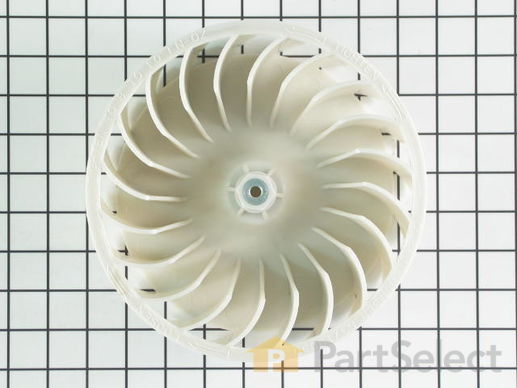
This blower wheel does not come with a spring clamp, but it does have twenty fins and it is designed to fit a 3/8 of an inch motor shaft.

$ 54.64
  In Stock
PartSelect Number PS2035614
Manufacturer Part Number 33001790

Replacing your Maytag Dryer Blower Wheel

Replacing your Blower Wheel

Customer Repair Stories

The dryer would rumble after startup.

We started by unplugging the unit thenremoving the door tand front panel.By removing the belt from the tensioner and lifting out the drum.the drum rollers were replaced first and rumble was still there when operated.Checking the blower wheel revealed a crack the width of the blower.After new blower was installed the dryer operated almost as quietly as new.
  • Lonnie from Carlton, OR
  • Difficulty Level:
    A Bit Difficult
  • Total Repair Time:
    15 - 30 mins
  • Tools:
    Nutdriver, Screw drivers
Was this instruction helpful to you?
Thank you for voting!
Fixes Symptom 1% of time
★★★★★
★★★★★
3 Reviews

Rated by 12 customers 


Easy 

1- 2 hours 

Ratings submitted by customers like you who bought this part.   

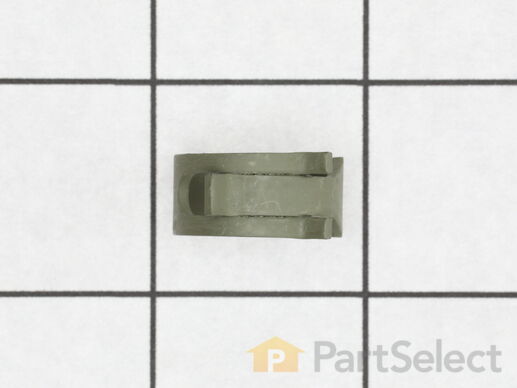
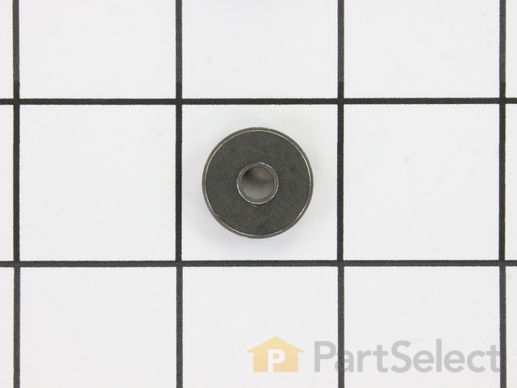
This sleeve is less than an inch in diameter. It is made of metal and is intended for use with the screw that holds the idler pulley of your clothes dryer.

$ 13.61
  In Stock
PartSelect Number PS11740802
Manufacturer Part Number WP315772

Customer Repair Stories

tumbler belt broke

After opening, found belt broke, idler pulley,arm and sleeve also needed replaced. Parts came quickly, and repair was made without any problems.
  • Tom from Ottumwa, IA
  • Difficulty Level:
    Really Easy
  • Total Repair Time:
    30 - 60 mins
  • Tools:
    Screw drivers, Socket set, Wrench (Adjustable)
0 of 1 people found this instruction helpful.
Was this instruction helpful to you?
Thank you for voting!
Fixes Symptom 1% of time
★★★★★
★★★★★
14 Reviews

Rated by 27 customers 


Easy 

30 - 60 mins 

Ratings submitted by customers like you who bought this part.   

This part moves the clothes around inside your dryer and helps to direct the flow of hot air during the drying cycle. NOTE: Screws are NOT included.

$ 41.62
  In Stock
PartSelect Number PS11741085
Manufacturer Part Number WP33002032

Replacing your Maytag Dryer Tall Baffle

Replacing your Tall Baffle

Customer Repair Stories

Baffels in Dryer came off

The YouTube video on how to replace the baffels was excellent. After watching the video, it was a piece of cake.
  • James from Canyon Lake, TX
  • Difficulty Level:
    Easy
  • Total Repair Time:
    15 - 30 mins
  • Tools:
    Socket set
3 of 4 people found this instruction helpful.
Was this instruction helpful to you?
Thank you for voting!

End of one baffle pulled away from drum

Following the instructions I pulled off the door and front panel. After rotating drum so the broken baffle was at the bottom I used a socket to remove the two screws on either end. I removed the broken baffle and inserted the new baffle in its place. Reinserted the screws, front panel, and door. I do strongly suggest having the manual handy to view the steps. It's available in PDF format.
  • Kim from Jacksonville, FL
  • Difficulty Level:
    A Bit Difficult
  • Total Repair Time:
    15 - 30 mins
  • Tools:
    Screw drivers, Socket set
3 of 3 people found this instruction helpful.
Was this instruction helpful to you?
Thank you for voting!
Fixes Symptom less than 1% of time

Rated by 4 customers 


Easy 

1- 2 hours 

Ratings submitted by customers like you who bought this part.   

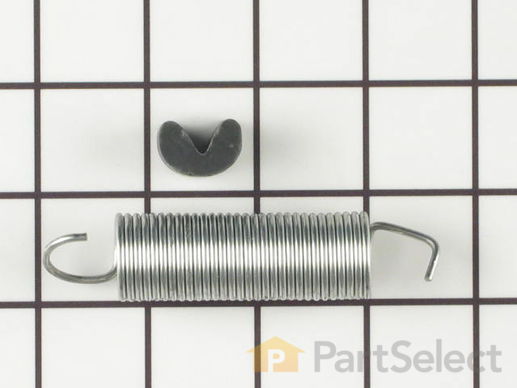
This part is the replacement idler spring and rubber dampener for your dryer. The package comes with both the spring and the dampener. The spring is made of metal and is approximately 4 inches long from end to end. The dampener is made of black rubber and is approximately 1 inch long and 1 inch in diameter. The idler spring puts tension on the belt, so the drum can turn. The main reason you would want to replace the idler spring is if your dryer is noisy and will not tumble, and you discover that the spring is broken. Be sure to disconnect your dryer from the power source before you begin this repair. This part is an authentic OEM part from the manufacturer.

$ 8.04
  In Stock
PartSelect Number PS2036150
Manufacturer Part Number 33002459

Replacing your Maytag Dryer Idler Spring with Rubber Dampener

Replacing your Idler Spring with Rubber Dampener
Fixes Symptom less than 1% of time
★★★★★
★★★★★
8 Reviews

Rated by 21 customers 


Easy 

1- 2 hours 

Ratings submitted by customers like you who bought this part.   

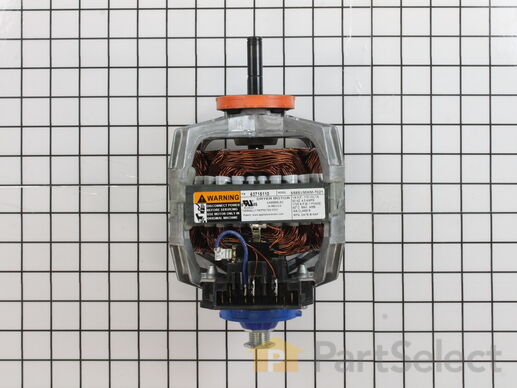
This part has a D-shaped motor shaft and this motor runs at 1/4 horsepower and carries 4.5 amps.

$ 159.21
  In Stock
PartSelect Number PS3500892
Manufacturer Part Number W10410997

Replacing your Maytag Dryer Drive Motor - 115V

Replacing your Drive Motor - 115V

Customer Repair Stories

dryer would not run

Removed door and front and drum. Removed fan assembly. Be careful when working fan off of motor shaft. Unhooked wiring from motor. Removed clips. Replaced motor. Reverse procedure to put dryer back together. Now works like new. Very, very, happy. Part came in 2 days using standard shipping. Way better than buying a new dryer.
  • Beverly from Oakland, MD
  • Difficulty Level:
    Easy
  • Total Repair Time:
    15 - 30 mins
  • Tools:
    Nutdriver, Pliers, Screw drivers
4 of 5 people found this instruction helpful.
Was this instruction helpful to you?
Thank you for voting!

Over the last year the 'start' button has had to be held to 'start' the dryer, with a humming noise during the process. Eventually it hummed, stank, and wounldn't start.

Yanked the front panel, observed motor operation while my smoking hot wife started the unit. Our washer and dryer get beaten like rented mules with kid laundry. I tried this site, and decided to spend a little $$ on a replacement motor. I was impressed with the operator, she even asked what the symptoms were and helped to avoid wasting time and money.
The part arrived on time, and installed quickly. I am a hero in my wife's eyes, and that certainly carries weight.
Then again, I didn't have to dispose of the old dryer, pay for a new one, or haul the replacement upstairs.
Win-win!
  • Ryan from Raleigh, NC
  • Difficulty Level:
    Easy
  • Total Repair Time:
    30 - 60 mins
  • Tools:
    Pliers, Screw drivers, Socket set
9 of 11 people found this instruction helpful.
Was this instruction helpful to you?
Thank you for voting!
Fixes Symptom less than 1% of time

Rated by 1 customer 


Easy 

30 - 60 mins 

Ratings submitted by customers like you who bought this part.   

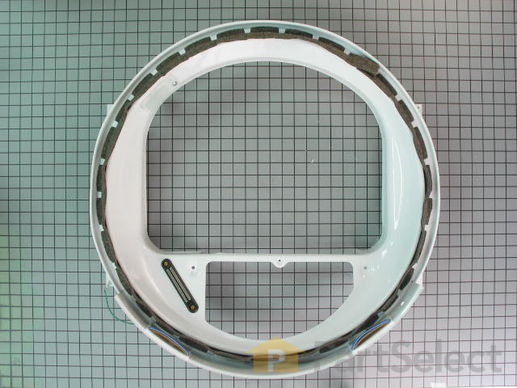
This tumbler includes the moisture sensor, glides and felt seals.

  No Longer Available
PartSelect Number PS2035678
Manufacturer Part Number 33001868

Customer Repair Stories

Metal burr ate away felt and tumbler edge

My boyfriend took the dryer apart but was not available for the reassembly. I simply pulled up the detailed diagram that Part Select had in their database and was able to put it back together, although a little slower than anticipated.

Thank you for everything.
  • Jill from Cape Corral, FL
  • Difficulty Level:
    Easy
  • Total Repair Time:
    30 - 60 mins
  • Tools:
    Nutdriver, Screw drivers
12 of 21 people found this instruction helpful.
Was this instruction helpful to you?
Thank you for voting!
Fixes Symptom less than 1% of time

$ 81.39
  In Stock
PartSelect Number PS11741126
Manufacturer Part Number WP33002797
Fixes Symptom less than 1% of time
★★★★★
★★★★★
148 Reviews

Rated by 135 customers 


Easy 

30 - 60 mins 

Ratings submitted by customers like you who bought this part.   

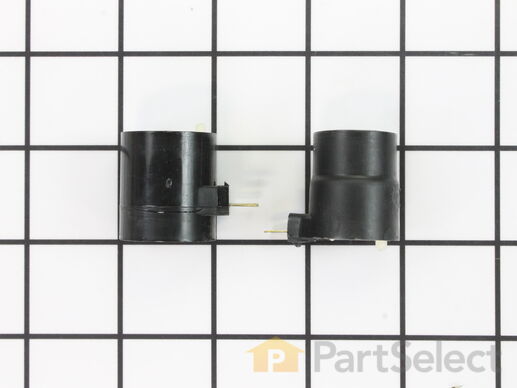
When the igniter reaches a high enough temperature, these coils (Coil Valve, Dryer Gas Valve Coil Kit, Dryer Valve Coil Kit, Gas Valve Solenoid) work together to open the gas valve and allow the gas to enter the burner. This is a safety mechanism to ensure that there are no unsafe buildups of gas inside your appliance. The coils are attached to the dryer gas valve. If the dryer does not heat or heats intermittently, the coil may not be opening the gas valve. Both coils must be operational for the valve to open. No continuity would indicate a defective coil, but they can be intermittent and fail when they get hot. Both coils should be replaced when one of them is broken. This part can break as a result of material fatigue from normal use. This part measures approximately 1 inch in diameter and 1 inch in height, and is constructed of plastic and metal. It comes in black/beige. This part features a 3-terminal boost/hold coil and a 2-terminal secondary coil

$ 30.89
  In Stock
PartSelect Number PS334310
Manufacturer Part Number 279834

Customer Repair Stories

Dryer would only heat cycle once

I removed the two screws holding the front panel to expose the lower works and verified the heating cycle failure. After a check of the vent system, checking the sensors for continuity and coils for resistance, I retired to the 'net for support. Accepting the general consensus that the most frequent, common and likely failure to be the coils, I rechecked them with the meter and found the two pronged coil to have significantly more resistance than the three prong coil. That was enough evidence to point to the coils. While I waited for the part to arrive, I replace the vent ducting. When the parts arrived I removed the two Phillips screws holding the coils, removed the old ones, installed the new ones, replaced the bracket, put the front cover back on and in less then ten minutes clothes where drying.
  • Robert from Seattle, WA
  • Difficulty Level:
    Really Easy
  • Total Repair Time:
    Less than 15 mins
  • Tools:
    Nutdriver, Screw drivers
80 of 89 people found this instruction helpful.
Was this instruction helpful to you?
Thank you for voting!

Dryer ran but would not heat

PartSelect showed seven different possibilities why the dryer wouldn't heat. I removed the two screws to remove the bottom panel and turned the dryer on and noticed that the heating element that ignites the gas was working fine. This meant that it was not getting gas so it could be the gas valve or one of the two gas valve coils which are located on top of the gas valve. I borrowed my neighbor"s ohm meter and touched the two probes on the coils terminals to check for continuity and found that one of the coils read zero. I then took both of the coils out by removing two screws and tested each coil again. One coil read 500-850 and the other read zero. This meant that it was no good so I called for the part and received it in three days. I reassembled the parts and turned the dryer on and it fired up after a few seconds. It works as good as new. The part plus shipping was less than $30. My repairman would have charged me $150-$200. While the dryer was apart I gave it a good cleaning with a vacuum and a toothbrush in delicate areas. I also removed and cleaned the lint trap housing by removing two nuts. I didn't know much about gas dryers, but thanks to PartSelect I easily fixed it myself.
  • Gary from Haverhill, NH
  • Difficulty Level:
    Easy
  • Total Repair Time:
    30 - 60 mins
  • Tools:
    Nutdriver, Screw drivers, Socket set
390 of 439 people found this instruction helpful.
Was this instruction helpful to you?
Thank you for voting!
Fixes Symptom less than 1% of time

Rated by 2 customers 


Easy 

30 - 60 mins 

Ratings submitted by customers like you who bought this part.   

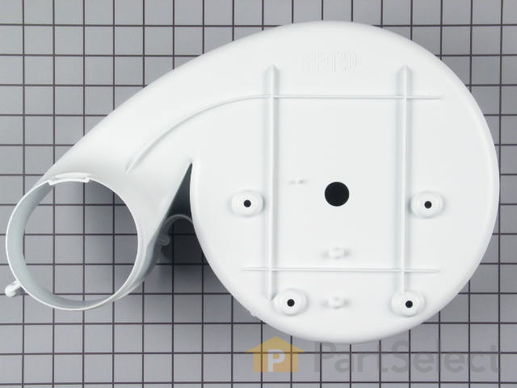
$ 77.60
  In Stock
PartSelect Number PS11741071
Manufacturer Part Number WP33001789

Replacing your Maytag Dryer Blower Housing

Replacing your Blower Housing
Fixes Symptom less than 1% of time
★★★★★
★★★★★
1 Review

Rated by 4 customers 


Really Easy 

15 - 30 mins 

Ratings submitted by customers like you who bought this part.   

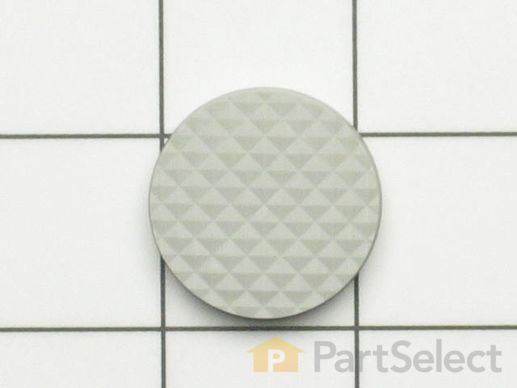
This gray levelling leg foot pad is made of rubber and is just over an inch in diameter. Sold individually.

$ 7.51
  In Stock
PartSelect Number PS11757547
Manufacturer Part Number WPY314137

Replacing your Maytag Dryer Rubber Leveling Leg Foot Pad

Replacing your Rubber Leveling Leg Foot Pad
Fixes Symptom less than 1% of time
★★★★★
★★★★★
19 Reviews

Rated by 27 customers 


Really Easy 

15 - 30 mins 

Ratings submitted by customers like you who bought this part.   

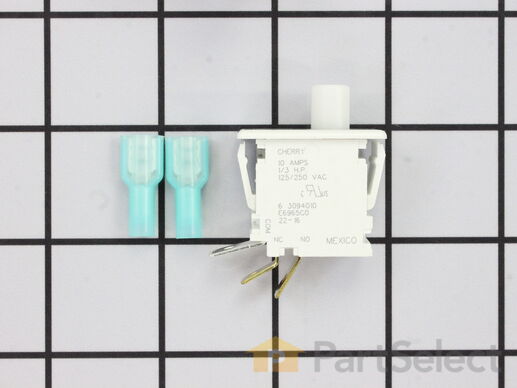
This part replaces two terminal switches in a dryer and prevents the dryer from running when the door is open. This includes two connectors. If your dryer will not shut off, start, or does not tumble, replacing the door switch can solve this appliance problem. The tools needed for replacement are a screw driver and wire strippers. Make sure to attach the two wires to the right two poles of the new switch, to do this you can check the resistance of the switch. Unplug the dryer before installing this part, also refer to the diagram provided by the manufacturer.

$ 29.94
  In Stock
PartSelect Number PS1964648
Manufacturer Part Number W10169313

Replacing your Maytag Dryer Door Switch Kit

Replacing your Door Switch Kit

Customer Repair Stories

Switch did not turn off dryer when door opened

Switch can be removed from outside of dryer and your video described the repair as having to work from inside dryer. But since wires were still attached to old switch, it could be popped out and wires switched. Since there were three wires on new switch to allow it to turn on and off a circuit, it was useful to check the resistance of the switch compressed or released to be certain I was attaching the two wires to the right two poles of the new switch. But that all required only a couple of minutes. Thank you.
  • paul from madison, CT
  • Difficulty Level:
    Really Easy
  • Total Repair Time:
    Less than 15 mins
13 of 17 people found this instruction helpful.
Was this instruction helpful to you?
Thank you for voting!

Switch sticking in on position

FIRST unplug dryer from electrical source, CAUTION, the top of this dryer does not open with clips, do not pry on top to open! On the front of the dryer look under the lower panel, and find two screws, one on the left side, and one on the right, remove these screws, and pull slightly down on panel to remove. Behind this panel find two screws holding the door panel, one on the left, and one on the right, remove the left, and support the door panel while removing the right side. Gently pull the bottom of door panel outward, and the clips on top of door panel will unhinge from top, carefully rotate left side of door panel to floor, and note the wire connections on switch, and orientation of switch, then unplug wires, and move door panel to a comfortable working positon. Door must be open to remove switch, then depress the two plastic retaining keepers on each side of switch, and push switch through toward door. Replace with new switch, reconnect the wires, and reassymble in reverse order. Remember, door assymbly must be inserted in dryer top at an angle, and then bottom rotated downward, and bottom panel nylon guildes inserted into door panel bottom.
  • Don from Jacksonville, FL
  • Difficulty Level:
    Really Easy
  • Total Repair Time:
    15 - 30 mins
  • Tools:
    Nutdriver
99 of 133 people found this instruction helpful.
Was this instruction helpful to you?
Thank you for voting!