Models > LFFH2067DW2 > Symptoms > Won’t start

Parts That Fix Frigidaire Freezer LFFH2067DW2 Won’t start

Won’t start is a commonly reported symptom for the LFFH2067DW2 Frigidaire Freezer, and we have put together a full guide on how to fix this. This advice is based on feedback from people who own this exact appliance. We have listed the most common parts for your LFFH2067DW2 Frigidaire Freezer that will fix Won’t start. We have included repair instructions, and helpful step-by-step video tutorials. If you are experiencing this issue, not to worry, DIYers just like you have fixed this, and shared their experience to help you!

Fixes Symptom 40% of time
★★★★★
★★★★★
16 Reviews

Rated by 10 customers 


Really Easy 

30 - 60 mins 

Ratings submitted by customers like you who bought this part.   

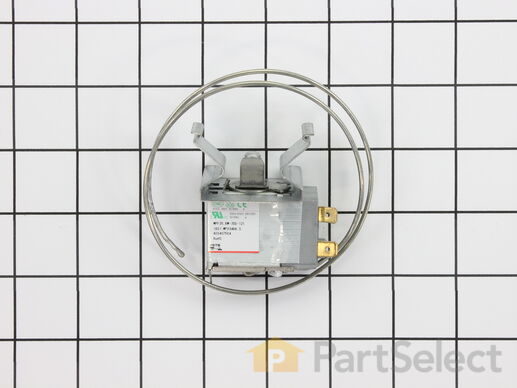
This part helps maintain a constant temperature within the appliance. The temperature control thermostat regulates the temperature inside the refrigerator. It turns on and shuts off the compressor as needed to maintain the set temperature.

$ 64.21
  In Stock
PartSelect Number PS12365300
Manufacturer Part Number 5304513033

Customer Repair Stories

freezer compressor ran continuously and freezer getting colder and colder.

Repair was quick and easy. I removed the frozen food in the bottom so the back panel could be removed. The temperature comtrol is attached to the back of that panel. It has a metal wire with a capillary tube on the end to sense the temperature. I just installed it exactly like the old one came out. Be sure and don't get the wires mixed up. Sometimes it helps to make notes. This was also a good time to clean the bottom out and make sure the drain hole was clear.

It took two days for the temperature to stabilize. I was anxious for a couple days that there was something else wrong. However, it smoothed out and the temperature control (thermostat) is now working properly.
  • john from hurst, TX
  • Difficulty Level:
    Easy
  • Total Repair Time:
    15 - 30 mins
  • Tools:
    Screw drivers
31 of 38 people found this instruction helpful.
Was this instruction helpful to you?
Thank you for voting!

freezer would run then thaw then freeze. tap on the control knob, it would start running again

Easy fix. I unplugged the freezer, unload items in freezer. took out shelves and baskets, Pulled off the control knob then removed all screws. removed inside panel, replaced part exactly as I took out old part. Put the panel back on, put everything back in place. Plugged freezer back in and turned the knob to 3. Let freezer run for a day to see if I ordered the correct part. Problem is fixed. Thank you, PartSelect for making it so easy to find, order the correct part and for all the customers input to make the repair easy.
  • WILLIAM from URBANA, OH
  • Difficulty Level:
    Easy
  • Total Repair Time:
    15 - 30 mins
  • Tools:
    Screw drivers
44 of 53 people found this instruction helpful.
Was this instruction helpful to you?
Thank you for voting!
Fixes Symptom 23% of time
★★★★★
★★★★★
16 Reviews

Rated by 12 customers 


Easy 

15 - 30 mins 

Ratings submitted by customers like you who bought this part.   

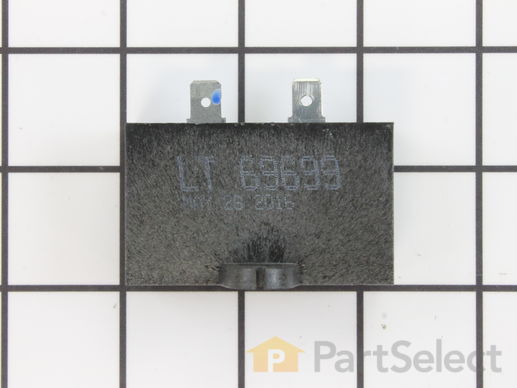
This part helps the compressor kick on and off while maintaining a constant temperature to keep things frozen in your freezer. The run capacitor is attached to the compressor. This part is 120 volts and 15 mfd. The run capacitor helps the compressor kick on and off while maintaining a constant temperature to keep things frozen in your freezer. If your refrigerator is too warm, will not start, or your freezer section is too warm, you may need to replace this part. This is a genuine OEM part. Please remember to disconnect power to your refrigerator before starting your repair.

$ 51.77
  In Stock
PartSelect Number PS3495561
Manufacturer Part Number 297286803

Customer Repair Stories

Coming from the refrigerator, there was an intermittent "clicking noise", occurring about every 30 seconds. The frig. eventually failed .

I removed the back cover and removed the clip holding the compressor- run capacitor and start relay. I replaced these 2 components and clean the dust from the frig., and from the bottom of the floor. I replaced the back cover ; Loss about $300 worth of meat when when the frig. failed. Then I thought that, during these turbulent times, there are many which don't have a refrigerator or any meat to place in it, The refrigerator is "running" normal again.
  • winifred from LOUISVILLE, KY
  • Difficulty Level:
    Easy
  • Total Repair Time:
    30 - 60 mins
  • Tools:
    Nutdriver, Pliers
4 of 4 people found this instruction helpful.
Was this instruction helpful to you?
Thank you for voting!
Fixes Symptom 16% of time
★★★★★
★★★★★
14 Reviews

Rated by 17 customers 


Really Easy 

30 - 60 mins 

Ratings submitted by customers like you who bought this part.   

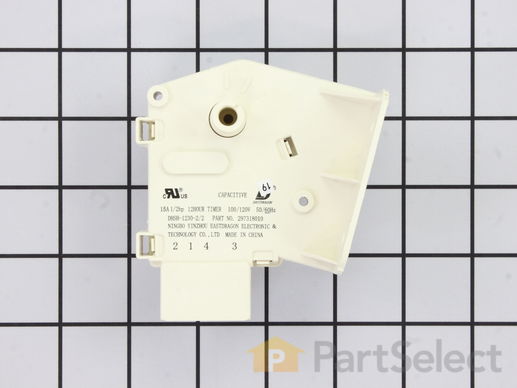
This is a 120 volt defrost timer manufactured for refrigerators. The defrost timer manages the automatic defrost systemin the unit. It acts like a clock by switching between activating the cooling cycle and the defrost heater to maintain the set thermostat temperature, preventing the unit from being too warm or cold. The defrost timer may need to be replaced if the fridge will not maintain its temperature or has frost buildup. Depending on the model, it could be located on the rear panel or ceiling of the fresh food compartment. Be sure to disconnect power to the refrigerator before replacing this part.

$ 45.53
  In Stock
PartSelect Number PS12585793
Manufacturer Part Number 5304518034

Replacing your Frigidaire Freezer DEFROST TIMER

Replacing your DEFROST TIMER

Customer Repair Stories

freezer was stuck in defrost mode - - stayed at 30 degrees

slid freezer away from wall - - bottom left hand corner was the frost timer - - removed two philip head screws - - unpluged timer and installed new timer - - turned timer past first click to a little past second click (freeze cycle) - - slid freezer back FINISHED - - YOU GUYS ARE THE BEST WITH YOUR WEB PAGE AND HELP!!!!! Next day freezer was at 0
  • don from stony point, NY
  • Difficulty Level:
    Really Easy
  • Total Repair Time:
    Less than 15 mins
  • Tools:
    Screw drivers
20 of 26 people found this instruction helpful.
Was this instruction helpful to you?
Thank you for voting!

Temp alarm sounding and food on top shelves partially thawed

After silencing the alarm, it seemed to be running as normal without any unusual noises, but food was starting to thaw from the top shelf on down and condensation was dripping from the roof. We were able to place most of the food in 2 large ice chests and then the rest in the freezer compartments of 2 fridges we have in the house. I then turned down the temp dial to the coldest setting and let it run for an hour or so; no change.

After researching on the internet, it sounded like our symptoms could be pointing to a defrost timer issue. I pulled the freezer away from the wall, located the timer and used a large screwdriver to slowly advance it. While doing this, at one point I could hear the compressor kick in. I pushed the quick freeze button and let it run for a while. When I checked it in a few hours, the alarm light had gone out and water that I had placed inside was frozen. We took a chance and put the food we placed in the ice chests back in the freezer. Everything was fine several hours later.

I ordered a new defrost timer, it arrived in a couple of days, and replaced the old one with it in a matter of minutes by disconnecting the wire harness from the old timer, removing the 2 screws holding it onto the bracket, screwing the new timer to the bracket, reconnecting the wires harness, and done. It's been a week or so and no problems.
  • Wayne from Forest Hill, MD
  • Difficulty Level:
    Easy
  • Total Repair Time:
    Less than 15 mins
  • Tools:
    Screw drivers
36 of 42 people found this instruction helpful.
Was this instruction helpful to you?
Thank you for voting!
Fixes Symptom 12% of time
★★★★★
★★★★★
33 Reviews

Rated by 34 customers 


Really Easy 

15 - 30 mins 

Ratings submitted by customers like you who bought this part.   

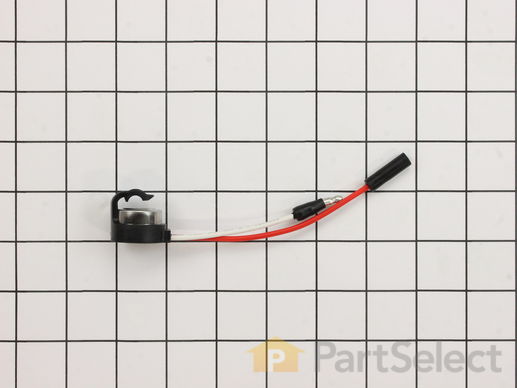
This refrigerator defrost thermostat is a genuine OEM part and is sourced directly from the manufacturer. Located on the back wall of the freezer section in the refrigerator, the defrost thermostat is used to regulate the appliances temperature to keep the refrigerator cold and constant. The part is made of plastic, and has a 4 inch terminal on the white lead and a 6 inch terminal on the red lead. A refrigerator defrost thermostat may need to be replaced if the appliance is experiencing temperature related issues such as: too cold, too warm, frost buildup, not running, or running too long.

$ 23.14
  In Stock
PartSelect Number PS2350702
Manufacturer Part Number 297216600

Replacing your Frigidaire Refrigerator Defrost Thermostat

Replacing your Defrost Thermostat

Customer Repair Stories

frezer not staying cold enough to freze newly added product

took the shelves out, unscrewed the rear panel,unpluged the thermistat and uncliped it from the line.Replaced with new thermistat in the reverse order. Before turning the unit back on,allowed the coils to defrost.All of the process was shown in your vidio that I was able to view while ordering the part. Thank you
  • Robert H. from Grand Blanc, MI
  • Difficulty Level:
    Really Easy
  • Total Repair Time:
    15 - 30 mins
  • Tools:
    Screw drivers
13 of 18 people found this instruction helpful.
Was this instruction helpful to you?
Thank you for voting!

Defrost function in freezer was not working, while the refrigerating side was warm

1. Turned off and unplugged the refrigerator.
2. Removed the lower back panel inside the freezer with a screwdriver.
3. Unplugged the thermostat. (No tool is needed)
4. Ordered a new thermostat from PartSelect and it arrived in 2 business days.
5. Plugged in the new thermostat..
6. Put the lower back panel inside the freezer with screwdriver.
7. Plugged in the Refrigerator and turned the power back on.
8. It is working again!!!
  • Sophia from San Antonio, TX
  • Difficulty Level:
    Easy
  • Total Repair Time:
    30 - 60 mins
  • Tools:
    Screw drivers
14 of 15 people found this instruction helpful.
Was this instruction helpful to you?
Thank you for voting!
Fixes Symptom 5% of time
★★★★★
★★★★★
7 Reviews

Rated by 6 customers 


Really Easy 

15 - 30 mins 

Ratings submitted by customers like you who bought this part.   

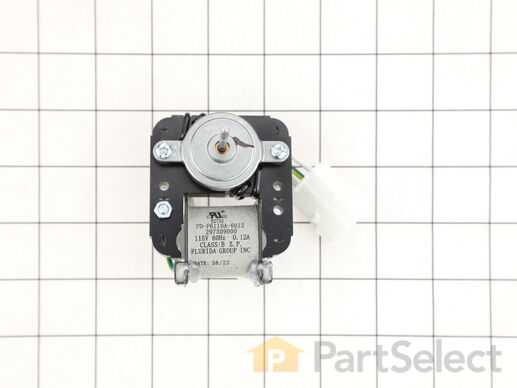
This evaporator fan motor is 115V. If you notice that your freezer is noisy or is too warm, you may need to replace the evaporator fan motor. This package comes with the evaporator fan motor itself, as well as a wire harness. The evaporator fan motor is in the back of the freezer, so you will need to remove your freezer shelves and the back panel before you can access it. The function of the evaporator fan motor is to circulate air over the coils. The coils convert the heat into cool air, which is then circulated. Be sure to remove the power source from the freezer before you begin this repair.

$ 93.37
  On Order
PartSelect Number PS3502361
Manufacturer Part Number 297309000

Replacing your Frigidaire Freezer FAN MOTOR EVAP 115V

Replacing your FAN MOTOR EVAP 115V

Customer Repair Stories

Evap fan motor intermitant

Removed evap cover from Commercial Refrigerator. Removed mounting screws from Evap motor mount. Replaced evap fan motor. Repositioned. Reinstalled evap cover. Tested . This motor was hard to find locally. Glad I called.
  • Mike from Los Banos, CA
  • Difficulty Level:
    Really Easy
  • Total Repair Time:
    15 - 30 mins
  • Tools:
    Nutdriver, Screw drivers
11 of 16 people found this instruction helpful.
Was this instruction helpful to you?
Thank you for voting!

Freezer thawing at about 20 degrees

Turned freezer off at themostat and unplugged freezer. Removed 2 screws at front 2 at the back and 2 at the top. Lowered top cover and removed evaporator fan bracket (2 more screws) removed themostat capulary tube( 1 screw and bracket) then unplug fan motor. Removed motor from bracket (2 screws). Put on new fan motor then removed fan blade from old motor and put on the new motor. Remounted fan motor bracket and thermostat capulary tube. Remounted top cover, plugged freezer in the set the thermostat to 4 and freezer is working fine and doing its job. I orderedmotor on a Sunday and it was shipped on Monday and I received said part at 7:pm on Wednesday.
  • Nathan M. from Bunnell, FL
  • Difficulty Level:
    Easy
  • Total Repair Time:
    15 - 30 mins
  • Tools:
    Screw drivers
21 of 24 people found this instruction helpful.
Was this instruction helpful to you?
Thank you for voting!
Fixes Symptom 3% of time
★★★★★
★★★★★
7 Reviews

Rated by 6 customers 


Easy 

15 - 30 mins 

Ratings submitted by customers like you who bought this part.   

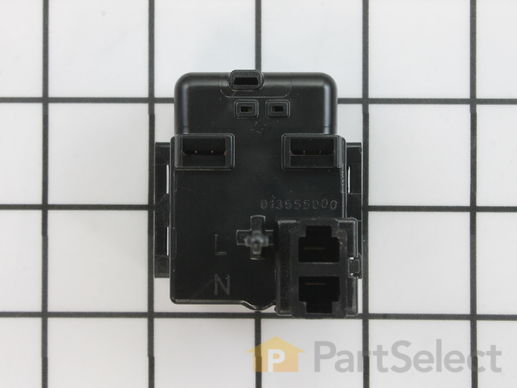
The start relay briefly boosts the compressor, and then shuts off as soon as the motor gets up to speed. Note: This part has been updated by the manufacturer. It may differ in appearance but will still function the same as the original.

$ 78.58
  In Stock
PartSelect Number PS3502347
Manufacturer Part Number 297237702

Customer Repair Stories

Not a original factory direct replacement part

The housing is not the same where the wires attach. I had to cut off the plastic shroud around barbs on start relay to accept the original larger wire end Fittings.
  • Robert from GULF SHORES, AL
  • Difficulty Level:
    A Bit Difficult
  • Total Repair Time:
    30 - 60 mins
  • Tools:
    Nutdriver, Pliers
1 person found this instruction helpful.
Was this instruction helpful to you?
Thank you for voting!

there is electrical surge from Pacific Gas and electric.

There is PG and E employee working in one of the electrical post that cause the electric surging,there is a 3 big bang then we smell burning wire.it blew and burned the compressor relay,so what i did is figure it out, all 2 refregirator fan is running the heater is working,but its not cooling, when I touch the compressor there is no vibration,so all i did is removed the compressor relay, and I found out that the wire is burned and melted the connector, i order the relay from parts select and install it.1.remove the capacitor and install it to the new relay. 2.put a new connecrtor from the wire.3. install the compressor relay.easy as 1,2,3.
  • Reynaldo from SAN BRUNO, CA
  • Difficulty Level:
    Really Easy
  • Total Repair Time:
    30 - 60 mins
  • Tools:
    Nutdriver, Screw drivers, Socket set
7 of 11 people found this instruction helpful.
Was this instruction helpful to you?
Thank you for voting!