


Models
>
KBRS22KGWH1
KBRS22KGWH1 KitchenAid Refrigerator - Overview
Sections of the KBRS22KGWH1
[Viewing 7 of 7]


Keep searches simple, eg. "belt" or "pump".

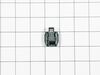
Refrigerator Door Switch
PartSelect #: PS12728638
Manufacturer #: W11384469
Door switch turns the light off when you close the door.
$19.31
In Stock

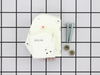
Door Shelf End Cap Set
PartSelect #: PS370794
Manufacturer #: 4386917
This door shelf end cap set contains two white end caps. Each end cap can be used as either the right or the left side. These end caps also come with adhesive strips and an instructions sheet.
$18.27
In Stock

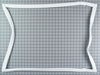
Freezer Door Gasket
PartSelect #: PS11738527
Manufacturer #: WP12550116Q
This freezer door gasket is white and made of rubber. It measures approximately 23-3/4 inches wide by thirty-one and a half inches long.
$106.12
In Stock

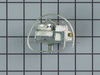
Defrost Timer Kit - 120V 60Hz
PartSelect #: PS2167006
Manufacturer #: R0131577
The timer will shut off the cooling system of the refrigerator and the defrost heater will turn on.
$51.04
In Stock

Bimetal Defrost Thermostat
PartSelect #: PS11738231
Manufacturer #: WP10442411
This refrigerator defrost thermostat will cut out at 55 degrees Fahrenheit and kick back in when the temperature drops to 20 degrees Fahrenheit. The thermostat itself is a little over an inch long whi...
$41.95
In Stock

Touch-Up Paint - White
PartSelect #: PS385132
Manufacturer #: 72017
This touch-up paint can be used on a wide variety of household appliances. It is most often used on washers, dryer, refrigerators, dishwashers, ranges, freezers, trash compactors, or microwaves. It is...
$8.00
In Stock


Water Inlet Valve
PartSelect #: PS11726315
Manufacturer #: W10833899
This part releases water from the supply line when it's activated. This single outlet water valve is intended for use with some ice makers and refrigerators.
$183.68
In Stock

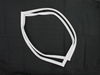
Refrigerator Door Gasket
PartSelect #: PS11738526
Manufacturer #: WP12550115Q
This door gasket is white and made of rubber. It measures approximately thirty-one and a half inches wide by thirty-eight and a half inches long.
$127.78
In Stock

Ice Bucket
PartSelect #: PS11743447
Manufacturer #: WP67001255
The ice bucket in your freezer catches and holds the ice when it is released by the icemaker. If your ice bucket is cracked or damaged, you may need to replace it to prevent a potential leak. This par...
$121.29
In Stock


Kick Plate Retaining Clip
PartSelect #: PS11738247
Manufacturer #: WP10551502
This kick plate retaining clip is sold individually and is made entirely of metal. If you are needing the kick plate as well, remember to check with your model number as these clips may already be included.
$7.59
In Stock
Questions And Answers for KBRS22KGWH1
We're sorry, but our Q&A experts are temporarily unavailable.
Please check back later if you still haven't found the answer you need.
Common Symptoms of the KBRS22KGWH1
[Viewing 17 of 17]Light not working
Fixed by
these parts
these parts


Show All
Fridge too warm
Fixed by
these parts
these parts


Show All
Freezer section too warm
Fixed by
these parts
these parts
Show All
Door Sweating
Fixed by
these parts
these parts

Show All
Freezer not defrosting
Fixed by
these parts
these parts
Show All
Ice maker not making ice
Fixed by
these parts
these parts


Show All
Frost buildup
Fixed by
these parts
these parts
Show All
Fridge runs too long
Fixed by
these parts
these parts
Show All
Leaking
Fixed by
these parts
these parts
Show All
Will Not Start
Fixed by
these parts
these parts
Show All
Door won’t open or close
Fixed by
these parts
these parts

Show All
Noisy
Fixed by
these parts
these parts

Show All
Freezer too cold
Fixed by
these parts
these parts
Show All
Fridge and Freezer are too warm
Fixed by
these parts
these parts
Show All
Fridge too cold
Fixed by
these parts
these parts
Show All
Too warm
Fixed by
these parts
these parts
Show All
Ice maker won’t dispense ice
Fixed by
these parts
these parts
Show All


Keep searches simple. Use keywords, e.g. "leaking", "pump", "broken" or "fit".
freezer door gasket needed replacing
Unplug refrigerator. Open freezer door. Lift the old gasket from the edge closest to the center of the door to expose the hex-head screws. Get a nut driver the appropriate size (1/4" if I remember) and loosen, but do not remove all of the screws. Once loosened, the old gasket can be removed. Slip the new gasket in just like the old o
... Read more
ne was. Lift the edges closest to the center of the door and tighten the screws. Test the fit of the new gasket by closing the door and sighting carefully down each of the four seal lines. Typically there will be spots where there are gaps, that is, the gasket is not "pulled out" enough to contact the refrigerator body. This is due to kinks that occur to the gasket during shipping. A paper that comes with the gasket notes the effect and recommends using a hair dryer to remove the kinks. Although the recommendation is to use the dryer BEFORE putting the gasket on, I used the dryer after, when I could see exactly where the gaps were. After noting the spots, open the door and with the dryer on HIGH setting, wave the hot air stream back and forth for a minute or two on each spot. Pull each spot out by hand with the hot air off and if/when the gasket is cool enough to touch but still warm. Close the door, inspect and repeat the process if necessary. I was able to achieve a good seal all the way around this way.
Read less
Parts Used:
-
Jeffrey from Palo Alto, CA
-
Difficulty Level:A Bit Difficult
-
Total Repair Time:30 - 60 mins
-
Tools:Nutdriver, Screw drivers
137 of 152 people
found this instruction helpful.
Was this instruction helpful to you?
Thank you for voting!
Fridge and freezer didn't cool enough
I diagnosed the problem via the internet. Diagrams helped a lot. Coils were frozen over. Thawed them out overnight. Manually advanced timer and the defrost heater was operable. The defrost timer wasn't "turning" on it's own. I turned the fridge back on while I awaited the part. It worked fine for the time I had to wait. (over two
... Read more
weeks since I had delayed ordering the part) New timer arrived as promised. Undid 4 hex head (1/4") screws. Unplugged 4 prong connection. Plugged in new timer and replaced the 4 screws. Frigde works great.
Read less
Parts Used:
-
Peter from Eden, UT
-
Difficulty Level:Really Easy
-
Total Repair Time:Less than 15 mins
-
Tools:Socket set
106 of 117 people
found this instruction helpful.
Was this instruction helpful to you?
Thank you for voting!
Frig was hot freezer was cold. Freezer was fronzen over.
The frig was hot but the freezer was cold. I opened the back of the freezer and found the condenser all frozen over. Upon inspecting the defrost thermostat I found that it was split open, as if water got into it and the froze breaking it open. I used a blow dryer to defrost the condenser. I then spent a long time trying to find the model
... Read more
on-line, even the manufactor said it did not exist. Partselect.com was the only place that said the model did exist. When that part came in I toke the back of the freezer out again. Unplugged the defrost thermostat plugged the new one in clipped it back on the condenser and put the it all back together. Everything is working fine now.
Read less
Parts Used:
-
James from Canyon Country, CA
-
Difficulty Level:Easy
-
Total Repair Time:15 - 30 mins
-
Tools:Nutdriver
99 of 102 people
found this instruction helpful.
Was this instruction helpful to you?
Thank you for voting!