Models > JVM1540DM5WW > Symptoms > Tray won’t turn

Parts That Fix General Electric Microwave JVM1540DM5WW Tray won’t turn

Tray won’t turn is a commonly reported symptom for the JVM1540DM5WW General Electric Microwave, and we have put together a full guide on how to fix this. This advice is based on feedback from people who own this exact appliance. We have listed the most common parts for your JVM1540DM5WW General Electric Microwave that will fix Tray won’t turn. We have included repair instructions, and helpful step-by-step video tutorials. If you are experiencing this issue, not to worry, DIYers just like you have fixed this, and shared their experience to help you!

Fixes Symptom 52% of time
★★★★★
★★★★★
14 Reviews

Rated by 3 customers 


Really Easy 

Less than 15 mins 

Ratings submitted by customers like you who bought this part.   

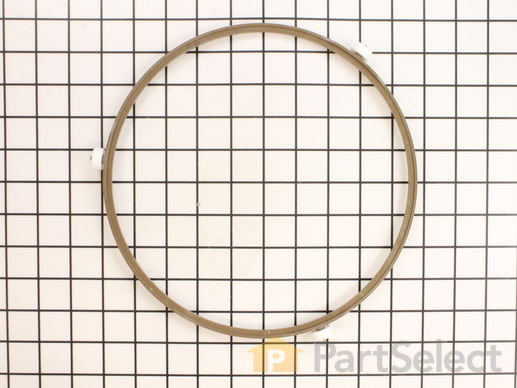
The rotating ring in your microwave rests under the microwave plate, and allows it to rotate when the microwave is running. It is a round plastic ring with 3 wheels spaced out around the perimeter. If your microwave plate or tray is not turning, you could have a broken or damaged rotating ring. This plastic ring is gray in color and is approximately 10 inches in diameter. The 3 wheels are made of white plastic. This part is sold individually.

$ 40.16
  In Stock
PartSelect Number PS1480805
Manufacturer Part Number WB06X10705

Customer Repair Stories

We broke the glass plate in the microwave and the rotating ring too

We had an accident on Christmas day, while using the convection option on the microwave, the glass plate and ring assembly slipped down from where it was temporally being stored, and shattered into many pieces.I was really lucky, we had a older GE microwave that we scrapped out. My wife and I decided to keep the glass plate and rotating ring, when we tried the parts it wouldn't turn. I decided to try a new rotating ring considering the glass plate would of cost quite a bit more. When the part came, I tried the ring and as I said I was really lucky, it worked perfectly. The ring from the old microwave made the glass plate sit too high and consequently wouldn't turn. It wasn't really much of a repair, but it all worked out great, the parts site was easy to use and the parts came when they said they would.
  • Dennis from Minneapolis, MN
  • Difficulty Level:
    Really Easy
  • Total Repair Time:
    Less than 15 mins
10 of 14 people found this instruction helpful.
Was this instruction helpful to you?
Thank you for voting!

Rotating Device Broken

Just replaced the rotating device.
  • Patsy from Shippensburg, PA
  • Difficulty Level:
    Really Easy
  • Total Repair Time:
    Less than 15 mins
17 of 24 people found this instruction helpful.
Was this instruction helpful to you?
Thank you for voting!
Fixes Symptom 24% of time
★★★★★
★★★★★
9 Reviews

Rated by 2 customers 


Very Easy 

Less than 15 mins 

Ratings submitted by customers like you who bought this part.   

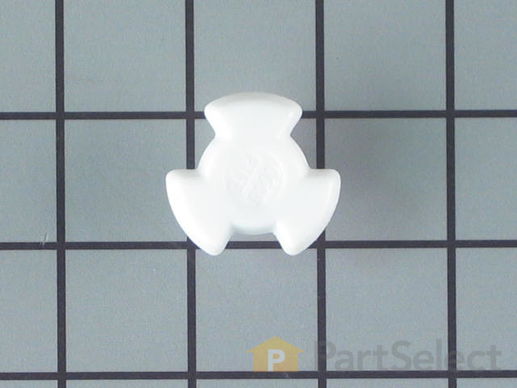
Also known as Coupler.

$ 24.73
  In Stock
PartSelect Number PS1480804
Manufacturer Part Number WB06X10704

Customer Repair Stories

Glass Turntable not rotating when microwave oven ON

Turntable shaft was worn and out of shape likely due to heat. Simply remove rotating glass and damaged plastic shaft underneath. Replace with new shaft.
  • MIKE from MEDFORD, NY
  • Difficulty Level:
    Really Easy
  • Total Repair Time:
    Less than 15 mins
1 person found this instruction helpful.
Was this instruction helpful to you?
Thank you for voting!

Plate wasn't spinning.

Simply popped the turntable shaft in. It was installed by hand, no tools required.
  • Michael from DENVER, CO
  • Difficulty Level:
    Very Easy
  • Total Repair Time:
    Less than 15 mins
2 of 2 people found this instruction helpful.
Was this instruction helpful to you?
Thank you for voting!
Fixes Symptom 12% of time
★★★★★
★★★★★
4 Reviews

Rated by 3 customers 


Really Easy 

15 - 30 mins 

Ratings submitted by customers like you who bought this part.   

$ 23.21
  On Order
PartSelect Number PS2370070
Manufacturer Part Number WB26X10240

Customer Repair Stories

Turn table did not rotate

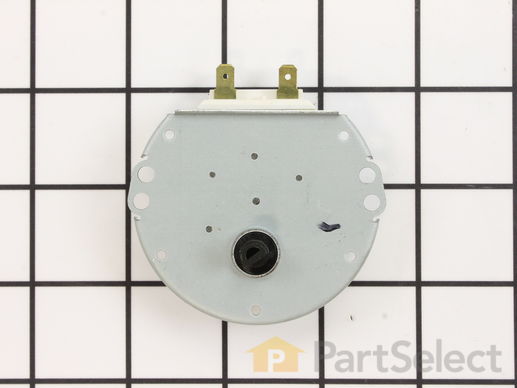
Removed the original synchronous motor and replaced it with a new one. It turned on and rotated for about 1 day and stopped. I tested the motor for continuity and it was good. I need help in further trouble shooting.
  • Ronald from Hyannis, MA
  • Difficulty Level:
    Easy
  • Total Repair Time:
    30 - 60 mins
2 of 2 people found this instruction helpful.
Was this instruction helpful to you?
Thank you for voting!

Turntable not rotating

Replaced the dead motor with new motor . I used YouTube video to install.
  • Ransford from LAUREL, MD
  • Difficulty Level:
    Really Easy
  • Total Repair Time:
    15 - 30 mins
  • Tools:
    Screw drivers
4 of 7 people found this instruction helpful.
Was this instruction helpful to you?
Thank you for voting!
Fixes Symptom 11% of time
★★★★★
★★★★★
11 Reviews

Rated by 8 customers 


Really Easy 

30 - 60 mins 

Ratings submitted by customers like you who bought this part.   

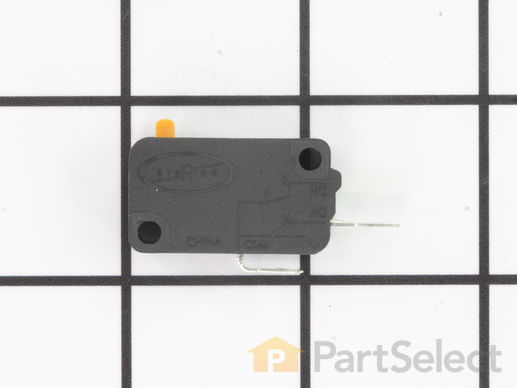
This is a replacement primary interlock door switch for your microwave. When the door is latched properly, the switch is actuated, and the microwave will operate. If your microwave will not start when the door is latched, you could have a faulty switch. The switch is black in color and has two metal terminals. It is approximately 1 inch long and ½ an inch wide. This part is sold individually and is an OEM part sourced directly from the manufacturer.

$ 15.68
  In Stock
PartSelect Number PS2370055
Manufacturer Part Number WB24X10180

Customer Repair Stories

Bad interlock switch

Took off vent cover and front panel, replaced switches.
  • Dan from STRONGSVILLE, OH
  • Difficulty Level:
    Easy
  • Total Repair Time:
    30 - 60 mins
  • Tools:
    Screw drivers
3 of 3 people found this instruction helpful.
Was this instruction helpful to you?
Thank you for voting!

Turntable did not rotate and food did not heat up

Suspected door switch after researching on You tube. (There are three of them). Ordered top switch and removed top vent panel and control panel to gain access. Saw that there were burn marks on the switch where the wire connected to it. Be careful when removing the old switch and installing new as it snaps in and it takes some finesse so you don't break off the retention tabs.....This is the second time I fixed this oven...The first time the door latch spring hook broke so I drilled a small hole to attach the spring into.
  • Rich from DES PLAINES, IL
  • Difficulty Level:
    Easy
  • Total Repair Time:
    30 - 60 mins
  • Tools:
    Screw drivers
6 of 6 people found this instruction helpful.
Was this instruction helpful to you?
Thank you for voting!