


Models
>
JJW9630DDS
JJW9630DDS Jenn-Air Wall Oven - Overview
Sections of the JJW9630DDS
[Viewing 9 of 9]


.gif "SUPPLEMENTAL INFORMATION Diagram and Parts List for Jenn-Air Wall Oven")


 Diagram and Parts List for Jenn-Air Wall Oven")
 Diagram and Parts List for Jenn-Air Wall Oven")
Manuals & Care Guides for JJW9630DDS
Click to downloadKeep searches simple, eg. "belt" or "pump".

Screw, 8/18 x 3/8
PartSelect #: PS11746840
Manufacturer #: WP90767
This screw is sold individually.
$5.42
In Stock

Oven Rack
PartSelect #: PS11744745
Manufacturer #: WP7801P173-60
This is a replacement oven rack and it is designed for use with ranges and ovens. This is a genuine OEM replacement part. The rack provides a level and stable surface for cookware inside of your appli...
$90.62
In Stock

Screw
PartSelect #: PS12349731
Manufacturer #: W11233072
This is a multi-use and multi-appliance screw. It can be used on a microwave, refrigerator, range/oven, air conditioner, dehumidifier, washer, or dryer. The measurements of this screw are 8 x 1/2 inch...
$20.79
In Stock

Terminal Block
PartSelect #: PS11750972
Manufacturer #: WPW10245259
This part is for oven ranges, it connects individual wires and protects the device from electrical surges, voltages, and current. With this part, the house power is connected to the range wire harness...
$34.09
In Stock


Bi-Pin Halogen Bulb
PartSelect #: PS11744355
Manufacturer #: WP74009925
This part is a replacement halogen lamp for your oven. The bulb is 25 watts and 120 volts. If your light bulb is burned out, this is the part that replaces it. Be sure to turn off power to your range ...
$25.76
In Stock

Door Hinge - Left or Right Side
PartSelect #: PS11744384
Manufacturer #: WP74010283
As per the manufacturer, when replacing the hinge, they recommend to also replace the hinge receptical also knows as the bracket. See related parts.
$88.99
In Stock


Stand Mixer Screw
PartSelect #: PS11742292
Manufacturer #: WP4159193
This screw is sold individually.
$8.63
In Stock

Hinge Bracket - Left or Right Side
PartSelect #: PS11744444
Manufacturer #: WP74011337
This part is the replacement hinge bracket for your microwave. It is made of metal and is approximately 8 inches long and 1 inch wide. The hinge bracket can also be known as the door hinge receiver or...
$29.48
In Stock

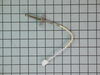
Meat Probe
PartSelect #: PS11744536
Manufacturer #: WP7430P038-60
Also known as Heat Probe or Gauge. This probe is used to check the internal temperature of the meat to ensure proper temperature is reached.
$166.77
In Stock

Oven Sensor
PartSelect #: PS11744233
Manufacturer #: WP74008369
This sensor detects the temperature within the oven cavity.
$152.10
In Stock
Questions And Answers for JJW9630DDS
We're sorry, but our Q&A experts are temporarily unavailable.
Please check back later if you still haven't found the answer you need.
Common Symptoms of the JJW9630DDS
[Viewing 6 of 6]Will Not Start
Fixed by
these parts
these parts


Show All
Door won’t close
Fixed by
these parts
these parts


Show All
Little to no heat when baking
Fixed by
these parts
these parts

Show All
Element will not heat
Fixed by
these parts
these parts
Show All
Oven not heating evenly
Fixed by
these parts
these parts
Show All
Touchpad does not respond
Fixed by
these parts
these parts
Show All


Keep searches simple. Use keywords, e.g. "leaking", "pump", "broken" or "fit".
Oven Door Inner Glass Broken
This is fairly easy for anyone to do. First I opened up the front (silver part) of the oven door by removing the screws at the top and the bottom. Then I kept on removing the various layers of glass... the 2 outside ones are removed by removing their respective screws and then you get to the inner-most. These 2 inner ones are in a fra
... Read more
me that holds them together. I removed the large silver frame that holds the insulation and the 2-glass-frame in it. Just remove the screws and then tilt the insulation frame out a bit to remove the glass frame. You can tilt the entire insulation holder out but the insulation is soft and it starts to fall off. Just tilting it enough worked for me. Then I opened up the glass frame from one end, removed the left-over broken piece of the old glass pane and installed the new one in. Then reassemble. The entire process is very easy - but you will need another person for a few minutes when you remove /reinstall the glass frame inside the insulation holder. You would just need a little help holding everything... nothing technical. I would rate the repair technicality at 4 or 5/10. It could even be a 3 if there were less steps involved. Good luck! By the way, Amana/Maytag wanted $70 or so for the glass and then the repair fee. I got the part here for about $50.
Read less
Parts Used:

-
Shariq from West Conshohocken, PA
-
Difficulty Level:Easy
-
Total Repair Time:30 - 60 mins
-
Tools:Nutdriver, Screw drivers
49 of 51 people
found this instruction helpful.
Was this instruction helpful to you?
Thank you for voting!
Burned terminal block and filter board
Removed and replaced above named parts, rewired.Be sure to tighten all nuts that secure wires. I believe this is what caused the problem.
Parts Used:

-
Joseph from Decatur, GA
-
Difficulty Level:Easy
-
Total Repair Time:30 - 60 mins
-
Tools:Nutdriver, Screw drivers, Socket set, Wrench set
90 of 192 people
found this instruction helpful.
Was this instruction helpful to you?
Thank you for voting!
Oven rack lost in a garage fire
First I opened the door to the oven. Then I opened the box that the part came in. (knife) I then slid the oven rack out of the box and unwrapped the plastic, being careful not to bend or scratch the new rack. Now, this is the tricky part... I had to move the existing rack down one space to make room for the new one. Then carefully sl
... Read more
id the new rack in, tipping it slightly and sliding it in. LOL
Read less
Parts Used:

-
Bob from Saint Clair Shores, MI
-
Difficulty Level:Really Easy
-
Total Repair Time:Less than 15 mins
29 of 37 people
found this instruction helpful.
Was this instruction helpful to you?
Thank you for voting!