


Models
>
JE2160W
JE2160W General Electric Microwave - Overview
Sections of the JE2160W
[Viewing 1 of 1]
Keep searches simple, eg. "belt" or "pump".

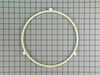
Roller Guide
PartSelect #: PS951887
Manufacturer #: WB02X10895
The roller glide in your microwave rests under the microwave plate, and allows it to rotate when the microwave is running. It is a round plastic ring with 3 wheels spaced out around the perimeter. If ...
No Longer Available

Cooking Tray
PartSelect #: PS956195
Manufacturer #: WB49X10108
This tray rotates in your microwave ensuring more even temperatures
$128.45
In Stock

Light Bulb and Socket
PartSelect #: PS247776
Manufacturer #: WB36X951
This light bulb is sold with the socket. The bulb is 120V and 25W.
$20.99
In Stock


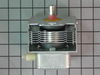
Magnetron
PartSelect #: PS953838
Manufacturer #: WB27X10682
This part is used to generate microwave energy/heat.
No Longer Available


Primary/Secondary Switch
PartSelect #: PS237415
Manufacturer #: WB24X823
This is sold individually. Your appliance would need 2 of these.
$103.49
In Stock


Questions And Answers for JE2160W
We're sorry, but our Q&A experts are temporarily unavailable.
Please check back later if you still haven't found the answer you need.
Common Symptoms of the JE2160W
[Viewing 3 of 3]Tray won’t turn
Fixed by
these parts
these parts

Show All
Won’t turn on
Fixed by
these parts
these parts


Show All
No heat
Fixed by
these parts
these parts

Show All
Keep searches simple. Use keywords, e.g. "leaking", "pump", "broken" or "fit".
Original lamp burned out.
After looking up on the computer a schematic of the unit, all that was needed was removing four screws to remove the top and side cover which was one piece.
Next was removal of electrical connection to burned out lamp, then removing burned out lamp and installing the new lamp and reconnecting electrical connection.
Job was co ... Read more mplete after reinstalling the cover.
Microwave now working with new lamp lighting when in use.
Next was removal of electrical connection to burned out lamp, then removing burned out lamp and installing the new lamp and reconnecting electrical connection.
Job was co ... Read more mplete after reinstalling the cover.
Microwave now working with new lamp lighting when in use.
Read less
Parts Used:
-
Rudy from Huntington, IN
-
Difficulty Level:Really Easy
-
Total Repair Time:15 - 30 mins
-
Tools:Screw drivers
73 of 89 people
found this instruction helpful.
Was this instruction helpful to you?
Thank you for voting!
Both Intermittent- and No-Heating
First, I read the PartsSelect DIY report by Linda, Warsaw, IN. With confidence, I purchased the magnetron. Upon receipt, I took the built-in microwave out of the cabinet, set the unit on the kitchen floor, and was stopped cold by the Safety Torx nuts on the reverse of the unit. Borrowing the right wrench allowed the 20 minute start-to-
... Read more
finish part changeout and reinstallation of the unit in the cabinet to proceed. The old magnetron was the defective part. Discovery of the 10-year Parts-Only warranty on the less than 10-year old unit was insufficinet to guide me to take the unit in for their Labor bill to repair. New part in hand, it just was that easy - and assumed to be no less expensive.
Read less
Parts Used:
-
Richard from Merritt Island, FL
-
Difficulty Level:Easy
-
Total Repair Time:15 - 30 mins
-
Tools:Screw drivers
17 of 23 people
found this instruction helpful.
Was this instruction helpful to you?
Thank you for voting!
The turntable would not turn, and made a clicking sound
Thanks to great instructions from a previous person, this was super easy. It took 5 minutes to remove and replace the new motor. The big part of this job was cleaning out the cabinet where the microwave sits, since I had to take it out.
There is a 'door cover' pressed into the bottom of the microwave, that just has 6 small tabs ... Read more that you need to cut. Then remove 1 screw, and the wire clip and the motor is changed. The door just reverses and re-installs with 1 screw. When the microwave was designed, this repair was in the engineers mind. So simple I couldn't beleive it.
There is a 'door cover' pressed into the bottom of the microwave, that just has 6 small tabs ... Read more that you need to cut. Then remove 1 screw, and the wire clip and the motor is changed. The door just reverses and re-installs with 1 screw. When the microwave was designed, this repair was in the engineers mind. So simple I couldn't beleive it.
Read less
Parts Used:
-
Dave from Danville, CA
-
Difficulty Level:Really Easy
-
Total Repair Time:Less than 15 mins
-
Tools:Screw drivers
10 of 11 people
found this instruction helpful.
Was this instruction helpful to you?
Thank you for voting!