Models > GSH25JFTAWW > Symptoms > Not dispensing water

Parts That Fix General Electric Refrigerator GSH25JFTAWW Not dispensing water

Not dispensing water is a commonly reported symptom for the GSH25JFTAWW General Electric Refrigerator, and we have put together a full guide on how to fix this. This advice is based on feedback from people who own this exact appliance. We have listed the most common parts for your GSH25JFTAWW General Electric Refrigerator that will fix Not dispensing water. We have included repair instructions, and helpful step-by-step video tutorials. If you are experiencing this issue, not to worry, DIYers just like you have fixed this, and shared their experience to help you!

Fixes Symptom 43% of time
★★★★★
★★★★★
80 Reviews

Rated by 112 customers 


Really Easy 

15 - 30 mins 

Ratings submitted by customers like you who bought this part.   

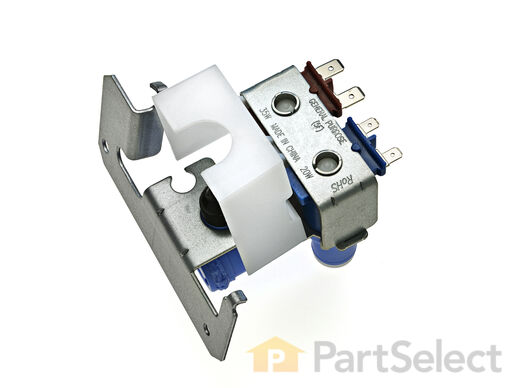
This water inlet valve (Refrigerator Water Inlet Valve Assembly) supplies water to the ice maker and the water dispenser in your refrigerator. It is located at the back of the fridge, beneath the bottom panel. It is connected directly to 2 water supplies, a wiring harness, and your inlet water tube. This part is located at the back of the fridge, beneath the bottom panel. It is connected directly to 2 water supplies, a wiring harness, and your inlet water tube. Minerals and sediments can build up over time and cause a blockage in your inlet valve. They can also cause the valve to stick open, leading to an overflow of water. If this part is malfunctioning, water flow to your appliance could be compromised. Check for small ice cubes or a lack of ice cubes/water, as this is an obvious sign the part is damaged. The water inlet valve must be replaced if the solenoids no longer have continuity or the valve has internal blockage. Test your water inlet valve with a multimeter. You can test both the water dispenser side and the ice maker side. The part measures approximately 3 inches long and 2.75 inches wide and is constructed of plastic and metal. This replacement part features 1 dual inlet water valve with quick connections. It also has 1/4 and 5/16 John Guest fittings for the outlet lines and a 1/4 compression fitting for the inlet line.

$ 93.82
  In Stock
PartSelect Number PS16226572
Manufacturer Part Number WR57X33326

Replacing your General Electric Refrigerator WATER VALVE WITH GUARD

Replacing your WATER VALVE WITH GUARD

Customer Repair Stories

Water dispenser not operating

Model includes filtered ice maker and water dispenser from front of unit. Water maker just suddenly stopped working but ice maker continued to work fine. After some phone calls to trouble shoot at a high level, I figured it was worth a try to buy the replacement part of the most likely culprit and see if it did the trick. Would have cost maybe $150 or more for service tech to make house call, provide the part and do the switch. Buying the part was only $40 and replacement was easy. Remove access panel from behind fridge and identify valve. It has intake water from the filter then has two outbound lines. One to ice maker, one to water dispenser. All function is in one part, but each outbound line has its own functioning valve. Unplug fridge, turn off water supply, disconnect all connections from old valve and reattach to new valve. When re-hooked, be patient in allowing water to re-fill line before coming out of dispenser in front. Likely to doubt it works, but surprised how long it took for water to fill line resevoir.
  • michael from pennsburg, PA
  • Difficulty Level:
    Easy
  • Total Repair Time:
    30 - 60 mins
  • Tools:
    Wrench set
192 of 228 people found this instruction helpful.
Was this instruction helpful to you?
Thank you for voting!

Refrigertor water dispenser not working BUT ice machine is working

The very first symptom here is important! The door water dispenser is not working but the ice macine is working. You may only have a frozen water tube in the door so do the following before diagnosing that your solenoid valve is bad: 1) the tube usually runs under the front of the refrigerator and usually has a quick disconnect. Undo the connection and press the dispenser. If water comes out of the tube you have a frozen or blocked tube in the door. 2) Immediately adjust the temperature in the freezer and warm the freezer compartment as much as you can without destroying the freezer contents. Wait 24 hours. This will usually unfreeze the line. Do not waste your time with a hair dryer. NOW, if this doesn't work and you are convinced you need to order and replace the solenoid, follow these steps. Assemble your tools first. I needed a good ratchet set and a screwdriver. A shop towel is helpful for spilled water. A light is handy. Pull out the refreigerator to gain access to the rear of the unit. Unplug the power and close the water valve (older homes, you may need to actually shut the house water supply). Remove the screws which hold the cover over the lower half of the refrigerator. On the left you will see the solenoid. It's always good to see that your new part matches the one you feel needs replaced. They may not match perfectly due to changing design but they should be very similar. One screw holds this part in place and access is very simple. Now simply unplug the electrical connections. In my case, one blue "blade" type connection (powering the water) and one red "blade" type connection powering the ice maker. They are not the same size and this coupled with the coloring means you will not accidently switch them. pull the tubes clear of the solenoid. This is simple and needs no explantion. Grab your new solenoid and reattach both the electrical and water lines (two, remember, ice maker and drink dispencer). Replace the single screw. Re-attach the rear, lower refrigerator cover and go to the front of the unit to check the water. You can listen carefully and hear the power engage from the new part bringing you water. Clean up, replace the refrigerator back to its place and look really tired when your wife sees that you worked "so hard"! You probably saved at least $50-$80 from a service call which can now be used to take the family to dinner after your "exhausting" 15 minute workout of removing about 10 screws and wheeling the unit in and out of place. Writing this article took longer! My 4 year old worked harder holding the flash light!
  • ralph from bristow, VA
  • Difficulty Level:
    Really Easy
  • Total Repair Time:
    Less than 15 mins
  • Tools:
    Nutdriver, Screw drivers, Socket set
1022 of 1133 people found this instruction helpful.
Was this instruction helpful to you?
Thank you for voting!
Fixes Symptom 16% of time
★★★★★
★★★★★
76 Reviews

Rated by 62 customers 


Really Easy 

15 - 30 mins 

Ratings submitted by customers like you who bought this part.   

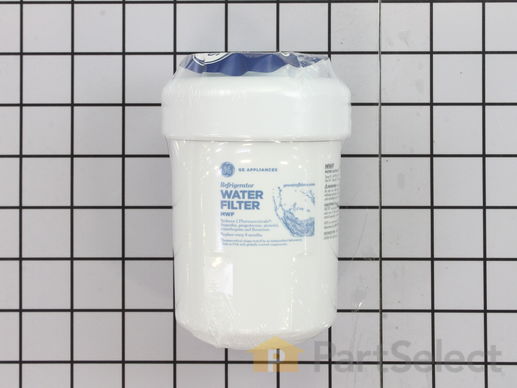
This OEM ice and water filter fits side-by-side and bottom-freezer GE models. The most common reason you would need to change this part is if you have never updated your model and it is no longer filtering your water. This also may lead to your refrigerator not dispensing water or ice properly. Manufacturers recommend you change your filter every six months to ensure it properly filters impurities. Depending on the model, a red light might also indicate that the filter is due for a replacement. Note: As per the manufacturer, this is an updated water filter. If you have never installed the updated part or your old model was made by Culligan, you may need the adapter to install the filter. See related parts. This filter is located inside the refrigerators upper right corner. It is common for water to drip from the dispenser when being changed so place a cloth underneath before you begin this repair. To remove the filter, turn it to the left until it releases without pulling down. Fill the new filter with tap water to prepare it. Position the new filter into the holder taking note of the arrows. The arrow on the front should be facing out. Gently push up on the filter and turn it to the right to secure it. Do not over-tighten. To release air in the system run 1-1/2 gallons of water through it. If your model has a reset button, press and hold this for a few seconds to reset it.

$ 73.07
  In Stock
PartSelect Number PS8746144
Manufacturer Part Number MWFP

Replacing your General Electric Refrigerator Refrigerator Ice and Water Filter

Replacing your Refrigerator Ice and Water Filter

Customer Repair Stories

water running slow

unscrewed old filter by hand, installed new filter.
  • David from Tacoma, WA
  • Difficulty Level:
    Really Easy
  • Total Repair Time:
    Less than 15 mins
35 of 57 people found this instruction helpful.
Was this instruction helpful to you?
Thank you for voting!

Replace water filter

Unscrew old filter and remove(counterclockwise). Line up arrow on new filter with arrow on connection housing. Turn clockwise till resistance met. Do not overtighten. Follow directions. Simple.
  • Alfred from Novato, CA
  • Difficulty Level:
    Really Easy
  • Total Repair Time:
    Less than 15 mins
223 of 337 people found this instruction helpful.
Was this instruction helpful to you?
Thank you for voting!
Fixes Symptom 7% of time
★★★★★
★★★★★
33 Reviews

Rated by 99 customers 


Easy 

30 - 60 mins 

Ratings submitted by customers like you who bought this part.   

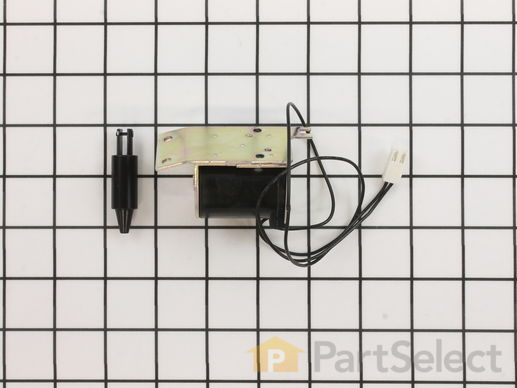
This part is a possible option when ice door won't open or shut properly or when water is not dispensing.

$ 64.74
  In Stock
PartSelect Number PS1483583
Manufacturer Part Number WR62X10055

Replacing your General Electric Refrigerator Dispenser Door Solenoid Assembly

Replacing your Dispenser Door Solenoid Assembly

Customer Repair Stories

Ice maker door not opening

Removed panel from front of freezer door by pushing up on three spring loaded screws located in the opening where the ice door opens and closes. they are about 1 inch apart on the bottom of the opening. Push up to free ice maker panel. Remove three screws from solenoid, located at the top right. Remove wire, replace with new and that is it. Fixed the problem!! Our ice maker hadn't worked for months. Be careful if you remove the round ice maker door to clean. There is a spring that located on the left side of sprocket. The spring fell off and took me a while to figure where it came from. Recieved package in three days and the job took minutes. Works great! Very easy to complete.
  • scott from lake orion, MI
  • Difficulty Level:
    Really Easy
  • Total Repair Time:
    Less than 15 mins
  • Tools:
    Nutdriver, Screw drivers
8 of 9 people found this instruction helpful.
Was this instruction helpful to you?
Thank you for voting!

Icemaker flap not closing, frosting up

Watched video, however could not get outer casing off. Under the panel are three small holes, pushed up with an Allen key, used a small screwdriver to wedge out, came out easily, followed instructions from video on removing and replacing solenoid
  • Graeme from Sarasota, FL
  • Difficulty Level:
    Easy
  • Total Repair Time:
    15 - 30 mins
  • Tools:
    Screw drivers
9 of 10 people found this instruction helpful.
Was this instruction helpful to you?
Thank you for voting!
Fixes Symptom 6% of time
★★★★★
★★★★★
10 Reviews

Rated by 30 customers 


Easy 

30 - 60 mins 

Ratings submitted by customers like you who bought this part.   

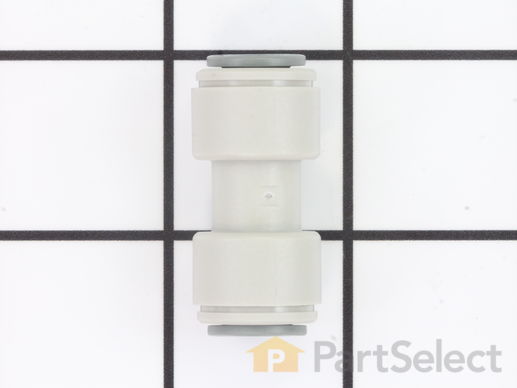
Quick connector for plastic water line - 5/16" to 5/16"

$ 9.03
  In Stock
PartSelect Number PS758446
Manufacturer Part Number WR02X11330

Replacing your General Electric Refrigerator Union Connector - 5/16 Inch to 5/16 Inch

Replacing your Union Connector - 5/16 Inch to 5/16 Inch

Customer Repair Stories

Moving the refrigerator into my new (very old) house we had to remove the doors which resulted in a crimped hose and union

Remove lower front panel, disconnect damaged union from water hose under freezer door, replace with new union, tighten and reattach front panel. No more water coming from under the unit. Ice maker and dispenser features returned to working order!
  • Laura from Manchester, NH
  • Difficulty Level:
    Really Easy
  • Total Repair Time:
    15 - 30 mins
  • Tools:
    Screw drivers
16 of 28 people found this instruction helpful.
Was this instruction helpful to you?
Thank you for voting!

My 13 yr grandson assisted me on this

We couldn't get the other connector loose from one end of the tubing so he said just cut it and so we did and attached the connector. I now have water again in my fridge and took the sticky note down "don't use the water" as it had leaked for a year...... Thanks!
  • Sherry from Auburn Hills, MI
  • Difficulty Level:
    Really Easy
  • Total Repair Time:
    Less than 15 mins
15 of 17 people found this instruction helpful.
Was this instruction helpful to you?
Thank you for voting!
Fixes Symptom 5% of time
★★★★★
★★★★★
6 Reviews

Rated by 15 customers 


Easy 

30 - 60 mins 

Ratings submitted by customers like you who bought this part.   

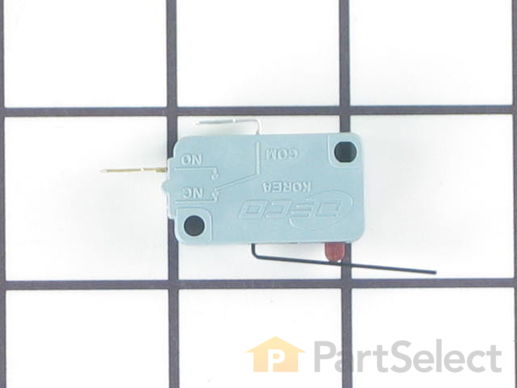
This is the replacement micro switch, or dispenser switch for your refrigerator. It is gray in color and measures approximately 1 inch by half an inch. The dispenser switch is what tells your refrigerator that it is ok to dispense ice or water. If your refrigerator is not dispensing ice or water, you may have a faulty or damaged switch. Be sure to disconnect the power to your refrigerator before you begin this repair. This switch is sold individually and is a genuine OEM replacement part sourced directly from the manufacturer.

$ 57.96
  In Stock
PartSelect Number PS8259956
Manufacturer Part Number WR23X10783

Replacing your General Electric Refrigerator Micro Switch

Replacing your Micro Switch

Customer Repair Stories

Water dispenser won't always dispense water

I followed the instructions found on this website. I removed the control panel by inserting a small Phillips screwdriver in the three holes at its bottom. I used the same screwdriver to pull the dispenser assembly down but could have used a larger one. The microswitch could be seen in the assembly at that point and was easily removed by opening the "fingers" that held it in place. I attempted to pull one of the terminals off without using a pair of needle-nosed pliers and ripped the wires right out of the terminal(I was able to find a replacement at Radio Shack). Low and behold after reinstalling the new part, it did not take care of the problem.

My problem is the water dispenser does work intermittently. When we place the glass in position and hit the lever, the lights in the control panel go off and no water is dispensed. My next guess may be the water valve or the control panel. The icemaker makes ice but I have had problems with it dispensing for nearly a year now.
  • Curtis from Corona, CA
  • Difficulty Level:
    Easy
  • Total Repair Time:
    15 - 30 mins
  • Tools:
    Pliers, Screw drivers
27 of 45 people found this instruction helpful.
Was this instruction helpful to you?
Thank you for voting!

Water dispensor would not shut off

Actually this was a two part repair of which I purchased both parts. The micro switch Pt # PS296176 and also a double outlet water valve Pt # PS304374 from Parts Select as well.

The difficult part was accessing the area to get to the micro switch.

The trim had to be removed, then the cover.

Then one unplugs the board and removed the face plate which also contains the micro switch.

Once removed the two electrical terminals had to be disconnected, the micro switch installed and terminal reconnected.

Then reverse the removal procedure.

Then on to the double outlet replacement.

Suggest watching the installation video for the replacement although it was really a straight forward repair.

Two things to remember.

1. Unplug the fridge

2. Shut off the water to the dispenser

Overall it was not bad at all.

This was my first attempt at refrigerator repair and it went well.

Good luck on yours.

John
  • John from Mason, OH
  • Difficulty Level:
    Easy
  • Total Repair Time:
    15 - 30 mins
  • Tools:
    Nutdriver, Pliers, Screw drivers, Wrench (Adjustable)
32 of 46 people found this instruction helpful.
Was this instruction helpful to you?
Thank you for voting!
Fixes Symptom 4% of time

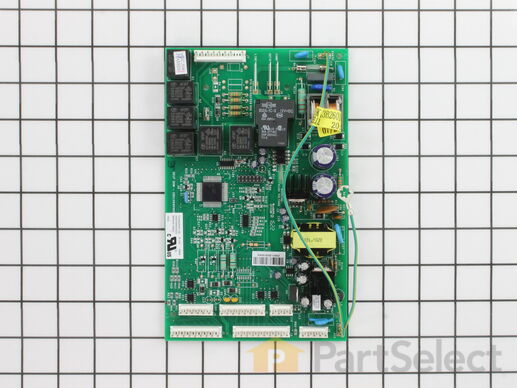
This electronic board (Main Control Board Assembly, Control Board, Motherboard) controls the temperature and defrost functions of the unit. This control board is located on the back of the refrigerator, and measures 8 inches by 5 inches. It’s constructed of metal and plastic, and comes in green. This kit includes one main control board with built in defrost controls. If broken due to electrical surges or normal use, your fridge may experience temperatures that are too warm or too cold, or inconsistent defrost cycles. If this happens, the part should be replaced.

$ 498.55
  In Stock
PartSelect Number PS16729744
Manufacturer Part Number WR55X10942C

Replacing your General Electric Main Control Board Assembly

Replacing your Main Control Board Assembly
Fixes Symptom 4% of time
★★★★★
★★★★★
15 Reviews

Rated by 7 customers 


Easy 

15 - 30 mins 

Ratings submitted by customers like you who bought this part.   

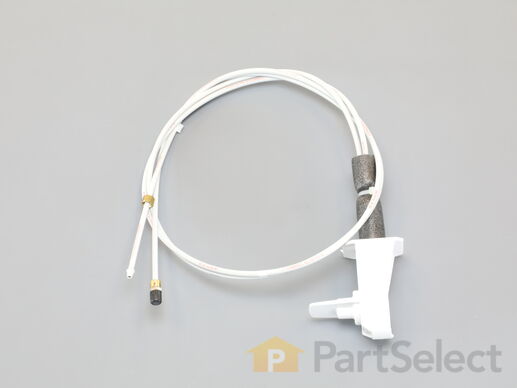
The water filter head and tubing holds the water filter and comes with the water lines.

$ 73.65
  In Stock
PartSelect Number PS12727268
Manufacturer Part Number WR17X22066

Customer Repair Stories

Water from door dispenser had slowed to a trickle

Initially, the diagnosis arrived at through the help of the "Parts Select" website was that the valve solenoid had failed. I ordered the valve solenoid and replaced it, which was easy to do based on the video help guide located on the "Parts Select" website. But, the problem persisted. In order to verify that the new solenoid worked properly, I removed the output lines from the solenoid and breifly activated the water dispenser. Based on the significant water flow, I was convinced that the solenoid was in fact operating properly. I did not reinstall the original solenoid but I am confident that it was operating fine. So, I have a spare solenoid now. At this point, I moved downstream which took me to the water filter housing. I removed the housing from the refrigerator and reconnected it behind the refrigerator which allowed me to "play" with the assembly. I do not know what the problem was but by pressing the filter harder into the housing assembly, I could improve the water flow. I ordered the new filter housing, which comes with tubes, changed it and the water flows like new.
  • Richard from Mount Pleasant, SC
  • Difficulty Level:
    A Bit Difficult
  • Total Repair Time:
    30 - 60 mins
  • Tools:
    Nutdriver, Pliers, Socket set, Wrench set
21 of 28 people found this instruction helpful.
Was this instruction helpful to you?
Thank you for voting!

Will not dispense water

The Top Filter Housing on this refrigerator contains some sort of Excess Flow Check Valve to prevent water flow if there is no filter installed. When the spring on this valve weakens over time, the valve closes unnecessarily with normal flow and chatters. This sounds like a woodpecker hammering on the side of your house and water flow is almost non-existant. You may have heard the same thing after you changed the filter if there was air in the system. The noise stops and you have normal water flow once the air is vented out of the filter. If you start hearing this noise unprovoked (filter has not been recently changed), the Top Filter Housing needs to be replaced. To replace this part, you will need a 1/4" and 5/16" nut drivers or sockets and two 1/2" open ended wrenches. You might also need plumber's putty. Shut off the water and have a bucket ready to drain the water into. Remove the lower cover from the back of the refrigerator. Disconnect the two hoses going to/from the top filter housing. One is connected to the main water line, the other is connected to the Water Fill Valve located in back of the refrigerator on the bottom left corner. Un-screw the cover plate from the back of the refrigerator and pull the plumbers putty out (can be re-used if still pliable). On the inside of the refrigerator, pull the plastic cap off the Top Filter Housing to expose the two screws holding it in place. Remove the two screws and pull out the Top Filter Housing with Tubing. Replacement is the reverse of what you just did. If the tubing is a little short, you will want to unbolt the Water Fill Valve from the refrigerator prior to re-connecting it to ensure a water tight connection.
  • Thomas from Leland, NC
  • Difficulty Level:
    Easy
  • Total Repair Time:
    Less than 15 mins
  • Tools:
    Nutdriver, Wrench set
62 of 75 people found this instruction helpful.
Was this instruction helpful to you?
Thank you for voting!
Fixes Symptom 3% of time
★★★★★
★★★★★
7 Reviews

Rated by 12 customers 


Easy 

30 - 60 mins 

Ratings submitted by customers like you who bought this part.   

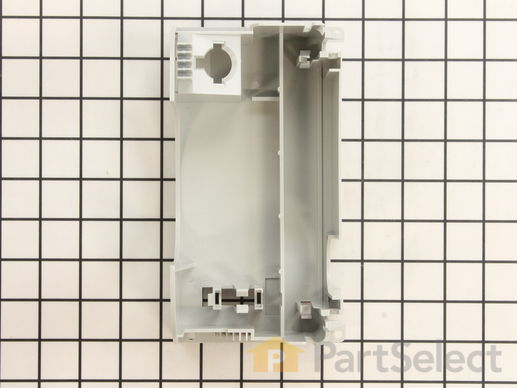
This part helps to contain parts for the ice and water dispenser. The overlay and dispenser board is attached on the front of the housing shield.

$ 20.48
  In Stock
PartSelect Number PS292255
Manufacturer Part Number WR17X11170
Fixes Symptom 3% of time
★★★★★
★★★★★
9 Reviews

Rated by 8 customers 


Really Easy 

Less than 15 mins 

Ratings submitted by customers like you who bought this part.   

This part is a replacement filter bypass cap for your refrigerator. If you intend to use an external water filtration system for your refrigerator, the bypass cap will allow you to do so. To use a filter bypass cap, simply screw it in where you would normally screw in the regular water filter. If you have a bypass system installed and your ice maker doesn’t make ice, your water dispenser doesn’t make water, or if there is water dripping inside your refrigerator, you may need to replace the bypass filter cap. This part is made of white plastic and is sold individually.

$ 12.75
  In Stock
PartSelect Number PS12727272
Manufacturer Part Number WR17X22070

Customer Repair Stories

GE Profile Refrigerator Plug for Water Filter

Called partselect and gave my model number for the frig. I wanted a filter plug because we did not need a frig filter. We have a whole house filter. They looked up the part, took my info, and sent it to me by UPS. It arrived fairly quickly and fit the frig perfectly. I screwed it into place immediately. It was the simplest order I have ever placed and the salesman was very pleasant and proficient. If I have more issues with my frig, I will call partselect again. Just remember to turn off the water before you start.
  • Linda from Liberty, NC
  • Difficulty Level:
    Really Easy
  • Total Repair Time:
    Less than 15 mins
33 of 53 people found this instruction helpful.
Was this instruction helpful to you?
Thank you for voting!

Water if refigerator door is really slow. Ice making is really slow.

Used by pass filter and problem disappeared. Of course wayer is now unfiltered. This is a GE design flaw. Also replacement filters are outrageously expensive and do not last long. We have good water here and I'll stick with the bypass.
  • Fred from Edgartown, MA
  • Difficulty Level:
    Really Easy
  • Total Repair Time:
    Less than 15 mins
41 of 59 people found this instruction helpful.
Was this instruction helpful to you?
Thank you for voting!
Fixes Symptom 3% of time
★★★★★
★★★★★
87 Reviews

Rated by 72 customers 


Easy 

30 - 60 mins 

Ratings submitted by customers like you who bought this part.   

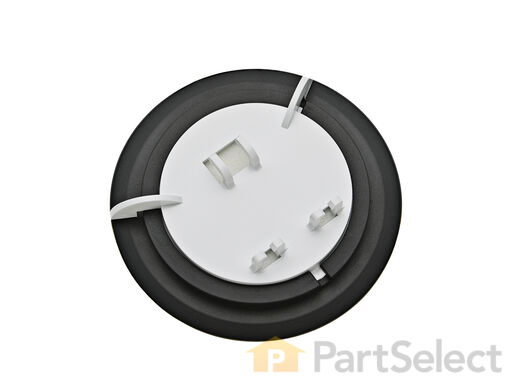
This “Dispenser Door Assembly” (Door Recess Assembly, Ice Door Assembly, Dispenser Door, Refrigerator Dispenser Ice Chute Door Kit, Dispenser Door Flap, Ice Chute Door, Flapper) keeps the room air from infiltrating the freezer. Once the lever is pressed, the door flap opens and allows the ice to dispense into your container. If your door flapper is broken, it could allow outside air to enter the freezer and alter the inside temperature. You may notice frost buildup surrounding the dispenser area. The door flap can disconnect from the dispenser lever, or the tabs that hold it in place may break. Frequent use may distort the sealing face and cause air leaks and frost buildup. This part mounts in the ice dispenser, and measures approximately 3.25 inches in diameter. It is constructed of plastic and rubber, and comes in white/black. This part is sold individually.

$ 15.58
  In Stock
PartSelect Number PS964304
Manufacturer Part Number WR17X11653

Replacing your General Electric Refrigerator Dispenser Door Assembly or Flapper

Replacing your Dispenser Door Assembly or Flapper

Customer Repair Stories

Flapper not sealing. Frost buildup on inside of freezer door

Followed previous instructions from a previous post. Inserted small screwdriver in the 2 outer holes up under the face plate to remove it then removed 4 screws holding the inner assembly which allowed access to the flapper assembly. Replaced it and reassembled everything. Problem solved
  • D from ZELLWOOD, FL
  • Difficulty Level:
    Easy
  • Total Repair Time:
    15 - 30 mins
  • Tools:
    Screw drivers
15 of 16 people found this instruction helpful.
Was this instruction helpful to you?
Thank you for voting!

This seems to be a design problem because I have to replace this part about every other year since we bought it. I tried to talk to GE but all they want to do is send a service man out to replace the part for about 100.00, But I do it for around 15.00. I just think they should find out why the rubbe

The repair is easy, just pop the grill off around the ice and water door, then there are 4 screwws to take out so the touch pad can be moved out of the way to unsnap the old door assm. and snap in the new one and wait about a year and a hald to order another one!!!!!
  • Jeff from Columbia City, IN
  • Difficulty Level:
    Really Easy
  • Total Repair Time:
    Less than 15 mins
  • Tools:
    Screw drivers
26 of 35 people found this instruction helpful.
Was this instruction helpful to you?
Thank you for voting!
Fixes Symptom 1% of time
★★★★★
★★★★★
12 Reviews

Rated by 47 customers 


Easy 

30 - 60 mins 

Ratings submitted by customers like you who bought this part.   

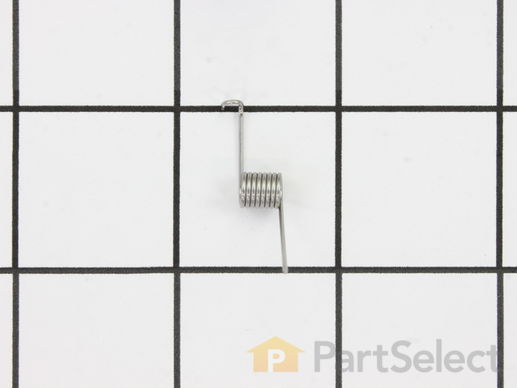
This door recess spring or dispenser lever spring in your refrigerator is used to return the ice door to the closed position or the dispenser lever to the home position once released. You will find the spring in the water dispenser assembly, behind the main control panel. If the dispenser lever is malfunctioning or the dispenser ice door is not closing, you may need to replace this door recess spring.

$ 9.17
  In Stock
PartSelect Number PS285013
Manufacturer Part Number WR02X10585

Replacing your General Electric Refrigerator Recess Door Spring

Replacing your Recess Door Spring

Customer Repair Stories

The ice cube door located on the front of the freezer (side by side freezer/refridgerator) stopped closing.

I removed the face plate (ice/water, selection panel) from the freezer door to access and remove the solenoid which was badly rusted and replaced with a new one, and a new spring too. Very simple repair for a chronic pain.
  • Todd from Milton, WI
  • Difficulty Level:
    Easy
  • Total Repair Time:
    15 - 30 mins
  • Tools:
    Screw drivers
0 of 1 people found this instruction helpful.
Was this instruction helpful to you?
Thank you for voting!

frost build up

flapper then bought the spring
  • JOHNNY from FORT WORTH, TX
  • Difficulty Level:
    Really Easy
  • Total Repair Time:
    15 - 30 mins
  • Tools:
    Pliers, Screw drivers
1 person found this instruction helpful.
Was this instruction helpful to you?
Thank you for voting!
Fixes Symptom 1% of time

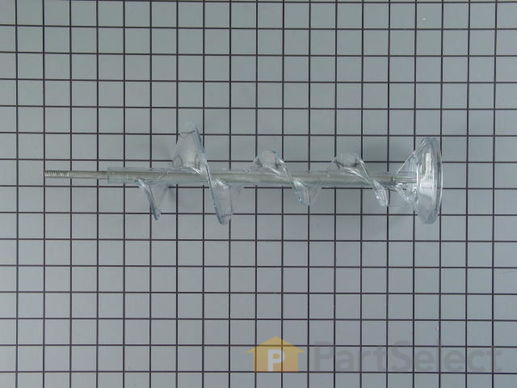
The ice bucket auger is located within the ice bucket assembly in your freezer. It stirs and dispenses the ice in the bucket. You may need to replace the auger if your ice maker is noisy, or not dispensing ice. Disassembly of the ice bucket assembly is necessary to replace this part. Turn off power to the appliance before removing the ice bucket assembly to do this repair.

  No Longer Available
PartSelect Number PS17139776
Manufacturer Part Number WR29X42446
Fixes Symptom 1% of time
★★★★★
★★★★★
1 Review

Rated by 6 customers 


Really Easy 

30 - 60 mins 

Ratings submitted by customers like you who bought this part.   

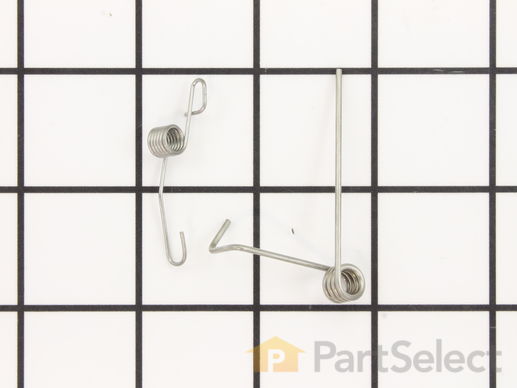
This part is the replacement torsion-fit spring for your refrigerator. It is made of metal and is sold individually. The torsion-fit spring provides tension to return the ice funnel back to its normal position after it dispenses ice. If your refrigerator is not dispensing ice or water properly, you may need to replace the torsion-fit spring. This is an OEM part sourced directly from the manufacturer.

$ 10.39
  In Stock
PartSelect Number PS2374786
Manufacturer Part Number WR49X10233
Fixes Symptom 1% of time
★★★★★
★★★★★
1 Review

Rated by 33 customers 


Easy 

30 - 60 mins 

Ratings submitted by customers like you who bought this part.   

The door recess crank for your refrigerator is located inside the water dispenser assembly. To access this part, you will need to take apart the dispenser assembly. To do this, you will need a putty knife and a Phillips screwdriver. If your dispenser door will not close properly, or ice is not dispensing properly, you may have a damaged door recess crank. This part is made of white plastic and is sold individually.

$ 13.84
  In Stock
PartSelect Number PS291908
Manufacturer Part Number WR17X10706

Replacing your General Electric Refrigerator Dispenser Door Recess Crank

Replacing your Dispenser Door Recess Crank
Fixes Symptom 1% of time
★★★★★
★★★★★
58 Reviews

Rated by 119 customers 


Really Easy 

Less than 15 mins 

Ratings submitted by customers like you who bought this part.   

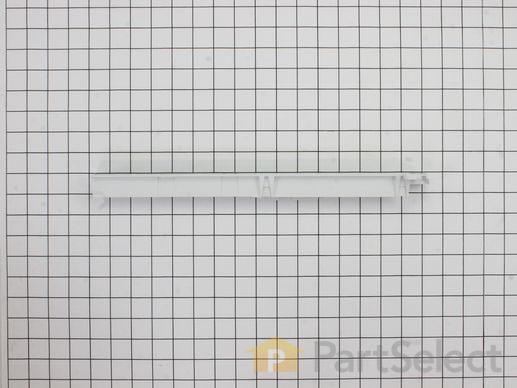
This drawer slide rail is for the right side of your refrigerator. The drawer slide rail attaches horizontally to the refrigerator wall and supports the drawer so it can easily slide in and out. If the drawer slide track is broken, not sliding, or the fridge is not dispensing water, replacing this part could solve the issue. Make sure to unplug the refrigerator from the power source and wear gloves to protect your hands when installing this part. Refer to the diagram provided by the manufacturer for further guidance and instruction.

$ 42.55
  In Stock
PartSelect Number PS306944
Manufacturer Part Number WR72X240

Replacing your General Electric Refrigerator Drawer Slide Rail - Right Side

Replacing your Drawer Slide Rail - Right Side

Customer Repair Stories

Drawer slide rail for upper drawer had broken

Removed the broken rail by removing two screws. Put one screw through the hole in the new rail, matched it to the hole in the side of the fridge, and tightened it - not too tight! Then guided the second screw into place and did the same thing. Replaced the drawer. Job done.

Identifying the part on the website was a breeze too, thanks to well-organized site, a picture of the part to match to my broken one, and even a video of a repairman making the repair. Couldn't have been easier, and probably saved me about $100.
  • Lanni from Irving, TX
  • Difficulty Level:
    Really Easy
  • Total Repair Time:
    Less than 15 mins
  • Tools:
    Screw drivers
2 of 2 people found this instruction helpful.
Was this instruction helpful to you?
Thank you for voting!

Drawer slide broke due to overloading with beer.

First I took a beer out and opened it then took a sip. Then I went into my garage and searched for my Black and Decker power drill with a phililps head on it. Failure to locate a phillips head bit i took another sip of beer and took out one of those old fashion screw drivers. I went back into the kitchen and much to my dismay the fridge didnt fix itself. After another sip of beer I took the old slide out and took it to the outside garbage. On my way around the house my neighbor started to mock my home fix-it skills and his back yard became the new home for the broken slide. I put the new slide in, reinstalled the drawer, and filled it with beer.
  • Ashley from Brandon, MS
  • Difficulty Level:
    Really Easy
  • Total Repair Time:
    Less than 15 mins
  • Tools:
    Screw drivers
102 of 122 people found this instruction helpful.
Was this instruction helpful to you?
Thank you for voting!
Fixes Symptom 1% of time
★★★★★
★★★★★
6 Reviews

Rated by 6 customers 


Easy 

30 - 60 mins 

Ratings submitted by customers like you who bought this part.   

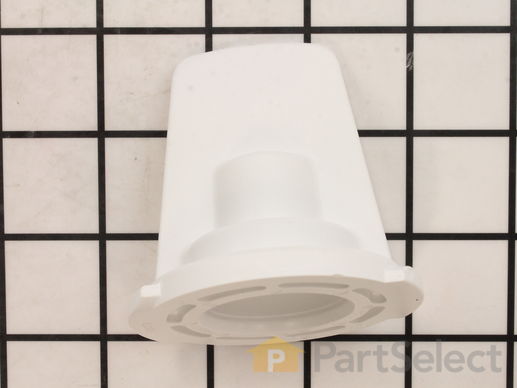
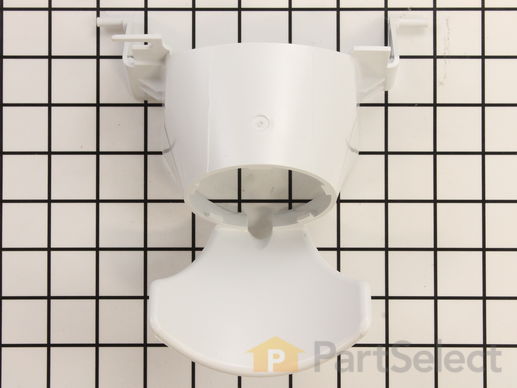
This part is the replacement ice funnel for your refrigerator. It is made of white plastic and is sold individually. The funnel is approximately 7 inches wide and 8 inches long. The ice funnel has a paddle that, when pushed by your glass, activates the dispenser and releases ice or water through the funnel. If your refrigerator is not dispensing water or ice, you may have a damaged ice funnel. This is an authentic OEM part sourced directly from the manufacturer.

$ 42.46
  In Stock
PartSelect Number PS758841
Manufacturer Part Number WR17X11264

Customer Repair Stories

The ice funnel side clip broke.

Remove outer trim of the in-door dispenser. Remove the electrics by popping it out and up. Remove the connectors. Remove the 4 screws that hold the ice funnel in place. Clean everything you can reach while you have this out. Remove the broken piece and note how the spring is hooked up. Remove the activation switch and reinstall the ice funnel and the spring. Reattach the activation switch and check it for proper activation. Reattach everything in reverse order.
  • Michael from Red Lion, PA
  • Difficulty Level:
    Really Easy
  • Total Repair Time:
    15 - 30 mins
  • Tools:
    Screw drivers
Was this instruction helpful to you?
Thank you for voting!

Ice Funnel on/off lever broken

Removed the trim around the entire opening. Be very careful. The trim is held in place with 4 pressure "prongs" on each side and 2 at the top which can easily break (I broke 4 of the 10 not knowing this). Two are 1/2" from the top and bottom, the other two are at about 1/3 from the top and bottom. There is a slot on either side under the bottom of the trim. Insert a screw driver in one and carefully pry the side up enough to slide a knife or putty knife under the trim and press the first "prong" to release the trim. Release the remaining three, then the 2 at the top. The trim should come off then, but if not you may have to release the 4 on the other side.

Next remove the control module which is also held in place by 2 prongs on the bottom. Insert a long screw driver behind the module to release the prongs and release the module. Alternatively, press down on the top side very carefully to avoid breaking the plastic until it releases. Remove the electrical sockets from the circuit board to get the board out of the way. I could not get the larger one to release so I taped a folded paper towel over the circuit board to avoid shocking or damaging the board as it hung there while I did the rest of the work.

Remove the 4 screws holding the ice funnel unit. Remove the unit and release the tension on the spring ASAP because the plastic “plate” above it that helps hold it in place is thin and fragile. (The corner of the plastic plate cracked and bent upward on mine so that I feared it was going to break off altogether when I put the tension back on the spring. So, I laid a 4" metal strap over it and secured it with 5 large paper clips to stabilize it. So far it is working.)

Remove the old funnel and install the new one.

Reassemble everything.
  • Donald from Albuquerque, NM
  • Difficulty Level:
    A Bit Difficult
  • Total Repair Time:
    30 - 60 mins
  • Tools:
    Pliers, Screw drivers
Was this instruction helpful to you?
Thank you for voting!
Fixes Symptom less than 1% of time
★★★★★
★★★★★
31 Reviews

Rated by 68 customers 


Really Easy 

15 - 30 mins 

Ratings submitted by customers like you who bought this part.   

This is a manufacturer-approved drawer slide rail for your refrigerator. This slide rail is for the left side of the fridge. All you need to complete this repair is a Phillips screwdriver. Remove the shelves above and below the slide rail so you have room to access it. Unscrew the slide rail and replace it with the new one.

$ 29.73
  In Stock
PartSelect Number PS306943
Manufacturer Part Number WR72X239

Replacing your General Electric Refrigerator Drawer Slide Rail - Left Side

Replacing your Drawer Slide Rail - Left Side

Customer Repair Stories

slide rail broke causing shelf to fall

repair was simple removed glass shelf and removed the two screws holding rail in place. I was really amazed at the quick service that I had receiced, I ordered two of the same part and they had the instructions to send back the additional part in my email the next day. Thanks for your help.
  • Mark from Albuquerque, NM
  • Difficulty Level:
    Really Easy
  • Total Repair Time:
    15 - 30 mins
  • Tools:
    Nutdriver
5 of 6 people found this instruction helpful.
Was this instruction helpful to you?
Thank you for voting!

the left drawer slide rail was broken from years of use.

First I removed the vegetable drawer and glass shelf. I matched up the 'new' drawer slide rail next to the broken slide.
I then used a phillips head screwdriver to remove the 2 screws that held the slide in place.
After removing the broken slide rail, I installed the new rail, replaced the vegetable drawer and glass shelf. New item worked like a charm.
The drawer slide arrived really quick after my order was placed. Approx. 2 days after ordering the part, it was on my front door step.
  • Carlton from Chino, CA
  • Difficulty Level:
    Really Easy
  • Total Repair Time:
    Less than 15 mins
  • Tools:
    Screw drivers
16 of 23 people found this instruction helpful.
Was this instruction helpful to you?
Thank you for voting!
Fixes Symptom less than 1% of time
★★★★★
★★★★★
18 Reviews

Rated by 16 customers 


Really Easy 

Less than 15 mins 

Ratings submitted by customers like you who bought this part.   

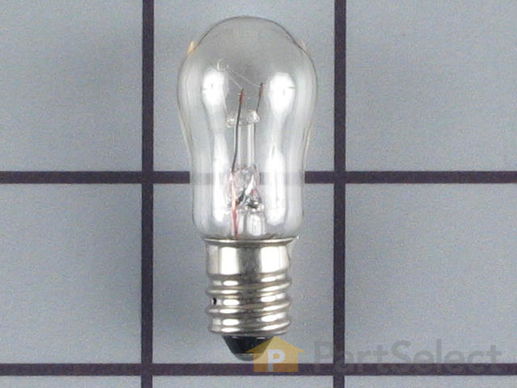
This twelve volt dispenser light bulb is a little under two inches long.

$ 17.85
  In Stock
PartSelect Number PS16554837
Manufacturer Part Number WR01X37886

Replacing your General Electric Refrigerator DISPENSER LIGHT

Replacing your DISPENSER LIGHT

Customer Repair Stories

ice door light bulbs burned out

found the correct bulbs, the hardest part.
un screwed old bulb.
Screwed in new bulb.
Waa La,
There was light.
  • Austin from New Portland, ME
  • Difficulty Level:
    Really Easy
  • Total Repair Time:
    Less than 15 mins
7 of 14 people found this instruction helpful.
Was this instruction helpful to you?
Thank you for voting!

light burned out

unscrewed lamp and replaced it with new one!
  • Gerald from Lincoln, CA
  • Difficulty Level:
    Really Easy
  • Total Repair Time:
    Less than 15 mins
10 of 22 people found this instruction helpful.
Was this instruction helpful to you?
Thank you for voting!
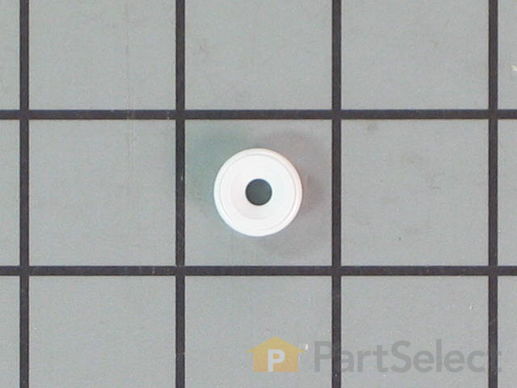
19 GROMMET
Fixes Symptom less than 1% of time

Rated by 1 customer 


Really Easy 

30 - 60 mins 

Ratings submitted by customers like you who bought this part.   

$ 8.54
  In Stock
PartSelect Number PS285096
Manufacturer Part Number WR02X10678
Fixes Symptom less than 1% of time
★★★★★
★★★★★
66 Reviews

Rated by 19 customers 


Really Easy 

Less than 15 mins 
Ratings submitted by customers like you who bought this part.   

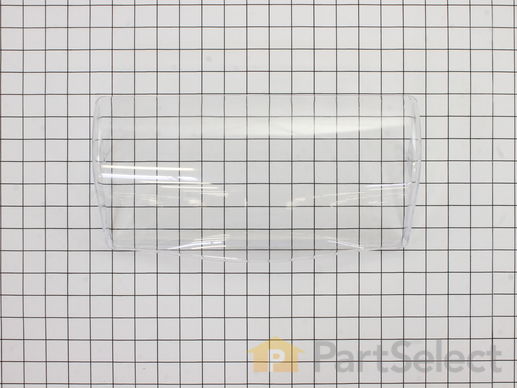
This is the replacement dairy door for a refrigerator. It is installed on the inner door and rotates up and down to allow access to the dairy compartment. It is made of clear plastic. If your dairy door is cracked, broken, missing, or won't stay on, you may need to replace it. This is an OEM part sourced directly from the manufacturer.

$ 20.67
  In Stock
PartSelect Number PS16619589
Manufacturer Part Number WR71X38317

Customer Repair Stories

Broken dairy door

Part arrived in 2 days and took about 15 seconds to install. Great!! No more broken eggs!!
  • Elizabeth from Huntersville, NC
  • Difficulty Level:
    Really Easy
  • Total Repair Time:
    Less than 15 mins
11 of 15 people found this instruction helpful.
Was this instruction helpful to you?
Thank you for voting!

Dairy Door Cover had cracked

Repair took about 5 seconds. No directions necessary. Super easy.
  • Stephanie from Tampa, FL
  • Difficulty Level:
    Really Easy
  • Total Repair Time:
    Less than 15 mins
21 of 29 people found this instruction helpful.
Was this instruction helpful to you?
Thank you for voting!