Models > FRS6LF7JS0 > Symptoms > Ice maker not making ice

Parts That Fix Frigidaire Refrigerator FRS6LF7JS0 Ice maker not making ice

Ice maker not making ice is a commonly reported symptom for the FRS6LF7JS0 Frigidaire Refrigerator, and we have put together a full guide on how to fix this. This advice is based on feedback from people who own this exact appliance. We have listed the most common parts for your FRS6LF7JS0 Frigidaire Refrigerator that will fix Ice maker not making ice. We have included repair instructions, and helpful step-by-step video tutorials. If you are experiencing this issue, not to worry, DIYers just like you have fixed this, and shared their experience to help you!

Fixes Symptom 59% of time
★★★★★
★★★★★
107 Reviews

Rated by 63 customers 


Really Easy 

30 - 60 mins 

Ratings submitted by customers like you who bought this part.   

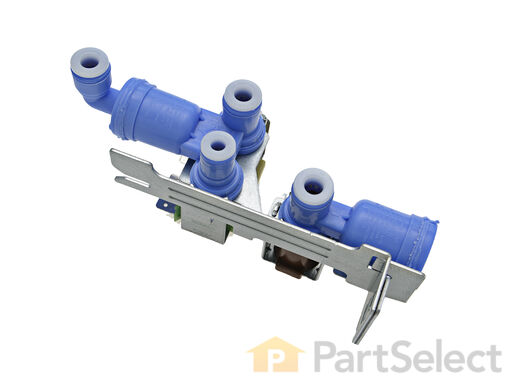
The function of the Refrigerator Water Inlet Valve (Triple Solenoid Water-Valve, Water Valve, Water Inlet Valve, Refrigerator Water Inlet Valve Assembly) is to release water from the supply line when activated, and send it through to your water dispenser or ice maker in your refrigerator. The water inlet valve is located at the back of the refrigerator, and connects to the water supply. The valve can break from material fatigue or normal use. If your water inlet valve is malfunctioning, you could be getting a lack of water to the inside of your refrigerator. Your ice maker may not produce cubes or your water dispenser may not work. The water inlet valve must be replaced if the solenoids no longer have continuity or the valve has internal blockage. This valve measures approximately 7 inches long and 4.5 inches wide, and is constructed of plastic and metal. It comes in blue, and includes the valve and mounting bracket.

$ 91.07
  In Stock
PartSelect Number PS7784018
Manufacturer Part Number 242252702

Replacing your Frigidaire Refrigerator Refrigerator Water Inlet Valve

Replacing your Refrigerator Water Inlet Valve

Customer Repair Stories

icemaker stopped making ice

Even though my wife said that our icemaker broke, there was actually nothing wrong with it. It was the valve that let water flow in during the 'harvest' cycle.
A real easy way to test the icemaker without voltage and current measurements, is to fill the tray by hand with a little cup of water; wait till the water freezes and see if the maker dumped the ice into the bin.
  • David from New Bern, NC
  • Difficulty Level:
    Really Easy
  • Total Repair Time:
    15 - 30 mins
  • Tools:
    Nutdriver, Screw drivers
333 of 386 people found this instruction helpful.
Was this instruction helpful to you?
Thank you for voting!

water leaking out of refrigerator

In my specific appliance the water valve is located in the bottom right hand corner looking at it from the back. To get to it I remove the thin layer of cardboard the covers the back of the fridge. I then proceeded to disconnect the 1/4" copper tubing which is the water feed coming out of the wall. Then I removed the screws that hold the valve assembly in place. I took the water valve out and removed the electrical connections as well as the plastic tubing which feed the water dispenser and the ice maker. To install the new water valve it was just a matter of reversing steps.
  • Jose from Alexandria, VA
  • Difficulty Level:
    Easy
  • Total Repair Time:
    15 - 30 mins
  • Tools:
    Nutdriver, Pliers, Wrench (Adjustable)
582 of 678 people found this instruction helpful.
Was this instruction helpful to you?
Thank you for voting!
Fixes Symptom 16% of time
★★★★★
★★★★★
81 Reviews

Rated by 26 customers 


Really Easy 

15 - 30 mins 

Ratings submitted by customers like you who bought this part.   

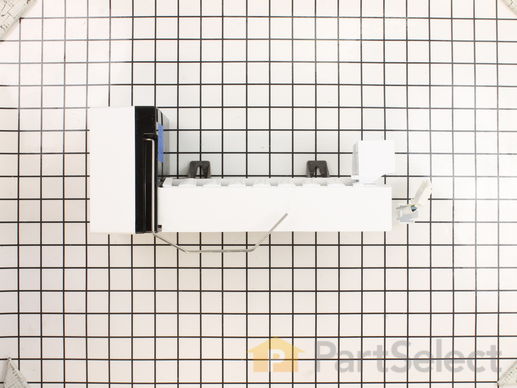
This 8-cube ice maker is used to create ice for your refrigerator. The ice maker receives water from the water inlet valve and will freeze until ice cubes are formed. Once the water has been frozen the cubes will be ejected from the mold in to the ice bucket. The ice maker will continue the process until the ice bucket has reached the limit. If your ice maker is not making ice you may need to replace this part. Please remember to disconnect the power and water supply before starting your repair. This ice maker is a genuine OEM part.

$ 153.41
  In Stock
PartSelect Number PS12364147
Manufacturer Part Number 241798231

Customer Repair Stories

Ice Maker stopped working

Reviewed the video on your website and followed the directions to the letter. Great video
  • Dennis from DEER LODGE, MT
  • Difficulty Level:
    Really Easy
  • Total Repair Time:
    15 - 30 mins
  • Tools:
    Nutdriver
38 of 45 people found this instruction helpful.
Was this instruction helpful to you?
Thank you for voting!

Broken ice maker

Unplugged faulty ice maker, removed two screws holding it to the refrigerator and took it out. Reversed the operation with the new ice maker and after a few minutes presto, we have ice.
  • Juan from Miami, FL
  • Difficulty Level:
    Really Easy
  • Total Repair Time:
    15 - 30 mins
  • Tools:
    Socket set
252 of 339 people found this instruction helpful.
Was this instruction helpful to you?
Thank you for voting!
Fixes Symptom 16% of time
★★★★★
★★★★★
35 Reviews

Rated by 49 customers 


Really Easy 

15 - 30 mins 

Ratings submitted by customers like you who bought this part.   

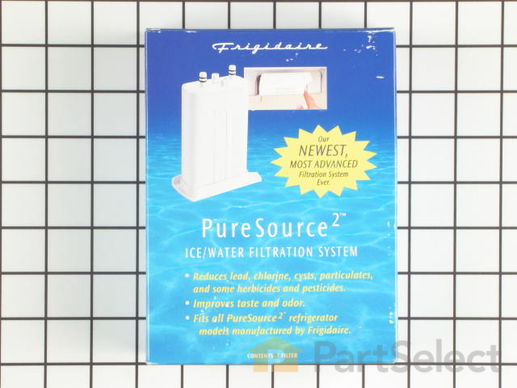
This is a single OEM water filter used in refrigerators to remove impurities and particles from water that goes through the water and ice dispenser. It is used for reducing cysts, turbidity, lead, mercury, herbicides, and more. If your icemaker is not making ice, not dispensing ice, dispenses too little ice, or there is leakage and the fridge is making loud noises, replacing the water filter may be the solution. This filter is located in the front, top right of side-by-side refrigerators. You will know it is time for a new filter when the light on the freezer door dispenser lights up red, or after 6 months (200 gallons) of use. No tools are required for this easy repair. First, press the release button to pull out the old water filter and push and lock in the new water filter. Run water through the dispenser for about 3 minutes to prime the filter for use. Dispose of the water or use it to water plants. Press the indicator for 3-10 seconds to reset after this repair is complete. This carbon-based filter measures 6 x 3 x 7 Inches and is white plastic.

$ 73.08
  In Stock
PartSelect Number PS503621
Manufacturer Part Number WF2CB

Replacing your Frigidaire Refrigerator Refrigerator Water Filter

Replacing your Refrigerator Water Filter

Customer Repair Stories

water leaking(pouring) from the filter into the refrigerator

Pushed the button on the filter in the fridge, the cartridge popped out and in with the new. That simple. Prior to replacement the water was leaking, although it was still producing water and ice through the door. When the filter was out, no leaks, but no water and ice! Just needed a new filter.
  • Michele from Red Oak, TX
  • Difficulty Level:
    Really Easy
  • Total Repair Time:
    Less than 15 mins
88 of 100 people found this instruction helpful.
Was this instruction helpful to you?
Thank you for voting!

yearly maintenance

swap filter
  • Antonio from Folsom, CA
  • Difficulty Level:
    Really Easy
  • Total Repair Time:
    Less than 15 mins
618 of 658 people found this instruction helpful.
Was this instruction helpful to you?
Thank you for voting!
Fixes Symptom 1% of time
★★★★★
★★★★★
22 Reviews

Rated by 16 customers 


Easy 

30 - 60 mins 

Ratings submitted by customers like you who bought this part.   

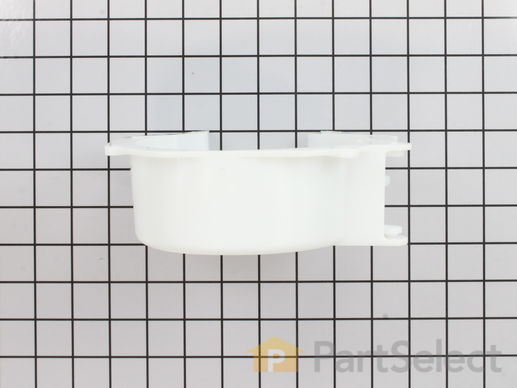
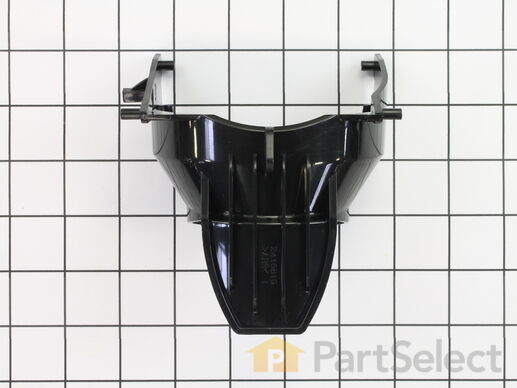
This dispenser crusher housing may also be known as a refrigerator ice crusher housing, and is compatible with your refrigerator. The function of the dispenser crusher housing is to shield the ice crushing blades within the ice container. To make this repair you will need a Phillips screwdriver, a flat blade screwdriver, a quarter-inch nut driver, and a pair of channel lock pliers. For this installation, work gloves are recommended. Note that this piece may look different or be a different color than the original, but this part will fit and function in the same way as the original part.

$ 64.56
  In Stock
PartSelect Number PS2378689
Manufacturer Part Number 241885001

Replacing your Frigidaire Refrigerator Dispenser Crusher Housing

Replacing your Dispenser Crusher Housing

Customer Repair Stories

Original gate broke at the swivel point

I removed the old gate by using a flat head screw driver to pry open mouth. I then removed 2 bolts that held on the cage that hols the ice crushing blades. Then I inserted the new gate and used a screw driver to pry the mouth open again (it was more difficult to insert than remove). I then popped in the new gate and re-assembled the cage. It worked on the first shot with no problems!

This is the 3rd time I have attemped and successfully repaired major home appliances myself after the warrenty ran out. I'm sure I could buy a new appliance for the money I saved.
  • Charles from New Orleans, LA
  • Difficulty Level:
    A Bit Difficult
  • Total Repair Time:
    15 - 30 mins
  • Tools:
    Screw drivers, Socket set
15 of 19 people found this instruction helpful.
Was this instruction helpful to you?
Thank you for voting!

Ice Crusher Broke. Plastic in Ice Tray

Removed 4 screws holding face plate onto ice bucket. Removed the 3 screws holding the ice crusher housing. Noted postion and rotation of teh s;ring loaded ice selecting rod. Removed broken crusher housing. Reveresed process for installion. Took for test drive. Operational...
  • Ronald from Dickson, TN
  • Difficulty Level:
    Easy
  • Total Repair Time:
    15 - 30 mins
  • Tools:
    Screw drivers
35 of 49 people found this instruction helpful.
Was this instruction helpful to you?
Thank you for voting!
Fixes Symptom 1% of time
★★★★★
★★★★★
7 Reviews

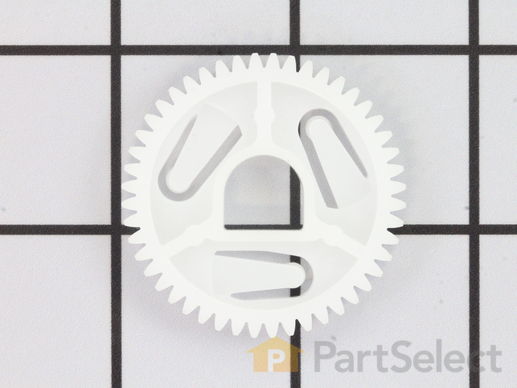
The ejector drive gear is a part for your refrigerator. This icemaker drive gear is for the ejector blades. The part rotates the cube ejector arm, which cycles the icemaker and pushes the cubes out and into the ice bucket, ready for the ice to be used. The outside diameter of this piece is almost two inches by two inches. The reason for needing to replace your gear is if the current one is broken/missing a tooth, or if your icemaker is not dispensing ice and is noisy.

$ 21.03
  In Stock
PartSelect Number PS2349843
Manufacturer Part Number 5304469403

Replacing your Frigidaire Refrigerator Drive Gear

Replacing your Drive Gear

Customer Repair Stories

The ice maker quit making ice.

I noticed that the two gears weren't meshing together so upon inspection I saw that one of the gears had an inner piece missing making it weak so it kept popping out away from the other great. I ordered the new gear and unscrewed the old one off and put the new one on. So easy. It made Ice beautiful after that
  • Kenneth from Allen, TX
  • Difficulty Level:
    Really Easy
  • Total Repair Time:
    Less than 15 mins
  • Tools:
    Screw drivers
Was this instruction helpful to you?
Thank you for voting!
Fixes Symptom 1% of time
★★★★★
★★★★★
7 Reviews

Rated by 6 customers 


A Bit Difficult 

30 - 60 mins 

Ratings submitted by customers like you who bought this part.   

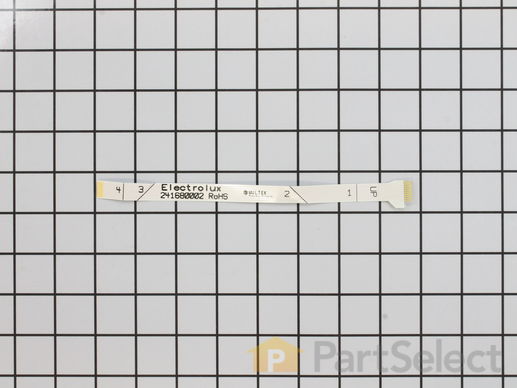
Used in the dispenser board area.

$ 15.35
  In Stock
PartSelect Number PS1526364
Manufacturer Part Number 241680002

Customer Repair Stories

Ice and Water dispenser stopped working

I had to remove the face cover to gain access to the ribbon harness, also had to remove the push pads The ribbon is a delicate item so care had to be taken not to bend the ends. The ribbon can fit either side so getting it in place to make contact was kind of tricky. After the ribbon was in, it just a matter of putting things back together. Dispenser is fixed at a minimum cost, ribbon was shipped within 2 days which was great. Thanks to Part Select for easy to find on the net, had a complete diagram of the refrigerator ice/water dispenser so finding the parts needed was simple. Doug
  • Doug from SUMNER, MI
  • Difficulty Level:
    A Bit Difficult
  • Total Repair Time:
    30 - 60 mins
  • Tools:
    Screw drivers
4 of 4 people found this instruction helpful.
Was this instruction helpful to you?
Thank you for voting!

No power to Ice and water dispenser

First removed the drip tray with a firm tug, Then removed the 2 screws to remove the trim, had to remove the board to get get to the connector. (there is a clip that holds the wire tight) connected the new ribbon cable and secured it with the clip, screwed the board back in and pushed in the other end of the cable. and screwed the trim back and the drip tray. surprisingly Very easy to do.
  • Carmelo from Howell, NJ
  • Difficulty Level:
    Easy
  • Total Repair Time:
    Less than 15 mins
  • Tools:
    Screw drivers
22 of 36 people found this instruction helpful.
Was this instruction helpful to you?
Thank you for voting!
Fixes Symptom 1% of time
★★★★★
★★★★★
19 Reviews

Rated by 9 customers 


Easy 

30 - 60 mins 

Ratings submitted by customers like you who bought this part.   

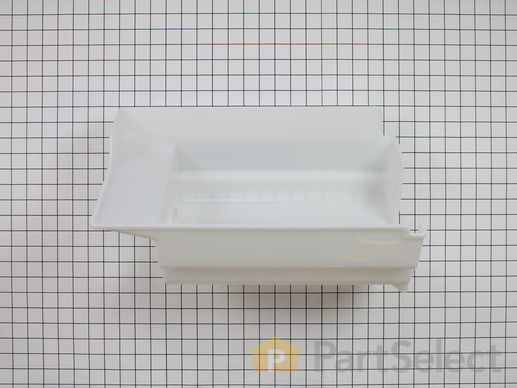
Bucket only. All other parts sold separately.

$ 83.62
  In Stock
PartSelect Number PS1526586
Manufacturer Part Number 241734001

Replacing your Frigidaire Refrigerator Ice Container/Bucket

Replacing your Ice Container/Bucket

Customer Repair Stories

A 2" x 4" section on the bottom of the ice container bucket broke out.

Simply detached the old ice container by removing four screws and removing one screw holding the lever onto the bottom of the container. A bit of advice; make sure you note how the spring is attached to the lever before removing the screw. It took me a bit to determine how the spring activated the lever when I was reattaching it to the bottom of the container. Also, double check your order before you finalize it. I must have inadvertently hit the item twice so I received two of them. This resulted in me having to return one item and paying for extra shipping both ways. I received the part within two days of my order. It was a very fast turn-around. Also, when I realized that I received two parts and had to call to explain the situation, I found the person on the phone to be extremely helpful and courteous. She sent me information regarding how to return the product and didn't ridicule me once for my stupidity.
  • David from Owensboro, KY
  • Difficulty Level:
    Easy
  • Total Repair Time:
    15 - 30 mins
  • Tools:
    Screw drivers
5 of 7 people found this instruction helpful.
Was this instruction helpful to you?
Thank you for voting!

There was a hole in the plastic bin where ice fell through to the freezer.

I removed the screws that held the the ice dispencer from the bin. I than removed three screws from the bottom of the bin. I put the new plastic piece on the end of the spiral piece that
pushes the ice. I inserted the spiral piece back into the hole. I than screwed the ice dispencer
to the bin and re-inserted it back in the refrigerator.
It took me about 5 to 10 minutes. It's really easy!
  • Thomas from Niceville, FL
  • Difficulty Level:
    Really Easy
  • Total Repair Time:
    Less than 15 mins
  • Tools:
    Screw drivers
9 of 9 people found this instruction helpful.
Was this instruction helpful to you?
Thank you for voting!
Fixes Symptom 1% of time
★★★★★
★★★★★
120 Reviews

Rated by 70 customers 


Really Easy 

Less than 15 mins 

Ratings submitted by customers like you who bought this part.   

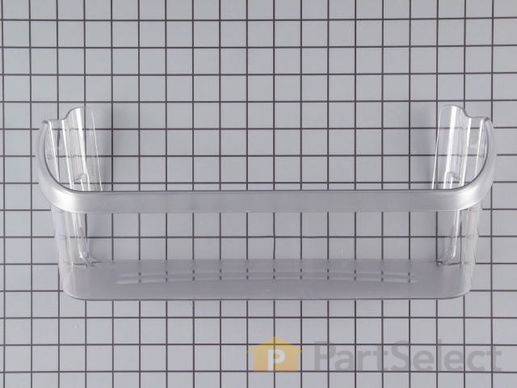
The Bottom Door Bin is also commonly known as a "cantilever shelf" is a clear plastic drawer which holds items in the bottom area of your fridge's interior, on the door. This OEM part is very easy to install and will not require any tools, you will just need to snap the mounting tabs into place for removal and installation. If damaged you will notice visible damage or have problems holding items in the fridge. If damaged, it should be replaced. Check your model number and user manual to see if this is the right part for you. This is important, as many fridges use multiple door bins, many of which vary slightly. This part is sold individually.

$ 53.53
  In Stock
PartSelect Number PS429725
Manufacturer Part Number 240323002

Customer Repair Stories

Took bin out to wash and it broke getting it out

No tools needed. Just had to slide the bin into place. HOWEVER, the bin has a jig-jagged style plastic groves on each side that need to be slide carefully into place. I couldn't get the orginal bin out in order to wash it. It looked easy - just slide it up and out of place, but when I did that the back, inter-locking pieces cracked off. I believe this is a terrible design and the bin should be replaced at the manufactures cost! The other bin slide in there with some elbow-grease. Good Luck!
  • Richelle from New Berlin, WI
  • Difficulty Level:
    A Bit Difficult
  • Total Repair Time:
    15 - 30 mins
168 of 249 people found this instruction helpful.
Was this instruction helpful to you?
Thank you for voting!

Tab on bottom door bin broke off

Replaced bottom door bin being careful not to put stress on the tabs to fit into molded area in door.
  • Mark from Redlands, CA
  • Difficulty Level:
    Really Easy
  • Total Repair Time:
    Less than 15 mins
539 of 567 people found this instruction helpful.
Was this instruction helpful to you?
Thank you for voting!
Fixes Symptom 1% of time
★★★★★
★★★★★
3 Reviews

Rated by 8 customers 


Really Easy 

30 - 60 mins 

Ratings submitted by customers like you who bought this part.   

This drive blade is a little under five inches long. It is used for the icemaker of many refrigerators.

$ 13.67
  In Stock
PartSelect Number PS12728807
Manufacturer Part Number 241684503

Replacing your Frigidaire Refrigerator DRIVE BLADE

Replacing your DRIVE BLADE

Customer Repair Stories

Ice was not allowed to be dispensed because of worn part on auger.

Followed instructions in video that was suggested when I placed the order.
  • Craig from AIKEN, SC
  • Difficulty Level:
    Very Easy
  • Total Repair Time:
    30 - 60 mins
  • Tools:
    Nutdriver, Pliers, Screw drivers
1 person found this instruction helpful.
Was this instruction helpful to you?
Thank you for voting!

ice maker would not rotate out cube or crushed ice.

1. Remove outer plastic face cover (4) screws.

2. Revove (1) U type nut keeper & (1) metal washer.

3. Remove (1) plastic nut on end of metal auger.

4. Remove inner plastic cover (4) screws and disconnect control rod. (Note postion of control rod befor disconnecting)

5. Note position and order of metal blades and plastic spacers on auger before siding off the end of auger to reposition them upon re-assembly.

6. Remove metal support panel from end of ice bucket (4) screws.

7. Remove auger & plastic cylinder from ice bucket.

8. Remove - slide drive blade off auger.

9. Drive blade replaced.

10. Re-assembled other items removed in reverse order
  • David from Ponca City, OK
  • Difficulty Level:
    Easy
  • Total Repair Time:
    30 - 60 mins
  • Tools:
    Nutdriver, Pliers, Screw drivers
40 of 58 people found this instruction helpful.
Was this instruction helpful to you?
Thank you for voting!
Fixes Symptom 1% of time
★★★★★
★★★★★
16 Reviews

Rated by 5 customers 


Easy 

30 - 60 mins 

Ratings submitted by customers like you who bought this part.   

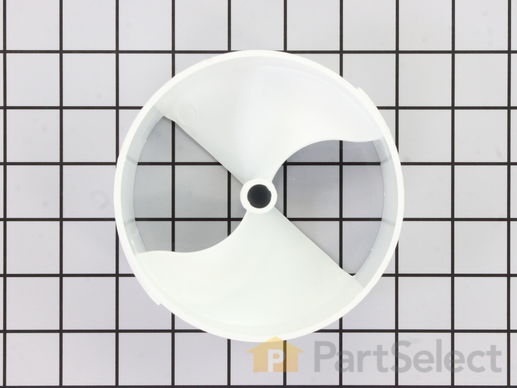
This part helps push the ice through the front plate to be crushed.

$ 43.21
  In Stock
PartSelect Number PS1526412
Manufacturer Part Number 241685101

Replacing your Frigidaire Refrigerator Ice Dispenser Drum

Replacing your Ice Dispenser Drum

Customer Repair Stories

Broken Drum

Had to disassemble the entire ice maker bucket. Simple and straightforward, didn't need any pictures or reference materials. Just time consuming.
  • Jubal from OZARK, AL
  • Difficulty Level:
    Really Easy
  • Total Repair Time:
    30 - 60 mins
  • Tools:
    Nutdriver, Pliers, Screw drivers
3 of 3 people found this instruction helpful.
Was this instruction helpful to you?
Thank you for voting!

The drum ice maker broke in half so it couldn't dependent the ice.

I had removed the housing that the drum was in and taken the screws out to get to the broken drum. I removed it there was a set of 6 blades that crushed the ice that had to go back on the same order when I removed these I put them on a piece of wire in the order they came off (so I would get them back I the correct order). Then I reversed the order and reassembled it in the opposite direction . It was fairly easy to do. I'm a 68 year old disabled woman so if I could do it I'm sure you could to. Good luck. It cost me $14.00 if I had bought the whole assembly it would have been $150.00. So it was well worth my time and effort.
  • ROWENA from WIGGINS, MS
  • Difficulty Level:
    Really Easy
  • Total Repair Time:
    30 - 60 mins
  • Tools:
    Screw drivers, Socket set
8 of 9 people found this instruction helpful.
Was this instruction helpful to you?
Thank you for voting!
Fixes Symptom 1% of time
★★★★★
★★★★★
1 Review

Rated by 1 customer 


Easy 

30 - 60 mins 

Ratings submitted by customers like you who bought this part.   

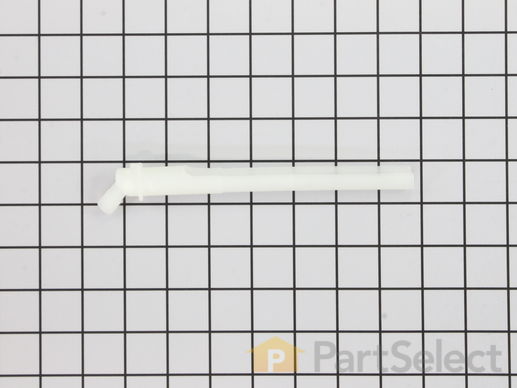
This is a water fill tube which is used in refrigerators. It attaches to the water inlet valve and supplies water to the components in your appliance that need it, such as the icemaker and water dispenser. You will need to replace your fill tube if you notice it is leaking or damaged. This replacement tube is approximately 7 inches in length, and it is made entirely of plastic. The fill tube is sold individually. Before you begin repairing your refrigerator, make sure the water supply has been turned off and that the appliance has been unplugged.

$ 28.42
  In Stock
PartSelect Number PS7783975
Manufacturer Part Number 241796405

Customer Repair Stories

Water Tube That Fills Ice Maker Leaking Water

Undone the water line that comes up the back of the refrigerator and pulled the water tube out the back of the refrigerator and reinstalled the new one and reinstalled the water line. Done
  • PAT from BATON ROUGE, LA
  • Difficulty Level:
    Easy
  • Total Repair Time:
    15 - 30 mins
Was this instruction helpful to you?
Thank you for voting!

Ice Maker not getting any water

1). Shut off water supply to fridge. 2). Move fridge out to gain access to back of fridge. 3). Remove poly line to water tube have a glass handy to catch any remaining water that might be in line. Some may have a foam insulating washer around water tube remove it first. 4). My Sears-Kenmore was a twist lock water tube have to turn it to left or right depending on brand to remove tube. 5). After removing make sure tube didn't just have water frozen in tube ( that was my problem ) run it under hot water frozen piece will come out. 5). Problem fixed, reverse directions to re-install tube!
  • Lawrence from Stow, OH
  • Difficulty Level:
    Easy
  • Total Repair Time:
    15 - 30 mins
  • Tools:
    Pliers
Was this instruction helpful to you?
Thank you for voting!
Fixes Symptom 1% of time
★★★★★
★★★★★
4 Reviews

Rated by 3 customers 


Easy 

1- 2 hours 

Ratings submitted by customers like you who bought this part.   

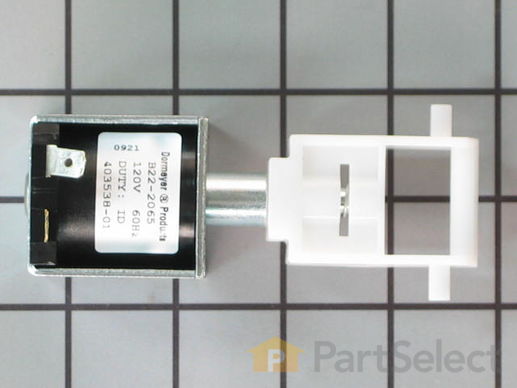
The cube solenoid allows cube or crushed ice to be dispensed on demand. 120V 60Hz

$ 88.65
  In Stock
PartSelect Number PS8691994
Manufacturer Part Number 241675704

Replacing your Frigidaire Refrigerator Refrigerator Ice Dispenser Solenoid

Replacing your Refrigerator Ice Dispenser Solenoid

Customer Repair Stories

ice maker is stuck on crushed ice.

We had someone to come and look at it and we were told it was the solenoid valve. The repairman unstuck it for us and said when it does it again, he would have to order the part. We took it upon ourselves to order the part and DIY. We replaced the part that we were told was the problem and "guess what" it's still not fixed. It's still shooting out crushed ice. Will have to call repair guy back out here to see what we did wrong.
  • Mary from MAGNOLIA, AR
  • Difficulty Level:
    A Bit Difficult
  • Total Repair Time:
    More than 2 hours
  • Tools:
    Nutdriver, Screw drivers
2 of 5 people found this instruction helpful.
Was this instruction helpful to you?
Thank you for voting!

Ice maker wouldn't change from crushed to cubed ice

First I pulled the ice tray out so I could see the solenoid housing/ice tray support(1 unit). Below the ice tray there are 2 screws that hold the solenoid housing/ice tray support. After removing those the assembly lifts up so you can see the wiring harness to disconnect. I pulled it out and removed the 2 screws to open it up. There is 2 screws holding the solenoid in place and one ground wire. This was an easy fix and I know I saved a lot of money.
  • robert from sioux falls, SD
  • Difficulty Level:
    Easy
  • Total Repair Time:
    30 - 60 mins
  • Tools:
    Nutdriver, Screw drivers
56 of 85 people found this instruction helpful.
Was this instruction helpful to you?
Thank you for voting!
Fixes Symptom 1% of time
★★★★★
★★★★★
7 Reviews

Rated by 14 customers 


Easy 

30 - 60 mins 

Ratings submitted by customers like you who bought this part.   

This is the ice actuator or ice actuator arm for your refrigerator. When you depress the actuator arm with a glass or bucket, ice is normally dispensed. If your current actuator arm is broken, missing, or if the ice dispenser isn’t dispensing ice, you may need to replace it. To access the actuator, you will first need to remove the dispenser assembly, and then remove the actuator from the assembly. Be sure to shut off the water and power source from your refrigerator before you begin this repair.

$ 66.20
  In Stock
PartSelect Number PS1526380
Manufacturer Part Number 241681903

Replacing your Frigidaire Refrigerator Ice Actuator

Replacing your Ice Actuator

Customer Repair Stories

ice dispenser paddle broke off

Remove power from refrigerator. Pull out the drip tray below paddle. Removed the 3 screws behind tray. Gently pull control panel out and remove the ribbon cable plug from panel. Set panel aside. Remove three screws holding panel housing to door, then pull out housing slightly and disconnect harness plug behind left side of housing. Pull housing out 3-4 inches. Look at the way paddle tabs engage ice dispenser switch mechanism. Remove the left paddle hinge screw and plate and loosen the right hinge screws(these also hold the water paddle hinge) Remove broken paddle by pulling out from right hinge plate and down. Install new paddle under right hinge plate, engage new paddle tabs correctly onto dispenser switch, install left hinge plate and screw, then tighten hinge screws. Reconnect harness plug, reinstall 3 housing to door screws, reconnect ribbon plug to control panel and reinstall panel screws. Reinstall drip tray. Reconnect power to refrigerator and check operation of ice and water paddles.
  • Emanuel from Coconut Creek, FL
  • Difficulty Level:
    Easy
  • Total Repair Time:
    15 - 30 mins
  • Tools:
    Screw drivers
8 of 11 people found this instruction helpful.
Was this instruction helpful to you?
Thank you for voting!

"Paddle" on ice actuator broke off.

Slide off drip tray at bottom of ice/water compartment.

Remove the 3 screws along bottom edge of face plate. Slide face plate upwards slightly to disengage tabs holding top of face plate to fridge door. Pull face plate slightly away from fridge, reach behind plate, and disconnect wiring harness. Set face plate aside.

Remove 3 screws holding ice/water actuator mechanism to fridge door. Disconnect wiring harness on left side of actuator mechanism. This allows the left side of mechanism to swing outwards.

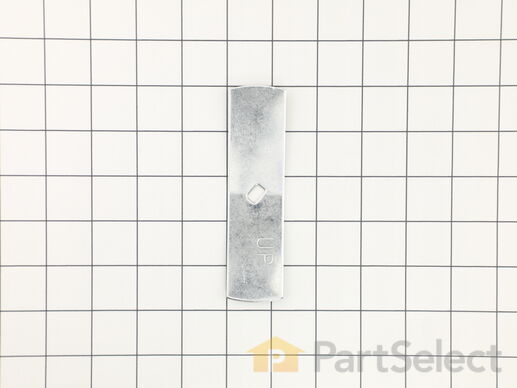
Looking down on top of mechanism, loosen the two screws holding the small, metal retaining plates for ice actuator. (The metal plates hold the ice actuator pivot pins in place in the actuator mechanism). Once the two screws are loosened, the metal plates can be moved to the side to free the ice actuator.

Remove old ice actuator and replace with new actuator. NOTE: Ensure the black ice door flap regulator (the thing with the gear teeth) stays engaged with the gear on the damping mechanism while installing the new ice actuator).

Move the metal retaining plates back in place over the ice actuator pivot pins and tighten both screws. Move the ice/water actuator mechanism back in place and re-connect the wiring harness on the left side. Re-install the 3 screws holding the entire mechanism in place.

Re-connect the wiring harness to the face plate and slide the tabs at the top of the plate into the holes in the fridge door. Slide face plate down and line up the 3 screw holes at the bottom of plate. Re-install the 3 screws. Re-install the drip tray. You're done!
  • Ryan from Elk Grove, CA
  • Difficulty Level:
    Easy
  • Total Repair Time:
    15 - 30 mins
  • Tools:
    Screw drivers
83 of 93 people found this instruction helpful.
Was this instruction helpful to you?
Thank you for voting!
Fixes Symptom 1% of time
★★★★★
★★★★★
1 Review

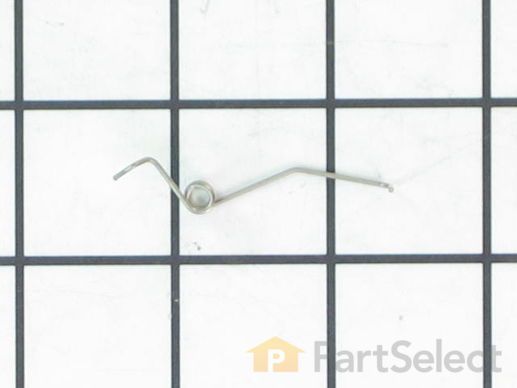
This genuine replacement shutoff arm spring is for refrigerator ice makers. It applies tension to the ice maker shutoff arm to hold it in place so that the ice maker will stop making ice when the ice bucket is full. If your ice maker continues to make ice when your bucket is full, you may need to replace this shutoff arm spring. This part is less than 2 inches long, and is made entirely of metal. Be sure to disconnect the power or the water supply to your refrigerator before completing this repair.

  No Longer Available
PartSelect Number PS2349836
Manufacturer Part Number 5304469396

Customer Repair Stories

arm wouldn't go all the way down and dump ice

Took front off and found the broken spring, got new one and replaced, now works great. Make sure to unplug as the water can come on and flood the freezer.
  • Ronald from Ft. Myers Beach, FL
  • Difficulty Level:
    A Bit Difficult
  • Total Repair Time:
    30 - 60 mins
  • Tools:
    Screw drivers
Was this instruction helpful to you?
Thank you for voting!