















FDS252RBS2 Frigidaire Dishwasher - Instructions
Keep searches simple. Use keywords, e.g. "leaking", "pump", "broken" or "fit".
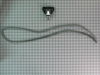
Latch broke
Six screws, two torque drive screws and, four wires.
Then reverse to install. Pull out old seal wash out groove find center mark on new seal and install be sure and fold notch on bottoms. Easy
Then reverse to install. Pull out old seal wash out groove find center mark on new seal and install be sure and fold notch on bottoms. Easy
Parts Used:
-
James from Grass valley, CA
-
Difficulty Level:Really Easy
-
Total Repair Time:15 - 30 mins
-
Tools:Screw drivers
2 of 2 people
found this instruction helpful.
Was this instruction helpful to you?
Thank you for voting!
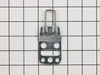
strike was broken
Easy as pie. I tokk the screws out that held the dishwasher to the counter top out. Then removed the screws holding the strike in place, inserted the new one, installed screws and then rescrewed the 2 screws backintothe countertop. Job done. All told 5 minutes.
Parts Used:
-
Ronald from Water Mill, NY
-
Difficulty Level:Really Easy
-
Total Repair Time:Less than 15 mins
-
Tools:Screw drivers
3 of 5 people
found this instruction helpful.
Was this instruction helpful to you?
Thank you for voting!
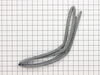
Gasket leak
First I pulled out the old gasket and replaced with the new one. The new one is too long on purpose but only had to be trimmed a little for a perfect fit. Very easy and now no leaks.
Parts Used:
-
William from Sacramento, CA
-
Difficulty Level:Really Easy
-
Total Repair Time:Less than 15 mins
3 of 5 people
found this instruction helpful.
Was this instruction helpful to you?
Thank you for voting!
Broken Door Latch
Removed the broken part and disconnected the four wires. Installed new part (two hex head fasteners) attached wires - good to go!
Quick delivery on the part allowed for dishwasher to be down for only a few days after the part was ordered.
Quick delivery on the part allowed for dishwasher to be down for only a few days after the part was ordered.
Parts Used:
-
Dale from Portage, MI
-
Difficulty Level:Really Easy
-
Total Repair Time:Less than 15 mins
-
Tools:Screw drivers
2 of 2 people
found this instruction helpful.
Was this instruction helpful to you?
Thank you for voting!
Brass nut split down its side , why ???????
Removed bottom cover , PLACED TAPE ON SHARP EDGES OF ALL METAL!!!!!!! Pulled electrical connections off with long reach pliers , removed old split nut ,it was loose !!!!!! . Placed new nut into deep socket , started by hand until sung ,then attached small short 1/4 ratchet to socket and took two (2) turns . Reattached wires with long pliers, Tested on short cycle and nooooo,leaks !!!!!!!! SAVED HUNDREDS OF $$$$$$$. Replaced lower cover .ITS NOT ROCKET SCIENCES. GET AFTER IT !!!!! Bill.
Parts Used:

-
Bill from PORT ORCHARD, WA
-
Difficulty Level:Really Easy
-
Total Repair Time:Less than 15 mins
-
Tools:Pliers, Screw drivers, Socket set
2 of 2 people
found this instruction helpful.
Was this instruction helpful to you?
Thank you for voting!
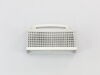
No problems encountered
There were 4 zip ties holding old silverware basket on to bottom rack snip them, remove basket install new basket with zip ties both ends 2 more in middle about 1-2” apart. Try to install ties about 1/2 way up on basket so it doesn’t get top heavy.
Parts Used:
-
Calvin from LOVINGTON, NM
-
Difficulty Level:Very Easy
-
Total Repair Time:15 - 30 mins
2 of 2 people
found this instruction helpful.
Was this instruction helpful to you?
Thank you for voting!
Water was leaking through the heating element Accra point.
Isolated the leak and found the nut had split thereby allowing a loose seal and water penetration. Ordered 2 nuts just in case the other goes and the installation was easy. Unplug the unit, remove baseplate, remove screws under the countertop, and slide the unit out a bit. Use needlenode pliers to remove terminal connection and replaced nut. Reverse it for assembly. 3 minutes tops $6 later it is done. Easy money saved by a DIY.
Parts Used:
-
daniel from OXFORD, MS
-
Difficulty Level:Very Easy
-
Total Repair Time:Less than 15 mins
-
Tools:Pliers, Screw drivers
2 of 2 people
found this instruction helpful.
Was this instruction helpful to you?
Thank you for voting!
The rinse aid cap fell off during the drying session and was warped as a result.
-
Jan from DENVER, CO
-
Difficulty Level:Really Easy
-
Total Repair Time:Less than 15 mins
2 of 2 people
found this instruction helpful.
Was this instruction helpful to you?
Thank you for voting!
Dishwasher hose had hole in it. It was 23 years old.
After getting a totally incorrect length of hose from partselect.com . Went to local hardware store and bought hose for $3.00 vs $20.99 + $10 shipping!
Partselect sent replacement hose of 24 1/4” vs the original hose of 27”. Good luck getting any response from them once they have your money!
Partselect sent replacement hose of 24 1/4” vs the original hose of 27”. Good luck getting any response from them once they have your money!
Parts Used:
-
Shelley from LACONA, NY
-
Difficulty Level:Very Difficult
-
Total Repair Time:More than 2 hours
2 of 2 people
found this instruction helpful.
Was this instruction helpful to you?
Thank you for voting!
The rinse cap was mutilated, the rinse agent leaked.
-
Rose from Summerville, SC
-
Difficulty Level:Very Easy
-
Total Repair Time:Less than 15 mins
2 of 2 people
found this instruction helpful.
Was this instruction helpful to you?
Thank you for voting!
Handle broke and would not latch
I followed the instructions in the video. It was really easy and took less than 15mins. Very happy with the part.
Parts Used:
-
Cait from ARLINGTON, MA
-
Difficulty Level:Really Easy
-
Total Repair Time:Less than 15 mins
-
Tools:Pliers, Screw drivers
2 of 2 people
found this instruction helpful.
Was this instruction helpful to you?
Thank you for voting!
Door Latch Broke Off, Can't Close Door
Very easy to remove old broken door latch assembly, easier to install replacement. With door fully opened, I removed the 8 screws holding down the whole front casing, including the controls casing. Removed 2 Torx screws holding door latch assembly and then made sure that I marked all 4 wires before disconnecting them from door latch assembly. Connected wires to new door latch assembly, secured it with the 2 Torx screws, aligned and secured the controls and front cover casings with 8 screws. Done within 30 mins. Thanks guys for posting how-tos and thanks to PartSelect for a very fast shipping!!!
Parts Used:
-
Giovanni from Glen Burnie, MD
-
Difficulty Level:Easy
-
Total Repair Time:15 - 30 mins
-
Tools:Screw drivers
2 of 3 people
found this instruction helpful.
Was this instruction helpful to you?
Thank you for voting!
Missing roller made it difficult to move rack.

-
Racquel from Lake Charles, LA
-
Difficulty Level:Really Easy
-
Total Repair Time:Less than 15 mins
3 of 6 people
found this instruction helpful.
Was this instruction helpful to you?
Thank you for voting!
Dishwasher was leaking water
The spray arm had become damaged on one side -- one side had apparently melted off. I replaced it, and it seems to have fixed the problem for now.
Parts Used:
-
Seth from Seattle, WA
-
Difficulty Level:Really Easy
-
Total Repair Time:Less than 15 mins
-
Tools:Wrench set
2 of 3 people
found this instruction helpful.
Was this instruction helpful to you?
Thank you for voting!
Relay shorted out after diagnostics ran
Removed two screws on each side, lower half. Inside, removed six screws. Replaced the assembly and replaced all screws.
Not worth the fifty dollars for the part, just to have a door open at the right time to empty soap. Quite a hefty price to pay considering the price of the machine
Not worth the fifty dollars for the part, just to have a door open at the right time to empty soap. Quite a hefty price to pay considering the price of the machine
Parts Used:
-
Philip from Stafford, VA
-
Difficulty Level:Really Easy
-
Total Repair Time:Less than 15 mins
-
Tools:Screw drivers
2 of 3 people
found this instruction helpful.
Was this instruction helpful to you?
Thank you for voting!