Models > ED5LTAXVL00 > Symptoms > Ice maker not making ice

Parts That Fix Whirlpool Refrigerator ED5LTAXVL00 Ice maker not making ice

Ice maker not making ice is a commonly reported symptom for the ED5LTAXVL00 Whirlpool Refrigerator, and we have put together a full guide on how to fix this. This advice is based on feedback from people who own this exact appliance. We have listed the most common parts for your ED5LTAXVL00 Whirlpool Refrigerator that will fix Ice maker not making ice. We have included repair instructions, and helpful step-by-step video tutorials. If you are experiencing this issue, not to worry, DIYers just like you have fixed this, and shared their experience to help you!

Fixes Symptom 36% of time
★★★★★
★★★★★
26 Reviews

Rated by 203 customers 


Really Easy 

15 - 30 mins 

Ratings submitted by customers like you who bought this part.   

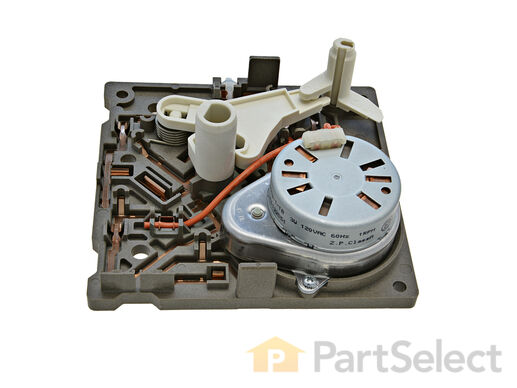
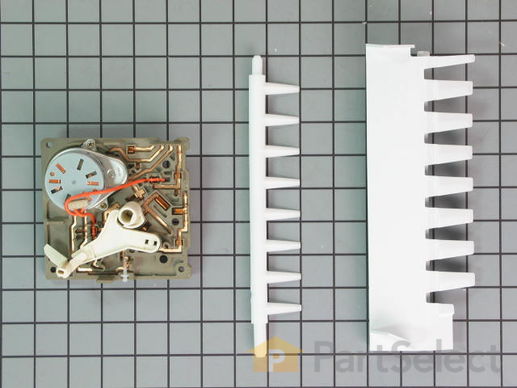
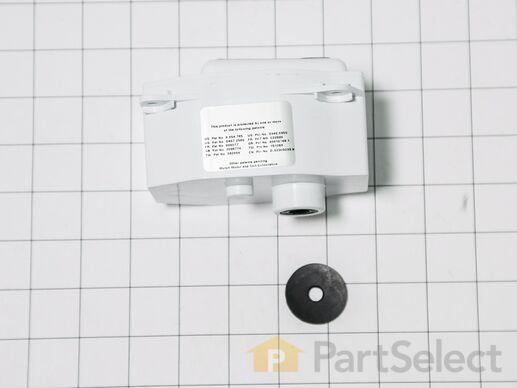
The “Icemaker Control Assembly” (Module & Motor Assembly, Ice Maker Control Module, Icemaker Module, Refrigerator Ice Maker Module) is what controls the actions of your ice maker. The control turns the timing cams and the ejector blades. It controls most of the basic parts and functions such as the heater, water inlet valve, the cube size, and cube ejection. If your ice maker control is broken it can no longer properly control the ice maker functions. It may not produce any ice, make small ice cubes, or have intermittent operation. This can occur due to normal wear and tear. The icemaker control assembly is attached to the ice maker mold, and is under the white cover. Test the icemaker control assembly by using a multimeter. If this reveals the assembly to be defective, you will need to replace this part. It is approximately 4.25 inches square, beige, and is constructed of plastic and metal. This replacement part features one icemaker control assembly, including the control module and the motor.

$ 118.52
  In Stock
PartSelect Number PS2341896
Manufacturer Part Number W10190935

Replacing your Kenmore Refrigerator Icemaker Control Assembly

Replacing your Icemaker Control Assembly

Customer Repair Stories

Ice Maker stopped working

With socket wrench un-screwed the 3 screws and pulled out the ice maker assembly.

Pulled off white plastic end-cap and noticed the plastic gear disk had snapped off (sub part # R0167202)

However, it is all-one-part of the motor assembly unit # w10190935 (part # PS2341896) which must be ordered as a complete part.
  • Robert from Port Washington, NY
  • Difficulty Level:
    Really Easy
  • Total Repair Time:
    15 - 30 mins
  • Tools:
    Screw drivers, Socket set
135 of 154 people found this instruction helpful.
Was this instruction helpful to you?
Thank you for voting!

No ice

removed flap door in front of icemaker...removed 3 screws with bolt heads...removed one additional screw with bolt head and ice unit slid out. I removed motor unit (pops out no screws). Replaced and had ice within 3 hours.
  • Daniel from Suwanee, GA
  • Difficulty Level:
    Easy
  • Total Repair Time:
    15 - 30 mins
  • Tools:
    Screw drivers, Socket set
557 of 665 people found this instruction helpful.
Was this instruction helpful to you?
Thank you for voting!
Fixes Symptom 25% of time
★★★★★
★★★★★
97 Reviews

Rated by 98 customers 


Really Easy 

15 - 30 mins 

Ratings submitted by customers like you who bought this part.   

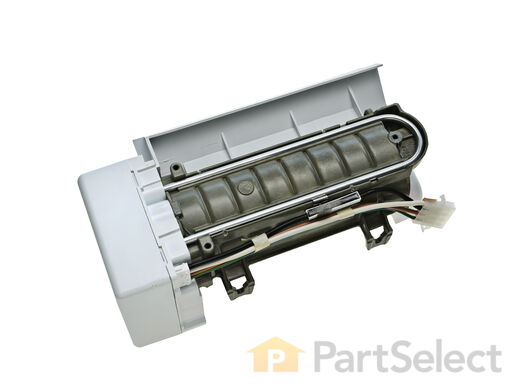
This Ice Maker (Icemaker Assembly, Complete Icemaker Assembly, Ice Maker Assembly, Refrigerator Ice Maker) can be used with 25-27 cubic feet refrigerators that have a vertical auger dispenser located on the freezer door. It’s used to make ice. When this part fails, no ice cubes will be made. It could prevent the icemaker from filling with water or just prevent the harvesting of the ice cubes. This is a sign the part should be replaced. The parts electrical contacts and motor can fail due to normal wear and tear. The icemaker attaches to the ceiling of the freezer compartment. This assembly measures 11 inches by 5 inches, is constructed of plastic and metal, and comes in black/white.

$ 145.08
  In Stock
PartSelect Number PS869316
Manufacturer Part Number 2198597

Replacing your Whirlpool Refrigerator Ice Maker Assembly - 8 Cube

Replacing your Ice Maker Assembly -  8 Cube

Customer Repair Stories

Ice maker quit working

First called the Sears repairman out (big mistake). I was worried it was something with the water line, but he ran some diagnostics and got it working. It did make one batch of ice. Cost $140 for the visit. The "fix" was short lived, since it immediately quit working again. After doing lots of reading online, all I could gather was that the main wheel inside was out of alignment/sync. Sears has a 90-day warranty on repairs, so we called them back. Of course, their warranty only covers their previous repair only, but at least we wouldn't get charged the $55 fee just to have them come out. Second repairman said there was a broken part inside the icemaker assembly, and it would cost over $320 to fix this time ($230 for the part, $70 for labor, plus tax). We politely declined. Found a whole new icemaker assembly from PartSelect for $68. Once it arrived, it was literally just three screws/bolts holding in the entire assembly, unplug the wire chassis, just like a computer motherboard, insert new assembly, plug in wire assembly, put screws back in. Works like a champ...
  • James from Puyallup, WA
  • Difficulty Level:
    Really Easy
  • Total Repair Time:
    15 - 30 mins
  • Tools:
    Nutdriver, Screw drivers
111 of 121 people found this instruction helpful.
Was this instruction helpful to you?
Thank you for voting!

Ice maker stopped functioning

Remove the icemaker service door... gently pry the door pins from the hinge sockets. Remove the 3 screws from the under side of the icemaker with a nut driver (1/4"). Gently remove the icemaker . It's a tight fit between the top of the compartment and the icemaker lower support tray. Next, disconnect the electrical connector at the right side. You're done! Reverse procedure for installing. Good luck. Remember, your working with cold plastic...take your time and don't force too much.
  • Phil from Auberry, CA
  • Difficulty Level:
    A Bit Difficult
  • Total Repair Time:
    15 - 30 mins
  • Tools:
    Nutdriver, Screw drivers
454 of 483 people found this instruction helpful.
Was this instruction helpful to you?
Thank you for voting!
Fixes Symptom 14% of time
★★★★★
★★★★★
12 Reviews

Rated by 70 customers 


Really Easy 

15 - 30 mins 

Ratings submitted by customers like you who bought this part.   

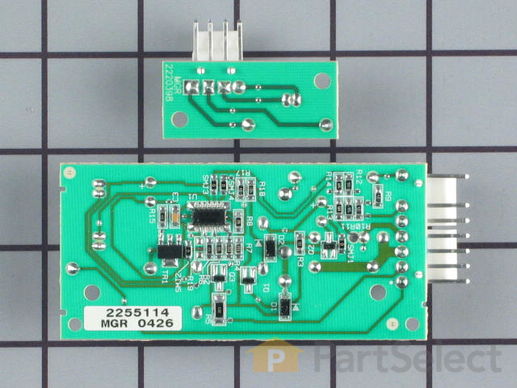
This set of two electronic control boards contains both the emitter and the receiver. These boards tells the icemaker when it's full and that it has to dump the ice, and it also tells the icemaker when to refill with water.

$ 445.12
  In Stock
PartSelect Number PS16875489
Manufacturer Part Number W11629974

Replacing your Kenmore Refrigerator CNTRL-ELEC

Replacing your CNTRL-ELEC

Customer Repair Stories

Ice maker stopped making ice.

I first removed the power cord of the refrigerator from the receptacle. I then removed the screws (3 each) from both the emitter and receiver face plates with a phillips screw driver. I than carefully removed the connector to the each of the circuit boards. A simple pull maneuver. I removed the circuit boards from the face plates. I took the new parts and put them back in reverse order. I put the power cord back in the receptacle.
  • Thomas from Riverside, CA
  • Difficulty Level:
    Really Easy
  • Total Repair Time:
    Less than 15 mins
  • Tools:
    Screw drivers
65 of 70 people found this instruction helpful.
Was this instruction helpful to you?
Thank you for voting!

Ice Maker would not stop making ice.

First, I tested the ice maker "switch" that actually just covers the beam that regulates the ice maker. In the "off" position, it still made ice. Then, I removed the three screws on the cover over the transmitter and disconnected the circuit board at the wire connector. It stopped. After ordering and receiving the new transmitter and receiver boards, I replaced both boards. They are located on either side of the freezer compartment under panels held in place by three screws. Probably saved 150 to 200 bucks.
  • Vince from El Cajon, CA
  • Difficulty Level:
    Really Easy
  • Total Repair Time:
    Less than 15 mins
  • Tools:
    Screw drivers
191 of 214 people found this instruction helpful.
Was this instruction helpful to you?
Thank you for voting!
Fixes Symptom 14% of time
★★★★★
★★★★★
79 Reviews

Rated by 72 customers 


Easy 

15 - 30 mins 

Ratings submitted by customers like you who bought this part.   

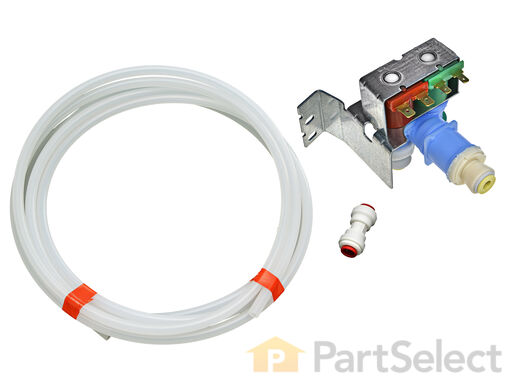
The water inlet valve (Refrigerator Water Inlet Valve Kit) provides water for the ice maker and water dispenser. This part is located at the back of the refrigerator, and connects to the water supply. If your water inlet valve is malfunctioning, you could be getting a lack of water to the inside of your refrigerator. Your ice maker may not produce cubes or your water dispenser may not work. This breakage can occur from material fatigue or normal use, and is a sign the part should be replaced soon. The water inlet valve must be replaced if the solenoids no longer have continuity or the valve has internal blockage. The part measures approximately 6.5 inches long and 3 inches wide and is constructed of plastic and metal. It comes in blue/green/red.

$ 110.34
  In Stock
PartSelect Number PS3497634
Manufacturer Part Number W10408179

Replacing your Whirlpool Refrigerator Water Inlet Valve

Replacing your Water Inlet Valve

Customer Repair Stories

Ice maker would't fill with water

I first read your forum which was extremely helpful! I checked the continuity of the electromagnetic valve and got a 0 reading on the ice fill valve. The valve next to it which is for the water in the door had a 300ohm reading on my meter. This meant there was a broken wire somewhere in the coil which confirmed the valve was bad. I tried to get the part locally but was told it was on back order! Ordered it thru Part Select at the regular shipping rates and to my surprise it arrived the very next day!
The valve was the new style where you push in the tubing until it locks. I carefully trimmed each tube square with a sharp razor knife, the old valve used plastic compression fittings which had to be cut off.One of the inlet tubes was smaller than the opening on the valve. I then noticed that there was a reducer in the box that snapped into place making the line a perfect fit! Even though the inlet valve looked different than the original it was an easy installation. After replacing it, I had ice again! Totally impressed with the service and how quickly they shipped the parts on the same day! I will never again run around town trying to find parts! Thanks to all of the hard working employees at Part Select!
  • Jerry from Cooper City, FL
  • Difficulty Level:
    Easy
  • Total Repair Time:
    30 - 60 mins
  • Tools:
    Nutdriver, Screw drivers
167 of 183 people found this instruction helpful.
Was this instruction helpful to you?
Thank you for voting!

When the remote water was turned on, water was pouring onto floor from rear of refrigerator

First I unplugged the fridge, then using the socket set I removed the cardboard shield from the lower rear of the refrigerator. I located the leaking water from a cracked solenoid water valve just inside the lower cavity directly behind the water intake line. Removing the valve was a snap - most of the valve plastic compression couplings unscrewed and came off. The metal compression fittings required an adjustable wrench and a pair of pliers to hold the solenoid unit steady. A couple of hex nuts kept the solenoid bolted to the refrigerator frame and came off easily with the socket. Two simple push-on electrical plugs came right off just by pulling on them. The new valve unit wasn't exactly like the original one. It had push-on instead of compression water fittings and the plugs were oriented differently. I recommend studying which water lines entered which port on the valve because I was a little unsure after I took the old one apart (whoops). After figuring out how to put it pack together, the push-on water fittings were even easier, and the unit was scewed back into place on the fridge frame. The electric plugs have different sized contacts so you can't mix them up. I put the cardboard shield back on. Viola!
  • Mark from Wolfeboro, NH
  • Difficulty Level:
    Easy
  • Total Repair Time:
    15 - 30 mins
  • Tools:
    Pliers, Socket set, Wrench (Adjustable)
214 of 248 people found this instruction helpful.
Was this instruction helpful to you?
Thank you for voting!
Fixes Symptom 2% of time
★★★★★
★★★★★
8 Reviews

Rated by 26 customers 


Easy 

15 - 30 mins 

Ratings submitted by customers like you who bought this part.   

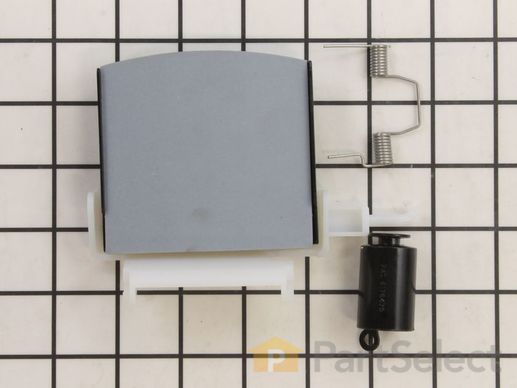
This kit includes the module motor, ejector arm, and ice stripper arm. The complete icemaker is sold separately.

$ 116.11
  In Stock
PartSelect Number PS733947
Manufacturer Part Number 8201515

Replacing your Whirlpool Refrigerator Icemaker Motor Kit

Replacing your Icemaker Motor Kit

Customer Repair Stories

Ice Magic Plus stopped making ice

First I removed the icemaker from the freezer by removing two horizontal screws holding it to the side wall, and one vertical screw holding the front to a bracket coming off the side wall. Then I used a flat screwdriver to unlock the electrical plug. (After doing this, I realized that this wasn't necessary at all, and this part could have been changed just as easily without removing the icemaker.) On the front, there is a white cover with Ice Maker Plus. Use a flat screwdriver to unlock the tangs and remove the cover. There are three screws in the corners that once removed, will allow the motor assy. to be gently pulled straight out. On the back of the part, you will see many gold lands that the timer touches. I don't think there was anything wrong with my motor. I had two spots where the gold plating was worn off, so I suspect it was not making contact, and the whole process would stop. Slide the new part in place making sure the teeth on the gears line up (not a big deal), and secure with the screws. Install cover and you're done. Mine has been making ice like it was brand new.
  • George from Hammond, LA
  • Difficulty Level:
    Really Easy
  • Total Repair Time:
    Less than 15 mins
  • Tools:
    Screw drivers
25 of 35 people found this instruction helpful.
Was this instruction helpful to you?
Thank you for voting!

KITCHEN AID SIDE-BY-SIDE REFRIGERATOR ICE-MAKER stopped working due to a broken motor assembly.

Changing the KITCHENAID MOTOR ASSEMBLY TO THE ICE-MAKER was fairly straightforward. The hardest part was figuring out WHAT was broken and how to fix it. I was determined to save myself hundreds of dollars by doing it myself and avoiding a visit by the 'repairman'.

1.) Went to KitchenAid website to look at Parts List for my side-by-side refrigerator and ice maker assembly (a PDF file, easily downloadable) . The illustrations helped me visualize the assembly and various parts involved.
2.) Removed cover on front of ice maker.
3.) Removed hex-head screw on undersurface of icemaker on the right, which stablilizes a plastic cover for the electrical connector to the ice maker. Once this is off, it's then possible to slide the ice maker out.
4.) Slide the ice maker out from it's 'shelf' in the freezer. You won't be able to completely remove it until you disconnect the power supply.
5.) Disconnect the multi-pin power connector. (It's probably safest to unplug the refrigerator altogether before doing this, but I did not. No exposed metal wiring or connectors. No problems when I did it this way.)
6.) Once the ice-maker was out, remove the white cover from the motor assembly (on the left side of the unit).
7.) Remove the three screws from the black housing of the motor assembly. (This is where I discovered that the connector between the motor and drive-train was broken and needed to be replaced.)
8.) Remove and replace the drive system for the ice cube ejector.
9.) Then reverse the steps to reassemble.

This may seem a bit vague, but it's really quite straightforward once the ice maker is out of the freezer. The replacement motor assembly includes the motor, the motor housing, the drive-train, and the ice-cube ejector. Very easy to re-asemble.

Shopping for and ordering the part took some time since there are so many different after-market parts dealers. In all honesty, I'm glad I decided on PartSelect.com. They had a decent price, safe checkout, and timely delivery. All the essentials of a good online store.

Thanks, and good luck to the next guy who has to deal with a KitchenAid snafu.
  • ANDREW from DURANGO, CO
  • Difficulty Level:
    A Bit Difficult
  • Total Repair Time:
    30 - 60 mins
  • Tools:
    Nutdriver, Screw drivers
56 of 76 people found this instruction helpful.
Was this instruction helpful to you?
Thank you for voting!
Fixes Symptom 2% of time
★★★★★
★★★★★
111 Reviews

Rated by 34 customers 


Really Easy 

Less than 15 mins 

Ratings submitted by customers like you who bought this part.   

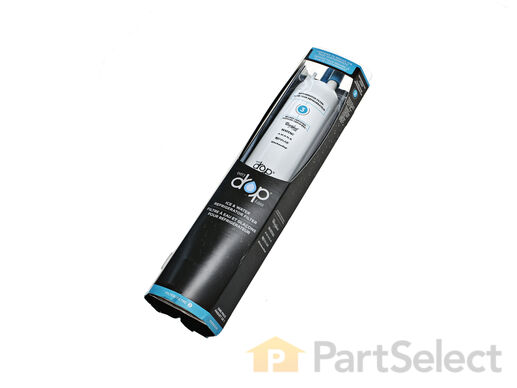
This EveryDrop Filter3 is certified to reduce the most contaminants with Triple Filtration Technology. Now, you and your family can enjoy the enriching benefits of cleaner, freshly filtered ice & water. Not just in beverages, but for preparing meals, too. This advanced generation of ice and water refrigerator filters from EveryDrop Filters are certified to reduce more contaminants with Triple Filtration Technology. Filter 5 reduces 16 contaminants, so you can feel reassured that you and your family are getting the most out of your water. Remember to replace your refrigerator filter every 6 months to maximize contaminant reduction.

$ 76.95
  In Stock
PartSelect Number PS11722128
Manufacturer Part Number EDR3RXD1

Replacing your Whirlpool Refrigerator Whirlpool EveryDrop3 Refrigerator Water Filter

Replacing your Whirlpool EveryDrop3 Refrigerator Water Filter

Customer Repair Stories

six months the light turns red. time to replace filter

First I shut the water off to the refrigerator.then i pushed the big button in the middle of the grille below the refrigerator door. pulled out the old filter, took the front cap off the old filter put it on the new filter. took the two red caps off the new filter. pushed the filter in till it locked in place. all done! Turned the back on.
  • Leroy from Perkiomenville, PA
  • Difficulty Level:
    Really Easy
  • Total Repair Time:
    Less than 15 mins
306 of 384 people found this instruction helpful.
Was this instruction helpful to you?
Thank you for voting!

there were directions

We didn't know where the product went and it was very difficult to install.
  • Kate from Jacksonville, FL
  • Difficulty Level:
    Very Difficult
  • Total Repair Time:
    30 - 60 mins
753 of 1268 people found this instruction helpful.
Was this instruction helpful to you?
Thank you for voting!
Fixes Symptom 2% of time
★★★★★
★★★★★
1 Review

Rated by 6 customers 


Easy 

30 - 60 mins 

Ratings submitted by customers like you who bought this part.   

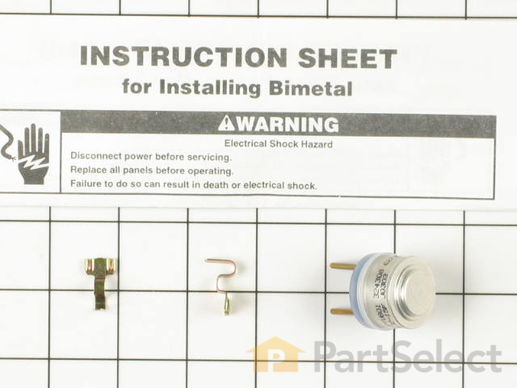
The ice maker thermostat, also known as the cycling thermostat, controls and regulates the ice maker ejection cycle by monitoring the temperature inside the freezer to determine when to release the ice into the bin and start the ice making cycle again. If your ice maker is making unusual noises, or if the ice maker is not making or dispensing ice, there could be an issue with the thermostat. Before you begin this repair, make sure the power is disconnected from your refrigerator, and that any food that may spoil is safely stored. This is an OEM part and is sourced directly from the manufacturer. This thermostat is sold individually, and comes with two attachment clips.

$ 62.09
  In Stock
PartSelect Number PS11743313
Manufacturer Part Number WP627985

Replacing your Kenmore Refrigerator Cycling thermostat

Replacing your Cycling thermostat

Customer Repair Stories

ice maker did not make ice

The ice maker was not getting water. I hotwired the water valve by switching the connectors for the water dispenser and ice maker water valves and water flowed into the icemaker when the water dispenser lever was pushed. I wronly assumed the water valve was good. I removed the icemaker and determined that the gear motor was not getting power in the position the icemaker had stopped.In this position, the thermostat determines when the motor gets power so I replaced the thermostat. The icemaker still would not get water! As it turns out, the water solenoid was sticking due to a deteriorated rubber washer which let the solenoid plunger get too far out of the magnetic field. I replaced the water solenoid assy and all is well. Don't get fooled by hotwiring the valve. If it isn't getting water, the solenoid probably is the culprit.
  • DAVID from TINLEY PARK, IL
  • Difficulty Level:
    A Bit Difficult
  • Total Repair Time:
    30 - 60 mins
  • Tools:
    Nutdriver
47 of 61 people found this instruction helpful.
Was this instruction helpful to you?
Thank you for voting!

No ice in ice trey

The easiest thing to do was pull the ice make off. After taking the 3 screws out of the wall of the freezer, take a screwdriver (flathead) and push on the tab for the electrical plug and wiggle the cord out. Then you can take 3 screws out for the main cover and another 2 screws on the next cover. There's the part, pop it out and replace holding pins and start the process of putting back together the opposite way you took it apart.
  • Wayne from Leesburg, FL
  • Difficulty Level:
    Really Easy
  • Total Repair Time:
    15 - 30 mins
  • Tools:
    Screw drivers, Socket set
78 of 100 people found this instruction helpful.
Was this instruction helpful to you?
Thank you for voting!
Fixes Symptom 1% of time
★★★★★
★★★★★
10 Reviews

Rated by 2 customers 


Easy 

15 - 30 mins 

Ratings submitted by customers like you who bought this part.   

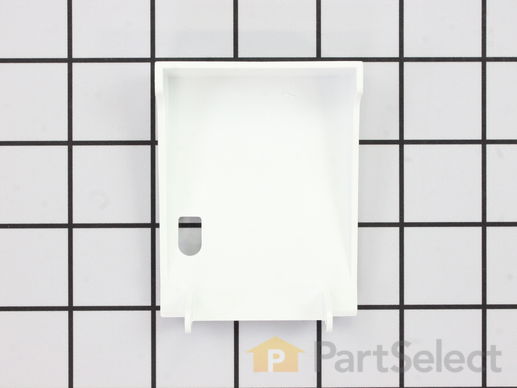
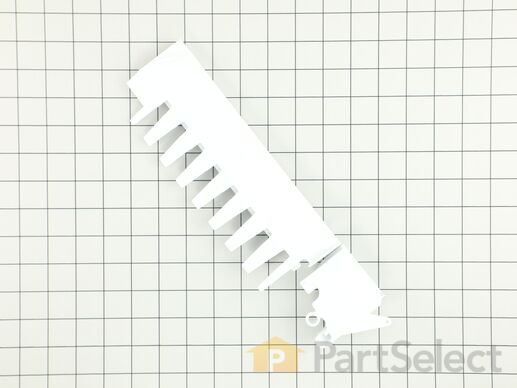
This part is a replacement flipper or emitter cover for your refrigerator. It is made of white plastic and is approximately 3 inches by 2 inches. The flipper shields the emitter control board and houses the flipper cover for the emitter board. If your flipper is broken or missing, your ice maker may not make or dispense ice, and will need to be replaced. This part is sold individually and is an authentic OEM part sourced directly from the manufacturer.

$ 39.20
  In Stock
PartSelect Number PS11739242
Manufacturer Part Number WP2198633

Replacing your Kenmore Refrigerator Flipper

Replacing your Flipper

Customer Repair Stories

Replace ice maker

Remove the door on the icemaker. Remove a screw on the bottom right of the icemaker and remove the bracket. push two small tabs on the bottom to release icemaker and slide out. unclip plugs that are on the wire. To reinstall just do the reverse.
  • Alfred from Jackson, NJ
  • Difficulty Level:
    Really Easy
  • Total Repair Time:
    Less than 15 mins
  • Tools:
    Socket set
Was this instruction helpful to you?
Thank you for voting!

Broken flipper at hinge end

Unscrew the three phillips screws holding the flipper and electric eye unit, pull it out a bit to unplug the connector. Take the assembly over to a flat surface, and use pliers and or crew driver to pry/pull off the press-on retainer on the hinge pin. Pull out hinge pin, remove the broken flipper. Put new flipper in place making sure spring is behind the flipper (holding it open). Reinsert hinge pin, and then reuse the press-on retainer to hold in in place. Then take the repaired assembly back to the freezer, re-plug the plug, and then reinstall the unit using the 3 phillips screws. Easy Peasy.
  • Lawrence B from RAPID CITY, MI
  • Difficulty Level:
    Really Easy
  • Total Repair Time:
    Less than 15 mins
  • Tools:
    Pliers, Screw drivers
9 of 9 people found this instruction helpful.
Was this instruction helpful to you?
Thank you for voting!
Fixes Symptom 1% of time
★★★★★
★★★★★
8 Reviews

Rated by 8 customers 


Easy 

30 - 60 mins 

Ratings submitted by customers like you who bought this part.   

This kit includes the stripper arm and fill cup.

$ 50.37
  In Stock
PartSelect Number PS2378115
Manufacturer Part Number W10297244

Replacing your Kenmore Refrigerator Stripper Arm Kit

Replacing your Stripper Arm Kit

Customer Repair Stories

The icemaker ice stripper arm broke off one side a year ago and the repair guy said we couldn't just replace that part. The other side broke recently and I thought I wold check on the interenet to see if I could find just that part and not pay for a service call and new ice maker.

Sorry I didn't do the repair but my husband did. It took him about an hour and a half. He did have to take the main part of the ice maker out of the fridge and take a couple of pieces off t oslide the tabs from the stripper arm into place. It was great. Fixed the icemaker for $22.00 dollars with no service fee. I can't imagine what they would have charged me.
  • Linda from evansville, IN
  • Difficulty Level:
    A Bit Difficult
  • Total Repair Time:
    1- 2 hours
  • Tools:
    Screw drivers
3 of 4 people found this instruction helpful.
Was this instruction helpful to you?
Thank you for voting!

Ice Maker stripper arm cracked

This was a pretty easy repair...I removed the retaining screws and slid the assembly off its tracks. Disconneting the wiring hardness was a pain but after a few minutes I had that off (use gloves, it gets cold in the freezer after a minute)

Once I had the unit completely out of the freezer the replacement part took only minutes to replace.

Reversed the process putting the ice maker back in - a few hours later my ice buck was full again.

Simple repair - well worth the effort.
  • Mark from Newtown, PA
  • Difficulty Level:
    Easy
  • Total Repair Time:
    15 - 30 mins
  • Tools:
    Screw drivers, Socket set
14 of 16 people found this instruction helpful.
Was this instruction helpful to you?
Thank you for voting!
Fixes Symptom 1% of time
★★★★★
★★★★★
13 Reviews

Rated by 25 customers 


Easy 

30 - 60 mins 

Ratings submitted by customers like you who bought this part.   

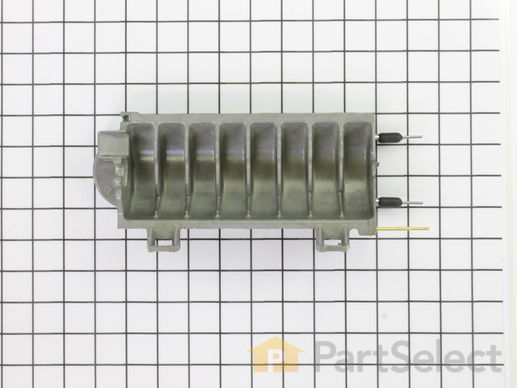
This is an ice maker mold and heater assembly for a refrigerator ice maker. It is used with modular style icemakers and is located in the freezer section of the refrigerator. This ice mold is flake resistant which prevents the coating on the mold from flaking into the ice cubes when the ice mold begins to wear. The ice mold forms the ice cubes and the heater allows the ice cubes to fall from the ice mold to drop them into the ice bucket. You will need to remove the ice maker from the refrigerator to access the mold and heater assembly. This is a genuine replacement part.

$ 165.75
  On Order
PartSelect Number PS11749915
Manufacturer Part Number WPW10190929

Replacing your Kenmore Refrigerator Ice Mold

Replacing your Ice Mold

Customer Repair Stories

The black plastic or teflon coating on the ice mold was coming off in flakes and freezing in the ice cubes

I took out the ice collection box and auger to get access to the three screws holding the ice maker assembly against the left wall of the freezer. You can use a screwdriver or a nut driver. I then unpluged the assembly and wiggled it loose from the water fill tube. I assumed that unplugging the unit would disable the water valve but I put a plastic tub under the fill tube just in case. I studied the assembly on the kitchen table for a few minutes before I disasembled it. After removing a snapon plastick cover I removed three or four screws on the gearbox and was able to pull and wiggle the parts apart. The heater contacts have rubber O rings so you have to be firm pulling the mould out of and into the gearbox mount. Make sure it is fully seated. On reassembly note that the ice kicking arm is notched so it fits into the gearbox only one way and it helps to have it in position when you screw the gearbox back on. I also found the plastic ice guide that fits on top of the mold a little awkward in snaping back together. Make sure its fingers space evenly with the ice kicking arms.
  • Roger from Sunnyvale, CA
  • Difficulty Level:
    Easy
  • Total Repair Time:
    30 - 60 mins
  • Tools:
    Nutdriver, Screw drivers
32 of 42 people found this instruction helpful.
Was this instruction helpful to you?
Thank you for voting!

Ice maker mold was cracked and leaking water into the bin which then froze all the cubes together.

I removed the ice maker assembly from the freezer compartment (four nuts/ nut driver) and unplugged the wire harness. I discovered the nature of the problem and I went on the Internet to look for replacement parts expecting I'd have to buy the entire ice maker. When I found PartSelect.com I looked through the pictures of the parts available for my ice maker. I found the correct part quickly and easily. And having an acurate photo on the site, I was able to match all the key features of the mold I had with the one on the screen. I ordered the part, and installed it the day it arrived with just a Phillips screwdriver and a nut driver. It functions perfectly.
  • George from Cottage Grove, MN
  • Difficulty Level:
    Really Easy
  • Total Repair Time:
    Less than 15 mins
  • Tools:
    Nutdriver, Screw drivers
28 of 30 people found this instruction helpful.
Was this instruction helpful to you?
Thank you for voting!
Fixes Symptom 1% of time
★★★★★
★★★★★
42 Reviews

Rated by 35 customers 


Easy 

30 - 60 mins 

Ratings submitted by customers like you who bought this part.   

In this kit you will find the support, the ice door, spring, and delay. The heater ribbon is no longer needed and therefore will not be included with this part. This kit works in the dispenser chute to let ice through when it is being dispensed. If you have the following symptoms such as: door sweating, difficulty opening or closing door, frost buildup, warm freezer section, or problems with ice dispensing, then this is a solution. The tools needed for this repair are a putty knife, needle nose pliers, and 1/4 inch nut driver. Wear work gloves to protect your hands when performing this repair.

$ 67.11
  In Stock
PartSelect Number PS11723180
Manufacturer Part Number W10823377

Replacing your Whirlpool Refrigerator Ice Door Kit

Replacing your Ice Door Kit

Customer Repair Stories

Warm Air Getting Into Freezer

Patience is a virtue. The kit really works. 1st, lift the front plate of the ice dispencer by placing a flat head screw driver into the two slots at the bottom of the panel. When the panel is lifted up slightly at the bottom, push up on the panel to remove it. Careful not to break panel and the wires attached. Next, remove the wiring panel by removing the two screws on left and right sides. Then, unplug the old black ice cover from the wiring panel (this is the heating plug that you will nolonger need). Next, remove the parts and replace them with the parts in the kit, noting where each part comes from, etc. All parts in the kit are necessary and should be used. Some of the replacements need trial and error. Patience will be important. Also needed is a person that loves to solve problems, especially because the kit does not come with instructions. But the kit definitely works!
  • David from Chesterfield, MO
  • Difficulty Level:
    A Bit Difficult
  • Total Repair Time:
    30 - 60 mins
  • Tools:
    Pliers, Screw drivers, Socket set
109 of 132 people found this instruction helpful.
Was this instruction helpful to you?
Thank you for voting!

where ic e dispencer spring is held to door broke at mold

after ordering ice dispencer repair kit, and removing the outer parts found out that the problem was the ice dispencer door shell . this part is no longer available.It seems to me that if whirlpool wants to have return customers they have to stand behind the product. Well I made a L bracket and drilled a hole to to recieve the spring keeper and glued this to the housing and used a 3 1/12"finishing nail as the pin all works fine
  • helen j from murrells inlet, SC
  • Difficulty Level:
    Really Easy
  • Total Repair Time:
    15 - 30 mins
  • Tools:
    Nutdriver, Pliers, Screw drivers
123 of 142 people found this instruction helpful.
Was this instruction helpful to you?
Thank you for voting!
Fixes Symptom less than 1% of time
★★★★★
★★★★★
404 Reviews

Rated by 114 customers 


Really Easy 

Less than 15 mins 

Ratings submitted by customers like you who bought this part.   

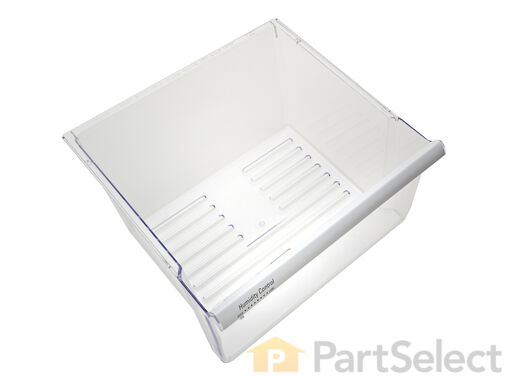
The crisper drawer (Crisper Pan, Refrigerator Crisper Drawer) with humidity control is meant to keep your vegetables and fruit as fresh as possible by allowing you to regulate the humidity levels within the drawer. It attaches on the inside of your refrigerator to the bottom of the crisper shelf. This drawer can break from misuse or accidental damage. It is also subject to material fatigue over time. If broken or damaged, it may be difficult to slide the drawer in and out, and it should be replaced. This plastic drawer measures 14.92 inches long, 7.6 inches high, and 16.5 inches wide and comes in white/clear.

$ 79.63
  In Stock
PartSelect Number PS11739119
Manufacturer Part Number WP2188656

Replacing your Whirlpool Refrigerator Refrigerator Crisper Drawer with Humidity Control

Replacing your Refrigerator Crisper Drawer with Humidity Control

Customer Repair Stories

Drawer guides broken

Simply pulled out old drawer and replaced with new one. This broken drawer really bothered my wife so this simple repair earned me alot of points at home. Lord knows i can use all the extra points i can get. Thanks for the quick shipment of the part. 2 days from time of call to part on my door step. Thanks again
  • Paula from Chesterfield, NJ
  • Difficulty Level:
    Really Easy
  • Total Repair Time:
    Less than 15 mins
316 of 409 people found this instruction helpful.
Was this instruction helpful to you?
Thank you for voting!

track of the pan become broken

Buy a new crisper pan,slide out old one ,slide in new one
  • Darrell from Cedar Bluff, VA
  • Difficulty Level:
    Really Easy
  • Total Repair Time:
    Less than 15 mins
422 of 442 people found this instruction helpful.
Was this instruction helpful to you?
Thank you for voting!
Fixes Symptom less than 1% of time
★★★★★
★★★★★
65 Reviews

Rated by 10 customers 


Really Easy 

15 - 30 mins 

Ratings submitted by customers like you who bought this part.   

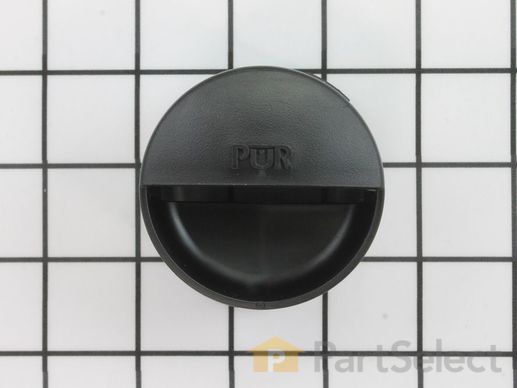
This black cap covers the water filter.

$ 23.81
  In Stock
PartSelect Number PS11739970
Manufacturer Part Number WP2260518B

Replacing your Kenmore Refrigerator Water Filter Cap - Black

Replacing your Water Filter Cap - Black

Customer Repair Stories

Part imediately broke

Dog chewes up the original part. Got the replacement , put it on the filter turned to lock in place and tried tp pull out old filter ( same procedure has been done multiple times successfully) part broke instantly upon putting pressure tom pull out filter. Sent back to you the next day for replacement.
  • STEVE from HUGHESVILLE, MD
  • Difficulty Level:
    Very Difficult
  • Total Repair Time:
    More than 2 hours
21 of 29 people found this instruction helpful.
Was this instruction helpful to you?
Thank you for voting!

Missing the cap on the water filter, made it really hard to replace the filter

Removed the filter and put the cap on the new filter and inserted it as instructed on the filter box. Really easy now that we have the new cap.
  • Pamela from Sacramento, CA
  • Difficulty Level:
    Really Easy
  • Total Repair Time:
    Less than 15 mins
65 of 78 people found this instruction helpful.
Was this instruction helpful to you?
Thank you for voting!
Fixes Symptom less than 1% of time
★★★★★
★★★★★
2 Reviews

Rated by 4 customers 


Easy 

Less than 15 mins 

Ratings submitted by customers like you who bought this part.   

This motor rotates the auger. When the auger rotates, it pushes ice out of the bin, through a chute to the user.

$ 275.97
  In Stock
PartSelect Number PS11723176
Manufacturer Part Number W10822635

Customer Repair Stories

Ice Dispenser Stopped Working after 2 -day Power Failure

I followed the instructions I found on the Web Site. I took off the Ice Container and revealed the two nut screws that had to be removed. The Directions then stated the cover pops off. I pryed up the cover to discover that I was taking off the wrong two nuts. I discovered this after 10 minutes of carefully trying to remove cover and discovered the foam insulation under the cover. I looked lower on the inside of the freezer door and discovered another two nut screws on the underside about a foot under where the ice container sits. Once I took the two nut screws off, the cover came right off and exposed the four nut screws holding the motor in place. I took off the wire to the motor and took the screws off. I then put the washer on the drive shaft, put it in the motor, attached the wire, and replaced the four nut screws. This was very easy, once you knew where the door was. It should be noted that you still needed to take up the two upper nut screws because they uncover the shaft. This is needed to ensure the shaft fits properly in the motor.
  • Philip from Cromwell, CT
  • Difficulty Level:
    A Bit Difficult
  • Total Repair Time:
    15 - 30 mins
  • Tools:
    Nutdriver
21 of 23 people found this instruction helpful.
Was this instruction helpful to you?
Thank you for voting!

Ice crusher dispenser motor burnt out

If you've ever replaced a computer hard drive - you can do this too. I didn't even unload the freezer. It really is about 10-15 minutes of work. I ordered the recommended replacement part - which was a newer part#. It's best to remove the shelf barrier under the ice dispenser assembly (pops off) for ease of access - the motor hatch is a bit awkwardly placed. Removing 2 x 1/4" screw nuts pops off the lower hatch on the underside of the ice dispenser assembly.
Inside, remove the wire connector + 4 x 1/4 nut driver screws and the whole motor is released, while the hex drive shaft remains attached to the dispenser assembly. No sweat so far. The new motor pops in the same way the old one came out - you might need to give the top of the hex drive shaft a twist to align. A powered nut-driver is recommended to do all of this yoga 2 feet off the floor with only 2 hands. Secure the 4 nut screws and reconnect the wire connector and you're almost done. But wait - read the directions and you notice that there's a rubber washer that has been introduced to prevent water leeching into the motor. @$%^ - didn't see that little thing in the shipping box - ok so I get to do this twice... don't make the same mistake. Attach that rubber washer to the hex shaft. Then, reattach the panel with 2 more nut screws and you really are done. Now dispense some fresh ice into that rum & coke. Ahhh.
  • David from Corinth, TX
  • Difficulty Level:
    Easy
  • Total Repair Time:
    Less than 15 mins
  • Tools:
    Nutdriver
46 of 53 people found this instruction helpful.
Was this instruction helpful to you?
Thank you for voting!
15 Seal
Fixes Symptom less than 1% of time
★★★★★
★★★★★
4 Reviews

Rated by 9 customers 


Really Easy 

15 - 30 mins 

Ratings submitted by customers like you who bought this part.   

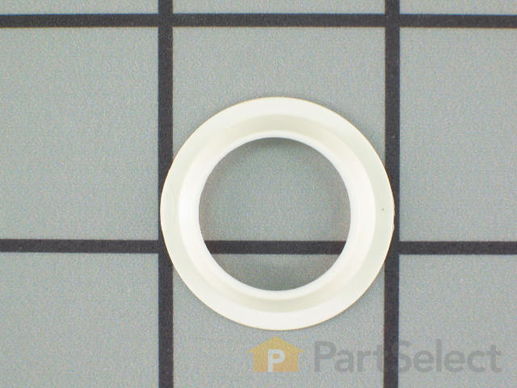
This part is a replacement refrigerator drive shaft seal for your refrigerator. The drive shaft seal protects the auger motor from water and condensation that may leak down the drive shaft from the ice bucket. If the seal is broken, water and condensation can get in, causing the ice maker to fail. To replace the seal, first remove the ice bucket from your freezer. Then remove the two screws on the drive shaft holder, and use a pair of pliers to remove the drive shaft. At this point you can remove the seal from the drive shaft. Be sure to clean the area that the seal sits in before you reinstall the drive shaft. This part is white in color and is about an inch in diameter. The seal is sold individually.

$ 14.58
  In Stock
PartSelect Number PS11739241
Manufacturer Part Number WP2198628
Fixes Symptom less than 1% of time
★★★★★
★★★★★
6 Reviews

Rated by 6 customers 


Really Easy 

15 - 30 mins 

Ratings submitted by customers like you who bought this part.   

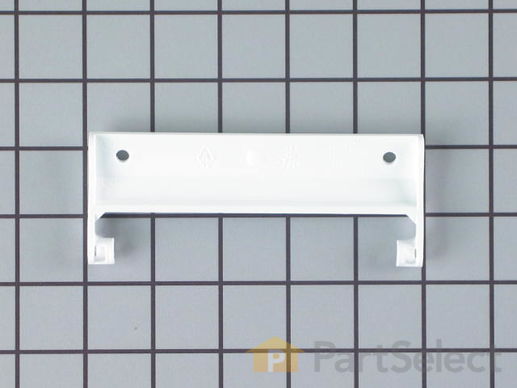
This is the replacement ice maker cover bracket for your refrigerator. It is made of white plastic and is approximately 5 inches wide and 2 inches long. The ice maker cover bracket holds and supports the ice maker cover. If the ice maker cover is loose or missing, you may need to replace the bracket. You will also want to replace the bracket if it will not stay in place, or if it is cracked or broken. To replace the cover bracket, simply remove the ice maker cover, then use a ¼ inch nut driver to loosen and remove the bracket. Screw in the new bracket and replace the cover to complete your repair. This is an OEM part that is sold individually.

$ 7.95
  In Stock
PartSelect Number PS11739245
Manufacturer Part Number WP2198641

Replacing your Kenmore Refrigerator Ice Maker Cover Bracket

Replacing your Ice Maker Cover Bracket

Customer Repair Stories

Ice Maker cocker Bracket broken hinge

Easy repair. Remove 2 hex bolts. And remove.Install Bracket and replace 2 hex bolts and reinstall ice maker door to bracket. 10 minute repair.
  • Louis from PELHAM, NY
  • Difficulty Level:
    Really Easy
  • Total Repair Time:
    30 - 60 mins
2 of 2 people found this instruction helpful.
Was this instruction helpful to you?
Thank you for voting!

broke tab on cover bracket

removed old bracket and replaced with new one - two screws and it was done - simple
  • brian from fresno, CA
  • Difficulty Level:
    Really Easy
  • Total Repair Time:
    Less than 15 mins
  • Tools:
    Nutdriver
8 of 10 people found this instruction helpful.
Was this instruction helpful to you?
Thank you for voting!
Fixes Symptom less than 1% of time

Rated by 3 customers 


Really Easy 

15 - 30 mins 

Ratings submitted by customers like you who bought this part.   

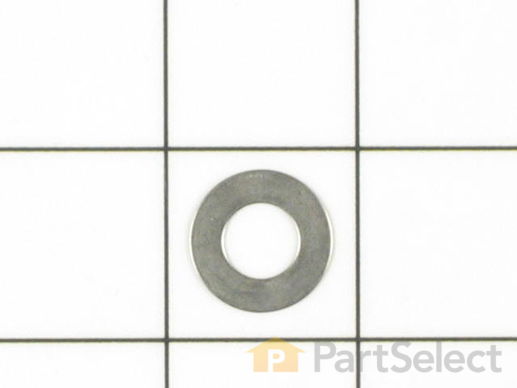
This washer is sold individually.

$ 9.43
  In Stock
PartSelect Number PS11739247
Manufacturer Part Number WP2198661
Fixes Symptom less than 1% of time
★★★★★
★★★★★
60 Reviews

Rated by 48 customers 


Really Easy 

15 - 30 mins 

Ratings submitted by customers like you who bought this part.   

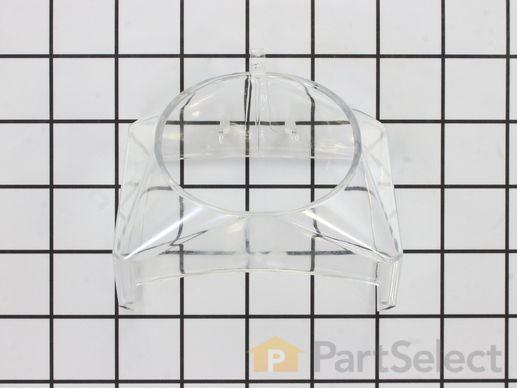
This is a refrigerator ice guide that is made entirely of clear plastic. This ice guide is located in the freezer door. Turn your refrigerator ice dispenser off before replacing the part. This is a simple repair, and the only tool you will need is a small flat blade screwdriver to push on the pivot tab on the bottom of the ice guide. Do not worry about breaking the side or pivot tabs on your existing ice guide because it will be discarded anyway. This is a genuine manufacturer replacement part.

$ 19.46
  In Stock
PartSelect Number PS11739026
Manufacturer Part Number WP2180224

Replacing your Whirlpool Refrigerator Ice Guide

Replacing your Ice Guide

Customer Repair Stories

plastic ice cube guide installed

Mine is a simple tale of the missing ice cube dispensor guide. When we moved, the guide was missing so when I built our new home with a kitchen in the basement I wanted to hook up the ice dispensor but when I did, the ice cubes always fell off to one side. I decided to order the misssing part on-line. I ordered it paid for it and then received it the next day-wonderful. Within ten minutes, I was ready to go. Thanks for great service. Rick Davis, Bloomington, IL.
  • Richard from Bloomington, IL
  • Difficulty Level:
    Easy
  • Total Repair Time:
    Less than 15 mins
15 of 18 people found this instruction helpful.
Was this instruction helpful to you?
Thank you for voting!

External Ice Guide Broke a Tooth and Fell Off

We waited two years to do this because we didn't want to hassle with a repair man to come out and charge us arm+leg for something so simple. Finally we searched and found the part on line. It came two days FASTER than promised. Kudos to Part Select.
Snapping it on was a breeze, although you do have to apply more pressure than feels comfortable with plastic clips. We can know get ice out of the external door system again.
  • Tracy from Jacksonville, FL
  • Difficulty Level:
    Really Easy
  • Total Repair Time:
    Less than 15 mins
170 of 186 people found this instruction helpful.
Was this instruction helpful to you?
Thank you for voting!
Fixes Symptom less than 1% of time
★★★★★
★★★★★
18 Reviews

Rated by 16 customers 


Really Easy 

30 - 60 mins 

Ratings submitted by customers like you who bought this part.   

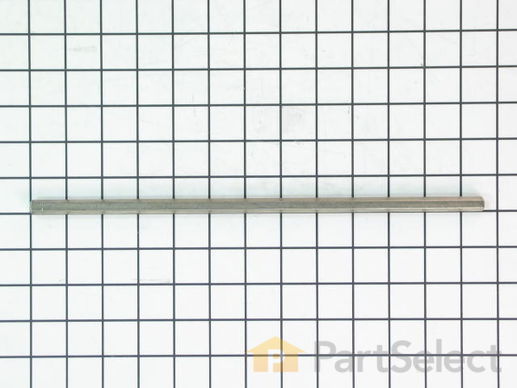
This part is the drive shaft for the auger.

$ 60.45
  In Stock
PartSelect Number PS11739142
Manufacturer Part Number WP2188917

Customer Repair Stories

In door ice dispenser would not dispense ice.

Long shaft from motor to dispenser was stripped. I removed 2 screws from the shaft holder in door, lifted old shaft out, put new shaft in and replaced the 2 screws. Took 2 mins! Works great!
  • Dave from LOGANVILLE, GA
  • Difficulty Level:
    Really Easy
  • Total Repair Time:
    Less than 15 mins
  • Tools:
    Socket set
3 of 3 people found this instruction helpful.
Was this instruction helpful to you?
Thank you for voting!

ice would not drop

removed the shaft that had worn end-replaced with new one- ok now
  • terry from panama city beach, FL
  • Difficulty Level:
    Really Easy
  • Total Repair Time:
    More than 2 hours
  • Tools:
    Nutdriver
46 of 82 people found this instruction helpful.
Was this instruction helpful to you?
Thank you for voting!
Fixes Symptom less than 1% of time

Rated by 1 customer 


Easy 

15 - 30 mins 

Ratings submitted by customers like you who bought this part.   

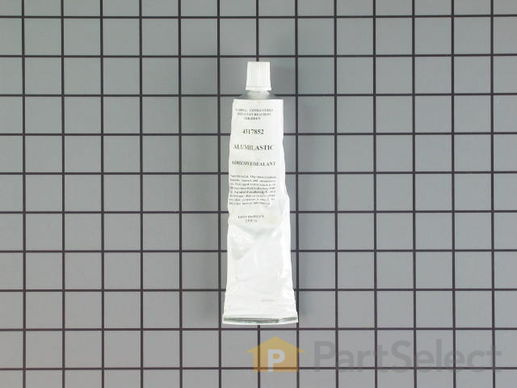
Also known as Alumilastic Cement.

  No Longer Available
PartSelect Number PS11742366
Manufacturer Part Number WP4317852