Models > DDP1375GBM

DDP1375GBM General Electric Dryer - Overview

Sections of the DDP1375GBM

[Viewing 3 of 3]

Manuals & Care Guides for DDP1375GBM

Click to download
Keep searches simple, eg. "belt" or "pump".
D-Shaped Knob Clip – Part Number: WH01X10106
D-Shaped Knob Clip
★★★★★
★★★★★
(28)
PartSelect #: PS268493
Manufacturer #: WH01X10106
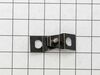
This clip ensures that the knob is securely fastened to the control shaft, allowing you to properly select the correct time and setting for your dryer. If your dryer will not start or shut off, the ti...
$9.01
  In Stock
Order within the next 3 hrs and your part ships today!
Rear Drum Bearing Kit – Part Number: WE25M40
Rear Drum Bearing Kit
★★★★★
★★★★★
(24)
PartSelect #: PS267529
Manufacturer #: WE25M40
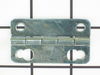
This rear drum bearing kit includes a shaft, ground strap, bearing, seven screws, and installation instructions. The bearing plate comes with a slot in it for the ground strap. This part helps keep yo...
$88.17
  In Stock
Order within the next 3 hrs and your part ships today!
Idler Pulley Wheel – Part Number: WE12X83
Idler Pulley Wheel
★★★★★
★★★★★
(7)
PartSelect #: PS265721
Manufacturer #: WE12X83
A dryer's idler pulley wheel serves to help the belt to rotate the drum.
$34.79
  In Stock
Order within the next 3 hrs and your part ships today!
Door Latch – Part Number: WE1M1011
Door Latch
★★★★★
★★★★★
(14)
PartSelect #: PS3502777
Manufacturer #: WE1M1011
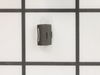
This door latch is designed for your dryer, and is mounted to the dryer frame. The door latch holds the door of your dryer closed while the machine is operating. If your dryer door is not catching on ...
$11.38
  In Stock
Order within the next 3 hrs and your part ships today!
Nut – Part Number: WE2M96
Nut
★★★★★
★★★★★
(1)
PartSelect #: PS267646
Manufacturer #: WE2M96
$9.41
  In Stock
Order within the next 3 hrs and your part ships today!
Door Switch – Part Number: WE4X197
Door Switch
PartSelect #: PS268004
Manufacturer #: WE4X197
This part has three terminals. Note: Use the two smaller terminals for models that only have two wires to the switch.
  No Longer Available
Door Hinge – Part Number: WE1M1033
Door Hinge
★★★★★
★★★★★
(1)
PartSelect #: PS8756812
Manufacturer #: WE1M1033
Screws NOT included.
$8.13
  In Stock
Order within the next 3 hrs and your part ships today!
CLAMP& SCREW – Part Number: WE1X688
CLAMP& SCREW
★★★★★
★★★★★
(1)
PartSelect #: PS267026
Manufacturer #: WE1X688
$21.21
  In Stock
Order within the next 3 hrs and your part ships today!
Screws - 12 per package – Part Number: WZ4X241D
Screws - 12 per package
PartSelect #: PS312570
Manufacturer #: WZ4X241D
Size - 8-18 ab
$20.05
  In Stock
Order within the next 3 hrs and your part ships today!
Screw Kit - Package of 12 – Part Number: WE2X263D
Screw Kit - Package of 12
PartSelect #: PS267704
Manufacturer #: WE2X263D
$12.55
  In Stock
Order within the next 3 hrs and your part ships today!
Rear Bearing Retaining Bracket – Part Number: WE1X461
Rear Bearing Retaining Bracket
PartSelect #: PS267002
Manufacturer #: WE1X461
$53.10
  Special Order
BELT DRIVE – Part Number: WE03X32037
BELT DRIVE
★★★★★
★★★★★
(1)
PartSelect #: PS16729246
Manufacturer #: WE03X32037
$59.20
  In Stock
Order within the next 3 hrs and your part ships today!

Questions And Answers for DDP1375GBM

Be the first to ask our experts a question about this model!

Common Symptoms of the DDP1375GBM

[Viewing 4 of 4]
Noisy
Fixed by
these parts
Fixing Fixing Fixing
Show All
Door won’t close
Fixed by
these parts
Fixing Fixing
Show All
Will Not Start
Fixed by
these parts
Fixing
Show All
Marks left on clothes
Fixed by
these parts
Fixing
Show All
Keep searches simple. Use keywords, e.g. "leaking", "pump", "broken" or "fit".
belt broken, pulley worn out
Removed 4 screws from top of control panel , remove 2 from back to lossen top of dryer. Removed rear lower access cover,6 screws on back of dryer exposing pulley and tensioner, remove broken belt and vaccuumed out a ton of lint , removed pulley and tensioner and replaced. From the front remove 4 screws and take off front of dryer, disconnecting several wires, again vaccumed out lint, lifter drum evough to replace belt. Reassembled
Parts Used:
Idler Pulley Wheel
  • Anthony from Mpls, MN
  • Difficulty Level:
    Easy
  • Total Repair Time:
    1- 2 hours
  • Tools:
    Socket set
68 of 102 people found this instruction helpful.
Was this instruction helpful to you?
Thank you for voting!
worn out drum bearing(squeaky)
If you're dis-assembling the dryer panels to remove the drum to acess the bearing located at the rear of the drum,don't hesitate to buy a idler pulley kit and a belt.It's easier to change them now,while it's apart. besides,their all pretty much in the same state of wear! In lew of prying my son away from the computer,an extra set of hands is a help, I used a scrap piece of 4x4 with a 1 inch whole bored in one side to place the bearing end into to steady it to get the screws started. otherwise you need to have 6ft.arms! re-assembly wasn't bad, a magnetic tipped #3 screw driver eliminates the frustration of dropping panel screws down inside the partially assembled body.
Parts Used:
Nut Rear Drum Bearing Kit Idler Pulley Wheel
  • Warren from Ballston Lake, NY
  • Difficulty Level:
    A Bit Difficult
  • Total Repair Time:
    30 - 60 mins
  • Tools:
    Screw drivers
47 of 66 people found this instruction helpful.
Was this instruction helpful to you?
Thank you for voting!
Squeaking Dryer - Rear Drum bearing gone bad
First, I loosened the the top control panel and then loosened the top flat roof panel which allowed me access to the inside of the dryer. Then, I removed the front panel which allowed access to the drum. I was amazed at the amount of lint that was inside the dryer itself. Most of my time was spent in the disassembly and cleaning of the internal cavity around the drum. I reached below the drum and removed the belt from the pulley wheels and then unscrewed the drum (from the inside) from the back of the dryer and bearing kit. I removed the diffuser and cleaned it thoroughly. Then I replaced the entire drum bearing kit - the old one was almost completely dissentigrated. I probably should have applied some kind of non-flammable lubricant to the new bearing kit - the instructions did not include this step but after about 3 loads a slight squeak (different). I put everything back together - applying the new drum kit will require 2 sets of hands (my 9-year old daughter did great at this). I re-assembled the dryer and it works great, again except for the slight squeak that's still there. I may disassemble it again and apply some lubricant but I do not know what kind to get; I need to check that out.
Parts Used:
Rear Drum Bearing Kit
  • Jason from Cary, NC
  • Difficulty Level:
    A Bit Difficult
  • Total Repair Time:
    More than 2 hours
  • Tools:
    Screw drivers, Socket set
32 of 35 people found this instruction helpful.
Was this instruction helpful to you?
Thank you for voting!