This an authentic OEM 40-Watt replacement light bulb, used in a number of household appliances. It is specially designed to withstand extreme temperatures, which is why these replacement bulbs are mos...
This is a multi-use and multi-appliance screw. It can be used on a microwave, refrigerator, range/oven, air conditioner, dehumidifier, washer, or dryer. The measurements of this screw are 8 x 1/2 inch...
Sold individually. This bulb is a 7-watt appliance incandescent light bulb. This appliance light bulb is two inches long. It is used for many clothes dryers. You will need a Phillips screwdriver and n...
The compression nut is used as a connection between the water supply line and other components in your refrigerator such as your ice maker and your water dispenser. Tools required for this repair incl...
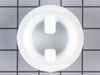
This drive ring is three inches in diameter. It is all white in color and is made of plastic. This ring is used with a refrigeraor's icemaker assembly.
This inlet hose washer, also known as a high pressure inlet hose washer, is used in washing machines, refrigerators, freezers, and dishwashers. The function of this part is to create a watertight seal...
This part supplies water to refrigerator components that require water, such as the ice maker and water dispenser. If you notice a leak coming from your refrigerator, the plastic tubing that feeds you...
This double outlet water valve has a treaded outlet connection, and comes with all of the necessary screws, fittings, and brackets needed to make this valve compatible.
No Longer Available
Questions And Answers for CDNS24T9
Be the first to ask our experts a question about this model!
✖
Ask a Question
Ask our experts a question on this model and we'll respond as soon as we can.
Removed the rubber cover over the actuator switch. Used a screwdriver to remove the switch, disconnected the wires. I then removed the switch from the mounting bracket using a small philips head screw driver. Installed the new switch on the mounting bracket then installed the switch onto the freezer door. The only difficult part was
... Read moreinstalling the rubber cover. Now I just need to repair the damage to my hardwood floors and carpet from all the water.
This was an easy fix. The old one had cracked probably from the frige being left out in cold weather. Just remove the back cover. Unscrew the water line and two plastic lines and unplug the two plugs. Then remove a single screw that holds the valve in place and put on the new one and reattach everything. Good idea to recut the ends o
... Read moref the tubing to remove old crimp.
Removed the ice bucket from the freezer. Removed the single screw on the left side with a nut driver, then lift and pull the tray toward you...there is a wiring harness in back of the tray that I had to unplug...easy, pinch the sides of the plastic connector and it disconnects..and the tray came out of the refrigerator...and the cussing s
... Read moretarted. Since the threaded yoke was stripped it could not be unscrewed from the motor shaft...I took my trusty Dremel Tool and cut the shaft off so the yoke could be separated from the motor shaft and the motor could be removed from the plastic housing. From here on it was a piece of cake...install the new motor and screw the new yoke onto the motor shaft... I think it has a left handed thread, like the old propane bottles used to have..slide the tray back in, reconnect the wiring harness (it only plugs in one way), make sure the tray is sitting on the 4 side supports, put the single screw on the left side and you are done....put the ice bucket back in and flip the bail down and you should be back on business....!!