


Models
>
19885(1988)
19885(1988) Kenmore Dishwasher - Overview
Sections of the 19885(1988)
[Viewing 12 of 12]
Keep searches simple, eg. "belt" or "pump".

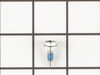
Hose Clamp
PartSelect #: PS11740613
Manufacturer #: WP285655
The hose clamp is used to hold the water hose in place which will prevent the hose from leaking water. Sometimes the clamp may lose its ability to latch on, causing a leaking washer. For the installat...
$11.10
In Stock

Float Switch
PartSelect #: PS11747680
Manufacturer #: WP99002560
Water that fills your dishwasher lifts this float. When it reaches a certain level, the float triggers the float switch to shut off, thereby shutting off the flow of water into the dishwasher.
$55.39
In Stock


Detergent Cup with Gasket
PartSelect #: PS2097055
Manufacturer #: 901839
This assembly comes with bi-metal.
No Longer Available


Detergent Cup Cam and Spring Kit
PartSelect #: PS1660445
Manufacturer #: 902247
An actuator connected to the timer is lifted by the cam and releases the detergent dispenser. There is a spring that holds the actuator tight against the cam, if the spring is broken the dispenser ca...
No Longer Available

SCREW----NA (PART NOT USED-DE
PartSelect #: PS11757545
Manufacturer #: WPY313561
$5.36
Special Order

Shaft Seal
PartSelect #: PS1660137
Manufacturer #: 900202
This part is found underneath the drain impeller and in the pump housing assembly of your dishwasher. Helps keep your dishwasher from leaking between the motor and the pump.
$10.17
In Stock


Questions And Answers for 19885(1988)
We're sorry, but our Q&A experts are temporarily unavailable.
Please check back later if you still haven't found the answer you need.
Common Symptoms of the 19885(1988)
[Viewing 6 of 6]Leaking
Fixed by
these parts
these parts


Show All
Will not fill with water
Fixed by
these parts
these parts
Show All
Not draining
Fixed by
these parts
these parts
Show All
Will not dispense detergent
Fixed by
these parts
these parts

Show All
Will Not Start
Fixed by
these parts
these parts
Show All
Noisy
Fixed by
these parts
these parts
Show All

Keep searches simple. Use keywords, e.g. "leaking", "pump", "broken" or "fit".
Detergent Cup would not open during wash cycle
This repair is very simple. Partselect.com sells a repair kit for this problem that you can use but for simplicity the entire unit is not that much more. First remove the four outside lower philips head screws on the inside of your dishwasher door. Support outer door panel while removing screws. This will remove the outer door panel to ga
... Read more
in access to the detergent cup. Remove panel by pulling out bottom first then slightly pulling downward. You will then see the detergent cup. Unplug the two leads that are connected to the unit keeping in mind their orientation. Remove the five screws that hold the detergent cup in place. Remove the cup assembly and gasket. Clean gasket area and install new cup and gasket. Reinstall five screws (do not overtighten) and plug leads back in. To reinstall door panel position door panel at a slight angle and install top first sliding upward into place under control panel then push inward at bottom. Reinstall the four philips head screws on the inside and you are finished. The complete repair will take you less than 30 minutes.
Read less
Parts Used:
-
Robert from Taylor, MI
-
Difficulty Level:Really Easy
-
Total Repair Time:15 - 30 mins
-
Tools:Nutdriver, Screw drivers
17 of 17 people
found this instruction helpful.
Was this instruction helpful to you?
Thank you for voting!
Detergent Cup did not work
I would recommend getting the entire unit. I could have replaced the electrical component only, but the other parts were deteriorating.
I removed the 4 screws in the lower side of the door and removed the front.
I lossened the 6 screws holding the detergent cup. This was done with a small hex wrench.
I r ... Read more eplaced the dispenser and connected the wires back onto the electrical sensor.
I put the front back on the door and tested the repair. Worked fine
I will be replacing the door gasket next. I found evidence of leakage when I removed the front of the door to replace the detergent cup.
Read less
Parts Used:
-
Reavis from Asheville, NC
-
Difficulty Level:Easy
-
Total Repair Time:15 - 30 mins
-
Tools:Screw drivers, Socket set
6 of 6 people
found this instruction helpful.
Was this instruction helpful to you?
Thank you for voting!
DIshes not getting clean. Cover of detergent cup sticking half way.
After nearly 20 years of use (and no service) my Maytag dishwasher stopped getting dishes clean. I called Maytag and they made me an appointment with a nearby service center. The Maytag person also suggested I do a run with an open container in the dishwasher filled with a couple of cups of white vinegar – since that dissolves the white
... Read more
scale buildup from hard water. That helped a lot. Yay Maytag!
I had 5 days to wait for service, so I started Googling. I found very negative reviews of my local service center, but I also learned that I could buy a replacement detergent dispenser online and I found excellent simple instructions for installing it. It arrived in two days and I installed it. The hardest part was removing the front panel of the dishwasher to get access and supporting it while taking out the last couple of screws – then holding it in place afterwards while putting the screws back in. I recommend having a second pair of hands!
I also realized that the two rotating spray arms (at the bottom and at the top) weren’t rotating! They’re easy to remove (just unscrew the center component), and I found that many of the holes were clogged – including all the ones pointing sideways that make them spin. I had to force water inwards through the holes to dislodge the debris, then I filled the arms with water through the center hole and sloshed it around to clear things out. That worked. I put it back together – and the dishwasher is now as good as new!
For good measure I took the cover off the strainer in the bottom to clean it, but surprisingly the strainer was almost completely clean.
I cancelled the service appointment, of course. I’m sure I saved a lot of $$$.
I had read that recently mandated reformulation of dishwasher detergent with lower phosphate content makes it less effective – but I’m not seeing that: a little simple maintenance and my dishes are 100% squeaky clean again!
Read less
Parts Used:
-
Paul from Summit, NJ
-
Difficulty Level:Easy
-
Total Repair Time:30 - 60 mins
-
Tools:Screw drivers, Socket set
4 of 4 people
found this instruction helpful.
Was this instruction helpful to you?
Thank you for voting!