Kelvinator Refrigerator Parts
Find your part
Enter your model number or a part number and click "Search"
Popular Kelvinator Refrigerator Parts
Your Price
$19.25
In Stock
Light Bulb
PartSelect Number PS12751166
Manufacturer Part Number 316538904
This OEM 40 watt appliance light bulb is used for some ranges, refrigerators, freezers, and microwaves. Simply locate the existing bulb, unscrew it from its socket, and replace with new light bulb. If the existing bulb is broken in the socket, disconnect the power to the refrigerator and use a pair of needle nose pliers to grip the internal fragments of the bulb to unscrew. Replace with the new bulb and reconnect the power to the refrigerator. These bulbs are sold individually and are a commonly replaced part; consider ordering a spare.
Installation Instructions
Colin from Hollis, NY
Ice-Maker and Water Dispenser not working.
First I disconnected the power cord, then removed the screws that held the bracket that holds the base for the water-filer in place. I then disconnected the water lines(intake and outflow). Next I removed the screws that held the water-filter's base in place. I then disconnected the release lock mechanism for the filter and finally removed the water-filter base. I did the reverse to install the new water-filter base. Previously I had tested the intake water line and noticed the water was flowing with enough pressure upto the water-filter's base but no water was exiting thru the outflow line, which leads to the Ice-Maker and Dispenser. I had tried changing the filter but that didn't solve the problem it was then I had realized that the Base was the problem. The actual problem was the spring-loaded valves for both the intake and outflow lines, which had a plastic prong that protrudes out of the base that is triggered by the filter when installed. The two prongs were worn-down so the filter wasn't activating the spring-loaded release valve to let the water thru. As for the light, I just unscrewed it.
Read more...
Your Price
$37.70
In Stock
Defrost Timer - 60Hz 120V
Pulled plug.
Had to remove bottom drawers then used nut driver to remove screws closest to back wall in drawer runners. Once the back screws were removed the runners could be swung up or down out of way so back cover could be removed.
Once back cover was removed thermostat was located attached to top pipe going into coil using a spring clamp.
Cut the wires just outside the crimp connectors going into thermostat. Released the spring clamp buy squeezing botton together.
Removed old badly corroded thermostat.
I wish I had attached the crimp connectors to the new thermostat wires before mounting it. Reaching way in the back, while turning shoulders verticly and trying to get the wire connectors set from both sides was awkward and uncomfortable...The biggest PIA of the whole task.
Once connected I let the fridge (thermostat) cool for 10 min. Turned the dial defrost timer to get it into defrost mode. Stupidly touched the heating element to see if it was getting warm...it was very hot.
Coils steamed...every looked like it was working. Unplugged, put back cover back on and retattached drawer mounts.
Plugged back in and everying is working great! Read more...
PartSelect Number PS423801
Manufacturer Part Number 215846602
This Defrost Timer works like a clock by switching on the defrost heater circuit after a predetermined amount of compressor run time. This allows the defrost circuit to clear the evaporator of ice or frost to maintain proper airflow. The defrost timer is located in the control housing which is in the refrigerator section of your appliance. If this part is not working, it can lead to temperature increases in your refrigerator. If the compressor circuit fails, no cooling will take place; if the defrost circuit isn't activated, ice will quickly build up on the evaporator coils and reduce airflow and efficiency. If the timer doesn't advance or if the contacts have no continuity, the timer will need to be replaced. This timer measures approximately 3 inches long and 2.5 inches wide, and is constructed of plastic and metal. It comes in black/white/silver and is sold individually. This replacement part features 1 defrost timer.
Fixes these symptoms
- Freezer not defrosting
- Freezer section too warm
- Freezer too cold
- See more...
Installation Instructions
Stephen from Warrington, PA
Fridge got warm and freezer coils were frosted
Fridge is a side by side. The freezer is pretty narrow for a guy with wide shoulders. Pulled plug.
Had to remove bottom drawers then used nut driver to remove screws closest to back wall in drawer runners. Once the back screws were removed the runners could be swung up or down out of way so back cover could be removed.
Once back cover was removed thermostat was located attached to top pipe going into coil using a spring clamp.
Cut the wires just outside the crimp connectors going into thermostat. Released the spring clamp buy squeezing botton together.
Removed old badly corroded thermostat.
I wish I had attached the crimp connectors to the new thermostat wires before mounting it. Reaching way in the back, while turning shoulders verticly and trying to get the wire connectors set from both sides was awkward and uncomfortable...The biggest PIA of the whole task.
Once connected I let the fridge (thermostat) cool for 10 min. Turned the dial defrost timer to get it into defrost mode. Stupidly touched the heating element to see if it was getting warm...it was very hot.
Coils steamed...every looked like it was working. Unplugged, put back cover back on and retattached drawer mounts.
Plugged back in and everying is working great! Read more...
Your Price
$46.66
In Stock
Evaporator Fan Blade
2. Remove the back panel. The evaporator motor and fan are located above the coils.
3. Unplug the wiring harness.
4. Remove the two gold mounting screws holding the motor and fan in place.
5. Remove the motor and fan including the brackets.
6. Install the new motor and fan onto the mounting bracket.
6a. Attach the green ground to the mounting bracket.
7. Screw the two gold screws back into the freezer.
8. Attach the new wiring harness. Note, the old harness had a mounting hole/space for it to connect to the wiring harness of the freezer. The new motor's harness was not long enough for this, so it is connected freely to the freezer harness.
9. Use the hair dryer to melt any ice that may have formed on the coils and hole where the fan goes.
10. Turn the freezer on to see if the fan turns on.
11. Reinstall the back panel.
All done! Read more...
PartSelect Number PS473177
Manufacturer Part Number 5308000010
This evaporator fan blade is a genuine OEM part that is sourced directly from the manufacturer. The evaporator fan blade circulates air through the refrigerator to control the amount of cold air goes that goes to internal compartments of the unit. It may need to be replaced if the fridge is noisy or not cold enough. This part is made of plastic and is sold individually. It will be necessary to disconnect power to the refrigerator and empty the freezer compartment of the refrigerator. The tools needed to complete this repair are a 1/4 inch nut driver and a pair of needle nose pliers.
Fixes these symptoms
- Fridge too warm
- Noisy
- See more...
Installation Instructions
Jordan from Maumee, OH
Noisy fan
1. Removed the 7 nuts using the nut driver from the freezer back panel inside the freezer.2. Remove the back panel. The evaporator motor and fan are located above the coils.
3. Unplug the wiring harness.
4. Remove the two gold mounting screws holding the motor and fan in place.
5. Remove the motor and fan including the brackets.
6. Install the new motor and fan onto the mounting bracket.
6a. Attach the green ground to the mounting bracket.
7. Screw the two gold screws back into the freezer.
8. Attach the new wiring harness. Note, the old harness had a mounting hole/space for it to connect to the wiring harness of the freezer. The new motor's harness was not long enough for this, so it is connected freely to the freezer harness.
9. Use the hair dryer to melt any ice that may have formed on the coils and hole where the fan goes.
10. Turn the freezer on to see if the fan turns on.
11. Reinstall the back panel.
All done! Read more...
Your Price
$81.42
In Stock
Evaporator Fan Motor Kit
2. Remove the back panel. The evaporator motor and fan are located above the coils.
3. Unplug the wiring harness.
4. Remove the two gold mounting screws holding the motor and fan in place.
5. Remove the motor and fan including the brackets.
6. Install the new motor and fan onto the mounting bracket.
6a. Attach the green ground to the mounting bracket.
7. Screw the two gold screws back into the freezer.
8. Attach the new wiring harness. Note, the old harness had a mounting hole/space for it to connect to the wiring harness of the freezer. The new motor's harness was not long enough for this, so it is connected freely to the freezer harness.
9. Use the hair dryer to melt any ice that may have formed on the coils and hole where the fan goes.
10. Turn the freezer on to see if the fan turns on.
11. Reinstall the back panel.
All done! Read more...
PartSelect Number PS450319
Manufacturer Part Number 5300158289
The evaporator fan motor kit is specifically made for your refrigerator to run the evaporator fan in your refrigerator. It is mounted on the center hub and has three lead wire terminals; its shaft has a diameter of 1/8 inches and is 1-1/4 inches long. The function of the evaporator fan motor is that it supplies air to the evaporator coils which then circulate cool air throughout your refrigerator, efficiently keeping your fresh food compartment cold. The tools you will need for this installation include a 1/4 inch nut driver, and a pair of wire strippers. Keep your hands protected during this repair by wearing work gloves.
Fixes these symptoms
- Freezer section too warm
- Fridge too warm
- Noisy
- See more...
Installation Instructions
Jordan from Maumee, OH
Noisy fan
1. Removed the 7 nuts using the nut driver from the freezer back panel inside the freezer.2. Remove the back panel. The evaporator motor and fan are located above the coils.
3. Unplug the wiring harness.
4. Remove the two gold mounting screws holding the motor and fan in place.
5. Remove the motor and fan including the brackets.
6. Install the new motor and fan onto the mounting bracket.
6a. Attach the green ground to the mounting bracket.
7. Screw the two gold screws back into the freezer.
8. Attach the new wiring harness. Note, the old harness had a mounting hole/space for it to connect to the wiring harness of the freezer. The new motor's harness was not long enough for this, so it is connected freely to the freezer harness.
9. Use the hair dryer to melt any ice that may have formed on the coils and hole where the fan goes.
10. Turn the freezer on to see if the fan turns on.
11. Reinstall the back panel.
All done! Read more...
Your Price
$41.43
In Stock
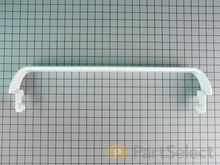
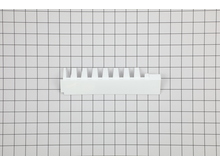
Door Shelf Retainer Bar
PartSelect Number PS734935
Manufacturer Part Number 240534901
This door shelf retaining bar, also known as refrigerator door bar retainer or fridge door rack, is a genuine part sourced from the original manufacturer. It is a white This manufacturer-certified Door Shelf Retainer Bar, sometimes otherwise known as the door rack or bar retainer, is a white, plastic part which can be easily installed onto the inside of the refrigerator or freezer door to hold items on the door shelves. It holds items in your fridge and will show physical damage if broken or warped, at which time it should be replaced. Check your user manual and model number to see if this part is right for you. No tools are required for this installation, the part should simply snap into place. This part measures roughly 25 inches wide, 3 inches high, and 5 inches deep. This part is sold individually, and we recommend checking the other door shelf retaining bars on your refrigerator or freezer at the same time as ordering this part to ensure that no others need to be replaced, as they often wear or warp at similar speeds.
Fixes these symptoms
- Door won’t open or close
- Leaking
- See more...
Installation Instructions
Cynthia from Long Beach, CA
The retainer door shelf broke 3 years ago
I just snapped the new shelves in place and !voila! I should've done this years ago.
Read more...
Your Price
$30.52
In Stock
Defrost Thermostat
Pulled plug.
Had to remove bottom drawers then used nut driver to remove screws closest to back wall in drawer runners. Once the back screws were removed the runners could be swung up or down out of way so back cover could be removed.
Once back cover was removed thermostat was located attached to top pipe going into coil using a spring clamp.
Cut the wires just outside the crimp connectors going into thermostat. Released the spring clamp buy squeezing botton together.
Removed old badly corroded thermostat.
I wish I had attached the crimp connectors to the new thermostat wires before mounting it. Reaching way in the back, while turning shoulders verticly and trying to get the wire connectors set from both sides was awkward and uncomfortable...The biggest PIA of the whole task.
Once connected I let the fridge (thermostat) cool for 10 min. Turned the dial defrost timer to get it into defrost mode. Stupidly touched the heating element to see if it was getting warm...it was very hot.
Coils steamed...every looked like it was working. Unplugged, put back cover back on and retattached drawer mounts.
Plugged back in and everying is working great! Read more...
PartSelect Number PS469269
Manufacturer Part Number 5303917954
This limiter thermostat cuts out when the temperature inside your refrigerator reaches 55 degrees Fahrenheit and kicks back in when the internal temperature drops to 20 degrees Fahrenheit. If you discover temperature issues with your refrigerator or freezer, the defrost thermostat may need to be replaced. You will need tools for this repair, including a 1/4-inch nut driver, a pair of wire strippers, and a heat gun. Be sure to disconnect power to the refrigerator before completing this repair. The defrost thermostat is located behind the back panel of your side-by-side refrigerator/freezer. You will first need to remove the panel and take the defrost thermostat out to complete the repair.
Fixes these symptoms
- Freezer not defrosting
- Freezer section too warm
- Freezer too cold
- See more...
Installation Instructions
Stephen from Warrington, PA
Fridge got warm and freezer coils were frosted
Fridge is a side by side. The freezer is pretty narrow for a guy with wide shoulders. Pulled plug.
Had to remove bottom drawers then used nut driver to remove screws closest to back wall in drawer runners. Once the back screws were removed the runners could be swung up or down out of way so back cover could be removed.
Once back cover was removed thermostat was located attached to top pipe going into coil using a spring clamp.
Cut the wires just outside the crimp connectors going into thermostat. Released the spring clamp buy squeezing botton together.
Removed old badly corroded thermostat.
I wish I had attached the crimp connectors to the new thermostat wires before mounting it. Reaching way in the back, while turning shoulders verticly and trying to get the wire connectors set from both sides was awkward and uncomfortable...The biggest PIA of the whole task.
Once connected I let the fridge (thermostat) cool for 10 min. Turned the dial defrost timer to get it into defrost mode. Stupidly touched the heating element to see if it was getting warm...it was very hot.
Coils steamed...every looked like it was working. Unplugged, put back cover back on and retattached drawer mounts.
Plugged back in and everying is working great! Read more...
Your Price
$49.15
In Stock
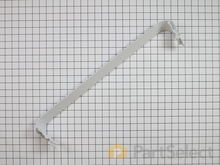
Door Shelf Retainer Bar
PartSelect Number PS734936
Manufacturer Part Number 240534701
The Door Shelf Retainer Bar, also known as a refrigerator door rack, is a white, plastic part which can be easily installed onto your fridge door. It holds items in your fridge and will show physical damage if broken, at which time it should be replaced. Check your user manual and model number to see if this part is right for you. To install this part, you will need to remove the old one by unlocking the tabs, which can be slid with your fingers. To install the new shelf, line it up with the shelf cut-outs, over the tabs, and gently press it down to lock it into place. This part generally fits the middle door shelf of refrigerators. This is a part that frequently requires multiple parts per refrigerator. Because it is sold individually, you will need to purchase as many door racks as necessary to complete your repair.
Fixes these symptoms
- Door won’t open or close
- See more...
Installation Instructions
Lannie from Buffalo, WY
door rack was broken
pulled broke rack off, snapped new one in place. Yeah!! No more broken jars on the floor.
Read more...
Your Price
$49.10
In Stock
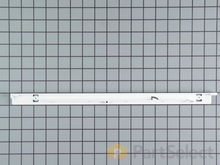
Drawer Support Rail - Right Side
PartSelect Number PS430917
Manufacturer Part Number 240530701
This manufacturer-certified drawer support rail supports the right side of the sliding drawer. It is a track that helps the drawer slide open and closed with ease. If you are having trouble opening or closing your fresh food drawer, check the support rails for any blockage, or visible damage. If the rail is damaged, it should be replaced to ensure no further damage is done to the drawer itself. The repair is straightforward: unscrew and remove the existing support rail, then fasten the new rail in place. This genuine OEM replacement part is made of plastic and is white in color. NOTE: This part is sold separately from the left side drawer support rail. The part measures approximately 16 inches long by 1 inch high.
Fixes these symptoms
- Door won’t open or close
- See more...
Installation Instructions
Jane from Owosso, MI
broken refrigerator door shelves
snapped right on and removed screws, insert and replace screws.
Read more...
Your Price
$108.45
In Stock
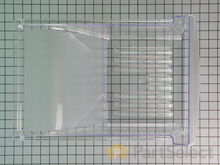
Refrigerator Crisper Pan
PartSelect Number PS429854
Manufacturer Part Number 240337103
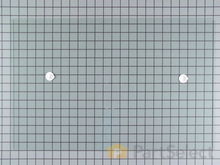
This manufacturer-certified Refrigerator Crisper Pan is a clear plastic pan which easily inserts into your fridge's crisper area in order to hold items. In some models of refrigerator this model is the same pan for both the meat and vegetable bins, but please note that this part is sold individually and not part of a complete kit. If broken then the part should be replaced. Refer to your user manual and model number to see if this crisper is right for your fridge. This bin measures approximately 11 inches deep and 22 inches long.
Fixes these symptoms
- Door won’t open or close
- Leaking
- See more...
Installation Instructions
Melody from Hammond, IN
pan-crisper broke / drawer support rail broke
pan-crisper pan was easy because is just slide in. the drawer support rail just took a screwdriver to unscrew the screw and replace it with new rail and put the screw back in. The thing I like the best is the fast service of the parts to me.
Read more...
Your Price
$47.10
In Stock
Drawer Support Rail - Left Side
PartSelect Number PS430916
Manufacturer Part Number 240530601
This drawer rail supports the left hand side of the sliding drawer.
Fixes these symptoms
- Door won’t open or close
- See more...
Installation Instructions
Jane from Owosso, MI
broken refrigerator door shelves
snapped right on and removed screws, insert and replace screws.
Read more...
Appliance Type
- Kelvinator Air Conditioner Parts
- Kelvinator Dehumidifier Parts
- Kelvinator Dishwasher Parts
- Kelvinator Dryer Parts
- Kelvinator Freezer Parts
- Kelvinator Parts
- Kelvinator Range Parts
- Kelvinator Washer Parts
Related Parts
- Kelvinator Refrigerator Compressors
- Kelvinator Refrigerator Door Shelves
- Kelvinator Refrigerator Drawers and Glides
- Kelvinator Refrigerator Hardware
- Kelvinator Refrigerator Hinges
- Kelvinator Refrigerator Seals and Gaskets
- Kelvinator Refrigerator Switches
- Kelvinator Refrigerator Thermostats
- Kelvinator Refrigerator Trays and Shelves
Popular Kelvinator Refrigerator Models
Below are the most popular Kelvinator Refrigerator models we have. Enter your model number in the search box to find your model.
- KRS220RHY2
- KRS220RHY3 REFRIGERATOR
- KRS220RHY0
- KATR1816MS1
- KRS221LHY2
- KGM220RHY3
- KRS220RGW0
- KATR1816MW1
- KATR1816MS0
- TSK140EN4V Top Freezer, Top Mount
- KRS221LGW1
- KGM220RHY1
- KRS221LHY0
- KRT18CRAW0 Top Freezer, Top Mount
- KRS220RHY1
- KATR1816MW7 REFRIGERATOR
- TSK140EN5F Top Freezer, Top Mount
- TPK140EN4D Top Freezer, Top Mount
- TSK140EN0D Top Freezer, Top Mount
- TPK160EN4D Top Freezer, Top Mount