Electrolux Parts

Electrolux Appliance Parts

Popular Electrolux Parts

Your Price
$11.88
   In Stock
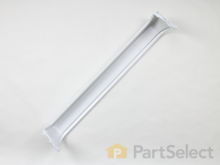
Electrolux Crisper Cover Support - Front
★★★★★
★★★★★
78 Reviews
PartSelect Number PS2358880
Manufacturer Part Number 241993101
This crisper cover front support is used to keep the crisper shelf in place and may need replacing if the door will not open or close. This white, OEM part measures roughly 1 inch in diameter and can be used for the front and the rear support, as designed by the manufacturer, and mounts to the inside cabinet wall. Replacing this part is an easy repair, and will require a small flat blade screwdriver, a putty knife, and a soft hammer. Remove the crisper and shelf from the refrigerator before replacing the support. The crisper cover front support is held in place with a locking pin. To remove the old part, you will first need to push the pin into the interior of the cabinet using the screwdriver, and then you can pull the support out with a putty knife. If you cannot get the pin out you can use a flat-blade screwdriver to push it down and out of sight and it will not harm anything in your refrigerator After removing the pin and attaching the new support, simply use the soft hammer to lock the new pin in place.
Fixes these symptoms
Installation Instructions
Peter from Amherst, NY
Support studs were broken
Used pliers to remove the residual broken stud that was still attached to the wall of the refrigerator, and then just pushed the new part in place. The longest time was spent in removing the food and crisper drawers. Read more...
Your Price
$50.88
   In Stock
Electrolux Refrigerator Door Shelf Bin
★★★★★
★★★★★
194 Reviews
PartSelect Number PS429871
Manufacturer Part Number 240338001
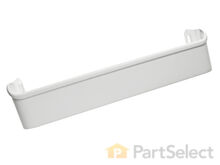
This manufacturer-approved Refrigerator Door Shelf Bin is made of white plastic and is easy to install. It is used to hold heavier items in the fridge, and you'll be able to visually see if the part is broken. This particular shelf attaches to the fridge door and is designed for the UPPER shelf. You can check if this model is right for your appliance by checking your user manual and model number. This model is just over 26" wide, just over 4" tall and just over 7" deep - front to back. This is a simple repair that requires only that you snap the old part out of place and snap the new one into place.
Fixes these symptoms
Installation Instructions
Connie from Franklin, IN
grandkids had broken the top and middle shelf bins in my refrigerator door
I simply snapped the proper pieces in place. It was sooo easy! Read more...
Your Price
$43.86
   In Stock
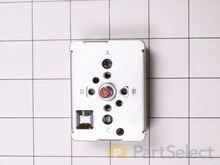
Electrolux Infinite Burner Switch
★★★★★
★★★★★
70 Reviews
PartSelect Number PS1145040
Manufacturer Part Number 316436001
The infinite burner switch controls the stove top eight-inch surface burner, which is the large surface element. If your surface element is not warming up, the element can be tested to determine whether or not it is defective. If your element is not defective, then it is more than likely that the infinite burner switch is the issue. Before you install the infinite burner switch you will need to unplug your range from the power supply, or shut off the home circuit breaker. The tools you will need to do this repair include a number one square head screwdriver and a pair of needle nose pliers.
Fixes these symptoms
  • Element will not heat
  • Little to no heat when broiling
  • Oven is too hot
  • See more...
Installation Instructions
William from Burke, VA
Back Burner didn't function
We moved into our townhouse about 6 yrs ago. During the home inspection we checked the range and saw the Red light come on when we turned on each burner. After moving in we realized the large back burner did not work. The light came on but the element never got hot. I of course replaced the element but that did not work. Several years passed and we just ignored the issue. We just got by with 3 burners. Lately we realized how much easier it would be to have all four burners working. Knowing that we will be selling our townhome soon we figured we should either fix the problem or replace the range.

I didn't want to call a repair man because I didn't want to be charged a $150 to have him come out and they to pay extra for parts (and of course a 2nd visit). So I went to www.Partselect.com and typed in the model of my range. Found the diagrams for my range and saw that from the switch ran a pair of wires to a Universal Receptacle (aka Terminal Block Kit). I figured since the Red light turns on when I turn the switch on it has to be the Terminal Block.

I ordered the part from www.Partselect.com ($14.00 including shipping) and replaced the part. The burner still would not get hot. I decided to test the switch. I removed the Control Panel cover (which is secure by 2 screws just below the digital clock). Once the cover was off, I saw the Blue wires going from the switch to the Terminal Block. To test the switch, I disconnected the two Blue Wires from connectors H1 and H2 and temporarily connected them to H1 and H2 of another switch. Sure enough, when I turned the other switch the element got hot.

So I placed another order from www.Partselect.com for a replacement switch ($50 including shipping). When that part came, I flipped the electrical circuit going to the range. I then removed the Control Panel cover again. With the new switch in hand (holding it near the old switch still attached to the Control Panel, I used the pliers to pull out each wire from it's connector and place it to it's corresponding connector on the new switch. Once all the wires were connected to the new switch, I pulled the knob of the switch off then used a phillips screwdriver to remove the two screws holding the switch to the control panel. I replaced the old switch with the new one put the screws back in, replaced the knob. Turned the circuit back on and tested to make sure that the element got hot. When it did, then I replaced the Control Panel cover and enjoyed a nice dinner that was cooked in less time than we're accustomed to because of the new burner. So I spent a total of $64.00 to fix our range. Less than half the amount I would've spent if I called for a technican. And far less then buying a new range.

Partselect is a great resource for information. They have diagrams and schematics available to view and/or download. And when ordering it's a snap because there's an "Add to Cart" button next to each part it lists. So there's no confusion. I've already recommended Partselect.com to about 5 people. And will continue to do so!!
Read more...
Your Price
$16.24
   In Stock
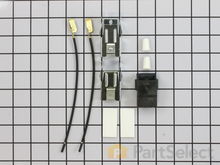
Electrolux Terminal Block Kit
★★★★★
★★★★★
37 Reviews
PartSelect Number PS470125
Manufacturer Part Number 5303935058
This part connects the wire harness to the surface element and is used for ranges. The kit includes interchangeable mounting brackets, ceramic wire nuts, heat shrink protective tubing, and wires. If your range/oven is having symptoms such as burner not heating, heating elements not working, burning smell, or if the oven is making a buzzing noise then this could be the solution. The tools needed to replace the kit are wire strippers, a heat gun or hair dryer, and #1 square heard screw driver. Refer to the installation/instructional video for further guidance to accurately replace the element.
Fixes these symptoms
  • Element will not heat
  • Oven not heating evenly
  • Will Not Start
  • See more...
Installation Instructions
Steven from Taylors, SC
rental property stove only had 2 working burners and bottom drawer off track
first i took out burners then i took out the screws of the termnal block bracket. i then raised the lid on the stoveand clipped the wires on all 4 of the terminal block kits.i then slipped the shrink wrap on wires and used the wire nuts to connect wires together then heated the shrink wrap. I then put screws back in terminal block brackets. I then put the burners on while looking under lid so i would know they were making good connections as this is a bad design from factory. if you pull out burners to clean them and they are not put back in right you dont have a good connection and that causes the terminal blocks to get hot and melt. thats what happened in my case.
As far as the drawer glides they just snap into place
Read more...
Your Price
$116.89
   In Stock
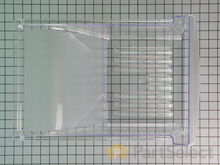
Electrolux Refrigerator Crisper Pan
★★★★★
★★★★★
32 Reviews
PartSelect Number PS429854
Manufacturer Part Number 240337103
This manufacturer-certified Refrigerator Crisper Pan is a clear plastic pan which easily inserts into your fridge's crisper area in order to hold items. In some models of refrigerator this model is the same pan for both the meat and vegetable bins, but please note that this part is sold individually and not part of a complete kit. If broken then the part should be replaced. Refer to your user manual and model number to see if this crisper is right for your fridge. This bin measures approximately 11 inches deep and 22 inches long.
Fixes these symptoms
Installation Instructions
Melody from Hammond, IN
pan-crisper broke / drawer support rail broke
pan-crisper pan was easy because is just slide in. the drawer support rail just took a screwdriver to unscrew the screw and replace it with new rail and put the screw back in. The thing I like the best is the fast service of the parts to me. Read more...
Your Price
$31.75
   In Stock
Electrolux Air Filter
★★★★★
★★★★★
17 Reviews
PartSelect Number PS1993820
Manufacturer Part Number EAFCBF
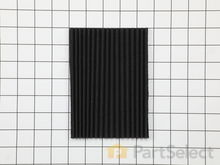
This manufacturer-approved air filter system for refrigerators eliminates odors and any impurities. It does this by neutralizing and removing odor-causing molecules. For best results, it is important to change the filter every 6 months to ensure that food is kept fresh, and the humidity is controlled. This part measures about 7 inches wide and 5 inches deep. Follow installation instructions provided by the manufacturer when installing this part to ensure accurate results and further guidance. Remember to unplug the refrigerator from the power source before starting this project. The air filter may be located in different places depending on your appliance, but is usually on the inner right or left side. See your manual for exact location. Our customers rated this as a very easy repair that takes only a few minutes; just locate and remove the old air filter and insert the new one to complete the repair, which requires no tools.
Fixes these symptoms
  • Fridge too cold
  • Fridge too warm
  • Ice maker not making ice
  • See more...
Installation Instructions
melvin from BASKING RIDGE, NJ
you r label (this end in arrow is wrong
placed filter in sideways Read more...
Your Price
$20.46
   In Stock
Electrolux LATCH
★★★★★
★★★★★
8 Reviews
PartSelect Number PS11766033
Manufacturer Part Number 5304505088
Fixes these symptoms
  • Lid or door won’t close
  • Locking Issues
  • Will Not Start
  • See more...
Installation Instructions
Kim from LAFAYETTE, CA
latch broke, door wouldn't shut, washer wouldn't run - no fun
I googled the problem, read the recommendation found the part and read that it was an easy fix. Took the broken part off the door and noticed the broke off piece was in the latch on the machine. Ordered the two parts, paid the $30 2-day delivery. Parts arrived and the machine was up and runnning in under 5 minutes Read more...
Your Price
$20.39
   In Stock
Electrolux Surface Element - 8 Inch - 2600W
★★★★★
★★★★★
20 Reviews
PartSelect Number PS2339242
Manufacturer Part Number 316442301
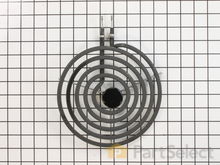
The range surface element provides heat to the cooking surface on top of the range. The element has a universal plug, is 8 inches in diameter, spans 5 coils in width and reaches 2600 watts. Before you begin your repair, ensure that the elements are turned off and have had time to cool. Once you have removed the element this is a good time to ensure the terminal is in good condition (they can wear over time) which may need to be replaced as well. This quick repair requires no tools except gloves for safety, and a small amount of time.
Fixes these symptoms
Installation Instructions
David from Encinitas, CA
burner shorted out
I followed the directions by clipping wires to old burner socket, splicing the wires to new terminal block, screwing down new "block bracket," and plugging in new burner. Read more...
Your Price
$49.38
   In Stock
Electrolux Refrigerator Door Shelf Bin
★★★★★
★★★★★
144 Reviews
PartSelect Number PS429873
Manufacturer Part Number 240338101
This retainer bar (Refrigerator Door Shelf Bin, Refrigerator Door Shelf, Door Shelf Bin, Refrigerator Door Bin) holds items on the refrigerator door shelf. The plastic retainer can become brittle with time and crack or break under the strain of normal use. It can also break if heavy items are placed in the door shelf. If this part will no longer hold securely onto the inner door panel it will need to be replaced. This model is white plastic, and measures 26 by 5 inches. Sold individually.
Fixes these symptoms
Installation Instructions
Jose from Alexandria, VA
water leaking out of refrigerator
In my specific appliance the water valve is located in the bottom right hand corner looking at it from the back. To get to it I remove the thin layer of cardboard the covers the back of the fridge. I then proceeded to disconnect the 1/4" copper tubing which is the water feed coming out of the wall. Then I removed the screws that hold the valve assembly in place. I took the water valve out and removed the electrical connections as well as the plastic tubing which feed the water dispenser and the ice maker. To install the new water valve it was just a matter of reversing steps. Read more...
Your Price
$91.07
   In Stock
Electrolux Refrigerator Water Inlet Valve
★★★★★
★★★★★
107 Reviews
PartSelect Number PS7784018
Manufacturer Part Number 242252702
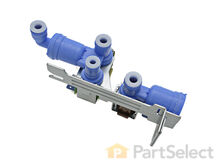
The function of the Refrigerator Water Inlet Valve (Triple Solenoid Water-Valve, Water Valve, Water Inlet Valve, Refrigerator Water Inlet Valve Assembly) is to release water from the supply line when activated, and send it through to your water dispenser or ice maker in your refrigerator. The water inlet valve is located at the back of the refrigerator, and connects to the water supply. The valve can break from material fatigue or normal use. If your water inlet valve is malfunctioning, you could be getting a lack of water to the inside of your refrigerator. Your ice maker may not produce cubes or your water dispenser may not work. The water inlet valve must be replaced if the solenoids no longer have continuity or the valve has internal blockage. This valve measures approximately 7 inches long and 4.5 inches wide, and is constructed of plastic and metal. It comes in blue, and includes the valve and mounting bracket.
Fixes these symptoms
  • Ice maker dispenses too little ice
  • Ice maker not making ice
  • Ice maker won’t dispense ice
  • See more...
Installation Instructions
Jane from Owosso, MI
broken refrigerator door shelves
snapped right on and removed screws, insert and replace screws. Read more...

Electrolux Appliance Types

Popular Electrolux Models

Below are the most popular Electrolux models we have. Enter your model number in the search box to find your model.