Models > DPSR473EW0WW > Symptoms > Marks left on clothes

Parts That Fix General Electric Dryer DPSR473EW0WW Marks left on clothes

Marks left on clothes is a commonly reported symptom for the DPSR473EW0WW General Electric Dryer, and we have put together a full guide on how to fix this. This advice is based on feedback from people who own this exact appliance. We have listed the most common parts for your DPSR473EW0WW General Electric Dryer that will fix Marks left on clothes. We have included repair instructions, and helpful step-by-step video tutorials. If you are experiencing this issue, not to worry, DIYers just like you have fixed this, and shared their experience to help you!

Fixes Symptom 28% of time
★★★★★
★★★★★
157 Reviews

Rated by 193 customers 


Easy 

30 - 60 mins 

Ratings submitted by customers like you who bought this part.   

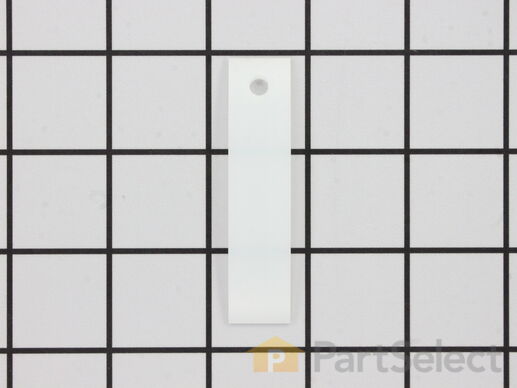
This authentic, white Drum Bearing Slide, also known as the bearing drum slide, glide, or pad, is a plastic, easy-to-install part for your dryer. It replaces the dryer's front drum slide to allow for easier movement. You'll know if this part is an issue if your dryer is unable to tumble properly or is very noisy. Damage can come from regular use. The part attaches to the outermost side of the bearing. Check both slides for signs of wear, because they often wear at the same rate, and should be replaced at the same time; there are 2 of these particular slides per dryer. This part is sold individually, so you'll need to purchase multiple parts if replacing both at the same time.

$ 18.58
  In Stock
PartSelect Number PS755842
Manufacturer Part Number WE1M504

Replacing your General Electric Dryer Drum Bearing Slide - White (Sold individually)

Replacing your Drum Bearing Slide - White (Sold individually)

Customer Repair Stories

Replaced Drum Bearing Front And Rear

Pulled the unit all apart to replace the rear drum bearing. Also replaced the front bearing. Works like brand new. Easier then I thought
  • philip from pickens, SC
  • Difficulty Level:
    Easy
  • Total Repair Time:
    1- 2 hours
  • Tools:
    Nutdriver, Screw drivers, Socket set
4 of 5 people found this instruction helpful.
Was this instruction helpful to you?
Thank you for voting!

The Front Drum Glides wore out

I first unplugged the unit, opened the top, disconnected and took off the control panel, took off the front panel to determine the source of the squeaking noise coming from the Dryer. I saw that 3 of the 4 Front Drum Glides were gone and the drum had worn away significant amounts of plastic from the Top Bearing Assembly. I purchased the Top Bearing Assembly and a set of 4 Front Drum Glides. Disassembled the damaged parts and reassembled with the new replacement parts. The reassembly took less than 20 minutes. I plugged in the Dryer and viola! It works as good as new.
  • Al from Elmhurst, IL
  • Difficulty Level:
    Really Easy
  • Total Repair Time:
    15 - 30 mins
  • Tools:
    Screw drivers
4 of 4 people found this instruction helpful.
Was this instruction helpful to you?
Thank you for voting!
Fixes Symptom 26% of time
★★★★★
★★★★★
27 Reviews

Rated by 174 customers 


Easy 

30 - 60 mins 

Ratings submitted by customers like you who bought this part.   

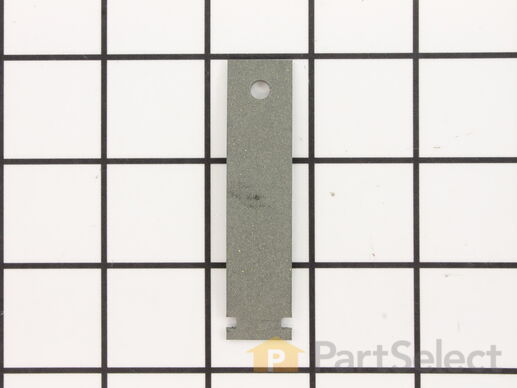
This original equipment manufacturer Drum Bearing Slide is a plastic, green, easy-to-install part for your dryer. It replaces the dryer's front drum slide to allow for easier movement. You'll know if this part is an issue if your dryer is unable to tumble properly or is very noisy. Damage can come from regular use. As the slides start to break down it may cause your dryer to make noise or not dry clothes in the usual amount of time. You will need to purchase two for both sides of your dryer. They attach to the outer-most sides of the bearing. The manufacturer recommends replacing both slides at the same time. Take this opportunity to clean out the lint and dust in the dryer, to keep it running smoothly. This is a genuine replacement part that comes directly from the manufacturer. This item is sold individually. The part attaches to the outermost side of the bearing. Although this part is denoted as being "Green" in its title, many users and technicians have noted that its true colour is closer to a dark gray or black.

$ 14.29
  In Stock
PartSelect Number PS6447706
Manufacturer Part Number WE1M1067

Replacing your General Electric Dryer Drum Bearing Slide - Green (Sold individually)

Replacing your Drum Bearing Slide - Green (Sold individually)

Customer Repair Stories

Squealing as drum rotated

Removed the star bit screws on the top of the control panel then removed the front by opening the door and removing the screws in the upper corners of the door jam. I then removed the top which exposed the drum slides. NOTE: This model requires 4 drum slides and NOT two as specified in the video.
  • Bill from COMSTOCK PARK, MI
  • Difficulty Level:
    Really Easy
  • Total Repair Time:
    15 - 30 mins
  • Tools:
    Screw drivers
2 of 2 people found this instruction helpful.
Was this instruction helpful to you?
Thank you for voting!

Dryer starts squeaking while operating

Open the dryer door and remove the two screws in the top of the door opening that hold the top of the dryer on, and then remove the dryer top. On the inside of the dryer, there are two screws that hold the front of the dryer on. Remove one screw from each side of the dryer near the top, and the front of the dryer will fall away. The drum slides are visible when you lean the front panel of the dryer out away from the drum. You can replace the drum slides without even removing the front of the dryer completely. Pull out the old drum slides and insert the new slides. Lift the drum slighly from the inside through the dryer door as you tilt the front back into place. Reinsert the screws holding the front of the dryer on and tighten. BE CAREFUL not to drop the screws or you may have to disassemble the dryer to get at the dropped screws. Reinstall the top of the dryer. It is a difficult fit which requres inserting into 3 tabs and sliding the top into place. Check that the top is flush before inserting and tightening the screws in the top of the door opening.
  • David from Littleton, CO
  • Difficulty Level:
    Easy
  • Total Repair Time:
    15 - 30 mins
  • Tools:
    Screw drivers
9 of 11 people found this instruction helpful.
Was this instruction helpful to you?
Thank you for voting!
Fixes Symptom 19% of time
★★★★★
★★★★★
85 Reviews

Rated by 144 customers 


Really Easy 

30 - 60 mins 

Ratings submitted by customers like you who bought this part.   

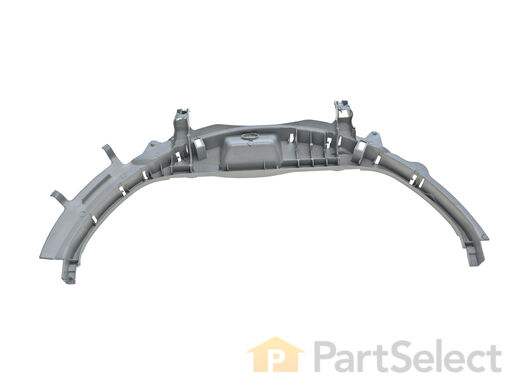
This Front Drum Bearing (Top Bearing, Dryer Drum Front Support Bearing, Drum Support Bearing, Dryer Drum Glide Bearing) holds the drum bearing and slides for the drum to turn on. The front drum bearing attaches onto the inside of the dryer front panel. When this part fails, the drum may no longer turn freely, make odd sounds, and not dry properly due to the drum no longer sealing. This part needs to be replaced if it is broken (often due to normal wear and tear), no longer able to hold the drum bearing slide securely, or has been eroded by the drum movement. This part is about 10 inches in height and 22 inches in width, and comes in white plastic. Sold individually.

$ 34.14
  In Stock
PartSelect Number PS960316
Manufacturer Part Number WE3M26

Replacing your General Electric Dryer Front Drum Bearing

Replacing your Front Drum Bearing

Customer Repair Stories

Dryer was not heating at any level and it was making noise while rotating

First, I unplugged the dryer, pulled it out into an open area. I then removed the vent hose. I opened the front door and removed the 2 screws that hold the top panel down. Once removed, I lifted off the top which exposed the drum. Next, I remove the 2 screws along each side that allows the front door panel to detached. I noticed that there was damage to the plastic bearing and 3 bearing pads were missing. That was the source of the noise. Once the door panel is lifted off the cabinet, the wires to the safety switch must be pulled off so the door can be set aside out of the way. Then I went to the rear and remove 2 more screws that gave access to the motor, wiring and the tensioner for the dryer belt. Once I gained access to the belt, I slipped it off the tensioner and drive pulley. This allows the drum to be removed from the cabinet. WE wrestled the drum out before realizing that we should have removed another 2 screws securing the sides of the dryer to a cross support under the front of the drum. This would have made the removal of the drum much easier. Once the drum was removed, I had access to the heating coils. Upon examining, I saw that both had burned out at the far left terminals. Directions that came with the new heating elements gave clear instructions on how to install. It's a little daunting to thread both elements through all the insulators, but patience paid off. Everything went back together easily and the dryer started up and heated up just like new.
  • Robert from Louisville, KY
  • Difficulty Level:
    Easy
  • Total Repair Time:
    30 - 60 mins
  • Tools:
    Pliers, Screw drivers
2 of 3 people found this instruction helpful.
Was this instruction helpful to you?
Thank you for voting!

My dryer was especially noisy like a constant squeeking sound.

I had already replaced the four (4) small wear strips which were like short strips of teflon, and the squeaking decreased almost completly. I noticed that front side of the drum itself had started to wear through the actual plastc drum bearing, but I hoped having previously replaced these tefon strips that would be the overall fix.
Wrong again... after a few weeks the squeeking continued until I ordered the new drum bearing and replaced the worn one with the new one. I was able to re-use the previous teflon wer strips, and it's like new now at least the squeaks are gone,

The actual fix was a very simple remove old drum bearing, snap in new drum bearing install old teflon wear strips put four screws in top, and front panel and I was back in business
  • Mark from Yorkville, IL
  • Difficulty Level:
    Really Easy
  • Total Repair Time:
    Less than 15 mins
  • Tools:
    Screw drivers
4 of 4 people found this instruction helpful.
Was this instruction helpful to you?
Thank you for voting!
Fixes Symptom 18% of time
★★★★★
★★★★★
42 Reviews

Rated by 85 customers 


Really Easy 

30 - 60 mins 

Ratings submitted by customers like you who bought this part.   

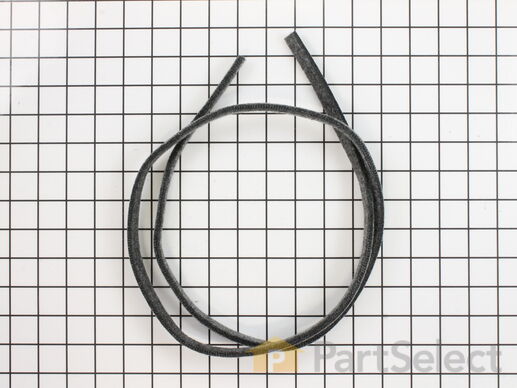
This is a duct felt seal for a dryer. The duct felt seal allows the front-load dryer drum to glide smoothly on the front panel. Your dryer will not function properly if the drum felt seal is compromised. Disconnect power to the dryer before completing this repair. You will need to remove the front of the dryer to gain access to the felt seal. This felt seal may differ in appearance from your original but will function the same as your original. This is an OEM replacement part that is sourced directly from the authentic manufacturer.

$ 11.56
  In Stock
PartSelect Number PS12722961
Manufacturer Part Number WE09X27634

Replacing your General Electric Dryer Duct Felt Seal

Replacing your Duct Felt Seal

Customer Repair Stories

Dryer leaving stains on clothes

Shortly after a piece of felt (the duct felt seal) was visible on the drum intererior, the dryer started making metal-on-metal squeaks. A few weeks later it started leaving'machine part' type brown/black marks on clothes. With the model # it was quite easy to find and order the correct part, which arrived a few days later. The accompanying video made installation quite straightforward, even for someone who's NEVER worked on a dryer before - even though the model used wasn't the same. Over half the repair time was to clean out lint and dirt from the various exposed parts. Overall, an easy and effective repair that solved the staining issue. Follow the video and you won't go wrong.
  • Tahir from ARLINGTON, MA
  • Difficulty Level:
    Easy
  • Total Repair Time:
    1- 2 hours
  • Tools:
    Screw drivers
1 of 3 people found this instruction helpful.
Was this instruction helpful to you?
Thank you for voting!

the felt in front door worn out

i follow your video and all went well except now the dryer will not heat. i went back on your site an tried the no heat option an still no heat
  • gerard from goldsboro, NC
  • Difficulty Level:
    Easy
  • Total Repair Time:
    30 - 60 mins
  • Tools:
    Nutdriver, Screw drivers
2 of 5 people found this instruction helpful.
Was this instruction helpful to you?
Thank you for voting!
Fixes Symptom 7% of time
★★★★★
★★★★★
17 Reviews

Rated by 21 customers 


Really Easy 

30 - 60 mins 

Ratings submitted by customers like you who bought this part.   

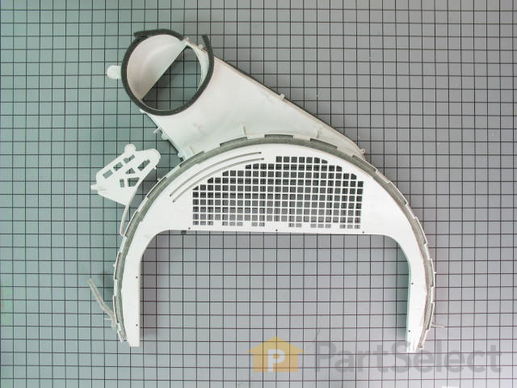
The lint chute assembly houses the lint filter and channels exhaust air from the drum to the blower wheel.

$ 108.72
  In Stock
PartSelect Number PS11763093
Manufacturer Part Number WE14X25080

Replacing your General Electric Dryer Dryer Lint Chute Assembly

Replacing your Dryer Lint Chute Assembly

Customer Repair Stories

Broken piece

Snap out the broken part. Snap in the new part. Use caution with the wires, but don’t have to disconnect them.
  • Kevin from GALES FERRY, CT
  • Difficulty Level:
    Really Easy
  • Total Repair Time:
    Less than 15 mins
  • Tools:
    Screw drivers
2 of 3 people found this instruction helpful.
Was this instruction helpful to you?
Thank you for voting!

Catching clothing and reping

Removed that to screws for that top first and door shake top little to that front and I took two screws on that top each side and removed that front and lint trap and install the new
  • Jose from LILBURN, GA
  • Difficulty Level:
    Really Easy
  • Total Repair Time:
    15 - 30 mins
  • Tools:
    Screw drivers
4 of 5 people found this instruction helpful.
Was this instruction helpful to you?
Thank you for voting!
Fixes Symptom 1% of time
★★★★★
★★★★★
5 Reviews

Rated by 5 customers 


A Bit Difficult 

1- 2 hours 

Ratings submitted by customers like you who bought this part.   

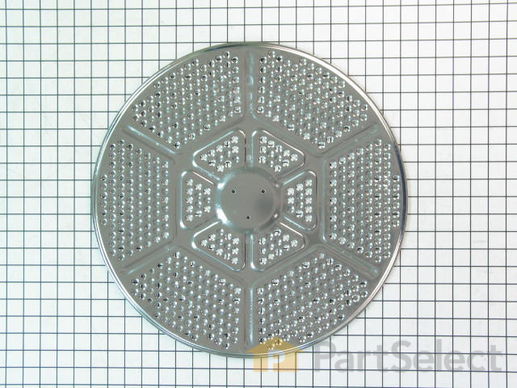
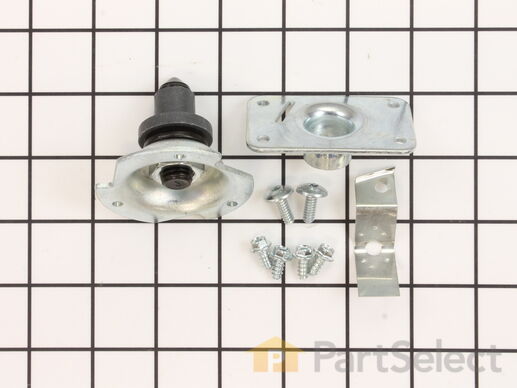
Also known as Drum Mounting Hub.

$ 26.89
  In Stock
PartSelect Number PS12743374
Manufacturer Part Number WE11X29438

Customer Repair Stories

Heat deflector was covered in melted plastic

Someone I'm related to by marriage accidentally dried a plastic-coated tablecloth on high heat, and our heat deflector was hosed. I was very happy to find this part here for such a reasonable price; Sears wanted about $65 for it. Installation required a Torx bit, and removing the old one was easy, but the dryer's design made it difficult to reinstall the heat deflector while keeping the dryer running concentrically. I ended up cutting the heads off three screws, threading those into the plate behind the drum, sliding the new heat deflector on over those, and then one by one replacing them with the original Torx head screws. Once I figured it out it didn't take long but it took me a while to figure it out. That's probably more a reflection on me than the dryer!
  • Charles from Alexandria, VA
  • Difficulty Level:
    A Bit Difficult
  • Total Repair Time:
    30 - 60 mins
  • Tools:
    Socket set
35 of 50 people found this instruction helpful.
Was this instruction helpful to you?
Thank you for voting!

Deflector was covered in burnt something.

Deflector has 3 bolts attaching it. They require a star wrench. Had to purchase same to do the repair. Removed the bolts(they are sheet metal type screws(bolts). Installed the deflector and started dryer. Loud rubbing sound noted. Shut off and checked the drum and noted it was not running concentrically. Removed deflector and the found the 3 screws actually retained the drum to drive. Had to make alignment pins to allow proper alignment of the drive, drum, and deflector. Once the pins were used during installation of the deflector everything worked correctly. Turned on dryer and it operated normally.
Had I had the proper tools the repair would probably have taken 30 minutes or less.
  • Richard from San Antonio, FL
  • Difficulty Level:
    Difficult
  • Total Repair Time:
    1- 2 hours
  • Tools:
    Wrench set
38 of 56 people found this instruction helpful.
Was this instruction helpful to you?
Thank you for voting!
Fixes Symptom 1% of time
★★★★★
★★★★★
24 Reviews

Rated by 64 customers 


Easy 

1- 2 hours 

Ratings submitted by customers like you who bought this part.   

This rear drum bearing kit includes a shaft, ground strap, bearing, seven screws, and installation instructions. The bearing plate comes with a slot in it for the ground strap. This part helps keep your dryer running as smoothly as possible with as little noise as possible by supporting the back of the dryer drum and reducing friction as the drum rotates. Over time, your drum bearing will wear out, cause your dryer to be noisy, and you will have to replace it. There may be some sharp internal parts, so be sure to wear work gloves during repair.

$ 88.17
  In Stock
PartSelect Number PS267529
Manufacturer Part Number WE25M40

Replacing your General Electric Dryer Rear Drum Bearing Kit

Replacing your Rear Drum Bearing Kit

Customer Repair Stories

Dryer squeaked when running

Everything is cleaned as it is removed.

Remove the two screws holding the top down.
Disconnect two wires from door switch.
Remove the two hex screws holding the front on.
Remove the 4 screws holding the access panel on the back and disengage idler pulley to loosen the belt.
Remove the drum.
Label the wires then remove the heating element.
Check orientation of ground strap before disassembling rear bearing.
Remove four screws holding rear bearing to back of heating element.
Install rear bearing and ground strap on to heating element.
Reinstall heating element.
Reconnect wires.

Most Important : Get help putting parts back on drum! I didn't and that's why it took over 2 hours.
I will describe how I did it.

Unscrew bearing from inside of drum.
Wrap screwdriver with tape to a little larger than the screw hole.
Use small screwdriver to line up the drum, shim and deflector.
Don't forget the brass shim. It wasn't on the parts diagram.
Start two screws don't tighten them yet.
Remove Screwdriver and start third screw. Tighten all three down.
Put belt on drum.
Install drum and belt.
Reverse disassembly.
When putting the front on make sure drum rests in the felt.

I rated this a bit difficult because I did it myself. With help this is a fairly easy repair.
  • Mark from Garrett, IN
  • Difficulty Level:
    A Bit Difficult
  • Total Repair Time:
    More than 2 hours
  • Tools:
    Nutdriver, Screw drivers, Socket set
29 of 38 people found this instruction helpful.
Was this instruction helpful to you?
Thank you for voting!

Squeaking Dryer - Rear Drum bearing gone bad

First, I loosened the the top control panel and then loosened the top flat roof panel which allowed me access to the inside of the dryer. Then, I removed the front panel which allowed access to the drum. I was amazed at the amount of lint that was inside the dryer itself. Most of my time was spent in the disassembly and cleaning of the internal cavity around the drum. I reached below the drum and removed the belt from the pulley wheels and then unscrewed the drum (from the inside) from the back of the dryer and bearing kit. I removed the diffuser and cleaned it thoroughly. Then I replaced the entire drum bearing kit - the old one was almost completely dissentigrated. I probably should have applied some kind of non-flammable lubricant to the new bearing kit - the instructions did not include this step but after about 3 loads a slight squeak (different). I put everything back together - applying the new drum kit will require 2 sets of hands (my 9-year old daughter did great at this). I re-assembled the dryer and it works great, again except for the slight squeak that's still there. I may disassemble it again and apply some lubricant but I do not know what kind to get; I need to check that out.
  • Jason from Cary, NC
  • Difficulty Level:
    A Bit Difficult
  • Total Repair Time:
    More than 2 hours
  • Tools:
    Screw drivers, Socket set
32 of 35 people found this instruction helpful.
Was this instruction helpful to you?
Thank you for voting!
Fixes Symptom 1% of time
★★★★★
★★★★★
73 Reviews

Rated by 26 customers 


Really Easy 

15 - 30 mins 

Ratings submitted by customers like you who bought this part.   

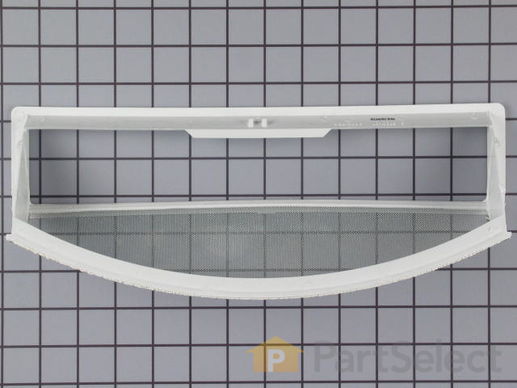
This is a lint filter screen that is used for many dryers. It has a metal screen with a white plastic frame, and is approximately 13 inches wide. This part is sold individually. The lint filter traps lint while clothes are being dried and prevents the lint from building up in clothes and internal parts of your appliance. Neglecting to clean your filter on a regular basis can negatively affect the operation of your dryer and is also a fire hazard. Be sure to clean your filter on a regular basis. Installation is easy, simply slide the filter in and out of the filter slot.

$ 70.13
  In Stock
PartSelect Number PS11767017
Manufacturer Part Number WE18X25100

Customer Repair Stories

new lint filter

my problem was easy, i orderd a new lint filter, for a
dryer that is at least 10y/o. it came to me by FEDEX,
in 3 days. i threw out the old one and put in the new
one. easy peasy. i will say that this website had what i
wanted and got it to me very quickly. good job by
PARTSELECT......
  • william from simi valley, CA
  • Difficulty Level:
    Really Easy
  • Total Repair Time:
    Less than 15 mins
20 of 29 people found this instruction helpful.
Was this instruction helpful to you?
Thank you for voting!

replacement of holed lint screen

straightforward swap, just form the top rail and click it in
  • Mark from Clarksville, VA
  • Difficulty Level:
    Really Easy
  • Total Repair Time:
    Less than 15 mins
30 of 41 people found this instruction helpful.
Was this instruction helpful to you?
Thank you for voting!