Models > DBXR453EA1WW > Symptoms > Noisy

Parts That Fix General Electric Dryer DBXR453EA1WW Noisy

Noisy is a commonly reported symptom for the DBXR453EA1WW General Electric Dryer, and we have put together a full guide on how to fix this. This advice is based on feedback from people who own this exact appliance. We have listed the most common parts for your DBXR453EA1WW General Electric Dryer that will fix Noisy. We have included repair instructions, and helpful step-by-step video tutorials. If you are experiencing this issue, not to worry, DIYers just like you have fixed this, and shared their experience to help you!

Fixes Symptom 28% of time
★★★★★
★★★★★
157 Reviews

Rated by 193 customers 


Easy 

30 - 60 mins 

Ratings submitted by customers like you who bought this part.   

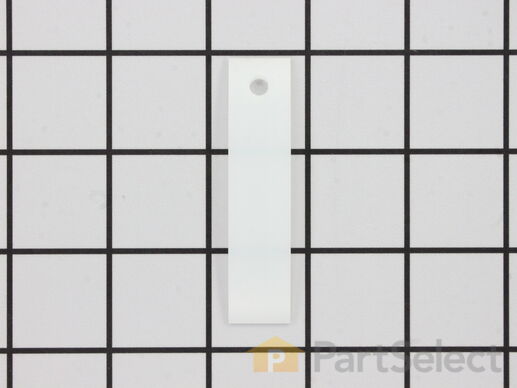
This authentic, white Drum Bearing Slide, also known as the bearing drum slide, glide, or pad, is a plastic, easy-to-install part for your dryer. It replaces the dryer's front drum slide to allow for easier movement. You'll know if this part is an issue if your dryer is unable to tumble properly or is very noisy. Damage can come from regular use. The part attaches to the outermost side of the bearing. Check both slides for signs of wear, because they often wear at the same rate, and should be replaced at the same time; there are 2 of these particular slides per dryer. This part is sold individually, so you'll need to purchase multiple parts if replacing both at the same time.

$ 18.58
  In Stock
PartSelect Number PS755842
Manufacturer Part Number WE1M504

Replacing your General Electric Dryer Drum Bearing Slide - White (Sold individually)

Replacing your Drum Bearing Slide - White (Sold individually)

Customer Repair Stories

Replaced Drum Bearing Front And Rear

Pulled the unit all apart to replace the rear drum bearing. Also replaced the front bearing. Works like brand new. Easier then I thought
  • philip from pickens, SC
  • Difficulty Level:
    Easy
  • Total Repair Time:
    1- 2 hours
  • Tools:
    Nutdriver, Screw drivers, Socket set
4 of 5 people found this instruction helpful.
Was this instruction helpful to you?
Thank you for voting!

The Front Drum Glides wore out

I first unplugged the unit, opened the top, disconnected and took off the control panel, took off the front panel to determine the source of the squeaking noise coming from the Dryer. I saw that 3 of the 4 Front Drum Glides were gone and the drum had worn away significant amounts of plastic from the Top Bearing Assembly. I purchased the Top Bearing Assembly and a set of 4 Front Drum Glides. Disassembled the damaged parts and reassembled with the new replacement parts. The reassembly took less than 20 minutes. I plugged in the Dryer and viola! It works as good as new.
  • Al from Elmhurst, IL
  • Difficulty Level:
    Really Easy
  • Total Repair Time:
    15 - 30 mins
  • Tools:
    Screw drivers
4 of 4 people found this instruction helpful.
Was this instruction helpful to you?
Thank you for voting!
Fixes Symptom 24% of time
★★★★★
★★★★★
27 Reviews

Rated by 174 customers 


Easy 

30 - 60 mins 

Ratings submitted by customers like you who bought this part.   

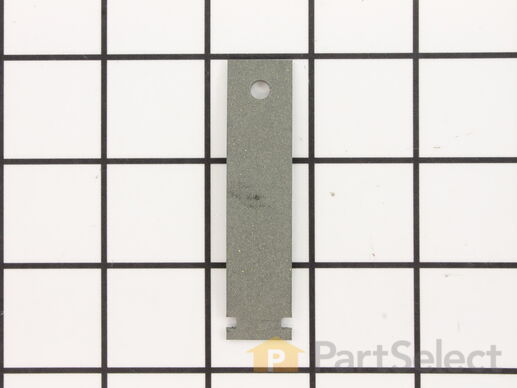
This original equipment manufacturer Drum Bearing Slide is a plastic, green, easy-to-install part for your dryer. It replaces the dryer's front drum slide to allow for easier movement. You'll know if this part is an issue if your dryer is unable to tumble properly or is very noisy. Damage can come from regular use. As the slides start to break down it may cause your dryer to make noise or not dry clothes in the usual amount of time. You will need to purchase two for both sides of your dryer. They attach to the outer-most sides of the bearing. The manufacturer recommends replacing both slides at the same time. Take this opportunity to clean out the lint and dust in the dryer, to keep it running smoothly. This is a genuine replacement part that comes directly from the manufacturer. This item is sold individually. The part attaches to the outermost side of the bearing. Although this part is denoted as being "Green" in its title, many users and technicians have noted that its true colour is closer to a dark gray or black.

$ 14.29
  In Stock
PartSelect Number PS6447706
Manufacturer Part Number WE1M1067

Replacing your General Electric Dryer Drum Bearing Slide - Green (Sold individually)

Replacing your Drum Bearing Slide - Green (Sold individually)

Customer Repair Stories

Squealing as drum rotated

Removed the star bit screws on the top of the control panel then removed the front by opening the door and removing the screws in the upper corners of the door jam. I then removed the top which exposed the drum slides. NOTE: This model requires 4 drum slides and NOT two as specified in the video.
  • Bill from COMSTOCK PARK, MI
  • Difficulty Level:
    Really Easy
  • Total Repair Time:
    15 - 30 mins
  • Tools:
    Screw drivers
2 of 2 people found this instruction helpful.
Was this instruction helpful to you?
Thank you for voting!

Dryer starts squeaking while operating

Open the dryer door and remove the two screws in the top of the door opening that hold the top of the dryer on, and then remove the dryer top. On the inside of the dryer, there are two screws that hold the front of the dryer on. Remove one screw from each side of the dryer near the top, and the front of the dryer will fall away. The drum slides are visible when you lean the front panel of the dryer out away from the drum. You can replace the drum slides without even removing the front of the dryer completely. Pull out the old drum slides and insert the new slides. Lift the drum slighly from the inside through the dryer door as you tilt the front back into place. Reinsert the screws holding the front of the dryer on and tighten. BE CAREFUL not to drop the screws or you may have to disassemble the dryer to get at the dropped screws. Reinstall the top of the dryer. It is a difficult fit which requres inserting into 3 tabs and sliding the top into place. Check that the top is flush before inserting and tightening the screws in the top of the door opening.
  • David from Littleton, CO
  • Difficulty Level:
    Easy
  • Total Repair Time:
    15 - 30 mins
  • Tools:
    Screw drivers
9 of 11 people found this instruction helpful.
Was this instruction helpful to you?
Thank you for voting!
Fixes Symptom 22% of time
★★★★★
★★★★★
85 Reviews

Rated by 144 customers 


Really Easy 

30 - 60 mins 

Ratings submitted by customers like you who bought this part.   

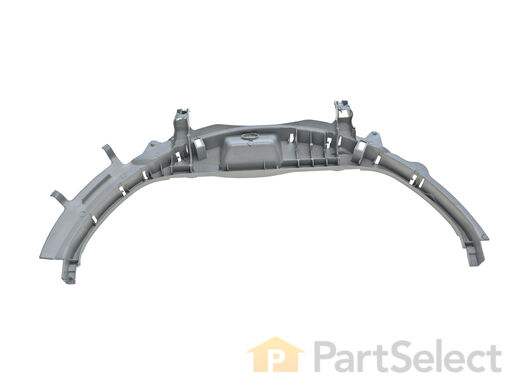
This Front Drum Bearing (Top Bearing, Dryer Drum Front Support Bearing, Drum Support Bearing, Dryer Drum Glide Bearing) holds the drum bearing and slides for the drum to turn on. The front drum bearing attaches onto the inside of the dryer front panel. When this part fails, the drum may no longer turn freely, make odd sounds, and not dry properly due to the drum no longer sealing. This part needs to be replaced if it is broken (often due to normal wear and tear), no longer able to hold the drum bearing slide securely, or has been eroded by the drum movement. This part is about 10 inches in height and 22 inches in width, and comes in white plastic. Sold individually.

$ 34.14
  In Stock
PartSelect Number PS960316
Manufacturer Part Number WE3M26

Replacing your General Electric Dryer Front Drum Bearing

Replacing your Front Drum Bearing

Customer Repair Stories

Dryer was not heating at any level and it was making noise while rotating

First, I unplugged the dryer, pulled it out into an open area. I then removed the vent hose. I opened the front door and removed the 2 screws that hold the top panel down. Once removed, I lifted off the top which exposed the drum. Next, I remove the 2 screws along each side that allows the front door panel to detached. I noticed that there was damage to the plastic bearing and 3 bearing pads were missing. That was the source of the noise. Once the door panel is lifted off the cabinet, the wires to the safety switch must be pulled off so the door can be set aside out of the way. Then I went to the rear and remove 2 more screws that gave access to the motor, wiring and the tensioner for the dryer belt. Once I gained access to the belt, I slipped it off the tensioner and drive pulley. This allows the drum to be removed from the cabinet. WE wrestled the drum out before realizing that we should have removed another 2 screws securing the sides of the dryer to a cross support under the front of the drum. This would have made the removal of the drum much easier. Once the drum was removed, I had access to the heating coils. Upon examining, I saw that both had burned out at the far left terminals. Directions that came with the new heating elements gave clear instructions on how to install. It's a little daunting to thread both elements through all the insulators, but patience paid off. Everything went back together easily and the dryer started up and heated up just like new.
  • Robert from Louisville, KY
  • Difficulty Level:
    Easy
  • Total Repair Time:
    30 - 60 mins
  • Tools:
    Pliers, Screw drivers
2 of 3 people found this instruction helpful.
Was this instruction helpful to you?
Thank you for voting!

My dryer was especially noisy like a constant squeeking sound.

I had already replaced the four (4) small wear strips which were like short strips of teflon, and the squeaking decreased almost completly. I noticed that front side of the drum itself had started to wear through the actual plastc drum bearing, but I hoped having previously replaced these tefon strips that would be the overall fix.
Wrong again... after a few weeks the squeeking continued until I ordered the new drum bearing and replaced the worn one with the new one. I was able to re-use the previous teflon wer strips, and it's like new now at least the squeaks are gone,

The actual fix was a very simple remove old drum bearing, snap in new drum bearing install old teflon wear strips put four screws in top, and front panel and I was back in business
  • Mark from Yorkville, IL
  • Difficulty Level:
    Really Easy
  • Total Repair Time:
    Less than 15 mins
  • Tools:
    Screw drivers
4 of 4 people found this instruction helpful.
Was this instruction helpful to you?
Thank you for voting!
Fixes Symptom 11% of time
★★★★★
★★★★★
42 Reviews

Rated by 85 customers 


Really Easy 

30 - 60 mins 

Ratings submitted by customers like you who bought this part.   

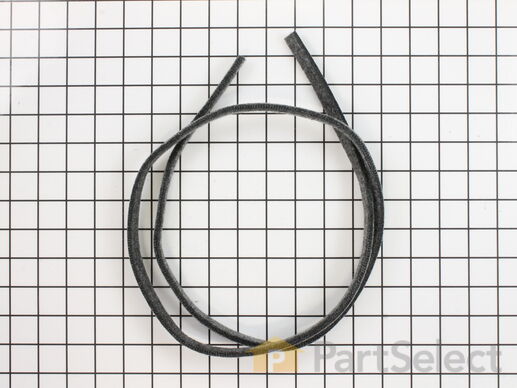
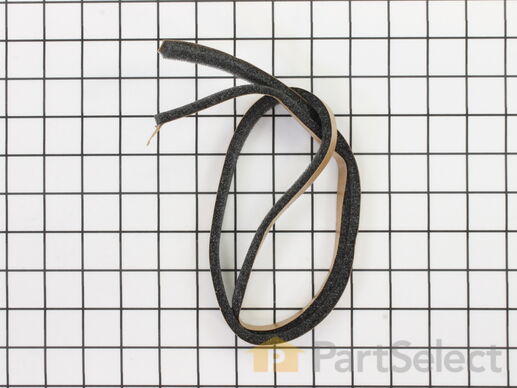
This is a duct felt seal for a dryer. The duct felt seal allows the front-load dryer drum to glide smoothly on the front panel. Your dryer will not function properly if the drum felt seal is compromised. Disconnect power to the dryer before completing this repair. You will need to remove the front of the dryer to gain access to the felt seal. This felt seal may differ in appearance from your original but will function the same as your original. This is an OEM replacement part that is sourced directly from the authentic manufacturer.

$ 11.56
  In Stock
PartSelect Number PS12722961
Manufacturer Part Number WE09X27634

Replacing your General Electric Dryer Duct Felt Seal

Replacing your Duct Felt Seal

Customer Repair Stories

Dryer leaving stains on clothes

Shortly after a piece of felt (the duct felt seal) was visible on the drum intererior, the dryer started making metal-on-metal squeaks. A few weeks later it started leaving'machine part' type brown/black marks on clothes. With the model # it was quite easy to find and order the correct part, which arrived a few days later. The accompanying video made installation quite straightforward, even for someone who's NEVER worked on a dryer before - even though the model used wasn't the same. Over half the repair time was to clean out lint and dirt from the various exposed parts. Overall, an easy and effective repair that solved the staining issue. Follow the video and you won't go wrong.
  • Tahir from ARLINGTON, MA
  • Difficulty Level:
    Easy
  • Total Repair Time:
    1- 2 hours
  • Tools:
    Screw drivers
1 of 3 people found this instruction helpful.
Was this instruction helpful to you?
Thank you for voting!

the felt in front door worn out

i follow your video and all went well except now the dryer will not heat. i went back on your site an tried the no heat option an still no heat
  • gerard from goldsboro, NC
  • Difficulty Level:
    Easy
  • Total Repair Time:
    30 - 60 mins
  • Tools:
    Nutdriver, Screw drivers
2 of 5 people found this instruction helpful.
Was this instruction helpful to you?
Thank you for voting!
Fixes Symptom 6% of time
★★★★★
★★★★★
24 Reviews

Rated by 64 customers 


Easy 

1- 2 hours 

Ratings submitted by customers like you who bought this part.   

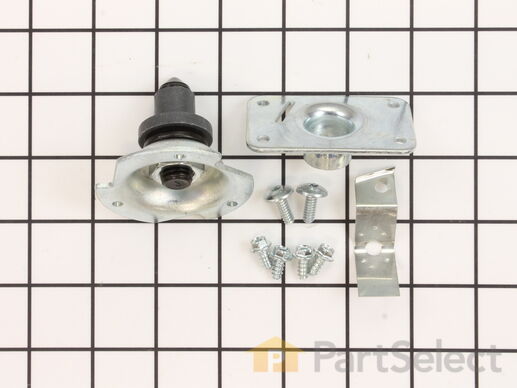
This rear drum bearing kit includes a shaft, ground strap, bearing, seven screws, and installation instructions. The bearing plate comes with a slot in it for the ground strap. This part helps keep your dryer running as smoothly as possible with as little noise as possible by supporting the back of the dryer drum and reducing friction as the drum rotates. Over time, your drum bearing will wear out, cause your dryer to be noisy, and you will have to replace it. There may be some sharp internal parts, so be sure to wear work gloves during repair.

$ 88.17
  In Stock
PartSelect Number PS267529
Manufacturer Part Number WE25M40

Replacing your General Electric Dryer Rear Drum Bearing Kit

Replacing your Rear Drum Bearing Kit

Customer Repair Stories

Dryer squeaked when running

Everything is cleaned as it is removed.

Remove the two screws holding the top down.
Disconnect two wires from door switch.
Remove the two hex screws holding the front on.
Remove the 4 screws holding the access panel on the back and disengage idler pulley to loosen the belt.
Remove the drum.
Label the wires then remove the heating element.
Check orientation of ground strap before disassembling rear bearing.
Remove four screws holding rear bearing to back of heating element.
Install rear bearing and ground strap on to heating element.
Reinstall heating element.
Reconnect wires.

Most Important : Get help putting parts back on drum! I didn't and that's why it took over 2 hours.
I will describe how I did it.

Unscrew bearing from inside of drum.
Wrap screwdriver with tape to a little larger than the screw hole.
Use small screwdriver to line up the drum, shim and deflector.
Don't forget the brass shim. It wasn't on the parts diagram.
Start two screws don't tighten them yet.
Remove Screwdriver and start third screw. Tighten all three down.
Put belt on drum.
Install drum and belt.
Reverse disassembly.
When putting the front on make sure drum rests in the felt.

I rated this a bit difficult because I did it myself. With help this is a fairly easy repair.
  • Mark from Garrett, IN
  • Difficulty Level:
    A Bit Difficult
  • Total Repair Time:
    More than 2 hours
  • Tools:
    Nutdriver, Screw drivers, Socket set
29 of 38 people found this instruction helpful.
Was this instruction helpful to you?
Thank you for voting!

Squeaking Dryer - Rear Drum bearing gone bad

First, I loosened the the top control panel and then loosened the top flat roof panel which allowed me access to the inside of the dryer. Then, I removed the front panel which allowed access to the drum. I was amazed at the amount of lint that was inside the dryer itself. Most of my time was spent in the disassembly and cleaning of the internal cavity around the drum. I reached below the drum and removed the belt from the pulley wheels and then unscrewed the drum (from the inside) from the back of the dryer and bearing kit. I removed the diffuser and cleaned it thoroughly. Then I replaced the entire drum bearing kit - the old one was almost completely dissentigrated. I probably should have applied some kind of non-flammable lubricant to the new bearing kit - the instructions did not include this step but after about 3 loads a slight squeak (different). I put everything back together - applying the new drum kit will require 2 sets of hands (my 9-year old daughter did great at this). I re-assembled the dryer and it works great, again except for the slight squeak that's still there. I may disassemble it again and apply some lubricant but I do not know what kind to get; I need to check that out.
  • Jason from Cary, NC
  • Difficulty Level:
    A Bit Difficult
  • Total Repair Time:
    More than 2 hours
  • Tools:
    Screw drivers, Socket set
32 of 35 people found this instruction helpful.
Was this instruction helpful to you?
Thank you for voting!
Fixes Symptom 4% of time
★★★★★
★★★★★
168 Reviews

Rated by 65 customers 


Easy 

1- 2 hours 

Ratings submitted by customers like you who bought this part.   

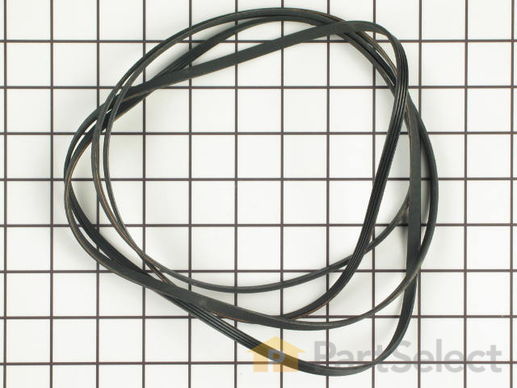
This Drive Belt is 89.5" long and comes in black, featuring four ribs on the inside for a better grip. This is a long belt that wraps all the way around the dryer drum, around a tension pulley, and then around the drive motor pulley, allowing all the parts to work together, spinning the drum as the motor rotates. If the drum will not turn when the dryer is turned on the belt is likely broken. It is common for belts to stretch or become brittle over time, which is what leads to the breakage. If broken, it should be replaced; the drum simply cannot spin without this belt. Refer to your model number and user manual to check if this part is right for you. Ensure you use work gloves to protect your hands from sharp internal parts during this repair. Please note: When comparing the length of your old belt to the length of the belt as stated here, remember that a small amount of stretching and contortion may occur with belts over time for a range of different reasons. Unless your belt is drastically different in length, this belt is what you are looking for despite any small inaccuracies. You will need to remove power to your appliance, remove the main panel, and access the motor drive to slip your new belt back into place.

$ 36.13
  In Stock
PartSelect Number PS16542496
Manufacturer Part Number WE03X29897

Replacing your General Electric Dryer Drive Belt

Replacing your Drive Belt

Customer Repair Stories

Broken Dryer Belt

I had to take most of the dryer apart because there is no rear access to the motor. It turned out to be easy to dissasembel the dryer. The only problem that I had was that I could not figure out how to route the belt around the motor and the idol pullies. I could not find anywhere that gave instructions on how to properly tension the belt. I finally figured out that the idoler pulley needs to be locked in place on the right side of the engie mount. Then the belt needs to be routed over idoler pulley and under the motor pulley. Finally release the idoler pully from the locked postion to put tension on the belt. It really turned out to be pretty easy.
  • Richard from Ashton, MD
  • Difficulty Level:
    Easy
  • Total Repair Time:
    1- 2 hours
  • Tools:
    Nutdriver, Screw drivers
62 of 87 people found this instruction helpful.
Was this instruction helpful to you?
Thank you for voting!

Drum belt broke

Removed the front Dryer panel. Left drum in place and lifted it up slightly to get access to motor drive. Slipped belt in place and put panel back on.
This was a first attempt ever at fixing an appliance and it was no big deal.
  • Adrian from Middletown, MD
  • Difficulty Level:
    A Bit Difficult
  • Total Repair Time:
    30 - 60 mins
  • Tools:
    Screw drivers
184 of 264 people found this instruction helpful.
Was this instruction helpful to you?
Thank you for voting!
Fixes Symptom 2% of time
★★★★★
★★★★★
7 Reviews

Rated by 17 customers 


Easy 

1- 2 hours 

Ratings submitted by customers like you who bought this part.   

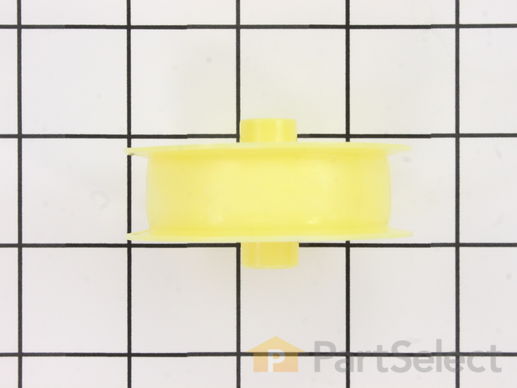
A dryer's idler pulley wheel serves to help the belt to rotate the drum.

$ 34.79
  In Stock
PartSelect Number PS265721
Manufacturer Part Number WE12X83

Replacing your General Electric Dryer Idler Pulley Wheel

Replacing your Idler Pulley Wheel

Customer Repair Stories

Replace broken drum belt and belt idler pully wheel.

Watched video instruction, paying attention to what it showed in machine. Several virsions of similar designs over the years, look over yours and note access points, take pictures as you go! Just pay attention, it is very logical. Spread the side panels to get the drum in and out, and pay attention to drum axel in back and the bushing it rides in. Be patient, be firm but gentle, no real forcing needed if you are alligned. Be sure the grooves of belt are on the drum, drive wheel on motor, no twists. Reverse order to reassemble. There are several internet videos of models with same basic setup, so look at others if one doesn't show the detail you need to see, or clear some uncertainty. Your local hardware to sorce push fastening for the idler wheel to shaft if you mash it up, they are cheep and several styles will work.
  • David from EASTON, CT
  • Difficulty Level:
    Really Easy
  • Total Repair Time:
    1- 2 hours
  • Tools:
    Pliers, Screw drivers, Socket set, Wrench set
1 person found this instruction helpful.
Was this instruction helpful to you?
Thank you for voting!

belt broken, pulley worn out

Removed 4 screws from top of control panel , remove 2 from back to lossen top of dryer. Removed rear lower access cover,6 screws on back of dryer exposing pulley and tensioner, remove broken belt and vaccuumed out a ton of lint , removed pulley and tensioner and replaced. From the front remove 4 screws and take off front of dryer, disconnecting several wires, again vaccumed out lint, lifter drum evough to replace belt. Reassembled
  • Anthony from Mpls, MN
  • Difficulty Level:
    Easy
  • Total Repair Time:
    1- 2 hours
  • Tools:
    Socket set
68 of 102 people found this instruction helpful.
Was this instruction helpful to you?
Thank you for voting!
Fixes Symptom 2% of time
★★★★★
★★★★★
7 Reviews

Rated by 8 customers 


Easy 

1- 2 hours 

Ratings submitted by customers like you who bought this part.   

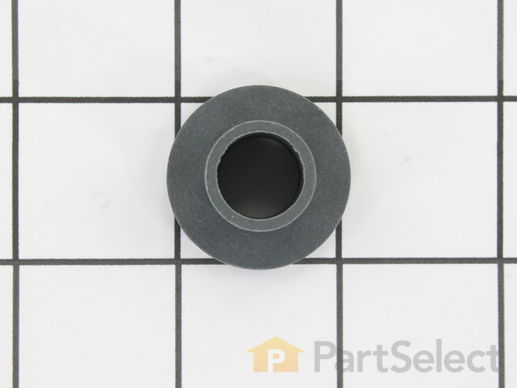
Sold individually.

$ 24.20
  In Stock
PartSelect Number PS266777
Manufacturer Part Number WE1M462

Replacing your General Electric Dryer Drum Bearing Sleeve

Replacing your Drum Bearing Sleeve

Customer Repair Stories

Loud noise

With the help of doityourself guy on the internet
  • Mary from Enterprise, AL
  • Difficulty Level:
    Easy
  • Total Repair Time:
    15 - 30 mins
  • Tools:
    Screw drivers
0 of 1 people found this instruction helpful.
Was this instruction helpful to you?
Thank you for voting!

Rubbing/Squealing Noise While Drying, especially during cold weather

This part arrived at our house two days after I ordered it. I was stunned by how quickly it arrived.

Our dryer was making a very annoying squeaking/rubbing noise while drying and it became worse as the outside temps dropped (it's winter)...colder air cooling the exhaust line, causing metal in dryer to contract more.
... Read more >I called an appliance repair service and they said, "Honestly, your money is going to be better spent to just buy a new dryer. The bearings on these are a pain to replace."

Yeah, right.

I've never taken apart a dryer, but it took me less than 45 minutes to complete this repair and our dryer is back to normal. Total cost was $18, including shipping. A $300 savings versus buying a new dryer.

There is another description of the process for this part so I won't repeat it all.

I did it a little differently than most, namely I did not remove the dryer drum. I simply pulled it out about six inches (make sure and slide belt back as you inch out the drum). But first, unplug the dryer, then remove the top, then the front.

A Philips screwdriver will quickly remove the top of the dryer (two screws on inside front, where door closes) and the front face (two screws at top of front, inside face). Lift the front up about an inch and it is free. I had to disconnect a couple wires, just make sure you mark before you disconnect them.

With that done, the drum will pull straight toward you (out). Make sure and support the weight of the drum as you slide it out. I found no need to remove the drum.

At the rear inside of our drum, there are three Torx screws that hold the bearing assembly on. I have a pretty long reach so I just removed two of the Torx screws, then reached around the back of the drum while removing the third screw, to keep the bearing assembly from falling onto the floor behind the back of the drum.

This plastic bearing is held to the bearing shaft by a little o-ring. Just pull the o-ring off, slide off the old bearing, slide the new bearing on and replace the o-ring (if yours is broken, any home store will have one that will work as a replacement in their faucet repair department).

Reattach the bearing housing to the drum with the Torx screws (get all three started before you tighten any of them), slide the drum back in - make sure you slide the belt as you move the drum back in and support the weight of the drum so you don't bash the bearing assembly into the back of the dryer.

You're doing this part blind, but in a few seconds, you can guide the bearing back into the hole in the back wall of the dryer. It just slides into the hole, nothing fancy.

Put the front of the dryer back on. Then replace the top (I had to remove the five screws on top of the dial panel to give it some flex so the top would pop back into place without stressing the dial panel), plug the dryer back in, and fire it up.

45 minutes after this part arrived at our home, our dryer problems were gone. Now that I've done one, I could probably do it in 20 minutes the next time (it's that simple/easy). And we didn't need a new dryer. Makes me think I should have the appliance guy who told me we needed a new dryer to direct all of these "pain in the fanny" bearing replacements to me because I could charge someone $50 total for the repair and make good money.

Hope all this babble helps someone else who doesn't need a new dryer.
  • Gary from Spring Hill, TN
  • Difficulty Level:
    Easy
  • Total Repair Time:
    30 - 60 mins
  • Tools:
    Screw drivers
51 of 61 people found this instruction helpful.
Was this instruction helpful to you?
Thank you for voting!
Fixes Symptom 1% of time
★★★★★
★★★★★
1 Review

Rated by 6 customers 


Easy 

30 - 60 mins 

Ratings submitted by customers like you who bought this part.   

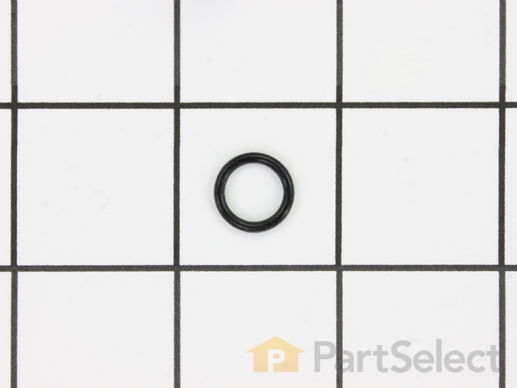
This is a replacement O-ring for the drum bearing retainer on your dryer. The drum bearing is found at the back of the dryer drum. The O-ring is designed to create a seal on the drum bearing. The O-ring is made of rubber, and can occasionally wear down and break. If you notice that your dryer drum bearing is worn while you’re replacing the O-ring, you should consider replacing it as well. This product is sold individually, and is an OEM part from the manufacturer.

$ 9.01
  In Stock
PartSelect Number PS266776
Manufacturer Part Number WE1M461

Replacing your General Electric Dryer Retainer O-Ring

Replacing your Retainer O-Ring
Fixes Symptom 1% of time
★★★★★
★★★★★
17 Reviews

Rated by 21 customers 


Really Easy 

30 - 60 mins 

Ratings submitted by customers like you who bought this part.   

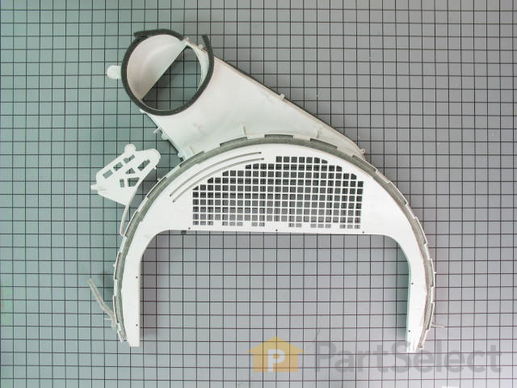
The lint chute assembly houses the lint filter and channels exhaust air from the drum to the blower wheel.

$ 108.72
  In Stock
PartSelect Number PS11763093
Manufacturer Part Number WE14X25080

Replacing your General Electric Dryer Dryer Lint Chute Assembly

Replacing your Dryer Lint Chute Assembly

Customer Repair Stories

Broken piece

Snap out the broken part. Snap in the new part. Use caution with the wires, but don’t have to disconnect them.
  • Kevin from GALES FERRY, CT
  • Difficulty Level:
    Really Easy
  • Total Repair Time:
    Less than 15 mins
  • Tools:
    Screw drivers
2 of 3 people found this instruction helpful.
Was this instruction helpful to you?
Thank you for voting!

Catching clothing and reping

Removed that to screws for that top first and door shake top little to that front and I took two screws on that top each side and removed that front and lint trap and install the new
  • Jose from LILBURN, GA
  • Difficulty Level:
    Really Easy
  • Total Repair Time:
    15 - 30 mins
  • Tools:
    Screw drivers
4 of 5 people found this instruction helpful.
Was this instruction helpful to you?
Thank you for voting!
Fixes Symptom less than 1% of time
★★★★★
★★★★★
2 Reviews

Rated by 4 customers 


A Bit Difficult 

1- 2 hours 

Ratings submitted by customers like you who bought this part.   

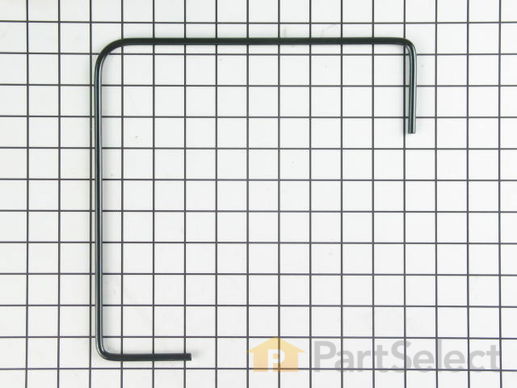
This is 39 inches long.

$ 12.89
  In Stock
PartSelect Number PS2577674
Manufacturer Part Number WE1M825

Customer Repair Stories

WAITING ON PART

Still waiting for your parts. over two weeks to get part which was a hinge for something, I don't know what, but not my dryer seal. You said you would refund shipping and wrong part and charge me for a new order. End result was I got charged extra shipping for your mistake. The part still is MIA and it has been 5 weeks since I originally ordered. Will never do business with you again.
  • MARTIN from MOUNTAIN VIEW, WY
  • Difficulty Level:
    Very Difficult
  • Total Repair Time:
    More than 2 hours
2 of 2 people found this instruction helpful.
Was this instruction helpful to you?
Thank you for voting!
Fixes Symptom less than 1% of time
★★★★★
★★★★★
1 Review

Rated by 2 customers 


A Bit Difficult 

30 - 60 mins 

Ratings submitted by customers like you who bought this part.   

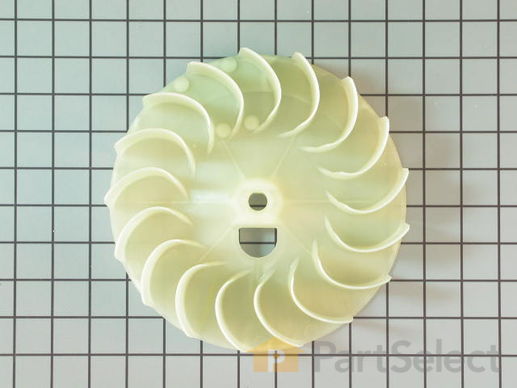
This wheel attaches to the motor.

$ 74.16
  In Stock
PartSelect Number PS960003
Manufacturer Part Number WE16M15

Replacing your General Electric Dryer Blower Wheel

Replacing your Blower Wheel
Fixes Symptom less than 1% of time
★★★★★
★★★★★
1 Review

Rated by 1 customer 


A Bit Difficult 

30 - 60 mins 

Ratings submitted by customers like you who bought this part.   

$ 21.21
  In Stock
PartSelect Number PS267026
Manufacturer Part Number WE1X688
Fixes Symptom less than 1% of time

Rated by 1 customer 


A Bit Difficult 

30 - 60 mins 

Ratings submitted by customers like you who bought this part.   

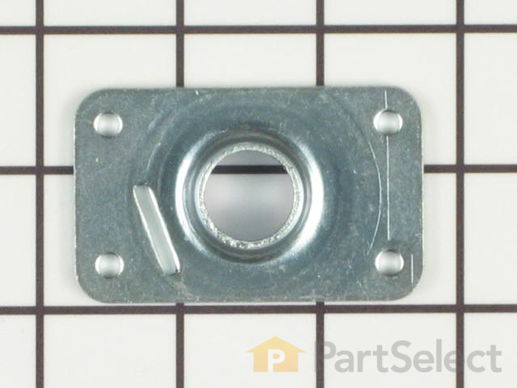
There is a slot in it for a ground strap.

$ 43.43
  In Stock
PartSelect Number PS266696
Manufacturer Part Number WE1M300
Fixes Symptom less than 1% of time
★★★★★
★★★★★
1 Review

This part, along with the idler pulley wheel, helps the belt to rotate the drum.

$ 90.11
  In Stock
PartSelect Number PS10059168
Manufacturer Part Number WE03X20434
Fixes Symptom less than 1% of time

Rated by 3 customers 


Easy 

1- 2 hours 

Ratings submitted by customers like you who bought this part.   

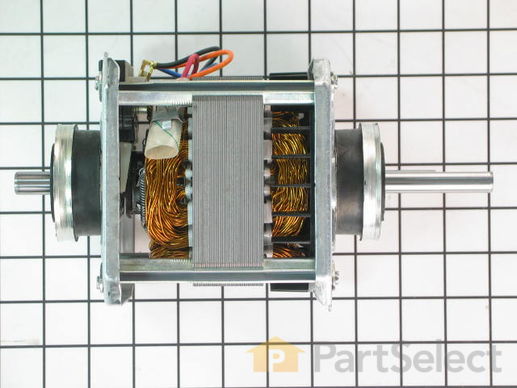
Replaces "T" and "V" style motors. Includes two motor pulleys. If you have an older model dryer, the pulley may be pressed on or held on with a set screw. If pulley is pressed on, a new motor pulley must be ordered.

$ 348.87
  In Stock
PartSelect Number PS1559768
Manufacturer Part Number WE17X10010

Customer Repair Stories

The main symptom was a burning smell that got on the clothes and the dryer was somewhat louder than it had been.

Researching on the web I thought the trouble might be lint buildup or trouble w/ one of the parts involved in spinning the drum. However I cleaned out all the lint and replaced the belt and idler pulley and this didn't improve the smell (drum bearing was fine). I then concluded the trouble was the motor. Running the motor w/o the drum in place confirmed this was where the noise/smell was coming from. Replacing the motor was fiddly--I had to remove the clip holding the motor (pried the top w/ a screwdriver), wires (made a diagram so as to put back in same order, they were hard to get off--a pliers did the job), clamps holding the motor on the duct, the motor mount, the duct, the fan. Putting all this back together took a while (not hard just fiddly). Tested the motor w/out the drum in place and it sounded fine. Put the drum and back/front/top panels back and the dryer runs fine now. All parts came quickly and exactly matched the parts in my 1993 Hotpoint dryer. As others have said the pulley kit is not needed--these are included w/ the motor. BTW I am a 53-year-old lady. Thanks to all who took the time to write up their experiences--big help!!
  • Kristin from Bellevue, WA
  • Difficulty Level:
    Difficult
  • Total Repair Time:
    More than 2 hours
  • Tools:
    Pliers, Screw drivers, Socket set
Was this instruction helpful to you?
Thank you for voting!
Fixes Symptom less than 1% of time
★★★★★
★★★★★
73 Reviews

Rated by 26 customers 


Really Easy 

15 - 30 mins 

Ratings submitted by customers like you who bought this part.   

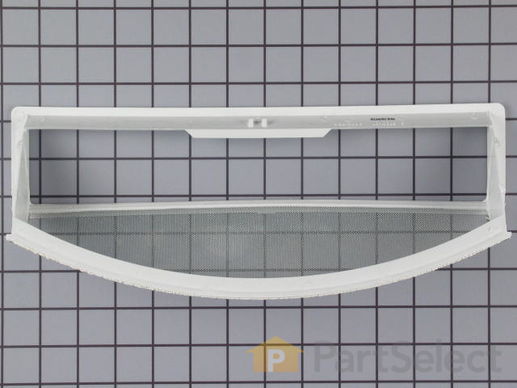
This is a lint filter screen that is used for many dryers. It has a metal screen with a white plastic frame, and is approximately 13 inches wide. This part is sold individually. The lint filter traps lint while clothes are being dried and prevents the lint from building up in clothes and internal parts of your appliance. Neglecting to clean your filter on a regular basis can negatively affect the operation of your dryer and is also a fire hazard. Be sure to clean your filter on a regular basis. Installation is easy, simply slide the filter in and out of the filter slot.

$ 70.13
  In Stock
PartSelect Number PS11767017
Manufacturer Part Number WE18X25100

Customer Repair Stories

new lint filter

my problem was easy, i orderd a new lint filter, for a
dryer that is at least 10y/o. it came to me by FEDEX,
in 3 days. i threw out the old one and put in the new
one. easy peasy. i will say that this website had what i
wanted and got it to me very quickly. good job by
PARTSELECT......
  • william from simi valley, CA
  • Difficulty Level:
    Really Easy
  • Total Repair Time:
    Less than 15 mins
20 of 29 people found this instruction helpful.
Was this instruction helpful to you?
Thank you for voting!

replacement of holed lint screen

straightforward swap, just form the top rail and click it in
  • Mark from Clarksville, VA
  • Difficulty Level:
    Really Easy
  • Total Repair Time:
    Less than 15 mins
30 of 41 people found this instruction helpful.
Was this instruction helpful to you?
Thank you for voting!
Fixes Symptom less than 1% of time
★★★★★
★★★★★
5 Reviews

Rated by 2 customers 


Really Easy 

30 - 60 mins 

Ratings submitted by customers like you who bought this part.   

$ 221.08
  In Stock
PartSelect Number PS10059171
Manufacturer Part Number WE49X22295

Customer Repair Stories

Rusty door

Removing the old door was the problem as the old screws were rusty. Then, because we are not very spatially adept, we had trouble putting the door back together with correct hinge alignment. This should have taken about an hour and the part was perfect. The dryer, which we were going to throw away, looks and works perfectly! Parts Select offers great, timely service.
  • David from Newport, AL
  • Difficulty Level:
    Easy
  • Total Repair Time:
    1- 2 hours
  • Tools:
    Screw drivers
Was this instruction helpful to you?
Thank you for voting!
Fixes Symptom less than 1% of time
★★★★★
★★★★★
75 Reviews

Rated by 61 customers 


Really Easy 

15 - 30 mins 

Ratings submitted by customers like you who bought this part.   

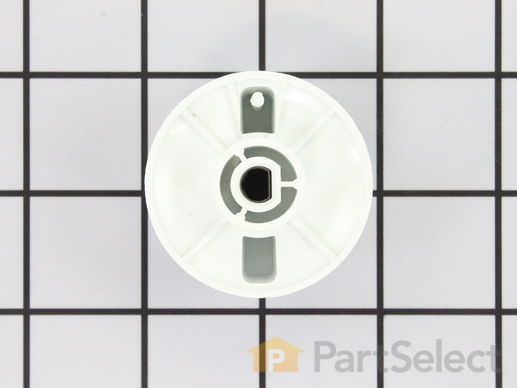
The selector knob is what you use to start the dryer. This replacement knob comes with a retaining clip. This is a very easy repair, the only tool you may need is a pair of needle nose pliers. Remove the existing knob by pulling it off, making sure to remove the retaining clip as well. Line up the new knob with the D-shaped shaft and slide it into place.

$ 14.42
  In Stock
PartSelect Number PS271094
Manufacturer Part Number WH1X2721

Replacing your General Electric Washer Selector Knob with Clip

Replacing your Selector Knob with Clip

Customer Repair Stories

The inside of the Selector Knob was stripped

Removed the damaged knob and replaced it with the new knob. Very ease
  • Frank from Irvine, CA
  • Difficulty Level:
    Really Easy
  • Total Repair Time:
    Less than 15 mins
383 of 389 people found this instruction helpful.
Was this instruction helpful to you?
Thank you for voting!

Replaced broken START knob on dryer.

Slid off the old START knob, then pushed on the new START knob.

I created and printed a label on my computer for use with the time selector dial, which must be set at or beyond 10 minutes, before turning the START knob.

I made a label that says "Minimum" with a red arrow that points past the 10 minute setting on the time selector dial.

My teenage daughter was not setting the time selector dial, to a point past 10 minutes. When she turned the START knob, the dryer would not come on, because the time selector dial was not set past the 10 minute setting.

My daughter had continually twisted the START knob until it broke. I am hoping she will be able to see the large printed label I put on the dryer near the time selector, saying "Minimum" with a large red arrow pointing past 10 minutes.

I am very pleased that I was quickly able to find the exact matching START knob for my dryer and the exact same color, from PartSelect.Com
  • SAM from ROCK HILL, NY
  • Difficulty Level:
    Really Easy
  • Total Repair Time:
    Less than 15 mins
502 of 513 people found this instruction helpful.
Was this instruction helpful to you?
Thank you for voting!