


Models
>
KECC567RBL05
KECC567RBL05 KitchenAid Cooktop - Overview
Sections of the KECC567RBL05
[Viewing 2 of 2]

Manuals & Care Guides for KECC567RBL05
Click to downloadInstall
Installation Instructions
(0.30MB)
Install
Installation Instructions
(1.76MB)
Install
Installation Instructions
(0.38MB)
Manual
Owner's Manuals
(3.29MB)
Keep searches simple, eg. "belt" or "pump".

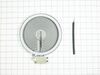
Element with Limiter 6 Inch - 1200W
PartSelect #: PS11764915
Manufacturer #: W10823711
This is a radiant surface element with limiter, and it works in conjunction with your range. The function of this part is to give heat to the surface directly above it, on cooking area stove top.This ...
$220.32
In Stock


Screw
PartSelect #: PS11740977
Manufacturer #: WP3196163
This screw is sold individually.
$8.04
In Stock

Radiant Surface Burner Element 1500W
PartSelect #: PS11764909
Manufacturer #: W10823699
This surface element is made for under glass set-ups and supplies the heat to a cooking area on top of the range. It has an outside diameter of approximately 7 inches (1500 watts), and is a genuine OE...
$106.72
In Stock

Hex Nut
PartSelect #: PS11738304
Manufacturer #: WP112432
This 10-32-inch hex nut works with multiple appliances in your home as a fastener. This specific model is sold individually. Hex nuts usually have 6 even sides and together they are used with bolts an...
$8.04
In Stock

Main Power Terminal Block
PartSelect #: PS11745232
Manufacturer #: WP8203546
Sold individually.
$24.59
In Stock


Control Knob - Black
PartSelect #: PS11745703
Manufacturer #: WP8286096BL
This knob is sold individually.
$29.24
In Stock

Infinite Switch - Triple Element
PartSelect #: PS11747410
Manufacturer #: WP9763765
$208.52
Special Order


Questions And Answers for KECC567RBL05
We're sorry, but our Q&A experts are temporarily unavailable.
Please check back later if you still haven't found the answer you need.
Common Symptoms of the KECC567RBL05
[Viewing 2 of 2]


Keep searches simple. Use keywords, e.g. "leaking", "pump", "broken" or "fit".
Right rear burner went bad
Turned the breaker off, I removed 2 screws securing the range top to the range, opened the top and secured it in the up position, Removed the 2 screws securing the element ,one at a time I swapped the quick connectors from the old element to the new and repeated the process in reverse. I save over $100.00 in labor, plus most companies get
... Read more
you for a trip charge. It was easy!!
Read less
Parts Used:
-
Mark from Loxahatchee, FL
-
Difficulty Level:Really Easy
-
Total Repair Time:15 - 30 mins
-
Tools:Nutdriver, Screw drivers
144 of 163 people
found this instruction helpful.
Was this instruction helpful to you?
Thank you for voting!
Hot Burner Light always on
Thermal switch is integral to element and can not be changed, must replace entire element.
Turn off power. Removed front two screws above oven door jamb and lifted the top. Removed the bracket that holds the element against the glass top and removed the element. Moved brackets from old element to new one, aligning to same numer ... Read more ical position and then moved wiring to new element. Slide new element under bracket and reinstalled single screw. Replaced top and screwed down. Turn on power and test .
Turn off power. Removed front two screws above oven door jamb and lifted the top. Removed the bracket that holds the element against the glass top and removed the element. Moved brackets from old element to new one, aligning to same numer ... Read more ical position and then moved wiring to new element. Slide new element under bracket and reinstalled single screw. Replaced top and screwed down. Turn on power and test .
Read less
Parts Used:
-
Gregory from Cary, NC
-
Difficulty Level:Really Easy
-
Total Repair Time:15 - 30 mins
-
Tools:Screw drivers
106 of 148 people
found this instruction helpful.
Was this instruction helpful to you?
Thank you for voting!
glass cooktop element stopped working
3 months after my 5 year warranty ran out, one of the elements on my wife's maytag cooktop "popped". I was curious to see if I could fix it myself and ran across partselect.com via google. Their step by step instructions for determining the source of the problem (i.e. either the element or the control was bad) led me to realize that the
... Read more
element was bad. I ordered a new one -- which arrived in 3 days! It was very easy to replace the element, since I had already taken the glass cooktop off of the range during the testing phase. Thanks partselect.com!
Read less
Parts Used:
-
Mark from mckinney, TX
-
Difficulty Level:Really Easy
-
Total Repair Time:Less than 15 mins
-
Tools:Screw drivers, Socket set
33 of 39 people
found this instruction helpful.
Was this instruction helpful to you?
Thank you for voting!