Models > KBRA22KMSS00

KBRA22KMSS00 KitchenAid Refrigerator - Overview

Sections of the KBRA22KMSS00

[Viewing 7 of 7]

Manuals & Care Guides for KBRA22KMSS00

Click to download
Keep searches simple, eg. "belt" or "pump".
Refrigerator Door Switch – Part Number: W11384469
Refrigerator Door Switch
★★★★★
★★★★★
(82)
PartSelect #: PS12728638
Manufacturer #: W11384469
Door switch turns the light off when you close the door.
$19.31
  In Stock
Condenser Fan Motor Kit – Part Number: 833697
Condenser Fan Motor Kit
★★★★★
★★★★★
(34)
PartSelect #: PS395284
Manufacturer #: 833697
This condenser fan motor kit is designed for use with refrigerators. This fan draws air through the condenser coils and over the compressor. It does this with the goal of cooling the warm refrigerant ...
$63.18
  In Stock
Door Switch – Part Number: W11396033
Door Switch
★★★★★
★★★★★
(33)
PartSelect #: PS12731166
Manufacturer #: W11396033
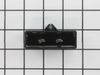
This light switch may also be known as a refrigerator door switch or a light switch kit, and is compatible with your refrigerator. The function of the refrigerator door switch is to turn on the light ...
$27.65
  In Stock
Compressor Start Device and Capacitor – Part Number: W10613606
Compressor Start Device and Capacitor
★★★★★
★★★★★
(28)
PartSelect #: PS8746522
Manufacturer #: W10613606
This includes both the run capacitor and the start relay. The capacitor helps the compressor kick on and off while maintaining a constant temperature to keep things frozen in your freezer. The start ...
$75.94
  In Stock
Run Capacitor – Part Number: WP65889-4
Run Capacitor
★★★★★
★★★★★
(5)
PartSelect #: PS11743364
Manufacturer #: WP65889-4
This part helps the compressor kick on and off while maintaining a constant temperature to keep things frozen in your freezer. If you are noticing temperature issues with your refrigerator or freezer,...
$66.72
  In Stock
Screw - 10-16 x 1 – Part Number: WP3387230
Screw - 10-16 x 1
★★★★★
★★★★★
(2)
PartSelect #: PS11741409
Manufacturer #: WP3387230
This screw is sold individually.
$7.95
  In Stock
Water Fill Cup and Bearing – Part Number: WP628356
Water Fill Cup and Bearing
★★★★★
★★★★★
(10)
PartSelect #: PS11743318
Manufacturer #: WP628356
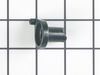
This refrigerator ice maker fill cup dispenses the water into the ice cube mold during the fill cycle. Replacing the water fill cup is a possible solution if you notice that the ice maker is leaking, ...
$40.40
  In Stock
Touch-Up Paint - White – Part Number: 72017
Touch-Up Paint - White
★★★★★
★★★★★
(1)
PartSelect #: PS385132
Manufacturer #: 72017
This touch-up paint can be used on a wide variety of household appliances. It is most often used on washers, dryer, refrigerators, dishwashers, ranges, freezers, trash compactors, or microwaves. It is...
$8.00
  In Stock
Screw – Part Number: WPW10348409
Screw
★★★★★
★★★★★
(5)
PartSelect #: PS11753384
Manufacturer #: WPW10348409
Sold individually.
$7.76
  In Stock
Evaporator Fan Blade – Part Number: WP2169142
Evaporator Fan Blade
★★★★★
★★★★★
(4)
PartSelect #: PS11738973
Manufacturer #: WP2169142
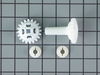
If your refrigerator or freezer is too warm, or making noises, you may need to replace the fan blade. The fan blade attaches to the evaporator motor, which is in the freezer section, to help circulate...
$37.20
  In Stock
Defrost Thermostat Kit – Part Number: 12001937
Defrost Thermostat Kit
★★★★★
★★★★★
(3)
PartSelect #: PS2003451
Manufacturer #: 12001937
This part is snapped onto the top portion of the evaporator. The thermostat sends temperature information to the processor. The defrost heater must be replaced when replacing the thermostat.
$74.07
  In Stock
Ice Bucket – Part Number: WP67001255
Ice Bucket
★★★★★
★★★★★
(4)
PartSelect #: PS11743447
Manufacturer #: WP67001255
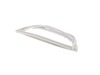
The ice bucket in your freezer catches and holds the ice when it is released by the icemaker. If your ice bucket is cracked or damaged, you may need to replace it to prevent a potential leak. This par...
$121.29
  In Stock

Questions And Answers for KBRA22KMSS00

Be the first to ask our experts a question about this model!

Common Symptoms of the KBRA22KMSS00

[Viewing 20 of 20]
Light not working
Fixed by
these parts
Fixing Fixing Fixing
Show All
Fridge too warm
Fixed by
these parts
Fixing Fixing Fixing
Show All
Will Not Start
Fixed by
these parts
Fixing Fixing Fixing
Show All
Freezer section too warm
Fixed by
these parts
Fixing Fixing Fixing
Show All
Noisy
Fixed by
these parts
Fixing Fixing Fixing
Show All
Fridge and Freezer are too warm
Fixed by
these parts
Fixing Fixing Fixing
Show All
Freezer not defrosting
Fixed by
these parts
Fixing Fixing Fixing
Show All
Door won’t open or close
Fixed by
these parts
Fixing Fixing Fixing
Show All
Ice maker not making ice
Fixed by
these parts
Fixing Fixing Fixing
Show All
Fridge runs too long
Fixed by
these parts
Fixing Fixing
Show All
Clicking sound
Fixed by
these parts
Fixing Fixing
Show All
Leaking
Fixed by
these parts
Fixing Fixing Fixing
Show All
Frost buildup
Fixed by
these parts
Fixing Fixing Fixing
Show All
Freezer too cold
Fixed by
these parts
Fixing Fixing Fixing
Show All
Too warm
Fixed by
these parts
Fixing Fixing Fixing
Show All
Ice maker won’t dispense ice
Fixed by
these parts
Fixing Fixing
Show All
Door Sweating
Fixed by
these parts
Fixing
Show All
Ice maker dispenses too much ice
Fixed by
these parts
Fixing
Show All
Not dispensing water
Fixed by
these parts
Fixing
Show All
Fridge too cold
Fixed by
these parts
Fixing
Show All
Keep searches simple. Use keywords, e.g. "leaking", "pump", "broken" or "fit".
The compressor would not run.
I removed the screws in the lower back panel where the compressor is located. Then I unplugged the capacitor and plugged the new one in. I then checked to see if the compressor would start. It wouldn't so I replaced the overload relay with capacitor and that fixed the problem. The capacitor just plugs into the relay then plugs into the compressor. There are several screws but all in all it is easy.
Parts Used:
Compressor Start Device and Capacitor Run Capacitor
  • Gilbert from Clinton, MO
  • Difficulty Level:
    Easy
  • Total Repair Time:
    15 - 30 mins
  • Tools:
    Nutdriver, Screw drivers
325 of 371 people found this instruction helpful.
Was this instruction helpful to you?
Thank you for voting!
Sometimes the condenser fan would start causing the refrigerator to overheat.
Unplug the appliance.
Removed the screws holding the back panel.
Removed the fan blade.
removed 3 screws holding the condenser fan.
Remove the 3 metal brackets attached to the fan.
(First note which studs the brackets are attached to. Attach the 3 metal brackets to the new fan. (New screws were supplied)
Cut and strip the wire about two inches from the fan.
Cut and strip the new wire. I cut the new wire in half (about 6 inches.) Connect the two wires, twist and used 2 wire nuts. Tie wrap the wire to the wire harness. Mount the new fan (three screws)
Screw the back panel back on.
Mount the new
Parts Used:
Condenser Fan Motor Kit
  • Tom from Franklin, WI
  • Difficulty Level:
    A Bit Difficult
  • Total Repair Time:
    15 - 30 mins
  • Tools:
    Nutdriver, Pliers
180 of 204 people found this instruction helpful.
Was this instruction helpful to you?
Thank you for voting!
The Bearing Cup Assembly was broken and ice would jamb against it during the ice making cycle.
I removed the ice maker from the refrigerator, by removing one screw on the underside bracket and loosening the two screws at the top side, then lifting the ice maker off the loosened screws. I then unplugged the electrical harness that supplies power from the refrigerator to the ice maker. I then disassembled the ice maker by removing the front cover which is snapped in place, then removing two recessed screws at the front. I removed the broken part, I then reassembled the ice maker with the new part. I replaced the two recessed screws at the front and snapped on the cover. Then I reinstalled the ice maker in the refrigator by plugging in the harness, slipping the ice maker over the loosened screws in the refrigerator and replacing the screw that was removed from the underside bracket. Tightening all the screws completed the project.
Parts Used:
Water Fill Cup and Bearing
  • David from Chester, CA
  • Difficulty Level:
    Really Easy
  • Total Repair Time:
    Less than 15 mins
  • Tools:
    Nutdriver, Screw drivers
107 of 133 people found this instruction helpful.
Was this instruction helpful to you?
Thank you for voting!