


Models
>
FEC36C4ACA
FEC36C4ACA Frigidaire Cooktop - Overview
Sections of the FEC36C4ACA
[Viewing 4 of 4]


Manuals & Care Guides for FEC36C4ACA
Click to downloadInstall
Installation Instructions
(0.39MB)
Manual
Owner's Manuals
(0.68MB)
Manual
Owner's Manuals
(2.18MB)
Specs
Product Specifications Sheet
(0.04MB)
Wiring
Wiring Diagram
(0.14MB)
Keep searches simple, eg. "belt" or "pump".

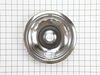
Drip Bowl - 8"
PartSelect #: PS437595
Manufacturer #: 316048413
This chrome drip bowl is designed for use with electric cooktops and ranges. This drip bowl is sold individually. At the widest point this part has a diameter of approximately 10 inches. It sits benea...
$12.59
In Stock

Chrome Drip Bowl - 6"
PartSelect #: PS437596
Manufacturer #: 316048414
The drip bowl catches grease and spills that come from cooking on your stove top. They are located under the heating elements. Drip bowls are often neglected and can become rusted and cracked. If your...
$7.46
In Stock

Terminal Block Kit
PartSelect #: PS470125
Manufacturer #: 5303935058
This part connects the wire harness to the surface element and is used for ranges. The kit includes interchangeable mounting brackets, ceramic wire nuts, heat shrink protective tubing, and wires. If y...
$16.24
In Stock

Burner Switch Kit
PartSelect #: PS470145
Manufacturer #: 5303935086
This is a burner switch kit, also known as the surface element control switch repair kit, for ranges. This burner switch kit sends voltage to the surface element coil and it controls the stove top sur...
$40.14
In Stock

Red Indicator Light Lens
PartSelect #: PS2349641
Manufacturer #: 318250801
This indicator light lens protects bulbs in ranges, ovens, stoves, and humidifiers. The lens keeps the bulb from getting cracked, scratched, and damaged. It is 1 inch long and 1 inch wide. If your len...
No Longer Available

Surface Burner Coil Element - 8" - 2100W
PartSelect #: PS473948
Manufacturer #: 5308011964
$152.66
In Stock


Questions And Answers for FEC36C4ACA
We're sorry, but our Q&A experts are temporarily unavailable.
Please check back later if you still haven't found the answer you need.
Common Symptoms of the FEC36C4ACA
[Viewing 3 of 3]Element will not heat
Fixed by
these parts
these parts


Show All
Will Not Start
Fixed by
these parts
these parts
Show All
Oven not heating evenly
Fixed by
these parts
these parts
Show All

Keep searches simple. Use keywords, e.g. "leaking", "pump", "broken" or "fit".
High heat reluctant to turn down.
Most of the job is simple fastener mechanics.
Use a nut driver or Phillips screwdriver. Remove rear panel.
Pull out control knob. If it is stuck, wrap a small rag around the back of it and pull the rag steadily.
Carefully match marked terminals on the replacement switch with those on original. Switch terminals ... Read more may not be in the same location. Replace wires one for one, one at a time.
Carefully select the correct knob filler for the switch post. Several are supplied. Proceed with logic and measure the shaft length and the filler length and type to match.
Read less
Parts Used:
-
George from New Port Richey, FL
-
Difficulty Level:Easy
-
Total Repair Time:15 - 30 mins
-
Tools:Nutdriver, Pliers, Screw drivers
45 of 49 people
found this instruction helpful.
Was this instruction helpful to you?
Thank you for voting!
Right front burner would over-heat
First of all I removed the top panel then removed the switch. I then took pictures of the switch & drew a sketch with all the info. Then I went to your web site, matched up the switch & ordered.
When the switch arrived I went thru the above replacing the bad switch.
When the switch arrived I went thru the above replacing the bad switch.
Parts Used:
-
Melvin from Attica, MI
-
Difficulty Level:Really Easy
-
Total Repair Time:15 - 30 mins
-
Tools:Nutdriver, Screw drivers
23 of 27 people
found this instruction helpful.
Was this instruction helpful to you?
Thank you for voting!
corroded terminals
was more of a job of splicing wires together than anything else. Loved the heat shrink electrical tubing
to put over the wires for insulation. used a hair
dryer. must buy more of that amazing stuff
to put over the wires for insulation. used a hair
dryer. must buy more of that amazing stuff
Parts Used:
-
Gary from hollywood, FL
-
Difficulty Level:Easy
-
Total Repair Time:15 - 30 mins
22 of 24 people
found this instruction helpful.
Was this instruction helpful to you?
Thank you for voting!