


Models
>
32-1272-57-02
32-1272-57-02 Tappan Range - Overview
Sections of the 32-1272-57-02
[Viewing 12 of 12]


Keep searches simple, eg. "belt" or "pump".

Light Bulb
PartSelect #: PS12751166
Manufacturer #: 316538904
This OEM 40 watt appliance light bulb is used for some ranges, refrigerators, freezers, and microwaves. Simply locate the existing bulb, unscrew it from its socket, and replace with new light bulb. If...
$19.73
In Stock

Burner Grate
PartSelect #: PS437719
Manufacturer #: 316055800
This is a burner grate for your surface burner, and it is compatible with your range stove top. The purpose of this part is to provide a balanced and stable surface for you to set your cookware on whi...
$37.34
In Stock

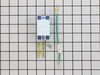
Gas Spark Ignition Switch
PartSelect #: PS437415
Manufacturer #: 316035200
When the gas burner valve knob is depressed and turned, this part creates a spark that lights the gas and starts the burner
$74.13
Special Order

Screw
PartSelect #: PS461124
Manufacturer #: 5303288565
This is an authentic mounting screw, which works with ranges, wall ovens, cooktops and warming drawers.
$9.48
In Stock

Spark Module - 120V
PartSelect #: PS468140
Manufacturer #: 5303912606
This part sends enough current to the igniter to create a spark to the bottom of the burner cap.
$106.22
In Stock


Thermostat Bulb Clip
PartSelect #: PS460519
Manufacturer #: 5303284616
This is a bulb clip, also known as a sensor clip or bulb holder, which is designed to hold the thermostat bulb in place within the interior of various models of ovens. This clip is made of metal, meas...
$9.26
In Stock


Questions And Answers for 32-1272-57-02
We're sorry, but our Q&A experts are temporarily unavailable.
Please check back later if you still haven't found the answer you need.
Common Symptoms of the 32-1272-57-02
[Viewing 2 of 2]Will Not Start
Fixed by
these parts
these parts

Show All
Gas igniter glows, but will not light
Fixed by
these parts
these parts

Show All

Keep searches simple. Use keywords, e.g. "leaking", "pump", "broken" or "fit".
My burners would not light. There wasn't the tell tale "click, click, click" of the spark module.
First I had to slide the stove out of its cubby and then I removed the two screws holding on the shield. I next removed the wires going to the spark module. I removed the top screw and loosened the bottom one. Installed the new spark module in reverse order. Less than 15 minutes for whole repair. Still have problems with spark module
... Read more
not working if oven is on, but I think it is because there is no air circulation behind the stove.
Read less
Parts Used:
-
Jonathan from Arkport, NY
-
Difficulty Level:Really Easy
-
Total Repair Time:Less than 15 mins
-
Tools:Screw drivers
15 of 21 people
found this instruction helpful.
Was this instruction helpful to you?
Thank you for voting!
Two top burners would not light, defective switch
Warning- we found a lot of bare wires in this stove, check your wires before replacing the bad switches. I lifted the top, disconnected the power, pulled off the knobs, unscrewed the switch for the back light, removed seven screws to finally get the front panel off. Once you have the front panel off, changing the swich takes less than a m
... Read more
inute. The switches just slide off the gas valve stems. Instructions show how to line up the new D-shaped switch mechanism to match the D-shaped shaft. Gently pull the two wires off the old switch and slide onto the new switch. Then put the panel back.
Read less
Parts Used:

-
Donald from Middle Village, NY
-
Difficulty Level:Easy
-
Total Repair Time:Less than 15 mins
-
Tools:Screw drivers
12 of 14 people
found this instruction helpful.
Was this instruction helpful to you?
Thank you for voting!
tHE ORIGINAL MODULE DIED AFTER 21 YEARS OF SERVICE
First had to move the stove out of its "nest", take the side cover off, remove 1 screw and loosen the other , take the old module out and reverse the operation. That simple.
Part was supplied 1 day before promised date, awesome. Part fitted exactly as the OEM part, works like a charm, everyone happy.
Part was supplied 1 day before promised date, awesome. Part fitted exactly as the OEM part, works like a charm, everyone happy.
Parts Used:
-
Jose from El Paso, TX
-
Difficulty Level:Really Easy
-
Total Repair Time:15 - 30 mins
-
Tools:Screw drivers
11 of 16 people
found this instruction helpful.
Was this instruction helpful to you?
Thank you for voting!