


Models
>
32-1012-00-06
32-1012-00-06 Tappan Range - Overview
Sections of the 32-1012-00-06
[Viewing 11 of 11]


Keep searches simple, eg. "belt" or "pump".

Burner Grate
PartSelect #: PS437719
Manufacturer #: 316055800
This is a burner grate for your surface burner, and it is compatible with your range stove top. The purpose of this part is to provide a balanced and stable surface for you to set your cookware on whi...
$37.34
In Stock

White Touch up Paint
PartSelect #: PS467298
Manufacturer #: 5303321319
This is white touch up paint for refrigerators, microwaves, ranges, dryers, and freezers. It is used to cover, or touch up, nicks and scratches on the appliance from wear and tear. It is an 18ml bottl...
$11.98
On Order

Screw
PartSelect #: PS461124
Manufacturer #: 5303288565
This is an authentic mounting screw, which works with ranges, wall ovens, cooktops and warming drawers.
$9.48
In Stock

Main Top
PartSelect #: PS438766
Manufacturer #: 316104301
This main top assembly is located on top of your range/oven to protect and house the burners. The main top also acts as a stable surface for cookware and cooking dishes. If your main stop is off balan...
No Longer Available

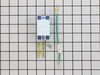
Spark Module - 120V
PartSelect #: PS468140
Manufacturer #: 5303912606
This part sends enough current to the igniter to create a spark to the bottom of the burner cap.
$106.22
In Stock


Thermostat Bulb Clip
PartSelect #: PS460519
Manufacturer #: 5303284616
This is a bulb clip, also known as a sensor clip or bulb holder, which is designed to hold the thermostat bulb in place within the interior of various models of ovens. This clip is made of metal, meas...
$9.26
In Stock


Questions And Answers for 32-1012-00-06
We're sorry, but our Q&A experts are temporarily unavailable.
Please check back later if you still haven't found the answer you need.
Common Symptoms of the 32-1012-00-06
[Viewing 2 of 2]Will Not Start
Fixed by
these parts
these parts
Show All
Gas igniter glows, but will not light
Fixed by
these parts
these parts

Show All
Keep searches simple. Use keywords, e.g. "leaking", "pump", "broken" or "fit".
the old top was cracked and rusted
The new part arrived quickly and well-packaged. Removing the old top was easy enough, but needed to remove the legs (that hold it in an open position for cleaning) from the old top. The sheet metal screws holding one of them in place were rusted in place. Had to loosen with WD-40 and vice grips, but got them off without breaking or stripp
... Read more
ing the threads. They installed perfectly on the new top and the top slipped into place easily.
Read less
Parts Used:
-
Richard from Brooklyn, NY
-
Difficulty Level:Easy
-
Total Repair Time:15 - 30 mins
-
Tools:Screw drivers
14 of 14 people
found this instruction helpful.
Was this instruction helpful to you?
Thank you for voting!
My burners would not light. There wasn't the tell tale "click, click, click" of the spark module.
First I had to slide the stove out of its cubby and then I removed the two screws holding on the shield. I next removed the wires going to the spark module. I removed the top screw and loosened the bottom one. Installed the new spark module in reverse order. Less than 15 minutes for whole repair. Still have problems with spark module
... Read more
not working if oven is on, but I think it is because there is no air circulation behind the stove.
Read less
Parts Used:
-
Jonathan from Arkport, NY
-
Difficulty Level:Really Easy
-
Total Repair Time:Less than 15 mins
-
Tools:Screw drivers
15 of 21 people
found this instruction helpful.
Was this instruction helpful to you?
Thank you for voting!
needed a new top-mine was so chipped.
I propped up the old one, the way you do to clean under the top, and removed the screw on either side of the prop up post. I slid off the top and then removed the vent so I could clean it and put it on the new top. I replaced the vent into the new one, put the props back in and then the screws. It may have gone faster for someone else-I a
... Read more
m a woman of 68 years of age and struggled a little with it. All in all, it went very well.
Read less
Parts Used:
-
Janice from Geneva, OH
-
Difficulty Level:Really Easy
-
Total Repair Time:15 - 30 mins
-
Tools:Pliers, Screw drivers
10 of 12 people
found this instruction helpful.
Was this instruction helpful to you?
Thank you for voting!