


Appliance Parts
- Accessories
- Dishwasher
- Dryer
- Stove / Oven
- Microwave
- Refrigerator
- Washer
- See more... See less...
Lawn Equipment Parts
- Lawn Mower
- Chainsaw
- Blower
- Generator
- Air Compressor
- Lawn Tractor
- Pressure Washer
- See more... See less...
Shop With Confidence


How To Fix An Oven With Little Or No Heat When Baking

Click a Part Below to Start Your Repair:
Bake Element Oven Control Thermostat Temperature Sensor Electronic Control Board FusesAbout this repair:
- Rated as EASY
- 1300 repair stories
- 12 step by step videos
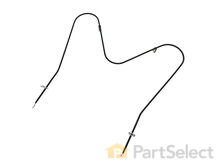
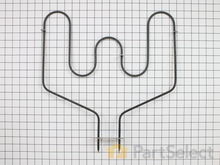
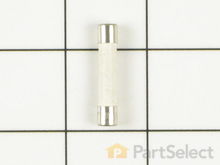
Bake Element
The bake element is the heating element that is found at the bottom of the oven. Most electric ovens use both the bake element and the broil element in a bake cycle, with the bake element performing 90 percent of the heating. If the bake element isn’t working, the oven may not reach the set temperature or will take longer to reach that temperature, and food will normally burn on the top. To help determine if the bake element is defective you should first do a visual check. If the element is blistered or separated, then it should be replaced. If the element appears to look normal, then turn the oven on to a bake function for a minute and then turn it off. Check the element for signs of heating and if it is still cold then it may be defective.
How to test an oven bake element with a multimeter:
- Because most ovens' voltage exceeds 200 volts, a jolt from which can be fatal, ensure that you disconnect your appliance from the power source before starting.
- Looking for loose or corroded wires, as well as for signs of damage or wear, inspect the terminals and wiring of your appliance’s bake element. You will need to remove the back panel to access the element and its wiring.
- If you do not find any issues while performing a visual inspection, you will need to test the element for continuity. To do this, remove the element from the appliance, change your multimeter to the Rx1 setting, and touch the probes to the element’s terminals.
- The exact reading of a functional bake element varies from model to model, but almost all fall somewhere between 19 and 115 ohms of resistance. Refer to your owner’s manual to determine what reading your test should produce.
- If your element no longer has continuity or is damaged, you will need a replacement bake element.

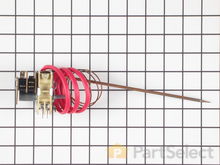
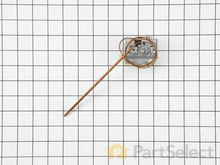
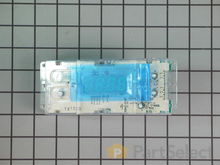
Oven Control Thermostat
The oven control thermostat controls the bake and broil elements. It is a temperature-controlled switch and as such will have contacts that supply power to these elements. A malfunctioning thermostat can cause your oven to produce too little, too much or no heat at all. For a symptom of not enough heat the oven thermostat, although unlikely, may be at fault. You should eliminate all other components first.
How to test your oven’s control thermostat with a multimeter:
- Ensure that you have unplugged your oven before beginning this inspection.
- The oven control thermostat is most often found on or near the control panel. Once you have located your thermostat, remove it in order to test it for continuity.
- Set your multimeter to the Rx1 setting and touch the terminals with the probes. The reading you should receive varies between models, refer to your owner’s manual to determine how much resistance a functioning thermostat should have for your model. Additionally, refer to your wiring diagram to determine which set of contact(s) you should be testing.
- If the results of your test(s) are different than the manufacturer recommendations, you will need a replacement oven control thermostat.
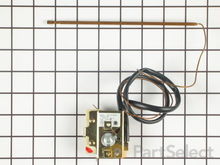
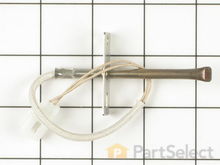
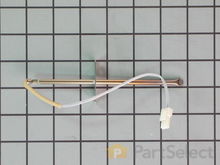
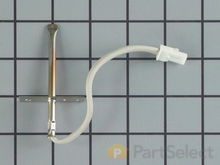
Temperature Sensor
On modern electronic control ranges, the oven temperature sensor is the part that monitors the oven temperature and signals the electronic control to turn the elements on and off. If it is not working properly it could be the reason why the oven is producing little or no heat. This part can be found inside the oven and is usually located near the broil element.
How to test an oven’s temperature sensor with a multimeter:
- Unplug your oven before starting this test.
- The temperature sensor is frequently found inside the oven, attached to the rear wall near the top. Once you have located it, remove it from the oven.
- In order to test it, you will need to reference your owner’s manual to determine what the reading for a properly functioning temperature sensor should be for your model, as this varies from model to model. To test for continuity, use a multimeter on the Rx1 setting and touch the terminals with the probes. This test needs to be done with the sensor at room temperature to produce accurate results.
- If your test results do not meet the manufacturer’s guidelines, you need a replacement temperature sensor.
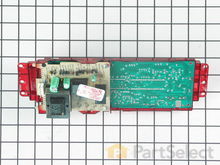
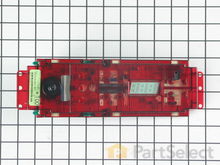
Electronic Control Board
Most modern ovens use an electronic control board to control the oven functions. These models will use the control board to operate the bake and broil elements.
How to inspect the electronic control board in an oven or range:
- Unplug your appliance before beginning this inspection.
- Your electronic control board will likely be found directly behind the control panel, likely requiring some disassembly in order to access it. Locate and remove your electronic control board.
- Looking for any signs of wear, damage, burning, or shorted terminals, visually inspect your electronic control board.
- If you find any issues while performing the inspection above, you may need a replacement electronic control board.
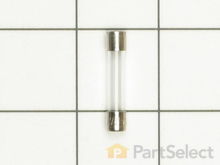
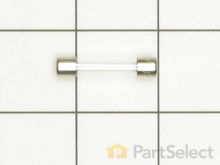
Fuses
If your oven has internal fuses, a wiring or component problem could have caused a fuse to blow. A blown fuse is an indication that a component has shorted or failed, and the problem will need to be corrected. Most ovens that use fuses will have an indication of the circuits that are affected by a particular fuse. If an oven fuse has blown, then you should inspect the oven element and the associated wiring to determine the cause before replacing the fuse. Do not change the rating of the fuses.
How to tell if your oven fuses are bad:
- Disconnect the appliance from the power source before beginning this inspection. The voltage of ovens can be as high as 220 volts, a jolt from which could be fatal.
- Identify which fuse you will be inspecting; most ovens have multiple fuses and their functions can be determined by looking at the wiring diagram or owner’s manual.
- To inspect the fuse, remove it from the oven and look through the glass window on the top of the fuse.
- If you find that the fusible link is not intact, you will need a replacement fuse.
More Repair Parts
Still not sure which part is broken? We can offer you custom troubleshooting help if you search with your model number.
