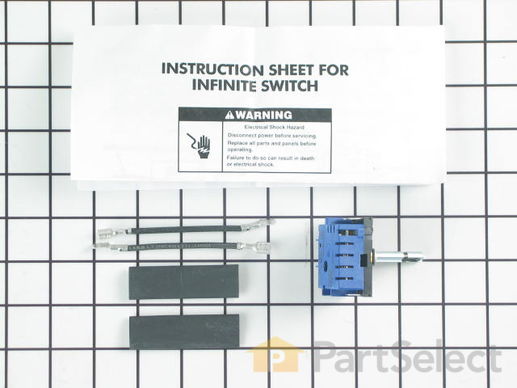
Part Location Diagram of 8203534 Whirlpool Surface Element Switch Kit
See part 7 in the diagram
( Grid squares measure 1x1 inch )
Customer Service Representative

Get in touch, we're here to help!

Daily 8am - 9pm EST

customerservice@partselect.com

Surface Element Switch Kit 8203534

 Fits your KECC502BWH2!
★★★★★
★★★★★
4 Reviews

Rated by 5 customers 

Easy 

30 - 60 mins 

Ratings submitted by customers like you who bought this part.

$ 121.26
  In Stock
Get FREE EconoShip on orders over $100! T&C apply

Get this part fast! Average delivery time for in-stock parts via standard shipping: 1.8 days.

 Fits your KECC502BWH2!
PartSelect Number PS972602
Manufacturer Part Number 8203534
Manufactured by Whirlpool
Product Description

Surface Element Switch Kit Specifications

This switch controls the stove top surface burner.
How Buying OEM Parts Can Save You Time and Money

How Buying OEM Parts Can Save You Time and Money

Troubleshooting
This part fixes the following symptoms:
Element will not heat
This part works with the following products:
Cooktop.
This part works with the following products:
KitchenAid, Whirlpool.
Part# 8203534 replaces these:
AP3672660, 1059866, 3188516, 8203534
Back to Top
Customer Reviews
Average Rating:
★★★★★
★★★★★
4 Reviews
3.3
Filter By Rating:
  • 5 Stars
    0
  • 4 Stars
    1
  • 3 Stars
    3
  • 2 Stars
    0
  • 1 Star
    0
Sort by:
  • 1
Sorry, we couldn't find any existing reviews that matched. Try using some different or simpler keywords.
  • 1
Customer Repair Stories
 Average Repair Rating: 3.7 / 5.0, 5 reviews. What's this?
Sort by:
  • 1
Sorry, we couldn't find any existing installation instruction that matched.
Infinite control switch not working
Turned the breaker off. Removed the glass cook top and removed the screws holding the cook glass to the metal burner case. Followed easy instructions removing one wire at a time and placing on the new switch. Put the glass top back on and installed screws. Placed back in the hole and turned the breaker on. Works like new.
  • John from Kentwood, LA
  • Difficulty Level:
    Really Easy
  • Total Repair Time:
    15 - 30 mins
  • Tools:
    Pliers, Screw drivers
4 of 6 people found this instruction helpful.
Was this instruction helpful to you?
Thank you for voting!
Dual Burner would only heat if knob held down
Called an authorized Kitchenaid service technician after ordering part. This was the second time this switch has required replacement so we saved time and money by ordering the part in advance from PartSelect. The trickiest part of the repair was separating the ceramic top from the rest of the cooktop. Had we attempted to do this ourselves, we would have given up at that point. I would only recommend this as a do-it-yourself repair if you are intimately familiar with how these cooktops are put together. It is fairly easy to break the ceramic top if you're not.
  • Bettye from Saint Francisville, LA
  • Difficulty Level:
    A Bit Difficult
  • Total Repair Time:
    30 - 60 mins
  • Tools:
    Screw drivers
5 of 10 people found this instruction helpful.
Was this instruction helpful to you?
Thank you for voting!
Switch on stove top would not work.
Got Model and SN, went on line and located correct part. Ordered part, arrived in 3 days. Started repair by turning off power to stovee top. Got putty knife and went around edge to loosen stove top to raise and het to underside to dismantle cover. Used battery drill to remove screws on cover. After accessing and removing top and bottom, removed 2 screws, changed one wire at a time and replaced on new switch, reassembled in reverse, turned on power and happily watched burner come to life with new switch.
  • Terry from Pana, IL
  • Difficulty Level:
    Easy
  • Total Repair Time:
    15 - 30 mins
  • Tools:
    Pliers, Screw drivers
4 of 6 people found this instruction helpful.
Was this instruction helpful to you?
Thank you for voting!
Replaced defective switch
I removed the rangetop from the counter, Then I removed the knobs and about 12 screws and removed the glass top. I then removed the panel with the controls. I marked down the wire and terminal locations and removed the defective switch . I installed the new switch and connected the wires using the supplied wiring instructions.
I was glad to see that the new switch came with wire extenders and shrink tubing. I used one of them.
I replaced the glass top and installed it back into the counter ,Turned on the circuit breaker and everything worked perfect..
  • George J from Franklin, NJ
  • Difficulty Level:
    Easy
  • Total Repair Time:
    15 - 30 mins
  • Tools:
    Screw drivers
9 of 15 people found this instruction helpful.
Was this instruction helpful to you?
Thank you for voting!
2 burner control - "Large" = "Large", "Small" = "Large"
Well, I found the two screws that held the cook top in place and backed them out. Pulled the cook top out of the counter and took out a bazillion little sheet metal screws that held the cover in place. The controllers were grouped in a cluster of four, and the "Front Left" was easy to spot. I pulled the wires off one-by-one and noted the marking on the old controller, and noted the markings on the new controller, especially the translator table that came with the new controller - the old and new controllers are a bit different. Then screwed the new controller in and tested the cook top - worked fine. Then I changed the hard wiring to the power source (a bad job originally) to a three prong plug and socket arrangement. Put it all back together and was back in business - a "piece of cake" repair. A week later "somebody" dropped "something" onto the corner of the glass and chipped out a little chunk of glass. Oh well, fun to fix anyway!
  • Scott from Huntsville, AL
  • Difficulty Level:
    Really Easy
  • Total Repair Time:
    30 - 60 mins
  • Tools:
    Screw drivers
18 of 22 people found this instruction helpful.
Was this instruction helpful to you?
Thank you for voting!
  • 1
Questions and Answers

Ask our experts a question about this part and we'll get back to you as soon as possible!

11 questions answered by our experts.
Sort by:
  • 1
  • 2
Sorry, we couldn't find any existing answers that matched.Try using some different or simpler keywords, or submit your new question by using the "Ask a Question" button above!
Chentao
September 18, 2019
Replace left front dual switch old 3188516 with new 8203534. How to wire with new ordered switch?
For model number KECC502GBL0
PartSelect logo
Hello Chentao, Thank you for the question. The wiring will go as follows: black wire from old #2 (L1) terminal will go to terminal L1, the orange/white (or blue/white) wire from old terminal 3 (H1) will go to new terminal H1a, the orange/black (or blue/black) wire from old terminal 4 (H2) will go to H1b, the violet wire from old terminal 5 (P) will go to new terminal P, the orange wire (or blue) from old terminal N (L2b) will go to new terminal H2, and the red wire from the old terminal N (L2b) will go to terminal L2. Thank you for your inquiry, good luck with this repair!

10 people found this helpful.

Was this helpful?
Thank you for voting!
Jonathon
June 13, 2019
The old duel switch 9753500 burner wires number dont match with the new universal switch. Is there a manual for it as i did not get one in the part i got.
For model number Gjp85800
PartSelect logo
Hello Jonathon, Thank you for the question. The wiring will go as follows: black wire from old #2 (L1) terminal will go to terminal L1, the orange/white (or blue/white) wire from old terminal 3 (H1) will go to new terminal H1a, the orange/black (or blue/black) wire from old terminal 4 (H2) will go to H1b, the violet wire from old terminal 5 (P) will go to new terminal P, the orange wire (or blue) from old terminal N (L2b) will go to new terminal H2, and the red wire from the old terminal N (L2b) will go to terminal L2. Thank you for your inquiry, good luck with this repair!

3 people found this helpful.

Was this helpful?
Thank you for voting!
Jose
January 15, 2019
My right rear dual burner comes on high and stays on high in single mode or in dual mode and neither in single or dual position it responds to the switch temperature selection settings. Is this switch, part no.Ps972602, what i need for my cooktop?
For model number kecc502bwh2 cooktop
PartSelect logo
Hello Jose, thank you for your question. Yes, that is the correct switch to replace for that burner. Please enter the part number into the site for current price and availability. Good luck with your repair!

2 people found this helpful.

Was this helpful?
Thank you for voting!
Lana
November 28, 2019
I'm looking for a surface burner switch for Whirlpool stove yrf263lxtq. Is this the right part? Thank you.
For model number YRF263LXTQ
PartSelect logo
Hello Lana, Thank you for contacting us. I have researched the model you have provided and have found the part you are looking for is Part #: PS11740774 for the switch that controls the small elements and Part #: PS11740783 for the large elements switch. Hope this helps!

1 person found this helpful.

Was this helpful?
Thank you for voting!
Related Parts:
Larry L. Smith
December 17, 2017
Our top left switch is defective. It requires a selection of inner or inner/outer burner with infinite heat selection. Does this switch replacement have that capability?
For model number KECC502BBL2
PartSelect logo
Hello Larry, Thank you for your inquiry. Yes, we do show that this switch is for the left rear dual burner and has the capability to select both options. Good luck with your repair!

1 person found this helpful.

Was this helpful?
Thank you for voting!
Ralph
March 12, 2020
When i turn the burner on low, it gets very hot, as if i set it to medium high or high. Seems like no regulation
For model number gjc3034
PartSelect logo
Hello Ralph, Thank you for your question. Our sources suggest replacing the burner switch itself to fix the burner control issues. We hope this helps.

1 person found this helpful.

Was this helpful?
Thank you for voting!
Tyson
February 8, 2018
Our left large dual burner either wont shut off or turns on and off sporadically. Is this the correct switch for that burner
For model number KECC502GBL1
PartSelect logo
Hi Tyson, Thank you for your question. Yes, this would be the correct switch. I hope this helps. Thank you and have a great day!

Was this helpful?
Thank you for voting!
Therese
February 25, 2018
I need a new control for the dual from burner. The inner circle won't adjust heat levels. Please tell me which kitchen aid part i need to order. Thank you.
For model number KECC502GWHO
PartSelect logo
Hi Therese, Thank you for your question. If the dual burner is not lighting up as it should then the issue is with the burner switch and it will need to be replaced. I hope this helps. Thank you and have a great day!

Was this helpful?
Thank you for voting!
Melissa
December 18, 2017
Is this part what i need for a burner that stays on high and will not turn down in heat? Do i need the whole kit or just one part?
For model number KECC507GBL0
PartSelect logo
Hi Melissa, Thank you for your question. Yes, if your burner is heating higher than it should then you will need to replace the switch that is used to operate it. I hope this helps. Thank you and have a great day!

Was this helpful?
Thank you for voting!
Jeff
March 2, 2020
After installing 8023534 infinite switch, the burner will turn on for only 20 seconds, This is for the double burner, this happens on both inner and outer. They only stay On for 20 seconds , then turn off..
For model number kecc502GBL2
PartSelect logo
Hello, Thank you for your question. You will want to check the element itself, If it is not functioning properly and the switch has been replaced you will want to check the element itself. We hope this helps.

Was this helpful?
Thank you for voting!
  • 1
  • 2
Model Cross Reference
This part works with the following models:
PartSelect Number: PS972602
Manufacturer Part Number: 8203534
Brand
Model Number
Description
Whirlpool
GJC3034GB0
Cooktop - Electric, Built-in
Whirlpool
GJC3034GQ0
Cooktop - Electric, Built-in
Whirlpool
GJC3034GS0
Cooktop - Electric, Built-in
Whirlpool
GJC3034GZ0
Cooktop - Electric, Built-in
Whirlpool
GJC3034HB0
Cooktop - Electric
Whirlpool
GJC3034HB1
Cooktop - Built-in 30" Electric
Whirlpool
GJC3034HB2
Cooktop - Electric
Whirlpool
GJC3034HB3
Cooktop - Electric, Counter-Unit
Whirlpool
GJC3034HB4
Cooktop - Electric, Counter-Unit
Whirlpool
GJC3034HP3
Cooktop - Electric, Counter-Unit
Whirlpool
GJC3034HP4
Cooktop - Electric, Counter-Unit
Whirlpool
GJC3034HQ0
Cooktop - Electric
Whirlpool
GJC3034HQ1
Cooktop - Built-in 30" Electric
Whirlpool
GJC3034HQ2
Cooktop - Electric
Whirlpool
GJC3034HQ3
Cooktop - Electric, Counter-Unit
Whirlpool
GJC3034HQ4
Cooktop - Electric, Counter-Unit
Whirlpool
GJC3034HT0
Cooktop - Electric
Whirlpool
GJC3034HT1
Cooktop - Built-in 30" Electric
Whirlpool
GJC3034HT2
Cooktop - Electric
Whirlpool
GJC3034HT3
Cooktop - Electric, Counter-Unit
Whirlpool
GJC3034HT4
Cooktop - Electric, Counter-Unit
Whirlpool
GJC3634GB0
Cooktop - Built-in, Electric
Whirlpool
GJC3634GQ0
Cooktop - Built-in, Electric
Whirlpool
GJC3634GS0
Cooktop - Built-in, Electric
Whirlpool
GJC3634GZ0
Cooktop - Built-in, Electric
Whirlpool
GJC3634HB0
Cooktop - Electric
Whirlpool
GJC3634HB1
Cooktop - Electric
Whirlpool
GJC3634HB2
Cooktop - Electric
Whirlpool
GJC3634HB3
Cooktop - Electric
Whirlpool
GJC3634HB4
Cooktop - Electric
Customer Service Representative

Get in touch, we're here to help!

Daily 8am - 9pm EST

Contact Customer Service