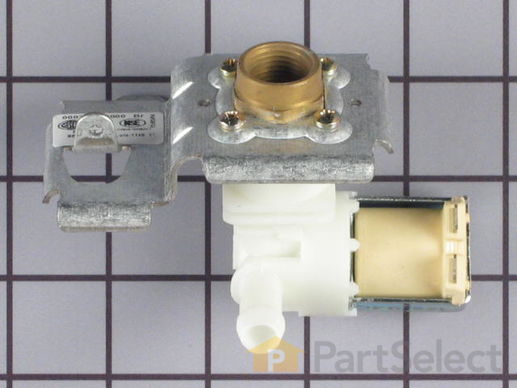
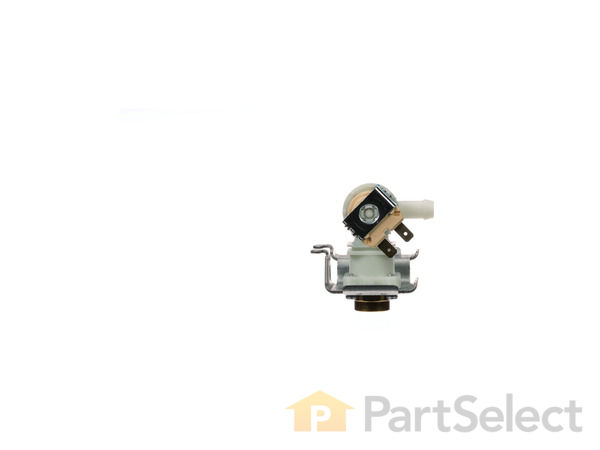
Part Location Diagram of WP8531669 Whirlpool Water Inlet Valve
See part 7 in the diagram
Replacing your Kenmore Dishwasher Water Inlet Valve
( Grid squares measure 1x1 inch )
Customer Service Representative

Get in touch, we're here to help!

Daily 8am - 9pm EST

customerservice@partselect.com

Water Inlet Valve WP8531669

 Fits your KUDI01FLBL1!
★★★★★
★★★★★
27 Reviews

Rated by 20 customers 

Easy 

1- 2 hours 

Ratings submitted by customers like you who bought this part.

$ 68.21
  In Stock
Get FREE EconoShip on orders over $100! T&C apply

Get this part fast! Average delivery time for in-stock parts via standard shipping: 1.8 days.

 Fits your KUDI01FLBL1!
PartSelect Number PS11746141
Manufacturer Part Number WP8531669
Manufactured by Whirlpool
Product Description

Water Inlet Valve Specifications

This water inlet valve should be located behind the lower kickplate panel in either the right or left corner. The attaching solenoid on the valve will open and close according to the desired amount of water needed.
How Buying OEM Parts Can Save You Time and Money

How Buying OEM Parts Can Save You Time and Money

Part Videos

Replacing your Kenmore Dishwasher Water Inlet Valve

Replacing your Kenmore Dishwasher Water Inlet Valve
Troubleshooting
This part fixes the following symptoms:
Leaking | Will not fill with water | Not cleaning dishes properly | Not draining
This part works with the following products:
Dishwasher.
This part works with the following products:
Kenmore, KitchenAid, Whirlpool, Inglis.
Part# WP8531669 replaces these:
AP6012920, 8268572, 8268590, 8528931, 8531351, 8531669, 8531670, 8531671, WP8531669VP
Back to Top
Customer Reviews
Average Rating:
★★★★★
★★★★★
27 Reviews
4.9
Filter By Rating:
  • 5 Stars
    26
  • 4 Stars
    0
  • 3 Stars
    1
  • 2 Stars
    0
  • 1 Star
    0
Sort by:
  • 1
  • 2
  • 3
Sorry, we couldn't find any existing reviews that matched. Try using some different or simpler keywords.
  • 1
  • 2
  • 3
Customer Repair Stories
 Average Repair Rating: 2.9 / 5.0, 20 reviews. What's this?
Sort by:
  • 1
  • 2
Sorry, we couldn't find any existing installation instruction that matched.
Water was leaking from the inlet valve
Turn off electrical power at breaker.
Turn off the water supply at nearest valve, disconnect supply line.
Disconnect drain hose.
Remove screws securing dishwasher to underside of countertop.
Pull dishwasher out from under the countertop, and tip it to one side.
Disconnect supply line from old inlet valve.
Disconnect rubber hose from inlet valve.
Unplug the two wires from the valve solenoid.
Remove the single screw holding the valve bracket in place, and slide the bracket to remove it.

**Unless you have an extra as I did, you will need to swap the brass 90° elbow from old valve to new. Don't forget to use thread sealer or tape.**

Reassembly is the reverse of disassembly. Watch for kinks in the supply or drain lines when pushing the dishwasher back under the counter. Be sure to check for leaks the first time you run it!

All said and done, it probably took me longer to type all this on my phone than to do the repair.
  • Mark from WHITEWATER, WI
  • Difficulty Level:
    Really Easy
  • Total Repair Time:
    15 - 30 mins
  • Tools:
    Nutdriver, Screw drivers, Wrench (Adjustable)
1 person found this instruction helpful.
Was this instruction helpful to you?
Thank you for voting!
Inlet valve failed causing dishwasher to flood the kitchen.
Replacing the valve was easy, but removing the old one was a nightmare- old, stuck parts, awkward location, minimal work space. Old fitting that connects hose to valve could not be removed, so I had to go to a plumbing supply company to get a replacement.
  • Rob from GREENSBORO, NC
  • Difficulty Level:
    A Bit Difficult
  • Total Repair Time:
    More than 2 hours
  • Tools:
    Nutdriver, Pliers, Wrench (Adjustable)
1 of 2 people found this instruction helpful.
Was this instruction helpful to you?
Thank you for voting!
water filling dishwasher even when it is off
I followed the video but reversed two of the steps. The video said to remove the water line and then remove the valve. However, there was not much room to get to the water line and it was really stuck after 10+ years. So I removed the valve first and that allowed me to move it around and get a better angle to remove the water line. For the new valve, I attached the water line first and then installed the valve. Dishwasher works fine now.
  • Cyrus from COLFAX, NC
  • Difficulty Level:
    A Bit Difficult
  • Total Repair Time:
    30 - 60 mins
  • Tools:
    Pliers, Screw drivers, Wrench (Adjustable)
1 person found this instruction helpful.
Was this instruction helpful to you?
Thank you for voting!
no water to dishwasher
googled "no water to dishwasher" and got u-tube video on 3 things to look for. first was water intake valve. video then showed how to remove and install. ordered part and installed. now have water to dishwasher tom
  • thomas from JACKSON, WY
  • Difficulty Level:
    Really Easy
  • Total Repair Time:
    30 - 60 mins
  • Tools:
    Pliers, Screw drivers, Wrench (Adjustable)
1 person found this instruction helpful.
Was this instruction helpful to you?
Thank you for voting!
No water coming into dishwasher
The repair was easy in that there were no surprises due to the video. The extra time was due to not being able to pull the appliance out for easy access. It was great to have the percentage for solving the problem identified on the website.
  • Charles from WEST PALM BCH, FL
  • Difficulty Level:
    Easy
  • Total Repair Time:
    1- 2 hours
  • Tools:
    Nutdriver, Pliers, Wrench (Adjustable)
3 of 3 people found this instruction helpful.
Was this instruction helpful to you?
Thank you for voting!
Water leaking out on sides and front of door. When opening door the tub was to full and would spill out.
Shut water off to dishwasher and turn power off. Remove kick plate in front. The part on my machine was on the left side. Not a lot space to get hands or tools in. Unhook water line watch for residual water , take a picture or make a mental note of how wires are hooked up and the direction of the brass coupling ( the part the water supply screws in to). Sliding the old part is easy. The hard part was getting the brass coupling off. Calcium and age made it difficult. Once you have it off reinstall to new part , reverse steps. Make sure everything is tight Turn water on and power. No leaks. Tub does not overfill.
  • Deb from COUNCIL BLFS, IA
  • Difficulty Level:
    A Bit Difficult
  • Total Repair Time:
    30 - 60 mins
  • Tools:
    Pliers, Screw drivers, Socket set, Wrench (Adjustable)
1 person found this instruction helpful.
Was this instruction helpful to you?
Thank you for voting!
Main Pump motor not turning
Disassebled diswasher to get to main pump motor, goal was to test Ohms of motor for failure. After disassembling to get to motor it freely turned and checked good per specifications. However, chopper blade connected to motor was locked up, preventing the motor from turning thus not turning the pump. During disassembley of chopper unit, the old rubber Water Inlet Valve was broken. A large seed was wedged behind the chopper preventing it from turning. Afer reassembley and installing new Water inlet Valve all works well. This project was more than I expected when I started and was not in any instruction manual to figure it out. However, if I couldn't make it work nothing would be lost other than my time and the expense of a new dishwasher which I was already looking at if I was not able to repair it. Most appliances are relatively simple if you have some understanding of electrical units and basic tools to work on them. PartSelect is a great resource for replacement parts with great shipping services.
  • Coy from Aurora, OH
  • Difficulty Level:
    Difficult
  • Total Repair Time:
    1- 2 hours
  • Tools:
    Nutdriver, Screw drivers, Wrench set
2 of 5 people found this instruction helpful.
Was this instruction helpful to you?
Thank you for voting!
We had banging water pipes in the house, when the dishwasher was in use.
I replaced the electric water valve (as suggested) It was in front of the unit, so it didn't need to be pulled out. I had to disconect the water line, and a by-pass line. The hard part was disconecting this rubber hose, as it was in back of the valve. Installed the part, connected the lines and two wires...No noise, works great....
  • Michael from Issaquah, WA
  • Difficulty Level:
    A Bit Difficult
  • Total Repair Time:
    30 - 60 mins
  • Tools:
    Pliers, Screw drivers
1 of 3 people found this instruction helpful.
Was this instruction helpful to you?
Thank you for voting!
Water leak
Decided to remove diswasher from built-in space to make part changeout easier and to check drain, wiring and change out water supply line. Since we had installed ceramic tile unit was a little hard to remove. Had to adjust front height as low as possible to get out. Once unit was out parts change went smoothly. Reinstalled and ran through entire cycle. No leaks!
  • Allen from Pinson, AL
  • Difficulty Level:
    Really Easy
  • Total Repair Time:
    1- 2 hours
  • Tools:
    Nutdriver, Pliers, Screw drivers, Socket set, Wrench (Adjustable), Wrench set
2 of 3 people found this instruction helpful.
Was this instruction helpful to you?
Thank you for voting!
Dishwasher leaking intermittently
To perform this repair do the following:
1.) Turn off power to the dishwasher
2.) Turn off water, disconnect the water supply and drain using adj. wrench and/or nutdriver, remove any contents from inside
3.) Remove screws (2) from underside cabinet, remove kick plate from bottom by removing two (2) screws there, pull out washer gently providing slack to drain hose and water line
4.) Gently place washer on side, do not invert or lean on the front side, water may enter control panel and damage it
5.) Remove the water line from Inlet valve using adj. wrench
6.) Disconnect both wires from solenoid.
7.) There is one metal screw holding the valve in place, remove it with a nutdriver, slide valve assembly out.
8.) Remove the 90 degree brass angle fitting from old valve, this may require some effort. Using thread tape, install fitting on new valve assembly.
9.) Replace parts in reverse order, using thread tape on any additional water line fittings requiring it, restoring water and power last.
10.) Run a test wash and check for leaks.
Hope this helps, it did appear to fix my problem.
  • Erick from Cary, NC
  • Difficulty Level:
    Easy
  • Total Repair Time:
    30 - 60 mins
  • Tools:
    Nutdriver, Pliers, Screw drivers, Wrench (Adjustable), Wrench set
6 of 9 people found this instruction helpful.
Was this instruction helpful to you?
Thank you for voting!
  • 1
  • 2
Questions and Answers

Ask our experts a question about this part and we'll get back to you as soon as possible!

6 questions answered by our experts.
Sort by:
  • 1
Sorry, we couldn't find any existing answers that matched.Try using some different or simpler keywords, or submit your new question by using the "Ask a Question" button above!
Dale
October 31, 2017
Water leaks into the dishwasher when it is not operating. I think it is the water inlet valve. Either a seal or the electric valve itself?
For model number GU2500XTPS7
PartSelect logo
Hi Dale, Thank you for the question. To stop the water from dripping into the appliance, I suggest replacing the Water Inlet Valve. Good luck with the repair!

20 people found this helpful.

Was this helpful?
Thank you for voting!
Adam
September 6, 2017
I have a problem with my dishwasher slowly filling with clean water from the bottom when it is not in use. Will replacing this part stop the water from seeping in when it is not in use?
For model number GU1200XTLB2
PartSelect logo
Hi Adam, Thank you for sending in your question. Yes normally when the tub is filling with water when the appliance is not in use it indicates the water valve is stuck open and leaking water into the tub. Replacing the valve should fix the issue. Good luck with the repair!

13 people found this helpful.

Was this helpful?
Thank you for voting!
Floyd
August 2, 2018
The one that came out of my dishwasher has a Green female in connector by the area where water line connects on the end of the thread spool looking thing. It has fsp stamped in the metal with the word part no inscribed in metal 8268572. The part i saw on your site does not have the Green female connection place on the end of the spool looking thing on the same end of i/2 inch water line. Will your part work
PartSelect logo
Hello, thank you for contacting us, In order for us to locate the correct parts and repair information we will require the model number of the appliance. Once you have located the model number please feel free to resubmit the question and we will be happy to help you. Look forward to hearing from you!

1 person found this helpful.

Was this helpful?
Thank you for voting!
Rick
July 12, 2019
The dishwasher fills very slowly after starting the wash cycle. The inlet valve screen is clear and water flows freely through the supply hose. Recently the dishwasher will discontinue the fill/wash process and stop completely. Is there a timer that would stop the dishwasher? Does it sound like a fill valve issue?
For model number KUDP01DLBS1
PartSelect logo
Hello Rick, Thank you for the question, If the appliance is filling slowly it is more then likely the valve, Water Inlet Valve, PartSelect Number PS11746141. If the appliance does not reach the proper level by a certain time (end of the fill cycle) the appliance will not proceed to the wash cycle. Hope this helps!

1 person found this helpful.

Was this helpful?
Thank you for voting!
Pete
July 24, 2019
Dishwasher doesn't fill with enough water to allow the heating element to bring the water up to temp, and therefore ends up in clean light flash 7 times. Not the float switch, does not appear debris in inlet valve screen. Not supply water pressure. Is it possible the inlet valve is not filling dishwasher fast enough before fill timeout? What else could it be?
For model number KUDP01ILBT6
PartSelect logo
Hello Pete, Thank you for the question. If the float switch tested to be good, the next part would be the water inlet valve. Hope this helps!

1 person found this helpful.

Was this helpful?
Thank you for voting!
Luc
July 31, 2023
my dishwasher still fill up when i'm not using it thank you
For model number 66516872000
PartSelect logo
Hello Luc, thank you for your query. Based on our understanding of the issue, we would suggest checking the water inlet valve, part number PS11746141, to fix the issue. The attaching solenoid on the valve will open and close accordingly and supply water to the dishwasher. We hope this solves your problem!

1 person found this helpful.

Was this helpful?
Thank you for voting!
  • 1
Model Cross Reference
This part works with the following models:
PartSelect Number: PS11746141
Manufacturer Part Number: WP8531669
Brand
Model Number
Description
Kenmore
665110739120
Dishwasher
Kenmore
665110739130
Dishwasher
Kenmore
665110739140
Dishwasher
Kenmore
665110739190
Dishwasher
Kenmore
66514353300
Dishwasher
Kenmore
66514353301
Dishwasher
Kenmore
66515872000
Dishwasher
Kenmore
66515874000
Dishwasher
Kenmore
66515879000
Dishwasher
Kenmore
66515882000
Dishwasher
Kenmore
66515884000
Dishwasher
Kenmore
66515887000
Dishwasher
Kenmore
66515889000
Dishwasher
Kenmore
66515892100
Dishwasher
Kenmore
66515894100
Dishwasher
Kenmore
66515899100
Dishwasher
Kenmore
66515912000
Dishwasher
Kenmore
66515912001
Dishwasher
Kenmore
66515914000
Dishwasher
Kenmore
66515914001
Dishwasher
Kenmore
66515919000
Dishwasher
Kenmore
66515919001
Dishwasher
Kenmore
66515922000
Dishwasher
Kenmore
66515922001
Dishwasher
Kenmore
66515923000
Dishwasher
Kenmore
66515923001
Dishwasher
Kenmore
66515924000
Dishwasher
Kenmore
66515924001
Dishwasher
Kenmore
66515929000
Dishwasher
Kenmore
66515929001
Dishwasher
Customer Service Representative

Get in touch, we're here to help!

Daily 8am - 9pm EST

Contact Customer Service