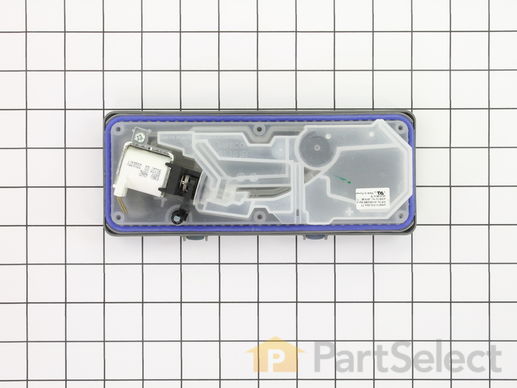
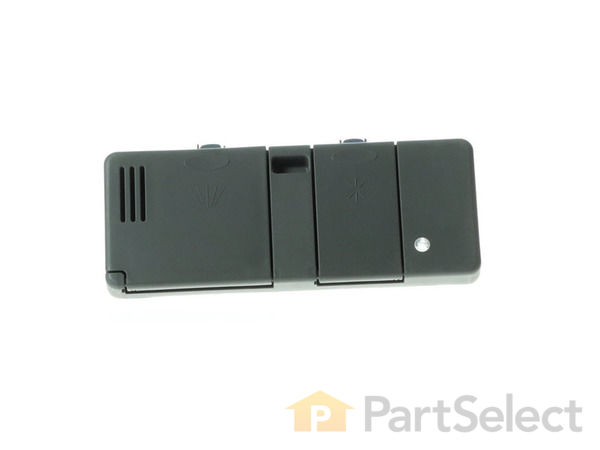
Part Location Diagram of WPW10616003 Whirlpool Detergent Dispenser
See part 11 in the diagram
Replacing your KitchenAid Dishwasher Detergent Dispenser
( Grid squares measure 1x1 inch )
Customer Service Representative

Get in touch, we're here to help!

Daily 8am - 9pm EST

customerservice@partselect.com

Detergent Dispenser WPW10616003

 Fits your KUDY24SEAL0!
★★★★★
★★★★★
3 Reviews

Rated by 8 customers 

Easy 

30 - 60 mins 

Ratings submitted by customers like you who bought this part.

$ 171.41
  In Stock
Get FREE EconoShip on orders over $100! T&C apply

Get this part fast! Average delivery time for in-stock parts via standard shipping: 1.8 days.

 Fits your KUDY24SEAL0!
PartSelect Number PS11756747
Manufacturer Part Number WPW10616003
Manufactured by Whirlpool
Product Description

Detergent Dispenser Specifications

This part releases the detergent and rinse aid into the dishwasher. **Note** this part has been redesign by manufacturer, may look and function differently than original. Rinse aid cap is NOT included. Cap is no longer needed.
How Buying OEM Parts Can Save You Time and Money

How Buying OEM Parts Can Save You Time and Money

Part Videos

Replacing your KitchenAid Dishwasher Detergent Dispenser

Replacing your KitchenAid Dishwasher Detergent Dispenser
Troubleshooting
This part fixes the following symptoms:
Will not dispense detergent | Door latch failure
This part works with the following products:
Dishwasher.
This part works with the following products:
KitchenAid, Kenmore.
Part# WPW10616003 replaces these:
AP6023403, 8193920, 9742629, 9744335, W10616003
Back to Top
Customer Reviews
Average Rating:
★★★★★
★★★★★
3 Reviews
4.3
Filter By Rating:
  • 5 Stars
    2
  • 4 Stars
    0
  • 3 Stars
    1
  • 2 Stars
    0
  • 1 Star
    0
Sort by:
  • 1
Sorry, we couldn't find any existing reviews that matched. Try using some different or simpler keywords.
  • 1
Customer Repair Stories
 Average Repair Rating: 3.5 / 5.0, 8 reviews. What's this?
Sort by:
  • 1
Sorry, we couldn't find any existing installation instruction that matched.
The soap dispenser lever had broken off the original unit
Remove bottom valence to get access to 2 screws on the bottom flange of front cover. With those 2 screws removed the front panel comes off revealing the rear side of the dispenser and 6 screws that hold dispenser tightly to the inside panel. Remove 2 wires that are push connectors to solenoid. The unit simply drops out. Installation is just the reversal of removal. Very easy.
  • John from Phillipsburg, NJ
  • Difficulty Level:
    Very Easy
  • Total Repair Time:
    15 - 30 mins
  • Tools:
    Screw drivers, Socket set
3 of 4 people found this instruction helpful.
Was this instruction helpful to you?
Thank you for voting!
Broken Latch on Detergent Dispenser
I had a broken latch on my dispenser, so had to replace the entire assembly. This is an easy repair, as the other posts have indicated. You do, however, really need a nutdriver. I undertook this project without a nutdriver and not only did it take ten times longer than it should've, but the dispenser leaked after my first attempt because I could not get the dispenser screwed in good and tight. All worked perfectly once I got the right tool, duh. The repair is done as other posters have indicated: unplug the machine, remove outer panel(s), remove six mounting screws, detach the wires attaching to the assembly, and reattach them to the new piece. **One thing not noted in other reports: there is a white plastic electrical connection on the lower right of the dispenser assembly. Mine had red wires attaching to it. To remove this from the old dispenser, you pull it straight out toward you, like a drawer from a dresser, and slot it into the new dispenser the same way. It would be quite easy to break this piece trying to get it out any other way, so use some caution.
  • Jennifer from Montgomery Village, MD
  • Difficulty Level:
    Easy
  • Total Repair Time:
    30 - 60 mins
  • Tools:
    Nutdriver, Screw drivers
49 of 60 people found this instruction helpful.
Was this instruction helpful to you?
Thank you for voting!
Detergent and rinse aid dispenser not working
Replaced dispenser. Leaked around dispenser the first time i installed. Re-tightened mounting screws and everything worked OK.
  • John from Dayton, OH
  • Difficulty Level:
    Easy
  • Total Repair Time:
    1- 2 hours
  • Tools:
    Nutdriver
5 of 9 people found this instruction helpful.
Was this instruction helpful to you?
Thank you for voting!
Latch was broken on the soap dispenser door
Turned off the power, just to be safe.

Removed the lower panel (4 screws). That made it easier to remove the lower 2 screws on the door panel. Slid the panel down slightly, then pulled off.

Removed the old dispenser - disconnected 2 wires, removed 6 screws, pushed in the plastic clips.

Pushed the new unit into place - clips click in. replaced 6 screws and 2 wires. Put the panels back on. Power on.

About 25 minutes.
  • Douglas from Grand Rapids, MI
  • Difficulty Level:
    Easy
  • Total Repair Time:
    15 - 30 mins
  • Tools:
    Nutdriver, Screw drivers
16 of 19 people found this instruction helpful.
Was this instruction helpful to you?
Thank you for voting!
soap dispenser spring wasn't working.
My husband replaced the entire soap dispenser until in under 30 minutes. I stayed out of the room. :) I didn't hear any swearing, so I assume it went fairly well. Sorry that I can't give you detailed instructions. He didn't need a manual or any type of directions. I guess it was kind of obvious how to do it. Just be sure you turn off the power first.
  • Nancy from Hollister, CA
  • Difficulty Level:
    Easy
  • Total Repair Time:
    15 - 30 mins
5 of 8 people found this instruction helpful.
Was this instruction helpful to you?
Thank you for voting!
Lower washer arm came loose- dispenser door would not stay closed
Replaced the lower washer arm retaining nut,bearing ring.and seal in about 3 min.The retaining nut had broken off inside - make sure to remove the broken piece-I used needle nose pliers.
The dispenser took about 35 mins. Removed all the screws around the inside of the door and removed panel.Removed screws holding the dispenser and replaced.I took time to give the dishwasher a good cleaning(inside edge).
Now my wife is happy.
Other Parts Used:
Detergent Dispenser Wash Arm Bearing Ring Wash Arm Retainer Nut Lower Sprayarm Seal
  • Brad from Dublin, VA
  • Difficulty Level:
    Really Easy
  • Total Repair Time:
    30 - 60 mins
  • Tools:
    Pliers, Screw drivers
8 of 10 people found this instruction helpful.
Was this instruction helpful to you?
Thank you for voting!
Soap dispenser would not stay closed.
First remove front panel of dishwasher. Held on by 2 screws on bottom of panel. Remove the electrical connections from the dispenser. Remove the six screws on the dispenser and remove dispenser. Reverse steps to install new dispenser. Also remove rinse aid sensor from old dispenser and install in the new dispenser.
  • Thomas from Inverness, FL
  • Difficulty Level:
    A Bit Difficult
  • Total Repair Time:
    1- 2 hours
  • Tools:
    Nutdriver, Screw drivers
10 of 17 people found this instruction helpful.
Was this instruction helpful to you?
Thank you for voting!
Door on soap dispenser broke off
First remove front panel of dishwasher. Held on by 2 screws on bottom of panel. Remove the electrical connections from the dispenser. Remove the six screws on the dispenser and remove dispenser. Reverse steps to install new dispenser.
  • Richard from Benton, IL
  • Difficulty Level:
    Easy
  • Total Repair Time:
    Less than 15 mins
  • Tools:
    Nutdriver, Screw drivers
32 of 41 people found this instruction helpful.
Was this instruction helpful to you?
Thank you for voting!
  • 1
Questions and Answers

Ask our experts a question about this part and we'll get back to you as soon as possible!

2 questions answered by our experts.
Sort by:
  • 1
Sorry, we couldn't find any existing answers that matched.Try using some different or simpler keywords, or submit your new question by using the "Ask a Question" button above!
Aaron
October 25, 2017
I have the above model of KitchenAid and need to replace the soap dispenser. You indicate that wpw10616003 is the correct replacement, however i noticed from other pictures available, that it has only one attachment for the wire harness while my unit has two separate wire harnesses. It appears one drives the motor and one the dispenser solenoid. Are you sure this is the right replacement and what is the procedure for the extra wire harness. Thank you
For model number KUDS24SEWH2
PartSelect logo
Hi Aaron, Thank you for your question. Yes, according to your manufacturer this is the correct part for your appliance. Good luck with your repair.

3 people found this helpful.

Was this helpful?
Thank you for voting!
Cecilia
December 3, 2021
Model No. is incomplete on dishwasher and part differs from manual: Manual says KUDS24SEAL1. The small plastic lever on the dishwashing soap dispenser broke off where it joins the dispenser. Can this be replaced without replacing the whole dispenser? If so, is the new lever made of more durable material (we ended up gluing this thing twice before giving up). Also is a new toeplate/kickplate available--years of floor mopping, etc. have not gone well with this. Otherwise, the appliance still works well.
For model number KUDVSEAL
PartSelect logo
Hi Cecilia, Thank you for your question. The lever is not sold separately and is only sold with the detergent dispenser. The part number listed under your model number for the detergent dispenser is PS11756747. The part number for the white toe panel is PS11741360 and the part number for the black toe panel is PS11741359. If you would like to place an order for these parts, you may order them either online or by calling our customer service line and anyone will be happy to assist you. We hope this helps! If you have any questions, please let us know.

Was this helpful?
Thank you for voting!
Related Parts:
  • 1
Model Cross Reference
This part works with the following models:
PartSelect Number: PS11756747
Manufacturer Part Number: WPW10616003
Brand
Model Number
Description
Kenmore
6651597299
Dishwasher - Kenmore Dishwasher Model 665.1597299 (6651597299, 665 1597299) Parts
Kenmore
66515972990
Dishwasher
Kenmore
66515972991
Dishwasher
Kenmore
66515972992
Dishwasher
Kenmore
6651597399
Dishwasher - Kenmore Dishwasher Model 665.1597399 (6651597399, 665 1597399) Parts
Kenmore
66515973990
Dishwasher
Kenmore
66515973991
Dishwasher
Kenmore
66515973992
Dishwasher
Kenmore
66515974990
Dishwasher
Kenmore
66515974991
Dishwasher
Kenmore
66515974992
Dishwasher
Kenmore
6651597999
Dishwasher - Kenmore Dishwasher Model 665.1597999 (6651597999, 665 1597999) Parts
Kenmore
66515979990
Dishwasher
Kenmore
66515979991
Dishwasher
Kenmore
66515979992
Dishwasher
Kenmore
66515982990
Dishwasher
Kenmore
66515983990
Dishwasher
Kenmore
66515984990
Dishwasher
Kenmore
66515987990
Dishwasher
Kenmore
6651598999
Dishwasher - Kenmore Dishwasher Model 665.1598999 (6651598999, 665 1598999) Parts
Kenmore
66515989990
Dishwasher
Kenmore
66515997499
Dishwasher - Kenmore Dishwasher Model 665.15997499 (66515997499, 665 15997499) Parts
KitchenAid
KUDC24SESS24
Dishwasher - UNDERCOUNTER DISHWASHER
KitchenAid
KUDC24SESS4
Dishwasher
KitchenAid
KUDC24SESS5
Dishwasher
KitchenAid
KUDC25CHBL0
Dishwasher
KitchenAid
KUDC25CHBL1
Dishwasher
KitchenAid
KUDC25CHBT0
Dishwasher
KitchenAid
KUDC25CHBT1
Dishwasher
KitchenAid
KUDC25CHSS0
Dishwasher
Customer Service Representative

Get in touch, we're here to help!

Daily 8am - 9pm EST

Contact Customer Service