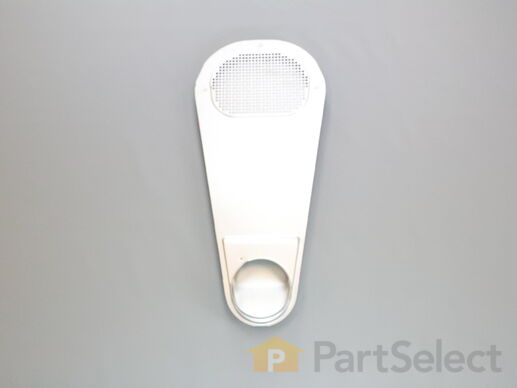
Part Location Diagram of 5304508449 Frigidaire Air Duct
See part 16 in the diagram
( Grid squares measure 1x1 inch )
Customer Service Representative

Get in touch, we're here to help!

Daily 8am - 9pm EST

customerservice@partselect.com

Air Duct 5304508449

 Fits your EWMED70JTS0!
★★★★★
★★★★★
2 Reviews

Rated by 3 customers 

Easy 

1- 2 hours 

Ratings submitted by customers like you who bought this part.

$ 89.91
  In Stock
Get FREE EconoShip on orders over $100! T&C apply

Get this part fast! Average delivery time for in-stock parts via standard shipping: 1.8 days.

 Fits your EWMED70JTS0!
PartSelect Number PS11775712
Manufacturer Part Number 5304508449
Manufactured by Frigidaire
Troubleshooting
This part fixes the following symptoms:
Marks left on clothes
This part works with the following products:
Dryer.
This part works with the following products:
Frigidaire, Electrolux, Crosley, Kenmore.
Part# 5304508449 replaces these:
AP6041718, 134694020, 134694030, 5304510146, 7134694020
Back to Top
Customer Reviews
Average Rating:
★★★★★
★★★★★
2 Reviews
4.0
Filter By Rating:
  • 5 Stars
    1
  • 4 Stars
    0
  • 3 Stars
    1
  • 2 Stars
    0
  • 1 Star
    0
Sort by:
  • 1
Sorry, we couldn't find any existing reviews that matched. Try using some different or simpler keywords.
  • 1
Customer Repair Stories
 Average Repair Rating: 2.7 / 5.0, 3 reviews. What's this?
Sort by:
  • 1
Sorry, we couldn't find any existing installation instruction that matched.
Dryer was leaving marks on clothing
You must disconnect appliance from the gas, water and vent to access the back. Remove the top of the dryer which then allows you to remove the rear panel by removing all screws, You may also have to remove 2 electrical connections to get this panel off. Now you have access to the air duct. To remove the air duct there are 3 screws inside the dryer and 2 screws on the lower part of the air duct. One of the lower screws is facing toward the inside of the dryer and you will need a 12"+ screwdriver to be able to remove. Once you do all that install the new part and repeat steps in reverse.
  • Mathew from CHELMSFORD, MA
  • Difficulty Level:
    Easy
  • Total Repair Time:
    1- 2 hours
  • Tools:
    Screw drivers
1 person found this instruction helpful.
Was this instruction helpful to you?
Thank you for voting!
Doable with 2 people but it definitely took tiime
Once we got the dryer out of the cramped where we could work on it, the project went a little quicker. I'd recommend using paper plates/bowls, that you label, to hold all the screws for each piece you remove off the back. It doesn't seem like it will be a lot, but we had at least 20-30 screws in 4-5 different sizes. Unlike someone else's install, we had to completely pull the white back panel off, as well as the main back cover, due to one screw holding the air duct from the inside of the dryer compartment (meaning we couldn't reach everything from the back). Getting this screw out was a challenge and seemed like a huge design flaw, but if you can't get to that screw, the old air duct isn't coming out. There are 2 other screws holding the air duct but they're easy to reach once the back panel is off.
Once that was taken out the process was straightforward, we just took our time reattaching everything step-by-step. Now our dryer works like new.
  • Louis from LOS ANGELES, CA
  • Difficulty Level:
    A Bit Difficult
  • Total Repair Time:
    1- 2 hours
  • Tools:
    Screw drivers
1 person found this instruction helpful.
Was this instruction helpful to you?
Thank you for voting!
Internal vent inside the drum was coated in black (plastics from use)
1. Loosened the 3 screws inside of the drum
2. Removed the entire back of the dryer (lots of screws)
3. Removed the old vent (there are 2 screws at the bottom that hold it in)
4. Install new vent (put the screws back in)
5. Close up back and proceed to put all of the screws back
  • Rich from New Albany, OH
  • Difficulty Level:
    Easy
  • Total Repair Time:
    30 - 60 mins
  • Tools:
    Screw drivers
9 of 10 people found this instruction helpful.
Was this instruction helpful to you?
Thank you for voting!
  • 1
Questions and Answers

Ask our experts a question about this part and we'll get back to you as soon as possible!

8 questions answered by our experts.
Sort by:
  • 1
Sorry, we couldn't find any existing answers that matched.Try using some different or simpler keywords, or submit your new question by using the "Ask a Question" button above!
Caitlin
November 19, 2017
Hello, i'm wondering if this part #16 is the air duct screen that shows in the back of the drum? Ours has melted nylon caked on it and we've tried to remove it and can't. The melted nylon is coming off on our sheets when we dry them. We would like to replace just this screen portion with the holes in it. I have an image but don't see a place to add it on. Thank you.
For model number 41781122310
PartSelect logo
Hi Caitlin, Thank you for your question. Yes, this would be that screen and the air duct at the back of your dryer there. I hope that helps. Good luck with your repair.

7 people found this helpful.

Was this helpful?
Thank you for voting!
Jean
January 27, 2018
The air duct on the back of the drum: Is this part replacable from the inside of the dryer? Or must you be able to access the back?
For model number FFQE5000QW
PartSelect logo
Hi Jean, Thank you for your question. To access the air duct and replace it, you will need to remove the back panel. I hope this helps. Thank you and have a great day!

3 people found this helpful.

Was this helpful?
Thank you for voting!
Kelly
March 17, 2018
For my model dryer, can this vent screen be replaced from inside the drum or does back panel need to be removed?
For model number EIGD55HIW0
PartSelect logo
Hello Kelly, Thank you for your inquiry. You would have to remove the back of the unit to get the duct assembly out. Hope this helps!

3 people found this helpful.

Was this helpful?
Thank you for voting!
David
January 30, 2019
Clothes that touch the vent in the drum are getting burn marks on them. Is this a cleaning issue or parts problem?
For model number FAQG7011KWO
PartSelect logo
Hello David, Thank you for contacting us. I suggest to check the following parts: PS11775712 Air Duct, PS2349310 PROTECTOR, and to look into reapplying adheisive to any parts near the duct that could have loosened, PS474458. Good luck with your repair!

2 people found this helpful.

Was this helpful?
Thank you for voting!
Bruce
February 16, 2023
i ordered an air duct part # ps11775712 to replace the 1 in my gas dryer the air duct currently in dryer is stainless and the new one appears to be white is is heat resistant enough for a high heat gas dryer
For model number efmg617siwo
PartSelect logo
Hi Bruce, Thank you for your question. The air duct is stainless. Because of the lighting in the photo, it appears white. If you would like to place an order for it, please call our customer service line and anyone will be happy to assist you. We look forward to hearing from you!

1 person found this helpful.

Was this helpful?
Thank you for voting!
Mckenna
March 9, 2023
hi, The back duct/vent inside the dryer has turned rusted. Is this a common problem? Why might this be happening?
For model number 970L88022A1
PartSelect logo
Hello Mckenna, thank you for getting in touch. It is common to see the vent inside your dryer turning brown as if there is burn residue on it. The dryer’s high heat itself can turn the color of the vent to a darker tint. To work well, your dryer does need to get very hot, and it is normal for this heat to discolor the vent inside your dryer. You need to clean your vent grill in order to get rid of the brownish stains. We hope this information is useful!

Was this helpful?
Thank you for voting!
Dolores
14 days ago
We have replaced this panel twice, hoping it would stop burning our clothes. I use the low cycle and it's burning my clothes. like a honeycomb. What else can I do or replace? This repair is costing me lots of money!!
For model number laqg7011kw0
PartSelect logo
Hi Dolores, thank you for contacting us. Regularly clearing dust and lint from vents with a vacuum hose prevents clogs. Dryer vents should be cleaned regularly to allow proper airflow and prevent blockages. Every 6 months or so, use a vacuum cleaner with a hose attachment to extract any lint buildup inside the dryer’s vents. If this does not help, we would recommend replacing the lint filter, part number PS2363394. We hope this solves your problem!

Was this helpful?
Thank you for voting!
Related Parts:
Steve
13 days ago
Any Suggestions for what to use to clean the residue from the dryer heat vent grill?
For model number FRQE7000LW0
PartSelect logo
Hi Steve, thank you for the question. Based on our research, you may need to use the soapy water with a squirt of dish soap to clean up the vent grill. We hope this information helps!

Was this helpful?
Thank you for voting!
  • 1
Model Cross Reference
This part works with the following models:
PartSelect Number: PS11775712
Manufacturer Part Number: 5304508449
Brand
Model Number
Description
Kenmore
41781100000
Dryer
Kenmore
41781101000
Dryer
Kenmore
41781102000
Dryer
Kenmore
41781102002
Dryer - Kenmore Dryer Model 417.81102002 (41781102002, 417 81102002) Parts
Kenmore
41781122310
Dryer - DRYER
Kenmore
41781122311
Dryer - DRYER
Kenmore
41784130000
Dryer
Kenmore
41784131000
Dryer
Kenmore
41784132000
Dryer
Kenmore
41788022000
Dryer - DRYER
Frigidaire
BAQE7073KW0
Dryer
Frigidaire
BAQE7077KB0
Dryer
Frigidaire
BAQE7077KW0
Dryer
Frigidaire
BAQG7073KW0
Dryer
Frigidaire
BAQG7077KB0
Dryer
Frigidaire
BAQG7077KW0
Dryer
Frigidaire
BKQE7017KT0
Dryer
Frigidaire
BKQE7071MT0
Dryer
Frigidaire
CAQE7001LW0
Dryer
Frigidaire
CAQE7001LW1
Frigidaire
CAQE7011KB0
Dryer
Frigidaire
CAQE7011KW0
Dryer
Frigidaire
CAQE7011LW0
Dryer
Frigidaire
CAQE7014KA0
Dryer
Frigidaire
CAQE7014KN0
Dryer
Frigidaire
CAQE7017KW0
Dryer
Frigidaire
CAQE7021LW0
Dryer
Frigidaire
CAQE7072LA0
Dryer
Frigidaire
CAQE7072LR0
Dryer
Frigidaire
CAQE7072LW0
Dryer
Customer Service Representative

Get in touch, we're here to help!

Daily 8am - 9pm EST

Contact Customer Service