This defrost thermostat is also known as a refrigerator defrost bi-metal thermostat kit. The function of the defrost bi-metal thermostat is to prevent overheating during the defrost cycle in your refrigerator by protecting the evaporator. The most common sign that there is a problem with your refrigerator defrost thermostat kit is if your freezer is cold but your refrigerator is warm. If your evaporator coils are icy then your defrost bi-metal thermostat kit could be defective. To do this installation the tools you will need include a 1/4 inch nut driver, a pair of wire strippers and crimpers, and a heat gun.
How Buying OEM Parts Can Save You Time and Money
Part Videos
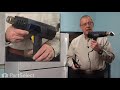
Replacing your Frigidaire Refrigerator Defrost Thermostat
Troubleshooting
This part fixes the following symptoms:
Fridge too warm | Freezer not defrosting | Freezer section too warm | Frost buildup
This part works with the following products:
Refrigerator.
This part works with the following products:
Frigidaire, Kenmore, Crosley, Westinghouse.
Part# 5303918202 replaces these:
AP2150133, 833603, 241619705, 5303918202
Customer Reviews
Average Rating:
★★★★★
★★★★★
18 Reviews
4.3
Filter By Rating:
5 Stars
12
4 Stars
4
3 Stars
0
2 Stars
0
1 Star
2
Sort by:
< Prev
1
2
Next >
Search filter:
Clear Filter
Your search term must have 3 or more characters.
Keep searches simple. Use keywords, e.g. "leaking", "pump", "broken" or "fit".
Sorry, we couldn't find any existing reviews that matched. Try using some different or simpler keywords.
★★★★★
★★★★★
Michael M - June 28, 2023
Verified Purchase
Fixed the evaporator
The defrost thermostat wasn’t working properly and I put my refrigerator info in and after reading up on my evaporator was freezing I bought the defrost thermostat at a very reasonable price and everything worked out great and all is well
★★★★★
★★★★★
Bryan L - February 2, 2023
Verified Purchase
Great Part
The part was in great condition and the kit helped with the installation. My fridge is now in full working order.
★★★★★
★★★★★
Dorothy D - March 16, 2022
Verified Purchase
Easy repair, works great again
the part was what I order and came a day earlier that said.
★★★★★
★★★★★
Arunkumar T - July 22, 2021
Verified Purchase
Works
I have received defrost timer and thermostat.first i replaced defrost timer my refrigerator works fine .i like to return thermostat.what is procedure?
★★★★★
★★★★★
Edward L - March 6, 2021
Verified Purchase
Easy install nice correct part
Part arrived in perfect condition
★★★★★
★★★★★
Kevin A - December 23, 2020
Verified Purchase
Easy Repair
The Part was about identical and had two wire terminal clips along with two heat shrink tubes that were totally inadequate they are much too large to affect a seal and not long enough to seal the wires in place ...Purchase your own heat shrink tubing or do as I had to do , twist the wires together and wrap with a high quality duct tape !
★★★★★
★★★★★
Robert H - May 14, 2020
Verified Purchase
defrost thermostat
part is exact fit installation was easy so far so good
★★★★★
★★★★★
Matt G - June 4, 2019
Verified Purchase
Freezer frigid but fridge warm.
Through a little bit of You Tube research and deductive reason, I narrowed it down to three possible parts to replace: heating element, thermostat timer and thermostat. I replaced all three to ultimately resolve this matter. It wasn't the heating element but the new part gives peace of mind that it's new. The fix was the result the replacement of the timer and thermostat. Freezer and lower fridge working perfectly now. 30-40 minutes quick fix.
★★★★★
★★★★★
George O - November 14, 2018
Verified Purchase
Thank you
The i orders was correct and the service you provided was on Poot
★★★★★
★★★★★
Walt C - October 28, 2018
Verified Purchase
Zero tech knowledge!
Frigidaire refrigerator freezer was working, but refrigerator was warm. Watched YouTube video for step-by-step troubleshooting. Heating coil was good, next thing on line was temp sensor. Ordered replacement part from Partselect, arrived in 3 days. BAMB! $28 part, no service tech bill, no new frig purchase necessary. Give it a shot. Do-it-yourself!
< Prev
1
2
Next >
Customer Repair Stories
Average Repair Rating: 3.5 / 5.0, 26 reviews.
What's this?
Sort by:
< Prev
1
2
3
Next >
Search filter:
Clear Filter
Your search term must have 3 or more characters.
Keep searches simple. Use keywords, e.g. "leaking", "pump", "broken" or "fit".
Sorry, we couldn't find any existing installation instruction that matched.
Freezer compartment works but gets frost and ice buildup. Then the refrigerator compartment fails to get cold. Milk would spoil but freezer stayed frozen.
After watching numerous YouTube videos I realized that my problem was either the timer or the thermostat. I purchased both for above $70 total and decided it was worth the gamble to self- repair it instead of buying a new refrigerator for $700 plus taxes and delivery charges. The videos were right on with excellent directions for replacin
... Read moreg these 2 products. Only has one problem… the shrink wrap that came with the thermostat is very thick and will NOT shrink with a hairdryer. I hade to run to ACE Hardware to buy a heat gun and more shrink wrap
Turned off fridge circuit breaker Removed all food from freezer and put in cooler. Removed shelves from freezer Removed ice maker Removed 2 hex head screws Tilted back evaporator cover and tried to unplug connection. Found connection was iced over with a huge block of ice coming from water inlet to ice maker<
... Read morebr />Spent several hours trying to melt and chip away ice without damaging fridge. Finally was able to break up ice with long flat head screwdriver and hammer. Unplugged connector and was able to remove evaporator cover. Cut wires near thermostat and removed Stripped wire as needed and crimped new thermostat in place. Used heat gun and lighter to melt heat shrink. This took a long time and required a lot more heat than expected. Reconnected evaporator cover connection and reattached cover. Reinstalled ice maker Reinstalled shelves. Put food back in Turned circuit breaker back on.
Read less
David from N KINGSTOWN, RI
Difficulty Level:
A Bit Difficult
Total Repair Time:
More than 2 hours
Tools:
Nutdriver, Pliers, Screw drivers
2 of 2 peoplefound this instruction helpful.
Was this instruction helpful to you?
Thank you for voting!
Top cools bottom is weak
Unplug, remove 2 screws off back panel inside the freezer. Cut wires on old one and crimped in new one. Light to melt the shrink wrap that came with it. Pretty easy.
JUSTIN from NEW BRAUNFELS, TX
Difficulty Level:
Very Easy
Total Repair Time:
15 - 30 mins
Tools:
Nutdriver, Pliers
2 of 2 peoplefound this instruction helpful.
Was this instruction helpful to you?
Thank you for voting!
Refrigerator evaporator coil was icing up
The evaporator coil is behind the freezer. Remove the rack that makes the shelf and remove two 1/4” hex head screws I the back of the freezer to access the coil. I used a hair dryer to melt the ice off the coil. The thermostat clips on the refrigeration pipe to the coil. Remove the old thermostat and cut the wires at least a fe
... Read morew inches from the thermostat. Clip the new thermostat on the pipe and strip about a 1/4” of the wire ends. The electrical connectors (provided with the new part) must be crimped to connect the wires.
Read less
David from VENICE, FL
Difficulty Level:
Easy
Total Repair Time:
15 - 30 mins
Tools:
Nutdriver
1 of 2 peoplefound this instruction helpful.
Was this instruction helpful to you?
Thank you for voting!
Freezer seemed ok, though frosty, but the bottom section was not cold enough, and the compressor seemed to run constantly.
The lower compartment was hovering around 50 degrees. Logic told me that cold air was not being driven from the freezer to the lower compartment. At first, I found the passageway between freezer and lower compartment was blocked with frost/ice, which could have been the entire problem. But why was that ice accumulated there? After def
... Read morerosting, the problem was only partly solved. A few how-to videos suggested that the defrost timer was a common problem, so I tried that, the part was about $11, with minimal improvement. So I concluded that the fan was not driving cold air from the freezer to the lower section. I tested the fan by removing the freezer back panel completely, wiring the fan to an old ordinary power cord, and plugging that in to a wall outlet. The fan would not start on its own, would only turn if I gave it a spin, and then was very weak - I could stop it with a finger without pain! When my new fan arrived, I again removed the back panel in the freezer and replaced the fan, just a few screws to remove, then swap the fan blade to the new fan motor. The process was simple and obvious. Now the lower section stays near 40 degrees, though I'm not convinced that's the only problem-there seems to be a lot of variation in the temperature. BTW, I had also confirmed the defrost heating element was functional by activating the defrost timer (see youtube), to eliminate that from the diagnosis.
Freezer was frosting up and refrigerator was not getting cold.
All 3 parts were very easy to replace. Thawing out the freezer took the most time. Great videos that go with each part for installation. I will be purchasing again from this company when needed.
Thawed out freezer, I recommend laying a couple old towels in freezer to soak up melted ice. Replaced old thermostat with new part. Removed 2 screws, removed back plate, unplugged 2 connectors and cut 2 wires. Crimped in new thermostat and repositioned to original part location. Reconnected plugs as I reinstalled back plate. Installed 2 s
... Read morecrews and connected power. Works like new! Trouble shooting and part installation video is very helpful, great site!
Read less
will from bushnell, IL
Difficulty Level:
Very Easy
Total Repair Time:
Less than 15 mins
Tools:
Nutdriver
1 personfound this instruction helpful.
Was this instruction helpful to you?
Thank you for voting!
Refrigerator not working, freezer working
I initially replaced the defrost timer, and later replaced it and the defrost thermostat. The defrost thermostat was the faulty component
I watched the video on how to change the defrost thermostat. I removed the back cover inside the freezer then I pulled off the old defrost thermostat and then using a pair of wire cutters I cut it off and then bared a little of both of the wires and then slid the heat sherink and wire connectors on the existing wires and then slid the ot
... Read moreher ends of the wires into the wire connectors then crimped the ends of the connectors and then tried using heat on the heat shrinks but still used rubber electric tape over it. I clipped the new thermostat were the old one was and then reattached the freezer wall cover and plugged the refrigerator back in. 24 hours later I checked the temperature in the refrigerator and freezer and both are running a lot colder.
Read less
Nathan from WELLS, ME
Difficulty Level:
A Bit Difficult
Total Repair Time:
30 - 60 mins
Tools:
Nutdriver, Pliers
2 of 2 peoplefound this instruction helpful.
Was this instruction helpful to you?
Thank you for voting!
< Prev
1
2
3
Next >
Questions and Answers
Ask our experts a question about this part and we'll get back to you as soon as possible!
27 questions answered by our experts.
Sort by:
< Prev
1
2
3
Next >
Search filter:
Clear Filter
Your search term must have 3 or more characters.
Keep searches simple. Use keywords, e.g. "leaking", "pump", "broken" or "fit".
Sorry, we couldn't find any existing answers that matched.Try using some different or simpler keywords, or submit your new question by using the "Ask a Question" button above!
Jack
July 22, 2017
No heat gun. What about a propane torch? (defrost thermostat)
For model number FRT21KS5AQ1
Hi Jack, thank you for the interesting question. A heat gun would be the safest route to shrink wrap your wires together. However you can also use a hair dryer, if a heat gun is unavailable to you. I hope this helps.
23 people found this helpful.
Was this helpful?
Thank you for voting!
Frank
September 19, 2017
How do you test defrost thermostat
For model number GLRT183TDW8
Hi Frank,
Thank you for the question, The best way to do this is to remove the thermostat from the refrigerator so you can control the temperature of the sensor. You can let the sensor warm up to room temperature. With the sensor warmed up to room temperature the thermostat should read approximately 6.2K Ohms at 68°F. With the thermostat submerged is a glass full of ice water, the sensor should be very close to 32°F which should read approximately 16.3K Ohms. If the values that you are getting are far off from these readings, then the sensor is bad and should be replaced.
Hope this helps!
18 people found this helpful.
Was this helpful?
Thank you for voting!
TJ
December 19, 2017
My fridge and freezer are running warm. I checked the evap. And compressor fan. I cleaned the coils and i checked the thermostat in the fridge. All these things check out. My last thing to check is the defrost thermostat. However, when i remove the panel in the freezer there is no ice build up. Is it possible that it is still defective but in a way that makes it turn on too often?
For model number LFTR1814LW8
Hello TJ, Thank you for your inquiry. Yes it can, and you should also check the defrost heater and timer as well. Hope this helps!
5 people found this helpful.
Was this helpful?
Thank you for voting!
Dale
December 28, 2017
Where is the defrost timer located my freezer and refrigerator area are warm, i unplugged it for a day and plunged it back in and the freezer got do to 0 deg. The unit sits in a garage around 45 degrees. Do not know if it is the timer or the defrost thermostat?
For model number FFTR1814LW9
Hi Dale,
Thank you for your question. The defrost timer is locacted in the control box where the light switch and air diffuser are. If the refrigerator and the freezer are too warm, there are some parts that you will need to check to see which one is causing the issue. You will need to check the defrost timer, the door gasket, the run capacitor, the condenser fan motor, the temperature control thermostat, the starter-ptc, and the defrost timer. I hope this helps. Thank you and have a great day!
3 people found this helpful.
Was this helpful?
Thank you for voting!
Adel
September 27, 2017
Where is the defrost thermostate is located
For model number 253.6580250A
Hi Adel,
Thank you for your inquiry. There is a video on lour website that you can reference on both how to install the part and where the part is located. The video is listed just under the information on the part on our website. I hope this helps. Thank you and have a great day!
3 people found this helpful.
Was this helpful?
Thank you for voting!
Denny
September 4, 2019
Water is leaking on the inside of the fridge and staying on the top shelf where it freezes. I don't know where it is coming from.
For model number FRT17G5CSBO
Hello Denny, thank you for your question. We would recommend checking the drain tube at the back of the freezer to be sure it isn't clogged. The back wall would have to be removed and inspected. You might want to check that area for any excess frost or ice buildup which could be caused by a bad thermostat, heater or evaporator motor. I hope this helps!
3 people found this helpful.
Was this helpful?
Thank you for voting!
Georgia
August 28, 2019
My refrigerator intermittently goes off and on. I replaced the thermostat control and when it failed again a few months later, i replaced the defrost timer. It's worked fine again for 3 months and it went off for a couple of hours yesterday and then back on again by itself. What parts would fail intermittently and what do you recommend that i do.
For model number Electrolux/Frigidaire refrigerator P/N 24516600. Model # FRT 18 IS 6CW? (the last number was rubbed
Hello Georgia, thank you for inquiring. This could be due to a faulty Run Capacitor or
Compressor Start Relay, but the model number you provided in partial with multiple variations using some different parts. We will need the rest of the model number to determine which parts list to use. There should be one last number or letter after the FRT18IS6CW that you have provided. We look forward to hearing back from you!
2 people found this helpful.
Was this helpful?
Thank you for voting!
Jeff
September 26, 2019
Hi, i was wondering how long the freezer compressor should continue running before it stops and the defrost heater comes on. I think i read around 8 hours somewhere. My freezer coils start to ice up long before that. Also, how long will the defrost cycle last?Thanks!
For model number FRT17G4BWD
Good Day Jeff. Thank you for your question in regards to your unit (Model Number FRT17G4BWD). Based on our research the defrost cycle should take approximately 20 to 30 minutes. When it comes to the freezer compressor, our research into this suggests that it should run 45 minutes per hour. Hope this helps. Best Regards.
2 people found this helpful.
Was this helpful?
Thank you for voting!
Laraine
April 26, 2018
My refrigerator isn’t cooling like it suppose to and freezer isn’t cooling like it suppose too my freezer has ice built up in it i replaced defrost timer it hasn’t fixed it what else could it be?
For model number Frt8g7hw0
Hi Laraine, Thank you for the question. I suggest testing the Defrost Thermostat, PartSelect Number: PS469510.The best way to do this is to remove the thermostat from the refrigerator so you can control the temperature of the sensor. You can let the sensor warm up to room temperature. With the sensor warmed up to room temperature the sensor should read approximately 6.2K Ohms at 68°F. With the thermistor submerged is a glass full of ice water, the sensor should be very close to 32°F which should read approximately 16.3K Ohms. If the values that you are getting are far off from these readings, then the sensor is bad and should be replaced. Hope this helps!
2 people found this helpful.
Was this helpful?
Thank you for voting!
Torring Ware
April 17, 2019
My freezer is icing up after a week.
For model number PLHT219TCB0
Hello Torring, thank you for inquiring. For this symptom you will want to replace either the Defrost Thermostat part PS469510 or the Evaporator Fan Motor Kit part PS3419839. We hope this helps.
1 person found this helpful.
Was this helpful?
Thank you for voting!
< Prev
1
2
3
Next >
✖
Ask a Question
Ask our experts a question on this part and we'll respond as soon as we can.