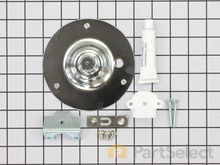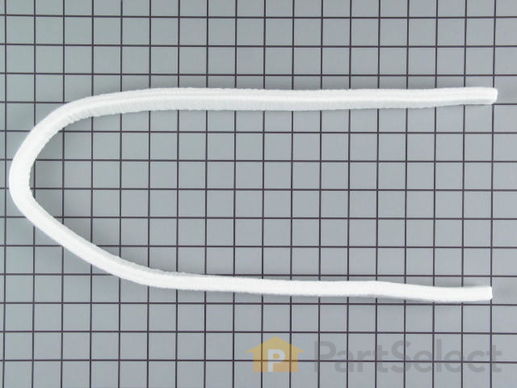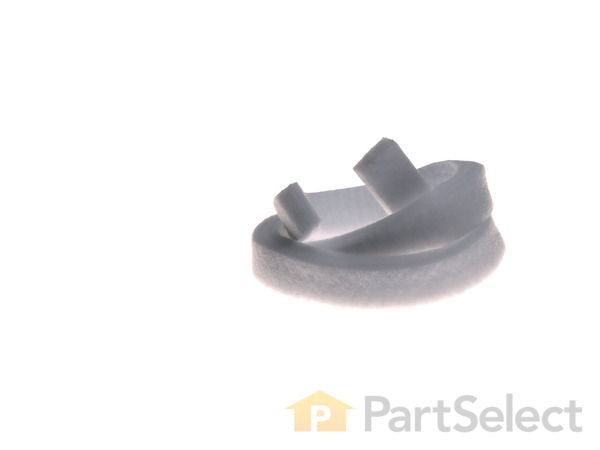
Front Drum Seal 5303281049
★★★★★
★★★★★
Rated by 14 customers
Easy
1- 2 hours
Ratings submitted by customers like you who bought this part.
$
28.04
On Order
Get FREE EconoShip on orders over $100! T&C apply
PartSelect Number PS459776
Manufacturer Part Number 5303281049
Manufactured by
Frigidaire
Product Description
Front Drum Seal Specifications
Used with dryers with a 27-inch drum.

How Buying OEM Parts Can Save You Time and Money
Troubleshooting
This part fixes the following symptoms:
Noisy | Marks left on clothes
This part works with the following products:
Dryer.
This part works with the following products:
Frigidaire, Kelvinator, Gibson, Tappan.
Part# 5303281049 replaces these:
AP2142612, 3576, 08015429, 3281049, 5303281049, 8015429, Q000616042, WQ616042
Customer Reviews
Average Rating:
1 Review
★★★★★
★★★★★
5.0
Filter By Rating:
-
5 Stars 1
-
4 Stars 0
-
3 Stars 0
-
2 Stars 0
-
1 Star 0
Sort by:
- < Prev
- 1
- Next >
Search filter:
Clear Filter
Your search term must have 3 or more characters.
Keep searches simple. Use keywords, e.g. "leaking", "pump", "broken" or "fit".
Sorry, we couldn't find any existing reviews that matched. Try using some different or simpler keywords.
★★★★★
★★★★★
Jana S - September 1, 2018
Verified Purchase
Will seek this vendor again!
All parts were as described, fit perfectly and returned our dryer to like new operation. Parts we're back ordered however arrive within a week.
- < Prev
- 1
- Next >
Back to Top
Customer Repair Stories
Average Repair Rating: 3.2 / 5.0, 14 reviews.
What's this?
Sort by:
- < Prev
- 1
- 2
- Next >
Search filter:
Clear Filter
Your search term must have 3 or more characters.
Keep searches simple. Use keywords, e.g. "leaking", "pump", "broken" or "fit".
Sorry, we couldn't find any existing installation instruction that matched.
sqeaking noise
Removed front of dryer scraped old seal off ,used brake cleaner on a rag to get old glue off and roughed up seal area with sand paper ,spread glue on attached seal held in place with clothes pin overnight.
Other Parts Used:
-
Ron from New Castle, IN
-
Difficulty Level:Really Easy
-
Total Repair Time:30 - 60 mins
-
Tools:Screw drivers
0 of 1 people
found this instruction helpful.
Was this instruction helpful to you?
Thank you for voting!
drum guide piece broke off causing it to snag drum seal
snapped guide in place and glued seal, I should have purchased 2 seals so they are same thickness2, oh well it is workinf fine .
Other Parts Used:
-
sidney from lockport, IL
-
Difficulty Level:Really Easy
-
Total Repair Time:15 - 30 mins
0 of 2 people
found this instruction helpful.
Was this instruction helpful to you?
Thank you for voting!
Dryer Belt Broke & Would Not Spin
First I pulled up on top panel. Next I removed the two screws holding on the front panel on. Next I pulled forward and front panel pulls out. I cleaned the old upper & lower drum glide & drum seal using a razor blade. I used the high temp glue that came with the top glide. I glued them both on & let sit for about half hour. While t
... Read more
he glued dried I installed new belt & belt idler pulley. I re-assembled the front panel while lining up the drum. Re-installed the 2 screws. Snapped the top panel back in place. Plugged it back in & turned it on. Awesome noise was gone & working great.
Read less
Other Parts Used:
-
ROBERT from LAKE ELSINORE, CA
-
Difficulty Level:Easy
-
Total Repair Time:30 - 60 mins
-
Tools:Screw drivers, Socket set
1 of 2 people
found this instruction helpful.
Was this instruction helpful to you?
Thank you for voting!
The belt was worn and the clothes were getting stained
I took the front off, placed the belt quite easily.
I then had to unglue the old front drum seal and drum glide and re glue the new one, but it came with everything I needed so there was no problem.
My clothes no longer get these little brown stains they got. I suppose they were getting caught.
Its wonderful!!
I then had to unglue the old front drum seal and drum glide and re glue the new one, but it came with everything I needed so there was no problem.
My clothes no longer get these little brown stains they got. I suppose they were getting caught.
Its wonderful!!
Other Parts Used:
-
Gustavo from Key Biscayne, FL
-
Difficulty Level:Easy
-
Total Repair Time:30 - 60 mins
-
Tools:Screw drivers
0 of 1 people
found this instruction helpful.
Was this instruction helpful to you?
Thank you for voting!
Rust Stains on clothes in dryer
1. Slid putty knife under each side of front of dryer to release lid.
2. Removed 2 screws from front of drum to release door assembly.
3. Removed wires from door switch.
3. Cleaned lint out of inside of dryer.
4. Removed old felt seals, upper & lower.
5. Removed old glue with goof off type remover.
6. ... Read more Glued new seals on & held then in place with clothes pins. (there was enough glue in the tube that came with the upper glide for both seals)
7. Put dryer back together.
**Ensure you verify the correct felt seal pieces with the model number of your dryer, usually on inside of door.
Read less
Other Parts Used:
-
Ryan from Jeffersonville, IN
-
Difficulty Level:Easy
-
Total Repair Time:15 - 30 mins
-
Tools:Screw drivers
4 of 5 people
found this instruction helpful.
Was this instruction helpful to you?
Thank you for voting!
Dryer was putting brown spots and tearing clothes.
My husband took the front panel off. We scaped the old seals off. Used the adhesive that came with the drum glide and replaced both parts. No more ripped and stained clothes, that easy!
Other Parts Used:
-
Angela from Runnemede, NJ
-
Difficulty Level:Easy
-
Total Repair Time:15 - 30 mins
1 of 2 people
found this instruction helpful.
Was this instruction helpful to you?
Thank you for voting!
Clothes where getting brown stripmarks on the fabric.
After removing the front door of the unit I removed the Drum seal felt and upper felt part. Then I cleaned the metal ring with acetone to remove dirt. We you install the new parts the glue sent with the Drum Glide is enough for the task with a little left over. Now its working great.
Thanks for good part Jeff
Thanks for good part Jeff
Other Parts Used:
-
Jeff from Reidsville, NC
-
Difficulty Level:Easy
-
Total Repair Time:1- 2 hours
-
Tools:Pliers, Screw drivers
2 of 2 people
found this instruction helpful.
Was this instruction helpful to you?
Thank you for voting!
The old drum seal top had torn off.
Opened the drayer top and then removed the front panel.
Removed the bottom seal from the acr as it was warn.
Carefully scarped off the remaining bits of felt from the arc.
Applied the supplied adhesive to the top half of the cleaned arc.
Placed the seal and held in place with small spring clamps.
Let it dry for ... Read more an hour, then I repeated the process with the bottom seal.
I let it dry over night, overkill probably but I wanted it to stay.
Replaced the front with new seal and closed up the top.
It has been working well since. Thanks for stocking parts that help out homeowner's on tight budgets.
Read less
-
jeffrey from round lake heights, IL
-
Difficulty Level:Easy
-
Total Repair Time:1- 2 hours
-
Tools:Screw drivers
2 of 2 people
found this instruction helpful.
Was this instruction helpful to you?
Thank you for voting!
Burn marks on clothes
Opened the top of the dryer (no tools needed).
used socket set and removed the two screws (one on each side). unpluged wires from front panel, labled each (good practice).
Pulled open the front panel.
cleaned old felt off all around the front panel. Wiped down everything. while I had it opened, I vaccumed out the dryer u ... Read more nderneath.
used glue provided in felt kit and glued new felt where old was.
let dry, put front panel back on ensuring that the felt was between drum and front panel.
put screws back in front panel. closed top.
Let me say that this is the third time I've done this to this dryer as it is about 18 years old.
Until the heating coils go out, this is the cheapest fix there is. :-)
Read less
Other Parts Used:
-
Carlis from Lexa, AR
-
Difficulty Level:Really Easy
-
Total Repair Time:30 - 60 mins
-
Tools:Nutdriver
1 person
found this instruction helpful.
Was this instruction helpful to you?
Thank you for voting!
My dryer squeaked - the squeak from hell
We had to take off the front door - rather simple. The belt was OK. It simply fit over the drum then was tightened up. The seal supplied didn't want to stick to the door. Thinking it was the wrong one - we went shopping. Come to find out it was the correct seal but the glide has been changed since the inception of my dryer. We had to
... Read more
poke holes in the seal to get the nibs on the glide to fit in the seal. Then it wouldn't stick to the dryer door, so we had to sand the outer door and we put some rtv on it and tied a belt around it to hold it. After drying for a couple of hours, we re-assembled the dryer only to have it overheat and burn up. New dryer $389. sad but true.
Read less
Other Parts Used:
-
Barbara from Rohnert Park, CA
-
Difficulty Level:A Bit Difficult
-
Total Repair Time:More than 2 hours
-
Tools:Nutdriver, Screw drivers, Wrench (Adjustable)
6 of 9 people
found this instruction helpful.
Was this instruction helpful to you?
Thank you for voting!
- < Prev
- 1
- 2
- Next >
Back to Top
Questions and Answers
Be the first to ask our experts a question about this part!
✖
Ask a Question
Ask our experts a question on this part and we'll respond as soon as we can.
Sorry, we couldn't find a match for "".
Here's a guide for finding your model number.
Something went wrong. Please try again later.
Your Question Has Been Submitted!
Our experts will send you an email as soon as your question has been answered.
Back to Top
You May Also Need
?


Back to Top
Model Cross Reference
This part works with the following models:
PartSelect Number: PS459776
Manufacturer Part Number: 5303281049
Manufacturer Part Number: 5303281049
Brand
Model Number
Description
Back to Top

Front Drum Seal
$
28.04
On Order
✖
Stock Status
In Stock
Item is in stock and will ship today if your order is placed before 4:00 PM Eastern Standard Time.
If your order is placed after 4:00 PM EST, the in stock items will ship on the next business day.
On Order
Item is not in stock and usually ships 3-5 business days from the time you place your order.
Special Order
Item is not in stock and usually ships 10-15 business days from the time you place your order.
NLA - No Longer Available
This item is no longer being made by the manufacturer, and cannot be added to your shopping cart.


