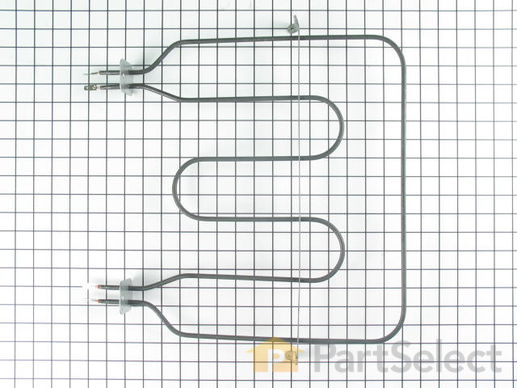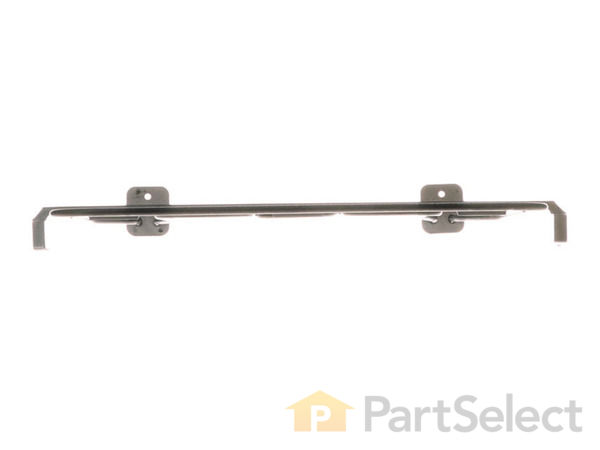
Dual Broil Element WP9750967
Fits your KERC601HBT4!
★★★★★
★★★★★
Rated by 5 customers
Easy
15 - 30 mins
Ratings submitted by customers like you who bought this part.
$
170.17
Special Order
Get FREE EconoShip on orders over $100! T&C apply
Fits your KERC601HBT4!
PartSelect Number PS11747122
Manufacturer Part Number WP9750967
Manufactured by
Whirlpool
Product Description
Dual Broil Element Specifications
This broil element is found on the roof of the oven.

How Buying OEM Parts Can Save You Time and Money
Troubleshooting
This part fixes the following symptoms:
Little to no heat when broiling | Element will not heat | Little to no heat when baking | Oven not heating evenly
This part works with the following products:
Range.
This part works with the following products:
KitchenAid, Whirlpool, Kenmore.
Part# WP9750967 replaces these:
AP6013892, 9750967, 9750967A
Customer Reviews
Average Rating:
5 Reviews
★★★★★
★★★★★
4.8
Filter By Rating:
-
5 Stars 4
-
4 Stars 1
-
3 Stars 0
-
2 Stars 0
-
1 Star 0
Sort by:
- < Prev
- 1
- Next >
Search filter:
Clear Filter
Your search term must have 3 or more characters.
Keep searches simple. Use keywords, e.g. "leaking", "pump", "broken" or "fit".
Sorry, we couldn't find any existing reviews that matched. Try using some different or simpler keywords.
★★★★★
★★★★★
Raymond Z - December 8, 2023
Verified Purchase
Easy to troubleshoot, easy to replace element.
The element arrived fast and came bubble wrapped in a cardboard box for proper shipping. Part was brand new, and is working very well. My wife was happy to have the oven cooking as expected.
★★★★★
★★★★★
Thomas T - November 25, 2021
Verified Purchase
Broiler element replacement
The part I received was exactly what I needed. It was quick to ship and received on time. I would definitely use them again!
★★★★★
★★★★★
ALAN D - June 2, 2021
Verified Purchase
I ordered, installed, and tested the part no hitches. Happy guy.
The package arrive timely in good shape, it matched the old part.
all is good, thanks .
★★★★★
★★★★★
RICHARD J - November 26, 2020
Verified Purchase
Replace dual broil element
The part was in good condition except that in shipping , one of the edge mounting ears was bent and needed straightening, but otherwise it mounted fine and the oven operates as designed.
★★★★★
★★★★★
Michael W - March 16, 2018
Verified Purchase
Great part
Was leery ordering the part I needed on line, but the part was exactly what I needed, it works, and just in time for my wife to bake some Irish soda bread for St. Paddy's day..thanks!
- < Prev
- 1
- Next >
Back to Top
Customer Repair Stories
Average Repair Rating: 4.0 / 5.0, 5 reviews.
What's this?
Sort by:
- < Prev
- 1
- Next >
Search filter:
Clear Filter
Your search term must have 3 or more characters.
Keep searches simple. Use keywords, e.g. "leaking", "pump", "broken" or "fit".
Sorry, we couldn't find any existing installation instruction that matched.
Only half of the broiler element would get hot enough to glow
First BE SURE TO TURN OFF THE CIRCUIT BREAKER!!! Remove the oven door if you need to get closer to the work. Then remove the screws securing the the element to the the oven. There were two on each side in the back where the element goes they the wall and two more that held the element to the upper surface. Carefully pull the element out t
... Read more
o gain access to the wires and terminals. Gently pull each wire off one at a time, being sure not to allow the wire to get pulled back into the rear part of the oven. Reconnect each wire securely to the new element. Doubly check each connection! Then replace each screw and you should be set!
Read less
-
Thomas from BOSSIER CITY, LA
-
Difficulty Level:A Bit Difficult
-
Total Repair Time:30 - 60 mins
-
Tools:Pliers, Screw drivers
1 person
found this instruction helpful.
Was this instruction helpful to you?
Thank you for voting!
element burned out
Moved stove away from wall, cleaned ( hadn't been moved in 17 years). Disconnected Dual Broil Element, replaced with a new one, stove worked fine.
-
James from Shaftsbury, VT
-
Difficulty Level:Easy
-
Total Repair Time:30 - 60 mins
-
Tools:Pliers, Screw drivers, Socket set
8 of 14 people
found this instruction helpful.
Was this instruction helpful to you?
Thank you for voting!
Dual Broil Element outer loop had broken and was no longer functioning. This effected the time it took the oven to reach desired temperture and also left me with no broiling capabilities.
Searched KitchenAid Broiler Element and found part needed to repair problem. Ordered part and received fast delivery (received in two days and part was on back order). Two screws and four wires were involved. Just needed to be very carfull when disconnecting the wires from old part. If you pull too hard you could have a much bigger proble
... Read more
m on you hands. Be patient and tug slowly you should have no issue. Completed in less than 15 minutes with only one glass of wine. My wife was even impressed
Read less
Other Parts Used:
-
Al from Barrington, IL
-
Difficulty Level:Really Easy
-
Total Repair Time:Less than 15 mins
-
Tools:Pliers, Screw drivers
302 of 4152 people
found this instruction helpful.
Was this instruction helpful to you?
Thank you for voting!
the stove shut down every time we had the broiler in use.
All it took was to remove the screws and disconect the clips on the element. Then reconnect and scred back together. It was harder to keep the dogs out of the way than doing the repair.
-
Dennis from Burlington, WI
-
Difficulty Level:Really Easy
-
Total Repair Time:15 - 30 mins
-
Tools:Screw drivers
17 of 22 people
found this instruction helpful.
Was this instruction helpful to you?
Thank you for voting!
element half lit
removed back of stove, removed 2 screws holding element, disconnected element and removed it, then reversed procedure. excellent service from part select and will use them again when needed.
-
Gerald from Perry, NY
-
Difficulty Level:Really Easy
-
Total Repair Time:Less than 15 mins
-
Tools:Pliers, Screw drivers
8 of 10 people
found this instruction helpful.
Was this instruction helpful to you?
Thank you for voting!
- < Prev
- 1
- Next >
Back to Top
Questions and Answers
Ask our experts a question about this part and we'll get back to you as soon as possible!
Sort by:
- < Prev
- 1
- Next >
Search filter:
Clear Filter
Your search term must have 3 or more characters.
Keep searches simple. Use keywords, e.g. "leaking", "pump", "broken" or "fit".
Sorry, we couldn't find any existing answers that matched.Try using some different or simpler keywords, or submit your new question by using the "Ask a Question" button above!
W.
February 19, 2018
Are both elements active when using oven to bake or only when broiling?
For model number KERC607HBS4

Hi W, Thank you for the question. When the appliance is set to bake, the bottom bake element will be the only active element after it pre-heats. Hope this helps!
Was this helpful?
Thank you for voting!
Steve
February 19, 2018
I asked if both elements were active in baking or only during broiling. Your response was that only bottom element was active after oven reaches temperature there is no bottom element on this kitchen aid model kerc607hbs4 so, i repeat my original question.
For model number KERC607HBS4

Hello Steve, thank you for your question. There are two elements in this stove the upper broil element, and a hidden bake element which is located under the floor of the oven itself. Both elements are active when the bake option is selected. The broil element (upper element) cycles on and off after the unit gets to the selected temperature so as to maintain even heat around the inner oven cavity. I hope this answers your question!
Was this helpful?
Thank you for voting!
Marilyn
November 21, 2018
Hi,
My broiler works, but when i bake, the food doesn't bubble when hot. The front of the upper element lights up, but the sides do not. Should the sides of the element light up, too?
For model number KERi500YWH1

Hello Marilyn, thank you for your question. Yes, the whole element should get red. If there are sections of the element that are not getting hot or lighting up it will have to be replaced. The upper broil element is part number PS11747122. Good luck with your repair!
Was this helpful?
Thank you for voting!
Donna
March 18, 2020
Oven element won't heat up. How do we remove and replace it?
For model number YKESC307HB7

Hello Donna, thank you for your question. First unplug the unit and open the door. Remove the screws in the bracket holding the element to the ceiling of the unit. Then remove the two screws on the back of the element holding it to the back wall of the oven. Remove the wires and be careful not to allow the wires to go back through the back of the oven or else the back wall of the oven would have to be removed and the element wire fished back through the insulation into the oven. Remove the element from the oven and reverse the steps to install the element. I hope this helps.
Was this helpful?
Thank you for voting!
Dana
December 31, 2017
All of a sudden the oven will not heat at all. Have not had the convection for over a year (guessing fan went out) but now will not heat on oven or broiler. Heating element or sensor?
For model number KESC307HBS3

Hello Dana, Thank you for your inquiry. You can test both parts with a multimeter. If you are unfamiliar with how a multimeter functions, there are YouTube videos available to assist you. Hope this helps!
Was this helpful?
Thank you for voting!
- < Prev
- 1
- Next >
✖
Ask a Question
Ask our experts a question on this part and we'll respond as soon as we can.
Sorry, we couldn't find a match for "".
Here's a guide for finding your model number.
Something went wrong. Please try again later.
Your Question Has Been Submitted!
Our experts will send you an email as soon as your question has been answered.
Back to Top
Model Cross Reference
This part works with the following models:
PartSelect Number: PS11747122
Manufacturer Part Number: WP9750967
Manufacturer Part Number: WP9750967
Brand
Model Number
Description
Back to Top

Dual Broil Element
$
170.17
Special Order
✖
Stock Status
In Stock
Item is in stock and will ship today if your order is placed before 4:00 PM Eastern Standard Time.
If your order is placed after 4:00 PM EST, the in stock items will ship on the next business day.
On Order
Item is not in stock and usually ships 3-5 business days from the time you place your order.
Special Order
Item is not in stock and usually ships 10-15 business days from the time you place your order.
NLA - No Longer Available
This item is no longer being made by the manufacturer, and cannot be added to your shopping cart.


