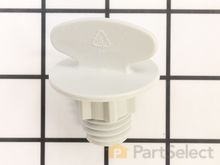
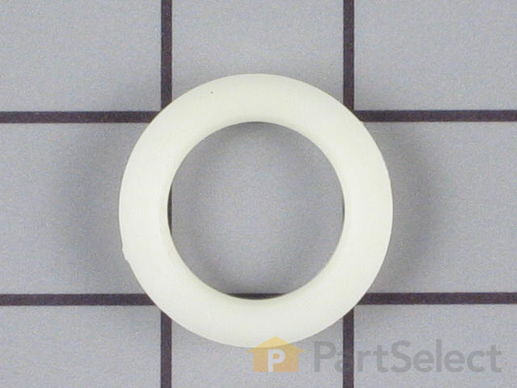
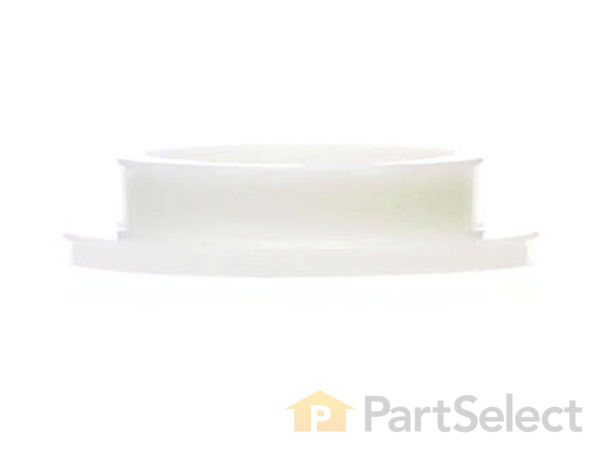
Part Location Diagram of WP9742946 Whirlpool Wash Arm Bearing Ring
See part 13 in the diagram
Replacing your Kenmore Dishwasher Wash Arm Bearing Ring
( Grid squares measure 1x1 inch )
Customer Service Representative

Get in touch, we're here to help!

Daily 8am - 9pm EST

customerservice@partselect.com

Wash Arm Bearing Ring WP9742946

★★★★★
★★★★★
33 Reviews

Rated by 95 customers 

Really Easy 

Less than 15 mins 

Ratings submitted by customers like you who bought this part.

$ 32.84
  In Stock
Get FREE EconoShip on orders over $100! T&C apply

Get this part fast! Average delivery time for in-stock parts via standard shipping: 1.8 days.

PartSelect Number PS11747064
Manufacturer Part Number WP9742946
Manufactured by Whirlpool
Product Description

Wash Arm Bearing Ring Specifications

This part will fit between the newer type lower wash arm and the wash arm retainer nut of your dishwasher.
How Buying OEM Parts Can Save You Time and Money

How Buying OEM Parts Can Save You Time and Money

Part Videos

Replacing your Kenmore Dishwasher Wash Arm Bearing Ring

Replacing your Kenmore Dishwasher Wash Arm Bearing Ring
Troubleshooting
This part fixes the following symptoms:
Not cleaning dishes properly | Leaking | Noisy | Not draining
This part works with the following products:
Dishwasher.
This part works with the following products:
Kenmore, Whirlpool, KitchenAid, Estate.
Part# WP9742946 replaces these:
AP6013837, 9742946, WP9742946VP
Back to Top
Customer Reviews
Average Rating:
★★★★★
★★★★★
33 Reviews
4.7
Filter By Rating:
  • 5 Stars
    26
  • 4 Stars
    5
  • 3 Stars
    2
  • 2 Stars
    0
  • 1 Star
    0
Sort by:
  • 1
  • 2
  • 3
Sorry, we couldn't find any existing reviews that matched. Try using some different or simpler keywords.
  • 1
  • 2
  • 3
Customer Repair Stories
 Average Repair Rating: 4.6 / 5.0, 95 reviews. What's this?
Sort by:
  • 1
  • 2
  • 3
Sorry, we couldn't find any existing installation instruction that matched.
Dishes not washed well
The touch pad insert is just a glorified decal stuck to the front of the door. Peel off the old insert, using a knife to pick up the corner. Then clean away the old adhesive with WD-40 as a cleaner, scraping the surface with the putty knife. Then carefully align and stick on the new insert over the panel having the buttons. That simple.

The middle spray arm changes out in a jiffy, with just a phillips screwdriver.

The lower spray arm nut was stuck so I used pliers to turn the screw and remove it. While you have the lower spray arm off, clean out food scraps and mineral deposits from the drain. The instructions say that if you remove the pump assembly you will need a new seal, so leave the pump on unless you order the appropriate parts. Clean all surfaces with a cleaner that can remove calcium deposits.
Other Parts Used:
Control Panel Touch Pad Insert - White Wash Arm Bearing Ring Wash Arm Retainer Nut Lower Sprayarm Seal Middle Spray Arm Kit
  • John from SAN JOSE, CA
  • Difficulty Level:
    Easy
  • Total Repair Time:
    15 - 30 mins
  • Tools:
    Pliers, Screw drivers
1 of 2 people found this instruction helpful.
Was this instruction helpful to you?
Thank you for voting!
washer arm retainer nut broke on the thread, upper bearing woren out
replaced bearing, seal and the Washer arm retainer nut Easy to do . It took more time to empty the lower tray than installing the new parts. Anybody can do it.Thanks for the fast response and shipment. Jerry
Other Parts Used:
Tine Pivot Wash Arm Bearing Ring Wash Arm Retainer Nut Lower Sprayarm Seal
  • Gerald from WEST CHICAGO, IL
  • Difficulty Level:
    Very Easy
  • Total Repair Time:
    Less than 15 mins
1 person found this instruction helpful.
Was this instruction helpful to you?
Thank you for voting!
retainer nut broke
2 minutes
Other Parts Used:
Wash Arm Bearing Ring Wash Arm Retainer Nut
  • Arden from HAMDEN, NY
  • Difficulty Level:
    Really Easy
  • Total Repair Time:
    Less than 15 mins
1 person found this instruction helpful.
Was this instruction helpful to you?
Thank you for voting!
missing bearing ring, lower spray arm; and insufficient water supply reaching upper spray arm.
replaced those parts... but lingering doubts about adequacy of water supply due to sediment primarily from old iron pipes, evidenced in faucet aerator. So I added a Rusco hot water sediment trap filter to the supply line leading to the dishwasher and faucet, along with a new flex supply line to the dishwasher. Water supply seems improved, and any potential sediment will be caught by the trap.The time, tools, and complexity of adding the hot water sediment filter are not covered in the above.
Other Parts Used:
Wash Arm Bearing Ring Upper Spray Arm Mount Lower Sprayarm Seal Middle Spray Arm Kit
  • William from ALLENTOWN, PA
  • Difficulty Level:
    Very Easy
  • Total Repair Time:
    15 - 30 mins
  • Tools:
    Screw drivers
1 person found this instruction helpful.
Was this instruction helpful to you?
Thank you for voting!
wiggle/waggle of lower arm
removed thumb screw and broken washer and replaced with new one. voila - all is well. thanks,
  • JUDITH from STURGEON BAY, WI
  • Difficulty Level:
    Very Easy
  • Total Repair Time:
    Less than 15 mins
1 person found this instruction helpful.
Was this instruction helpful to you?
Thank you for voting!
Water was leaking (gushing) out the door
Researched parts - 10 minutes - - - Ordered parts - 5 minutes - - - Waited for parts - 14 DAYS! - - - Installed parts - 5 minutes
Other Parts Used:
Wash Arm Bearing Ring Pump Outlet Seal
  • Carla from LEWISTOWN, MT
  • Difficulty Level:
    Very Easy
  • Total Repair Time:
    Less than 15 mins
  • Tools:
    Nutdriver
1 person found this instruction helpful.
Was this instruction helpful to you?
Thank you for voting!
The wash arm retainer nut had broken off so that the arm had fallen off.
The nut had broken off even with the top of the threaded area, so we had to remove that broken part. We did so by using small pliers and inserting them in the opening and held them in a spreaded position while turning the broken piece out. We replaced the three new parts and put it back together and it works fine. So easy and much cheaper that having a repairman come in. Took us less than 15 minutes.
Other Parts Used:
Wash Arm Bearing Ring Wash Arm Retainer Nut Lower Sprayarm Seal
  • Cynthia J from Saranac Lake, NY
  • Difficulty Level:
    Really Easy
  • Total Repair Time:
    30 - 60 mins
  • Tools:
    Pliers
2 of 2 people found this instruction helpful.
Was this instruction helpful to you?
Thank you for voting!
washers,bearing and wing nut replaced
slid basket out removed old broken wingnut,bushing and bearing and replaced new parts! very easy.
Other Parts Used:
Wash Arm Bearing Ring Wash Arm Retainer Nut Lower Sprayarm Seal
  • yancey from calhoun, GA
  • Difficulty Level:
    Really Easy
  • Total Repair Time:
    Less than 15 mins
  • Tools:
    Wrench (Adjustable)
0 of 1 people found this instruction helpful.
Was this instruction helpful to you?
Thank you for voting!
Washing poorly, irregular noise in wash cycle
I removed the old parts and replaced them with new parts. It failed to solve the problem.
Other Parts Used:
Wash Arm Bearing Ring Wash Arm Retainer Nut Lower Sprayarm Seal
  • Joseph from Spokane, WA
  • Difficulty Level:
    Really Easy
  • Total Repair Time:
    Less than 15 mins
  • Tools:
    Screw drivers
0 of 2 people found this instruction helpful.
Was this instruction helpful to you?
Thank you for voting!
dishwaster would not completely drain
My dishwasher was not completely draining. I took the arm that sprays the water off and felt for something that might be stopping up the drain....finding nothing, I took the seal to Home Depot to ask if this ring was broken or if the gap was supposed to be there. The "you can do it, we can help" guys didn't have the faintest idea. So I came home and looked up parts for Whirlpool dishwashers and landed on your site. Found that the wash arm bearing ring was missing on my machine (don't know where or how it got off it's intended spot...never did find it). So I ordered the missing part and fixed it myself. Did I say that I'm 77, a widow and live alone....so I was quite proud of myself. Thank you for such a helpful website for DIYers.
  • Marie from Plano, TX
  • Difficulty Level:
    Really Easy
  • Total Repair Time:
    Less than 15 mins
0 of 1 people found this instruction helpful.
Was this instruction helpful to you?
Thank you for voting!
  • 1
  • 2
  • 3
Questions and Answers

Ask our experts a question about this part and we'll get back to you as soon as possible!

6 questions answered by our experts.
Sort by:
  • 1
Sorry, we couldn't find any existing answers that matched.Try using some different or simpler keywords, or submit your new question by using the "Ask a Question" button above!
Jill
March 19, 2018
How can you tell when you need to replace wash arm bearing ring (part #: Ps11747064), and/or wash arm bearing nut (part #: Ps11747063)? Can you look at the original and see wear? Can you tell by spinning the wash arm? It spins freely but wobbles...is this normal? my dishwasher is leaking from under the front door. it doesn't seem to be the door seal gasket. thanks
PartSelect logo
Hello Jill, thank you for your question. The bearing nut and wash arm bearing might shows signs of wear; scuffs, cracks, chips, ect. They might be slightly uneven, or warped. The spray arm should not wobble, it should spin evenly when pushed with your finger. I would suggest replacing the bearing ring as well as the nut. Check the spray arm as well to be sure its not warped and needs to be replaced as well. I hope this helps!

15 people found this helpful.

Was this helpful?
Thank you for voting!
Lela
December 10, 2018
What makes lower spray arm be wobbly?
For model number GU940SCGZ3
PartSelect logo
Hello Lela, thank you for your question. Usually the lower spray arm gets wobbly because of any of these three parts. Part Number: PS11745480, Part Number: PS11741334, Part Number: PS11747064. The most common issue is a broken or cracked bearing ring. Over time the wear on these parts can cause the spray arm to become unsteady. I hope this helps!

7 people found this helpful.

Was this helpful?
Thank you for voting!
LINDA
July 20, 2017
Need to order part hat holds spray arm in place
PartSelect logo
Hi Linda, I think we can help you out. There are two parts that hold your lower spray arm in place. One is the wash arm bearing ring (part #: PS11747064), and the other is the wash arm bearing nut (part #: PS11747063). The bearing nut screws into the bearing ring, and keeps the spray arm in place. You can order either one, depending on which piece needs replacing. Hopefully this helps you with the repair.

6 people found this helpful.

Was this helpful?
Thank you for voting!
Carol
August 29, 2017
Portable dishwasher leaks from bottom after cycle is completed and unit has been moved away from sink. Where would you suggest I start looking for leak?
For model number DP940PWKQ1
PartSelect logo
Hi Carol, Thank you for the question. One of the more common problems when leaking is the Drain and Wash Impeller Kit, I suggest starting here to make sure the seal and parts are all intact. While looking at the impeller kit it will be a good idea to also check the seals around the pump. Hope this helps!

3 people found this helpful.

Was this helpful?
Thank you for voting!
Related Parts:
Jesse
April 15, 2019
The washer won't start the wash, rinse or drain cycles (pump won't start). The washer fills. The control board lights up and the buttons seem to be functioning correctly. Water drains out when the drain hose is removed from the drain valve located on the bottom portion of the motor. Before replacing the motor could there be a relay,switch or fuse that would not start the motor?
For model number KUDR24SEBL1 KitchenAid Dishwasher
PartSelect logo
Hello Jesse, thank you for your question. We would recommend testing these two parts before replacing anything. High Limit Thermostat Part Number: WP661566 and Fuse Assembly Part Number: 675796. Usually if the dishwasher won't start, there is an issue with a fuse, or thermostat in the unit. I hope this helps!

3 people found this helpful.

Was this helpful?
Thank you for voting!
Carrol
January 4, 2018
You guys show a ring that fits below the nut on the bottom impeller this machine does not have this what it does have is a metal ring that is attached to the metal impeller which is comeing loss allowing the impeller to get wedged under this stopping the action will this plastic ring i have ordered solve this???? please reply
For model number GU980SCGQO
PartSelect logo
Hi Carrol, Thank you for your question. I believe the part you are looking for is in the impeller kit, part number PS382822. I hope this helps. Thank you and have a great day!

2 people found this helpful.

Was this helpful?
Thank you for voting!
  • 1
You May Also Need ?
Model Cross Reference
This part works with the following models:
PartSelect Number: PS11747064
Manufacturer Part Number: WP9742946
Brand
Model Number
Description
Kenmore
110773811
Dishwasher
Kenmore
110773812
Dishwasher
Kenmore
110773813
Dishwasher
Kenmore
110773881
Dishwasher
Kenmore
110773882
Dishwasher
Kenmore
110773883
Dishwasher
Kenmore
66513402K900
Dishwasher
Kenmore
66513402K901
Dishwasher
Kenmore
66513409K900
Dishwasher
Kenmore
66513409K901
Dishwasher
Kenmore
66513442K900
Dishwasher
Kenmore
66513442K901
Dishwasher
Kenmore
66513443K900
Dishwasher
Kenmore
66513443K901
Dishwasher
Kenmore
66513444K900
Dishwasher
Kenmore
66513444K901
Dishwasher
Kenmore
66513449K900
Dishwasher
Kenmore
66513449K901
Dishwasher
Kenmore
66513492K600
Dishwasher
Kenmore
66513499K600
Dishwasher
Kenmore
66513592K600
Dishwasher
Kenmore
66513593K600
Dishwasher
Kenmore
66513594K600
Dishwasher
Kenmore
66513599K600
Dishwasher
Kenmore
66513692K600
Dishwasher
Kenmore
66513699K600
Dishwasher
Kenmore
66515622000
Dishwasher
Kenmore
66515624000
Dishwasher
Kenmore
66515627000
Dishwasher
Kenmore
66515629000
Dishwasher
Customer Service Representative

Get in touch, we're here to help!

Daily 8am - 9pm EST

Contact Customer Service