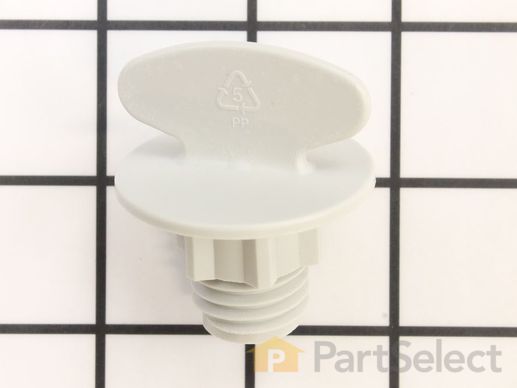
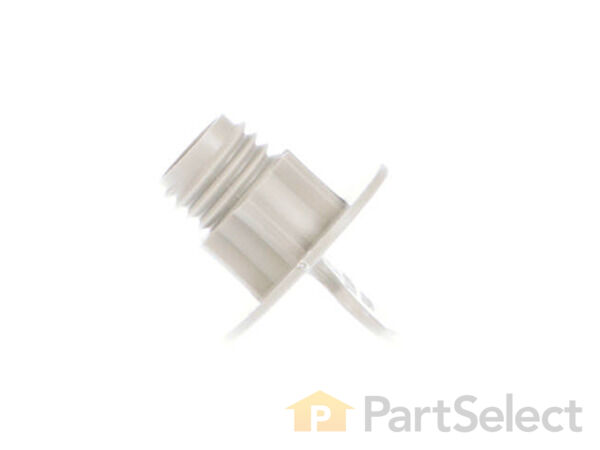
Part Location Diagram of WP8268873 Whirlpool Lower Sprayarm Nut
See part 12 in the diagram
Replacing your Kenmore Dishwasher Lower Sprayarm Nut
( Grid squares measure 1x1 inch )
Customer Service Representative

Get in touch, we're here to help!

Daily 8am - 9pm EST

customerservice@partselect.com

Lower Sprayarm Nut WP8268873

 Fits your YMH2175XSS4!
★★★★★
★★★★★
22 Reviews

Rated by 14 customers 

Really Easy 

Less than 15 mins 

Ratings submitted by customers like you who bought this part.

$ 8.00
  In Stock
Get FREE EconoShip on orders over $100! T&C apply

Get this part fast! Average delivery time for in-stock parts via standard shipping: 1.8 days.

 Fits your YMH2175XSS4!
PartSelect Number PS11745480
Manufacturer Part Number WP8268873
Manufactured by Whirlpool
Product Description

Lower Sprayarm Nut Specifications

This spray arm nut is used in dishwashers and works as the retaining nut for the lower dishwasher spray arm. The nut makes sure the lower spray arm is secured to the pump housing. If your spray arm is coming off, or your nut is lost or damaged, replacing the part can be a solution to your problem. Remember to unplug dishwasher from power source and disconnect the water supply before you begin this installation. Refer to the manual provided by the manufacturer for further installation instructions.
How Buying OEM Parts Can Save You Time and Money

How Buying OEM Parts Can Save You Time and Money

Part Videos

Replacing your Kenmore Dishwasher Lower Sprayarm Nut

Replacing your Kenmore Dishwasher Lower Sprayarm Nut
Troubleshooting
This part works with the following products:
Dishwasher.
This part works with the following products:
Kenmore, Whirlpool, Estate, Inglis.
Part# WP8268873 replaces these:
AP6012273, 8268873
Back to Top
Customer Reviews
Average Rating:
★★★★★
★★★★★
22 Reviews
4.8
Filter By Rating:
  • 5 Stars
    18
  • 4 Stars
    3
  • 3 Stars
    1
  • 2 Stars
    0
  • 1 Star
    0
Sort by:
  • 1
  • 2
  • 3
Sorry, we couldn't find any existing reviews that matched. Try using some different or simpler keywords.
  • 1
  • 2
  • 3
Customer Repair Stories
 Average Repair Rating: 4.8 / 5.0, 14 reviews. What's this?
Sort by:
  • 1
  • 2
Sorry, we couldn't find any existing installation instruction that matched.
lower spray arm nut
Open the dishwasher door and remove the lower dish rack.
The spray arm nut had broken off and the spray arm was wobbly.
Removed the spray arm. The threads of the nut had broken off inside the arm. I used three 1/4 inch bolts and inserted them together inside the threaded part of nut and turned counterclockwise. The threaded section came out.
Once the new nut arrived, I replaced the spray arm in the dishwasher and screwed the new nut clockwise in the center of the arm. That's it!
  • Michele from THOMPSON, CT
  • Difficulty Level:
    Really Easy
  • Total Repair Time:
    30 - 60 mins
2 of 2 people found this instruction helpful.
Was this instruction helpful to you?
Thank you for voting!
Lower sprayarm broken
Note I did not have a model number just the manufacturer and name on unit. The website was still able to find the part. Impressive!
Easy installation. I recommend you also get the sprayarm seal. Be careful to insure the nut is seated securely before screwing in the nut. Highly recommend the video. Good company.
Other Parts Used:
Lower Sprayarm Nut Lower Sprayarm Seal
  • Robert from MENTOR, OH
  • Difficulty Level:
    Really Easy
  • Total Repair Time:
    Less than 15 mins
1 person found this instruction helpful.
Was this instruction helpful to you?
Thank you for voting!
Nut broke
Removed piece of nut that remained and screwed in new one by hand
  • Kay from YORK, PA
  • Difficulty Level:
    Very Easy
  • Total Repair Time:
    Less than 15 mins
2 of 2 people found this instruction helpful.
Was this instruction helpful to you?
Thank you for voting!
Sprayarm Nut broke in half
Ordered a new one The Spray arm nut broke in two right above the last threads. The thread part was still in the pump out and was able to remove it with putting a flat screwdriver in the center of the hole and unscrewed it did not take the pump apart because it came out easy with the screwdriver by wedging the flat screwdriver sideways in the hole and turning it counterclockwise. when the new one came I just screwed it in.
  • James from PUEBLO, CO
  • Difficulty Level:
    Very Easy
  • Total Repair Time:
    Less than 15 mins
  • Tools:
    Screw drivers
1 person found this instruction helpful.
Was this instruction helpful to you?
Thank you for voting!
broken upper wash arm stabalizer bracket...
very easy to fix..i replaced many other parts while i was at it..figured i d "upgrade". washes much better now....less noisy..
Other Parts Used:
Wash Arm Bearing Ring Lower Sprayarm Nut Manifold Screw Cover - White Spray Arm Feed Tube Holder Upper Wash Assembly Lower Sprayarm Seal
  • todd from woodstock, IL
  • Difficulty Level:
    Really Easy
  • Total Repair Time:
    Less than 15 mins
  • Tools:
    Screw drivers
2 of 9 people found this instruction helpful.
Was this instruction helpful to you?
Thank you for voting!
The nut that holds the lowere sprayarm on broke.
Simple easy twist on and off replacement.
  • Maurice from Debord, KY
  • Difficulty Level:
    Really Easy
  • Total Repair Time:
    Less than 15 mins
3 of 6 people found this instruction helpful.
Was this instruction helpful to you?
Thank you for voting!
lower spray arm nut broken, upper wash assembly was broken
just put the pieces where they belonged and tighten the screws. it longer to figure out how it was supposed to fit than the actual fixing.
Other Parts Used:
Wash Arm Bearing Ring Lower Sprayarm Nut Upper Wash Assembly
  • JOHN from SPOONER, WI
  • Difficulty Level:
    Easy
  • Total Repair Time:
    15 - 30 mins
  • Tools:
    Screw drivers
3 of 6 people found this instruction helpful.
Was this instruction helpful to you?
Thank you for voting!
Lower sprayarm nut stripped + broken inside Pump outlet
You WILL need a star-tip screwdriver for this COMMON DU915 repair. We already had one.
The plastic "wing" nut which keeps the lower sprayarm attached to the pump assembly cracked inside where the threading on each part meets. Have been reattaching the nut to the Pump outlet for a year or so with super glue and finally found PartSelect.com. My husband had to fix this with a star screwdriver and vice grips (and he is super strong)-- otherwise an easy fix using just the manual supplied by the manufacturer. I just noticed the virtual repairman feature on partselect but we didn't need to go there.
The starhead screws that hold the pump outlet in place were on super tight. Other than that, no problem. It has been a week and the dishwasher works like new.
I ordered the parts online at 9pm at night and had the parts in my mailbox the next day - LESS than 24 hours later. How is that even possible?
Just ask anyone who knows me...I am NOT easy to please when it comes to customer service in any realm of the retail world - I have to say without any doubt PartSelect is the BEST experience I've had in my entire shopping life. It's as if customers run this company. I only wish they sold car parts, groceries, clothes and food.
I will be back to purchase again, I'm sure and I know it will go just as smoothly.
PartSelect.com...Please call me when you are ready to launch an IPO!!!!!!!
Other Parts Used:
Pump Outlet and Seal Wash Arm Bearing Ring Lower Sprayarm Nut
  • patricia from Chicago, IL
  • Difficulty Level:
    Easy
  • Total Repair Time:
    15 - 30 mins
  • Tools:
    Pliers, Screw drivers, Wrench (Adjustable)
74 of 89 people found this instruction helpful.
Was this instruction helpful to you?
Thank you for voting!
had to replace nut that held on the bottom sprayer and replace the water inlet tube
I had already removed the old parts so when the new parts arrived, I just attached the water inlet tube holder and put the nut on the top of the sprayer assembly and it was good to go!!!! I ordered the parts one day before 3:00 and they were delivered the next day!!!! Unbelievable service!!!! Thanks and I am a very satisfied customer!!!!

Julie Welty
Other Parts Used:
Lower Sprayarm Nut Water Inlet Tube Holder
  • Julie from Christiansburg, OH
  • Difficulty Level:
    Really Easy
  • Total Repair Time:
    Less than 15 mins
4 of 8 people found this instruction helpful.
Was this instruction helpful to you?
Thank you for voting!
Dishwasher leaks at front door
My dishwasher started leaking at the door. I checked the level, door seal, fill float, etc. Nothing worked. Another reviewer of these parts said to replace the Seal, Lower Sprayarm, the Wash Arm Bearing Ring, and the wash arm. I replaced the seal and the bearing, not the washer arm, as my spray had little to no wear. This fixed the problem! If you dishwasher leaks at the door, it is possible these parts are worn and replacing them wil fix the leak. Thanks to the other reviewer I now have no leaks! Buy a spare nut because they break very easy if overtorqued!
Other Parts Used:
Wash Arm Bearing Ring Lower Sprayarm Nut Lower Sprayarm Seal
  • Sean from Oceanside, CA
  • Difficulty Level:
    Really Easy
  • Total Repair Time:
    Less than 15 mins
4 of 6 people found this instruction helpful.
Was this instruction helpful to you?
Thank you for voting!
  • 1
  • 2
Questions and Answers

Ask our experts a question about this part and we'll get back to you as soon as possible!

2 questions answered by our experts.
Sort by:
  • 1
Sorry, we couldn't find any existing answers that matched.Try using some different or simpler keywords, or submit your new question by using the "Ask a Question" button above!
Dustin
November 21, 2017
Any recommendation for a broken lower prey arm nut, when broken at thread.
PartSelect logo
Hi Dustin, Thank you for contacting us. You may have to use a pair of pliers and try to slowly remove the part that way. I hope that helps. Good luck with removing that part.

12 people found this helpful.

Was this helpful?
Thank you for voting!
Kelly
September 15, 2021
Need wing nut and metal sleeve washer deal
PartSelect logo
Hello Kelly, thank you for contacting us, In order for us to locate the correct parts and repair information we will require the model number of the unit. Once you have located the model number please feel free to resubmit the question and we will be happy to help you. We are looking forward to hearing from you!

2 people found this helpful.

Was this helpful?
Thank you for voting!
  • 1
You May Also Need ?
Model Cross Reference
This part works with the following models:
PartSelect Number: PS11745480
Manufacturer Part Number: WP8268873
Brand
Model Number
Description
Kenmore
66513402K900
Dishwasher
Kenmore
66513402K901
Dishwasher
Kenmore
66513409K900
Dishwasher
Kenmore
66513409K901
Dishwasher
Kenmore
66513442K900
Dishwasher
Kenmore
66513442K901
Dishwasher
Kenmore
66513443K900
Dishwasher
Kenmore
66513443K901
Dishwasher
Kenmore
66513444K900
Dishwasher
Kenmore
66513444K901
Dishwasher
Kenmore
66513449K900
Dishwasher
Kenmore
66513449K901
Dishwasher
Kenmore
66513492K600
Dishwasher
Kenmore
66513499K600
Dishwasher
Kenmore
66513592K600
Dishwasher
Kenmore
66513593K600
Dishwasher
Kenmore
66513594K600
Dishwasher
Kenmore
66513599K600
Dishwasher
Kenmore
66513692K600
Dishwasher
Kenmore
66513699K600
Dishwasher
Kenmore
66515622000
Dishwasher
Kenmore
66515624000
Dishwasher
Kenmore
66515627000
Dishwasher
Kenmore
66515629000
Dishwasher
Kenmore
66515632000
Dishwasher
Kenmore
66515634000
Dishwasher
Kenmore
66515637000
Dishwasher
Kenmore
66515639000
Dishwasher
Kenmore
66515652000
Dishwasher
Kenmore
66515654000
Dishwasher
Customer Service Representative

Get in touch, we're here to help!

Daily 8am - 9pm EST

Contact Customer Service