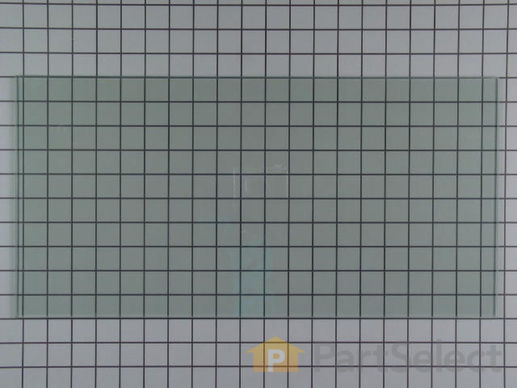
Part Location Diagram of WP4449259 Whirlpool Inner Door Glass
See part 3 in the diagram
( Grid squares measure 1x1 inch )
Customer Service Representative

Get in touch, we're here to help!

Daily 8am - 9pm EST

customerservice@partselect.com

Inner Door Glass WP4449259

 Fits your KEBC207KBL03!
★★★★★
★★★★★
81 Reviews

Rated by 41 customers 

Easy 

30 - 60 mins 

Ratings submitted by customers like you who bought this part.

$ 112.25
  In Stock
Get FREE EconoShip on orders over $100! T&C apply

Get this part fast! Average delivery time for in-stock parts via standard shipping: 1.8 days.

 Fits your KEBC207KBL03!
PartSelect Number PS11742543
Manufacturer Part Number WP4449259
Manufactured by Whirlpool
Product Description

Inner Door Glass Specifications

This inner door glass is a heat resistant part that fits into a stove, oven, wall oven, cooktop, or range as the inner glass panel of the appliance door. The glass panel allows you to see the items being cooked or heated in the appliance. Handle with caution and be sure to use gloves, as the door is heavy and the glass is breakable. Do not replace the glass until the appliance is cool to the touch. This genuine manufacturer part is approximately 20 inches by 10 inches. The inner glass door is sold individually and contains the glass panel only.
How Buying OEM Parts Can Save You Time and Money

How Buying OEM Parts Can Save You Time and Money

Troubleshooting
This part works with the following products:
Wall Oven, Microwave Oven Combo, Range, Dryer.
This part works with the following products:
Whirlpool, KitchenAid, Maytag, Jenn-Air.
Part# WP4449259 replaces these:
AP6009384, 4449258, 4449259
Back to Top
Customer Reviews
Average Rating:
★★★★★
★★★★★
81 Reviews
4.8
Filter By Rating:
  • 5 Stars
    71
  • 4 Stars
    8
  • 3 Stars
    1
  • 2 Stars
    0
  • 1 Star
    1
Sort by:
  • 1
  • 2
  • 3
Sorry, we couldn't find any existing reviews that matched. Try using some different or simpler keywords.
  • 1
  • 2
  • 3
Customer Repair Stories
 Average Repair Rating: 3.0 / 5.0, 41 reviews. What's this?
Sort by:
  • 1
  • 2
  • 3
Sorry, we couldn't find any existing installation instruction that matched.
Oven glass shattered
It was a matter of swapping out the old door with new door. In all, it was a snap . Around 10 screws to take it apart and a few brackets to hold it all together.
  • Gray from ATHENS, GA
  • Difficulty Level:
    Really Easy
  • Total Repair Time:
    30 - 60 mins
  • Tools:
    Screw drivers
2 of 3 people found this instruction helpful.
Was this instruction helpful to you?
Thank you for voting!
Inside oven door glass was broken and door was not closing completely.
I removed the door from the oven by locking the hinges with the built-in locks leaving the door open about 20 degrees. the door can then be lifted slightly off the hinges and pulled out at the bottom while tilting the top inward to remove it from the oven. With the door laying on a suitable surface with the outside face down, I removed about 6 or 8 screws from the door inside panel freeing the springs and the inside panel from the middle and front panels. Care must be taken to note from which locations the pointed self-taping screws come as opposed to the narrower-thread machine screws that hold the springs. Note: The inside panel does not need to be removed! Once the inside panel is freed from the inner panels, using suction cups the glass can be lifted slightly and slid toward the bottom of the door, rotated slightly, and removed through the window hole in the back face of the door. The new glass is installed in a similar way using suction cups by maneuvering it at a angle through window hole and into its frame. The hinges were replaced by lifting the bottom of the inner door panel slightly to clear the hinge and swapping in the new ones. Be sure to observe the difference between the left and right hinges in the location of the screw hole at the bottom of each hinge The narrow-thread machine screws that hold the hinges to the inside panel should be installed first while you can get you hand inside the door to hold each hinge in alignment with the screw holes while you start each screw. Re-install the pointed self tapping screws by pressing down on the rear panel to collapse the spring-action glass frames within the door so that the short screws will reach their threaded hole. Be careful to back off the self tapping screws first until you feel a click into the original threads to avoid stripping the holes. Last re-install the door on the oven. The replacement hinges should have come with the springs already "cocked" with the built in locks in place. Install the door with it in tan almost-closed position by sliding the hinge extensions into the slots in the oven. Once the extensions are properly in the slots the door can be fully opened and the built-in hinge locks re-positioned to the unlocked position to allow the door to fully close. Should you accidentally release only one of the hinge locks in trying to insert the hinge extensions into the slots you will have to reset the hinge. If the door is free from the oven, this may require a pair of heavy pliers, like channel lock pliers, to re-tension the hinge spring and "cock" the hinge extension by re-positioning the built-in lock in the locked position. If the hinge lock on one side of the door releases, but the the opposite side hinge extension is not fully inserted into the oven slot I recommend carefully moving the door to the fully open position, being careful to avoid twisting the inserted spring's extension, so that the hinge lock can be re-positioned to the locked position, the door full removed, and start again to install it. It helps to have two persons to hold opposite sides of the door for this operation as the door is heavy, but not essential. When in the proper position the hinge extensions may not appear fully inserted, but this is normal to allow for closing of the built in locks. It helps to observe how much of the hinge extension is exposed either before removing the door initially, or, if you have a double oven, looking at the hinges on the door of the other oven. Good luck with your repair.
Other Parts Used:
Door Hinge - Left Side Door Hinge - Right Side Inner Door Glass
  • William from Dumfries, VA
  • Difficulty Level:
    Easy
  • Total Repair Time:
    30 - 60 mins
  • Tools:
    Pliers, Screw drivers
3 of 4 people found this instruction helpful.
Was this instruction helpful to you?
Thank you for voting!
Inner glass was broken by previous tenants
Read all the way through this once before doing it. It really helps in keeping pieces and parts separated. First I had to take off the oven door. Please do this as it will make your life so much easier! The owners instructions does a lousy job explaining how to do this. You need to insert a small Allen wrench into the holes behind the door hinge pin. Just stick them in there and leave them. If you don't have Allen wrenches you can use small nails or the like, but you have to put something into the holes. Close the door slowly, yes it will feel like you are going to break the hinges or the wrenches. When you get the door almost completely closed you should wiggle the door a bit by the handle and pull up. The door will come off. Once you get the door off you can get to work. Leave these wrenches in the hinge holes. You will need a flat surface big enough to lay the door down to work on it. Lay it down with the handle towards the surface and the broken glass facing you. Remove the 4 screws on the broken glass side, the 2 screws holding the brackets on the bottom and the 2 screws on the top of the door. You will need to wiggle the inside cover off because there are 2 little clips at the top you need to get it off of the outer glass door. You should have 2 separate pieces, the outer glass of the door and the inner tempered glass and sheet metal portion of the door. Set the outer glass door aside, somewhere safe, as you really don't want to have to reorder that part too! From there you can lay the door down with the broken inner door glass towards the work surface. Remove the screws and good pieces of glass and lay them down in the order you take them out. This helps putting them back together later. Keep the pieces together in sets so you know which set goes to each section. There should be 3 pieces of glass total in the assembly. You remove the screws and the 2 good pieces of glass. The inside door glass is accessible under a large piece of sheet metal held in place by little flanges cut into it. You can remove this sheet metal panel piece by wiggling it out away from under the hinges and away from the hinge end. There is a piece of insulation under there as well. Make sure you reseat it correctly when you put it all back together. If you don't it will stick out, and make things hard to line up. Pull the broken glass out, Put the new glass in and replace the sheet metal panel. At this point I would suggest putting the four screws you took out at the very beginning from the inside of the door back in. They keep the 2 hinge assemblies in place and they will be harder to line up if you don't. You need to work from the bottom side up but it's pretty easy to get the 4 screws back in. Don't be afraid to wiggle the pieces around so you can line up the holes. They need to line up so that the hinges line up back to the oven. Reverse how you took the other glass pieces out and put the door back together. Put the front glass piece back on and secure it in place with the bottom door brackets and screws and the top 2 screws. Lift the door unit back up by the handle and place it in the slots for the hinges exactly the way you removed it. You will feel it sort of catch when you pull the door open slowly. Remove the Allen wrenches and you are done.
  • Janene from ORLANDO, FL
  • Difficulty Level:
    Easy
  • Total Repair Time:
    30 - 60 mins
  • Tools:
    Screw drivers
3 of 4 people found this instruction helpful.
Was this instruction helpful to you?
Thank you for voting!
Inner glass door shattered
Unlocked the latches that hold door into oven. Removed door to work on it. Disassembled door by removing all the screws that hold it together. Removed two other glass sheets to access location. Cleaned out broken glass. Installed new glass sheet and reinstalled two other glass sheets. Reassembled door and reinstalled in oven. Not difficult, just a fair number of parts and pieces to take apart and put back together.
  • Michael from LAKE FOREST, CA
  • Difficulty Level:
    A Bit Difficult
  • Total Repair Time:
    30 - 60 mins
  • Tools:
    Screw drivers
1 of 2 people found this instruction helpful.
Was this instruction helpful to you?
Thank you for voting!
Inner door glass broken
Relatively easy, my Jenn Aire model has a small 1/8 inch (est)hole under each of the door hinge assembly's, I inserted a an allen wrench on each side to hold the hinge. I then semi-closed the oven door, caution do it slowly until you get some resistance. You then pull upward on the door, caution it is heavy, you might have to jiggle it a bit. Once you have the door off you have to remove screws around the cover, the rest is intuitive. We took longer because we cleaned all the components.
Other Parts Used:
GASKET-CAVITY, 30, BLK Inner Door Glass
  • Waldemar from Oak Hill, VA
  • Difficulty Level:
    Easy
  • Total Repair Time:
    30 - 60 mins
  • Tools:
    Screw drivers
7 of 23 people found this instruction helpful.
Was this instruction helpful to you?
Thank you for voting!
inner glass broke (water on hot glass, not good)
I did not take the door off the oven, i dissassbled it in place. all the visible screws on the door have to be removed. The "vent" air diflector or what ever it is , between the upper and lower doors has to come off also to access the screws that hold the front of the door on. The only confussion i had was the bracket that holds the third layer of glass. I forgot that it is held on with the same bracket/screws that hold the secound layer on.
  • eugene from Roseville, MN
  • Difficulty Level:
    A Bit Difficult
  • Total Repair Time:
    30 - 60 mins
  • Tools:
    Screw drivers
0 of 1 people found this instruction helpful.
Was this instruction helpful to you?
Thank you for voting!
broken inside glass
unscrewed the oven door, took off the entire door, pulled apart the glass pieces and replaced
  • Rene from Keller, TX
  • Difficulty Level:
    Easy
  • Total Repair Time:
    15 - 30 mins
  • Tools:
    Screw drivers
0 of 1 people found this instruction helpful.
Was this instruction helpful to you?
Thank you for voting!
inner glass broken
fairly easy. took a while to reassemble. otherwise all was ok.
  • J from Niceville, FL
  • Difficulty Level:
    Easy
  • Total Repair Time:
    30 - 60 mins
  • Tools:
    Screw drivers
1 of 3 people found this instruction helpful.
Was this instruction helpful to you?
Thank you for voting!
Broken Glass Replaced
XLarge pizza tray in a 450 degree oven - slam the door & CRACK. Replacement glass arrived on Saturday - VERY FAST DELIVERY. Placed 2 allen wrenches in both hinges - open the door half way & lift up. Place the door on a towel. Removed 6 screws, lift & seperated the inner oven covering, removed the broken glass & cleaned inside & replaced with new glass. More time was spent cleaning & coming up with a tool to fit into the hinge
  • Tom from Rancho Santa Fe, CA
  • Difficulty Level:
    Easy
  • Total Repair Time:
    30 - 60 mins
  • Tools:
    Screw drivers
0 of 2 people found this instruction helpful.
Was this instruction helpful to you?
Thank you for voting!
The interior oven door glass was broken
I found some of the feedback posted on this site very helpful. Taking photos as I went along was also very helpful in remembering how to put it back together. There are several over-lapping pieces to the door and you have to be careful to put things back together in the correct order. Lining up the screw holes on the hinges with the door is also a little tricky.
  • Dante from Apex, NC
  • Difficulty Level:
    A Bit Difficult
  • Total Repair Time:
    30 - 60 mins
  • Tools:
    Screw drivers
0 of 1 people found this instruction helpful.
Was this instruction helpful to you?
Thank you for voting!
  • 1
  • 2
  • 3
Questions and Answers

Ask our experts a question about this part and we'll get back to you as soon as possible!

65 questions answered by our experts.
Sort by:
  • 1
  • 2
  • 3
Sorry, we couldn't find any existing answers that matched.Try using some different or simpler keywords, or submit your new question by using the "Ask a Question" button above!
Irene
September 9, 2017
Cracked inside oven glass on my Whirlpool and need replacement. Not sure which option would fit and is it easy to replace? Thanks
For model number RBS305PDB16
PartSelect logo
Hello Irene, thank you for contacting us. The correct inner door glass for your model is PS11742543. We have a video that shows how to remove and install the new glass panel, you can follow the link below, hope this helps! https://www.youtube.com/watch?v=pUBqjWO0MOo

30 people found this helpful.

Was this helpful?
Thank you for voting!
Nathaniel
January 22, 2019
I broke the inside glass on my oven. The one that is closest to the food on the inside. Can you tell me the product number so i get the right piece of glass? Thanks!
For model number KEBC107KSS0
PartSelect logo
Hello Nathaniel, Thank you for contacting us. I have researched the model you have provided and have found the part you are looking for is Part Number: PS11742543. Thank you for your inquiry, good luck with this repair!

10 people found this helpful.

Was this helpful?
Thank you for voting!
Gerry
March 6, 2018
I broke the door panel glass ! I need to know what part number to order also broke the handle on the oven can't find ! Also does self-adhesive come with that glass!
For model number RBS305PDS17
PartSelect logo
Hello Gerry, Thank you for contacting us. I have researched the model you have provided and have found the part you’re looking for is Part Number: PS11747234 for the outside panel in Stainless Steel and Part Number: PS11747257 for white, Part Number: PS11747258 is black and Bisque has been discontinued. The exterior panels come with eh silver tape. The door handle has been discontinued in all color options sorry. Hope this helps!

7 people found this helpful.

Was this helpful?
Thank you for voting!
Kevin
December 22, 2017
Is this the right glass for my oven?
For model number KEBC208KSS0
PartSelect logo
Hello Kevin, Thank you for your inquiry. This is the pane of oven door glass that faces the inside of the oven when the door is closed. Hope this helps!

6 people found this helpful.

Was this helpful?
Thank you for voting!
Hazel
August 27, 2019
I have broken inner glass on the door of my oven. What number do I need to replace this please ?
For model number RBS305PRS00
PartSelect logo
Hi Hazel, Thank you for your question. There are 3 panes of inner door glass listed for your oven door. The part number for the pane of glass behind the exterior door glass is PS11747242. The part number listed for the pane of glass just behind the first pane of inner door glass is PS11747245. The part number listed for the pane of inner door glass that faces the heat from the oven when the door is closed is PS11742543. I hope this helps. Thank you and have a great day!

5 people found this helpful.

Was this helpful?
Thank you for voting!
Ayman
December 27, 2017
Is this inner glass compatible with my oven?
For model number RBS305PDQ9
PartSelect logo
Hi Ayman, Thank you for the question. Yes, according to the model number provided this is the correct Inner Door Glass. Hope this helps!

4 people found this helpful.

Was this helpful?
Thank you for voting!
Robin
November 20, 2017
I need to replace the inner glass on my wall oven, and you have two listed but not sure which one I need? The inner glass broke in the bottom oven if that makes a difference.
For model number GBD307PDQ7
PartSelect logo
Hi Robin, Thank you for the question. The Part Number PS11742543 is the inner glass that is closest tot he inside of the oven and takes the heat.Part Number PS11742625 is the next layer of glass behind the very inside glass and Part Number PS11742544 is the third layer and sits behind the very outside piece of glass.Hope this helps!

3 people found this helpful.

Was this helpful?
Thank you for voting!
Related Parts:
Tom
June 3, 2019
This is the second time within a year I am replacing the inner glass on my double oven. First time it was the top, now it is the bottom oven door. My tenant told me the glass broke when she was running the clean cycle. Does this often happen or was there a chance it was actually hit when it was in use and not during the clean cycle. Also, can the oven still be used with a cracked inner glass? thank you.
For model number KEBC208KSS0
PartSelect logo
Hello Tom, Thank you for the question. Normally if it cracks during the clean cycle it is due to a defect or a unnoticeable chip or small crack that was in the glass and the heat can cause the larger crack or break. If used with the crack it can cause it to shatter or damage to the door and other layers of glass. Hope this helps!

3 people found this helpful.

Was this helpful?
Thank you for voting!
Lea
February 28, 2019
The inner door glass is broken and i need to replace, can you tell me the correct part #?Thank you
For model number GBD307PDQ3
PartSelect logo
Hello Lea, Thank you for contacting us. I have researched the model you have provided and have found the part you are looking for is PS11742543. Have a great day!

3 people found this helpful.

Was this helpful?
Thank you for voting!
Saleh
December 19, 2017
I need to replace the inner glass door of my oven . What's the replacement part no ?
For model number RBS275PDQ16
PartSelect logo
Hello Saleh, Thank you for your inquiry. Part# WP4449253 is the innermost piece of glass that faces the inside of your oven when the door is closed. Hope this helps!

2 people found this helpful.

Was this helpful?
Thank you for voting!
  • 1
  • 2
  • 3
Model Cross Reference
This part works with the following models:
PartSelect Number: PS11742543
Manufacturer Part Number: WP4449259
Brand
Model Number
Description
Whirlpool
GBD307NKB0
Range - Whirlpool Range/Stove/Oven Model GBD307NKB0 Parts
Whirlpool
GBD307NKQ0
Range - Whirlpool Range/Stove/Oven Model GBD307NKQ0 Parts
Whirlpool
GBD307PDB0
Wall Oven - Built-in, Wall, Electric 30"
Whirlpool
GBD307PDB09
Wall Oven - Built-in, Electric
Whirlpool
GBD307PDB1
Wall Oven - Built-in, Electric
Whirlpool
GBD307PDB10
Wall Oven - Built-in, Electric, Double
Whirlpool
GBD307PDB2
Wall Oven - Built-in, Electric
Whirlpool
GBD307PDB3
Wall Oven - Built-in, Electric, Wall
Whirlpool
GBD307PDB4
Wall Oven - Built-in, Electric
Whirlpool
GBD307PDB5
Wall Oven - Built-in, Electric
Whirlpool
GBD307PDB6
Wall Oven - Built-in, Electric
Whirlpool
GBD307PDB7
Wall Oven - Built-in, Electric
Whirlpool
GBD307PDQ0
Wall Oven - Built-in, Wall, Electric 30"
Whirlpool
GBD307PDQ09
Wall Oven - Built-in, Electric
Whirlpool
GBD307PDQ1
Wall Oven - Built-in, Electric
Whirlpool
GBD307PDQ10
Wall Oven - Built-in, Electric, Double
Whirlpool
GBD307PDQ2
Wall Oven - Built-in, Electric
Whirlpool
GBD307PDQ3
Wall Oven - Built-in, Electric, Wall
Whirlpool
GBD307PDQ4
Wall Oven - Built-in, Electric
Whirlpool
GBD307PDQ5
Wall Oven - Built-in, Electric
Whirlpool
GBD307PDQ6
Wall Oven - Built-in, Electric
Whirlpool
GBD307PDQ7
Wall Oven - Built-in, Electric
Whirlpool
GBD307PDS09
Wall Oven - Built-in, Electric
Whirlpool
GBD307PDS1
Wall Oven - Built-in, Electric
Whirlpool
GBD307PDS10
Wall Oven - Built-in, Electric, Double
Whirlpool
GBD307PDS2
Wall Oven - Built-in, Electric
Whirlpool
GBD307PDS3
Wall Oven - Built-in, Electric, Wall
Whirlpool
GBD307PDS4
Wall Oven - Built-in, Electric
Whirlpool
GBD307PDS5
Wall Oven - Built-in, Electric
Whirlpool
GBD307PDS6
Wall Oven - Built-in, Electric
Customer Service Representative

Get in touch, we're here to help!

Daily 8am - 9pm EST

Contact Customer Service