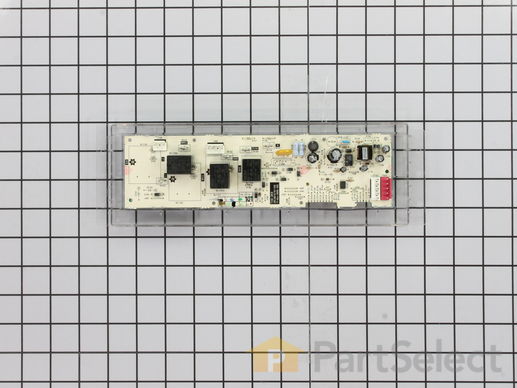
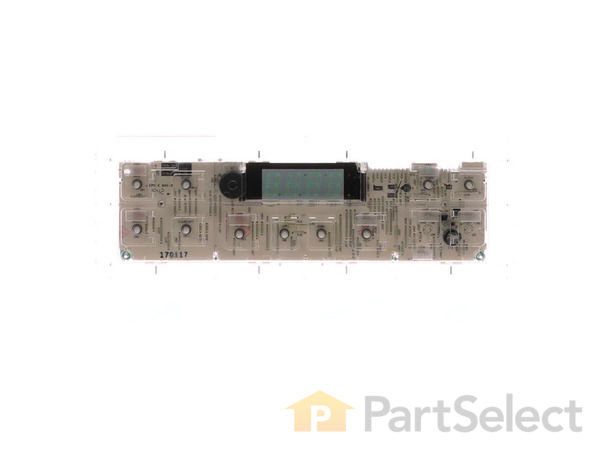
Part Location Diagram of WB27K10354 GE Electronic Control Board
See part 105 in the diagram
( Grid squares measure 1x1 inch )
Customer Service Representative

Get in touch, we're here to help!

Daily 8am - 9pm EST

customerservice@partselect.com

Electronic Control Board WB27K10354

 Fits your EGR2000EM1BB!
★★★★★
★★★★★
7 Reviews

Rated by 4 customers 

Really Easy 

30 - 60 mins 

Ratings submitted by customers like you who bought this part.

$ 122.19
  In Stock
Get FREE EconoShip on orders over $100! T&C apply

Get this part fast! Average delivery time for in-stock parts via standard shipping: 1.8 days.

 Fits your EGR2000EM1BB!
PartSelect Number PS3486626
Manufacturer Part Number WB27K10354
Manufactured by GE
Product Description

Electronic Control Board Specifications

Please note: With this control the wiring could be different from the original. It will possibly need to be installed by an appliance repair person.
How Buying OEM Parts Can Save You Time and Money

How Buying OEM Parts Can Save You Time and Money

Troubleshooting
This part fixes the following symptoms:
Touchpad does not respond
This part works with the following products:
Range.
This part works with the following products:
General Electric, Kenmore.
Part# WB27K10354 replaces these:
AP4980366, 1810619, WB27K10090, WB27K10209, WB27K10219, WB27K10339
Back to Top
Customer Reviews
Average Rating:
★★★★★
★★★★★
7 Reviews
4.6
Filter By Rating:
  • 5 Stars
    6
  • 4 Stars
    0
  • 3 Stars
    0
  • 2 Stars
    1
  • 1 Star
    0
Sort by:
  • 1
Sorry, we couldn't find any existing reviews that matched. Try using some different or simpler keywords.
  • 1
Customer Repair Stories
 Average Repair Rating: 4.2 / 5.0, 4 reviews. What's this?
Sort by:
  • 1
Sorry, we couldn't find any existing installation instruction that matched.
Replace control pad
Very ez. Watched a YouTube video first. Could have figured it out ez without, but it always helps.
Other Parts Used:
Electronic Control Board OVERLAY T09-A
  • Roger from HACKETTSTOWN, NJ
  • Difficulty Level:
    Really Easy
  • Total Repair Time:
    30 - 60 mins
  • Tools:
    Screw drivers, Socket set
2 of 2 people found this instruction helpful.
Was this instruction helpful to you?
Thank you for voting!
Mother board shows F8 means that is no longer good
Opened the back and installed the new one. The only problem was pealing the paper of the old one that shows the labels. Strongly recommend to buy that part also. The job will be more neat.
  • Jorge from BRONX, NY
  • Difficulty Level:
    Very Easy
  • Total Repair Time:
    15 - 30 mins
  • Tools:
    Nutdriver, Screw drivers
1 person found this instruction helpful.
Was this instruction helpful to you?
Thank you for voting!
Sometimes the cake bakes, sometimes it doesn't
First replaced temperature sensor following YouTube instructions.

Then removed upper back panel to expose the control board. Removed the screws holding the control board, but DID NOT disconnect the wires. Moved the old control board up over the top of the range to let it rest on the stove top.

Fit the new overlay on the new control board. There are edges on the bottom and one side of the control board that makes aligning it easy.

Then ONE AT A TIME, starting with the largest connector on the end of the board, disconnected a lead and reconnected to the new board. NOTE: THE CONNECTORS ON THE NEW BOARD ARE IN DIFFERENT LOCATIONS THAN ON THE OLD! But if you look closely, they are all labeled. Simply find the same label on the new board and connect the lead from that connector on the old board. Making the right connections is NOT a problem. And there are connectors on the new board that are NOT USED! A note in the packaging warns of this.

Remounted the control board, replaced the back panel, and plugged the range back in. The new control board flashed all the LEDs and the clock started blinking. Set the clock. Turned the oven on and confirmed that it lit, cycled on and off during preheat, and beeped when it came out of preheat.

Since this was a new sensor and a new control board, I used my DMV and thermocouple to check the min/max temp during the heating cycle. Had to calibrate the temp down 5 degrees. Instructions for doing this are on the web and in the owners manual. It is easy.

Finally, did the GE Biscuit Test (Google it) and the biscuits were a bit under baked at the minimum time and a bit over baked at the maximum time. Perfect!

Everything fit, everything worked, took about 45 minutes start to finish. Wife is happy and I'm getting baked goodies again!
Other Parts Used:
OVERLAY T09-A Electronic Control Board TEMPERATURE SENSOR
  • Richard from LEESBURG, FL
  • Difficulty Level:
    Really Easy
  • Total Repair Time:
    30 - 60 mins
  • Tools:
    Nutdriver, Pliers, Screw drivers
2 of 2 people found this instruction helpful.
Was this instruction helpful to you?
Thank you for voting!
No power to electronic readout screen there was no control to the oven at all. The troubleshooting guide in the oven manual several symtoms said to replace the electronic control board. So I did.
First of all disconnect the power cord and then remove the top section of the oven which consisted of 2 small allen screws located in the front bottom corners [ left and right ] on the frontside. On the backside there was 2 phillip screws on top corners [ left and right ]. Also there was 2 bolthead screws that I use my small socket set or you can use a small ajustable wrench. Once all these were removed it rolled forward right off. The control board was located in the center of the panel. Made sure the part matched up and it did, removed 4 small corner phillip screws and 4 or 5 removable plug in wire connectors which were easily identified. Put everything back together, plug power cord back in and the electronic display came on. Everything worked on the oven. done deal.
  • victor from thatcher, AZ
  • Difficulty Level:
    Really Easy
  • Total Repair Time:
    15 - 30 mins
  • Tools:
    Screw drivers, Socket set
33 of 39 people found this instruction helpful.
Was this instruction helpful to you?
Thank you for voting!
  • 1
Questions and Answers

Ask our experts a question about this part and we'll get back to you as soon as possible!

4 questions answered by our experts.
Sort by:
  • 1
Sorry, we couldn't find any existing answers that matched.Try using some different or simpler keywords, or submit your new question by using the "Ask a Question" button above!
George
December 26, 2017
My oven stopped working. All other functions, self cleaning, broil, work fine. The oven never lights off.....will the control board solve this issue?
For model number JGBP28WEL3WW
PartSelect logo
Hi George, Thank you for the question. Yes the control board, PartSelect Number PS3486626 is not repairable so it will need to be replaced. Hope this helps!

2 people found this helpful.

Was this helpful?
Thank you for voting!
Kevin
October 10, 2019
Oven will not heat to the right temperature. I replaced the temperature probe, but it still will not keep the right temp while baking.
For model number 362.74620301
PartSelect logo
Hi Kevin, Thank you for your question. If installing a new temperature probe did not fix the heating issue in the oven, you will need to check the electronic control board, the elements and the wiring between the parts to see which one is causing the issue. I hope this helps. Thank you and have a great day!

1 person found this helpful.

Was this helpful?
Thank you for voting!
John
November 16, 2017
I have an f2 error message on the panel. The oven was not lighting so I replaced the igniter. The oven now lights but shuts off after 30 minutes with the f2 error message. I have tried to reset the oven by turning off and on power
For model number JGBP28SEJ1SS
PartSelect logo
Hi John, Thank you for the question. I suggest testing the Oven Sensor,PartSelect Number PS236043.Testing the temperature sensor probe on your oven is easy. With the sensor at room temperature, measure the resistance between the two prongs at the end of the sensor connector. The resistance of the sensor should read approximately 1080 – 1090 ohms at room temperature. Hope this helps!

1 person found this helpful.

Was this helpful?
Thank you for voting!
Mariano
December 30, 2022
Bottom oven element not working. Replace new one still not working replace temperature sensor still not working. Any suggestions? Thank you
For model number CC2S985SET5SS
PartSelect logo
Hello Mariano, thank you for your inquiry. According to our research, we would recommend testing the Contro Board for continuity with a multimeter. If there is no continuity, replace it with part number PS3505414. If that does not help, we would recommend checking the Glass & Touch Board Assembly, part number PS3505414. If you require assistance to place an order, please contact customer service. We hope that helps!

Was this helpful?
Thank you for voting!
Related Parts:
  • 1
Model Cross Reference
This part works with the following models:
PartSelect Number: PS3486626
Manufacturer Part Number: WB27K10354
Brand
Model Number
Description
Kenmore
36272620300
Range
Kenmore
36272620301
Range
Kenmore
36272620302
Range
Kenmore
36272621300
Range
Kenmore
36272621301
Range
Kenmore
36272621302
Range
Kenmore
36272622300
Range
Kenmore
36272622301
Range
Kenmore
36272622302
Range
Kenmore
36272624300
Range
Kenmore
36272624301
Range
Kenmore
36272624302
Range
Kenmore
36274620300
Range
Kenmore
36274620302
Range
Kenmore
36274621300
Range
Kenmore
36274621302
Range
Kenmore
36274622300
Range
Kenmore
36274622302
Range
Kenmore
36274624300
Range
Kenmore
36274624302
Range
Kenmore
36275620300
Range
Kenmore
36275620301
Range
Kenmore
36275620302
Range
Kenmore
36275621300
Range
Kenmore
36275621301
Range
Kenmore
36275621302
Range
Kenmore
36275622300
Range
Kenmore
36275622301
Range
Kenmore
36275622302
Range
Kenmore
36275624300
Range
Customer Service Representative

Get in touch, we're here to help!

Daily 8am - 9pm EST

Contact Customer Service