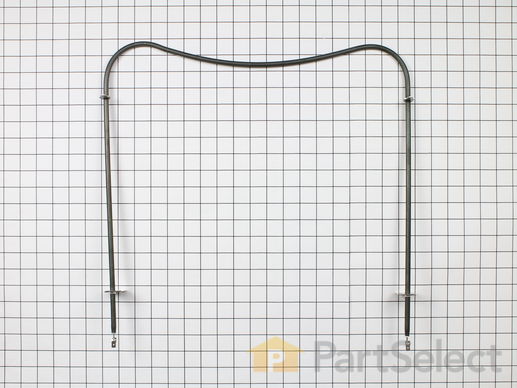
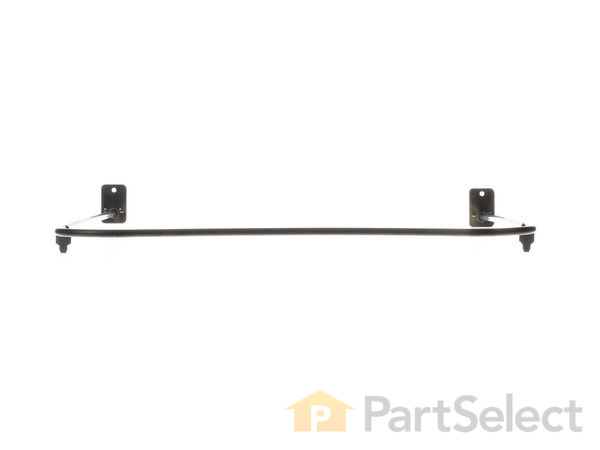
Part Location Diagram of WPW10310274 Whirlpool Bake Element
See part 15 in the diagram
( Grid squares measure 1x1 inch )
Customer Service Representative

Get in touch, we're here to help!

Daily 8am - 9pm EST

customerservice@partselect.com

Bake Element WPW10310274

 Fits your JES9900BCS!
★★★★★
★★★★★
43 Reviews

Rated by 11 customers 

Really Easy 

Less than 15 mins 

Ratings submitted by customers like you who bought this part.

$ 102.34
  In Stock
Get FREE EconoShip on orders over $100! T&C apply

Get this part fast! Average delivery time for in-stock parts via standard shipping: 1.8 days.

 Fits your JES9900BCS!
PartSelect Number PS11752540
Manufacturer Part Number WPW10310274
Manufactured by Whirlpool
Product Description

Bake Element Specifications

This bake element is found on the bottom of the oven. his bake element is for ranges. The bake element is at the bottom of the oven and supplies the heat for baking. Unplug the range or shut off the house circuit breaker for the range before installing this part. Wear work gloves to protect your hands.
How Buying OEM Parts Can Save You Time and Money

How Buying OEM Parts Can Save You Time and Money

Troubleshooting
This part fixes the following symptoms:
Element will not heat | Little to no heat when baking | Oven not heating evenly
This part works with the following products:
Range.
This part works with the following products:
Jenn-Air, Whirlpool, Maytag, Amana.
Part# WPW10310274 replaces these:
AP6019234, 74010883, 7406P439-60, W10310274
Back to Top
Customer Reviews
Average Rating:
★★★★★
★★★★★
43 Reviews
4.9
Filter By Rating:
  • 5 Stars
    38
  • 4 Stars
    4
  • 3 Stars
    1
  • 2 Stars
    0
  • 1 Star
    0
Sort by:
  • 1
  • 2
  • 3
Sorry, we couldn't find any existing reviews that matched. Try using some different or simpler keywords.
  • 1
  • 2
  • 3
Customer Repair Stories
 Average Repair Rating: 4.4 / 5.0, 11 reviews. What's this?
Sort by:
  • 1
  • 2
Sorry, we couldn't find any existing installation instruction that matched.
bake element non operational
No instructions with part, so I had to look up on internet. This took more time than installing it. Think basic instructions should come with the expensive part.
  • Charles from Sneads Ferry, NC
  • Difficulty Level:
    Easy
  • Total Repair Time:
    15 - 30 mins
  • Tools:
    Pliers, Screw drivers
2 of 2 people found this instruction helpful.
Was this instruction helpful to you?
Thank you for voting!
The electric element in the oven broke
Shut off breaker, assure zero energy. Using phillips screwdriver remove old element, unplug wires from element. Reconnect wires to new element, secure screws. Assure all tools removed and people are clear before re-energizing power to range. I was not happy with the packaging, the new element came in a box with no protective packing material!
  • richard from hamilton, NJ
  • Difficulty Level:
    Easy
  • Total Repair Time:
    Less than 15 mins
  • Tools:
    Socket set
3 of 3 people found this instruction helpful.
Was this instruction helpful to you?
Thank you for voting!
Oven would not heat past 200
First be sure to unplug stove or turn off from breaker switch. I Removed racks from oven . Using screwdriver I loosened the back plate in the oven that held the wires connected to heating element , being careful not to let wires fall through holes . Gently pull element tip apart from wire. Snap end of new element to wires, screw plates back to tighten
Turn oven on and check to assure heating properly. Very simple
  • Desmona from GONZALES, LA
  • Difficulty Level:
    Very Easy
  • Total Repair Time:
    15 - 30 mins
  • Tools:
    Screw drivers
3 of 3 people found this instruction helpful.
Was this instruction helpful to you?
Thank you for voting!
Burned out lower oven element replacement
SHUT OFF POWER AT BREAKER BOX! Remove oven door, use nut driver to remove two screws holding old element to back of oven. Pull forward to get wires into oven, remove wire clips from old part and re-attach to new element using pliers. Re-attach to back of oven, replace door. Turn on power and heat oven to burn off coating on new element. Not at all difficult, except for wire clips are at angle to wire, making re-attachment a bit difficult to do. DO NOT LOSE WIRES INTO BACK AS THEY WOULD BE VERY DIFFICULT TO RESCUE IN A JENN-AIR SLIDE IN UNIT LIKE OURS.
  • Lynn from MENOMONIE, WI
  • Difficulty Level:
    Easy
  • Total Repair Time:
    15 - 30 mins
  • Tools:
    Nutdriver, Pliers
2 of 3 people found this instruction helpful.
Was this instruction helpful to you?
Thank you for voting!
Lower range burner element burned out
Should have been under the 'very easy' category, unscrew 2 screws, pull out old element, disconnect wires, reconnect new wires and screw back in. Unfortunately the right wire disconnected while pulling out the element, so I had to pull the the stove out, disconnecting vents in the process, then remove the back to be able to feed the wire back in thru the element hole . While back here I noticed that the reason the wire came off is that the way it was routed behind the stove cover was such that there was virtually no slack to be able to pull the element out in the first place. I'll bet that at the factory, the element was installed first, THEN the wires were connected. Whoever was on the line that day made extra sure of no slack in back, and that made the job take 5-6 times longer than it should have. As for the part replacement, it was a perfect match to the original part so it was super easy once the wire got back in the oven...
  • Andrew from SAINT PAUL, MN
  • Difficulty Level:
    A Bit Difficult
  • Total Repair Time:
    30 - 60 mins
  • Tools:
    Nutdriver, Screw drivers
7 of 8 people found this instruction helpful.
Was this instruction helpful to you?
Thank you for voting!
My old element finally went out
Easy peasy...1. Take 2 screws out to remove the back cover. 2. Unplug the 2 wires from the element. 3. Remove the 2 screw holding the element from inside the oven and take out the old element. Repeat the steps above in reverse order.
  • Ricky from JASPER, TX
  • Difficulty Level:
    Very Easy
  • Total Repair Time:
    Less than 15 mins
  • Tools:
    Screw drivers
6 of 6 people found this instruction helpful.
Was this instruction helpful to you?
Thank you for voting!
Bake element failed
Removed 2 screws holding element to stove then gently pulled element forward to exposed lead connections and disconnected leads to element then reconnected leads to new element and gently pushed element ends back into the openings in the back of the stove and replaced screws to hold element to stove
  • Christopher from Daphne, AL
  • Difficulty Level:
    Really Easy
  • Total Repair Time:
    Less than 15 mins
  • Tools:
    Nutdriver
18 of 21 people found this instruction helpful.
Was this instruction helpful to you?
Thank you for voting!
Bake element blew up
took the old one out (two phillips head screws)and put the new one in. done. took about 5-6 minutes.
  • Kevin from Norfolk, VA
  • Difficulty Level:
    Easy
  • Total Repair Time:
    Less than 15 mins
  • Tools:
    Screw drivers
4 of 7 people found this instruction helpful.
Was this instruction helpful to you?
Thank you for voting!
needed new element. Old one burnt in two
unscrewed and unplugged the old one and plugged in and screwed in the new one. EASY!
  • Elaine from Orfordville, WI
  • Difficulty Level:
    Really Easy
  • Total Repair Time:
    Less than 15 mins
  • Tools:
    Pliers
26 of 35 people found this instruction helpful.
Was this instruction helpful to you?
Thank you for voting!
bake element needed replacement
replacement was very easy, took 5 min
  • svetlana from chicago, IL
  • Difficulty Level:
    Really Easy
  • Total Repair Time:
    Less than 15 mins
  • Tools:
    Screw drivers
4 of 7 people found this instruction helpful.
Was this instruction helpful to you?
Thank you for voting!
  • 1
  • 2
Questions and Answers

Ask our experts a question about this part and we'll get back to you as soon as possible!

11 questions answered by our experts.
Sort by:
  • 1
  • 2
Sorry, we couldn't find any existing answers that matched.Try using some different or simpler keywords, or submit your new question by using the "Ask a Question" button above!
Gary
August 16, 2017
I just ordered a new baking element for my Maytag oven. The old one had broken in two. I knew to expect both rear terminals to be attached to wires coming from the two holes in the rear of the oven. However only one terminal was connected to a wire. I was very careful when i pulled the old element out so as to not "lose" the wires through to the back of the unit. I also felt way back into the hole and could not find any wire. Is there any possibility that this element has electricity to only one terminal??
PartSelect logo
Hello Gary, Thank you for your question. Your oven element would require two wires to complete the circuit. You may need to remove the back panel on your unit to see if you can locate the second wire. It is possible the terminal connection may have come off as the broken element was being removed. The wire can fall quite far down as the only thing securing them in place is the terminal connection itself. I hope this helps!

10 people found this helpful.

Was this helpful?
Thank you for voting!
Dan
October 19, 2017
Oven on bake only heats to about 200 degrees, does that mean i need to replace the bake element ?
For model number JES9705BAS
PartSelect logo
Hi Dan, Thank you for your question. It could be your bake element. I could also suggest testing your over temperature probe as well. You can test both of your parts with a multi meter. Good luck with your repair.

2 people found this helpful.

Was this helpful?
Thank you for voting!
Laura
March 27, 2019
Our Jenn-Air electric smooth top downdraft slide-in range is 12 -years-old, and it seems like the heating element is no longer working, as it only heats to 198. When I called the dealer from whom we purchased it, a customer care rep. said there are no longer parts for this range. When looking it up on your site, it seems as though we found the heating element. The model number: (p) jes9900bas serial number: (s) 12724095jp
For model number JES9900BAS
PartSelect logo
Hello Laura, thank you for inquiring. For your model the Bake Element is part PS11752540 and the Broil Element is part PS11744519.

2 people found this helpful.

Was this helpful?
Thank you for voting!
Tom
November 24, 2019
On preheat cycle only top element is heating and then when temperature is reaching (to fast) only top element is working causing top cooking burning. This cause can to due to baking under element?
For model number JES9900CCW00
PartSelect logo
Hello Tom, Thank you for the question. If the bottom element is not turning on during or after the pre-heat, it will need to be replaced. You can verify it is defective by checking for continuity with a multi meter. Hope this helps!

2 people found this helpful.

Was this helpful?
Thank you for voting!
Tom Bamrounsavath
November 25, 2019
Hi, my oven element seem ok 20 homs. But during preheat cycle it’s seem not working only broil element works the oven element not become red but lukewarm... what is the trouble? relay on electronic board? best regards,
For model number JES9900CCW00
PartSelect logo
Hi Tom, please read our guide here: https://www.partselect.com/Repair/Range-Stove-Oven/No-Heat-When-Baking/. Thank you for your question and good luck with your repair!

1 person found this helpful.

Was this helpful?
Thank you for voting!
Pam
May 9, 2022
Oven element does not adequately heat nor hold heat. Has bright red spot in one portion of element. Has one side that looks like it is degrading. Have no idea how old appliance is, but maybe original to house built in 1992.
For model number JES9750CAS01
PartSelect logo
Hi Pam, Thank you for your question. If the broil or bake element shows signs that they are degrading, they will need to be replaced. The part number listed under your model number for the broil element is PS11744519. The part number listed for the bake element is PS11752540. If you need help placing an order for these parts, customer service is open 7 days a week and anyone will be happy to assist you. Please feel free to give us a call. We look forward to hearing from you!

Was this helpful?
Thank you for voting!
Related Parts:
Mary
March 6, 2023
How to install bake element
For model number WDE15OLVQ
PartSelect logo
Hello Mary, thank you for reaching out. You can easily remove and install the bake element by using the following steps: 1. Unplug the range. 2. Disconnect the wires. 3. Remove the oven rack. 4. The bake element is present at the bottom of the oven. 5. Remove the 2 screws holding the bake element to the stove. 6. Remove the old bake element and install the new one. 7. Align the new bake element to the screws and tighten them. We hope this helps, good luck with this repair!

Was this helpful?
Thank you for voting!
Charles
March 15, 2023
Instructions on how to replace the Bake Element.
For model number JES9800CAS02
PartSelect logo
Hello Charles, thank you for reaching out. You can easily remove and install the bake element by using the following steps: 1. Unplug the range. 2. Disconnect the wires. 3. Remove the oven rack. 4. The bake element is present at the bottom of the oven. 5. Remove the 2 screws holding the bake element to the stove. 6. Remove the old bake element and install the new one. 7. Align the new bake element to the screws and tighten them. We hope this helps, good luck with this repair!

Was this helpful?
Thank you for voting!
Mark
November 15, 2019
My oven preheats to the correct temp while in the bake mode but does not maintain this temp throughout the cooking process. I will check the temp in the oven and realize that it feels cooler and then i'd put the oven into a preheat mode and in fact find the temp is 75-100 degrees below the set point.
For model number JDS9860BDB
PartSelect logo
Hi Mark, test the bake element PS11752540 and bake thermostat PS1570174. More than likely one of these part is the cause of the problem. Thank you for your question and good luck with your repair!

Was this helpful?
Thank you for voting!
Related Parts:
Beverly Davis
February 11, 2019
We have tested the long oven sensor,it was working! Got anymore suggestions, we do not think is the elements! Is there possibility, a part in the control panel, that has some control over oven and broiler not heating? Everything is working fine on top of stove!
For model number JES9800CAB01
PartSelect logo
Hello Beverly, thank you for your question. If the thermostat is tested and is fine the issue would be with the Electronic Control board Part Number: PS11745985. This part is the other part that controls over the oven and broiler not heating. I hope this helps.

Was this helpful?
Thank you for voting!
  • 1
  • 2
Model Cross Reference
This part works with the following models:
PartSelect Number: PS11752540
Manufacturer Part Number: WPW10310274
Brand
Model Number
Description
Amana
AES1350BAW
Range - Slide-in, Electric
Amana
AES3540BAW
Range - Slide-in, Electric
Amana
AES3760BAB
Range - Slide-in, Electric
Amana
AES3760BAQ
Range - Slide-in, Electric
Amana
AES3760BAS
Range - Slide-in, Electric
Amana
AES3760BAW
Range - Slide-in, Electric
Amana
AES3760BCB
Range - Slide-in, Electric
Amana
AES3760BCS
Range - Slide-in, Electric
Amana
AES3760BCS16
Range - 30" SLIDE-IN ELECTRIC RANGE
Amana
AES3760BCW
Range - Slide-in, Electric
Magic Chef
CES3759BCB
Range - Slide-in, Electric
Magic Chef
CES3759BCS
Range - Slide-in, Electric
Magic Chef
CES3759BCW
Range - Slide-in, Electric
Whirlpool
GY397LXUB0
Range - Slide-in, Electric
Whirlpool
GY397LXUB02
Range - Slide-in 30" Electric
Whirlpool
GY397LXUB03
Range
Whirlpool
GY397LXUQ0
Range - Slide-in, Electric
Whirlpool
GY397LXUQ03
Range - Slide-in 30" Electric
Whirlpool
GY397LXUQ04
Range
Whirlpool
GY397LXUS0
Range - Slide-in, Electric
Whirlpool
GY397LXUS02
Range - Slide-in 30" Electric
Whirlpool
GY397LXUS03
Range
Whirlpool
GY397LXUT0
Range - Slide-in, Electric
Whirlpool
GY397LXUT02
Range - Slide-in 30" Electric
Whirlpool
GY397LXUT03
Range - Slide-in 30" Electric
Whirlpool
ISE630VS11
Range - 30" Slide-in, Electric
Whirlpool
ISE630WS00
Range - 30" Slide-in, Electric
Whirlpool
ISE630WS01
Range
Jenn-Air
JDS9860BDB
Range
Jenn-Air
JDS9860BDB21
Range - 30" MODULAR GAS DOWNDRAFT RANGE
Customer Service Representative

Get in touch, we're here to help!

Daily 8am - 9pm EST

Contact Customer Service