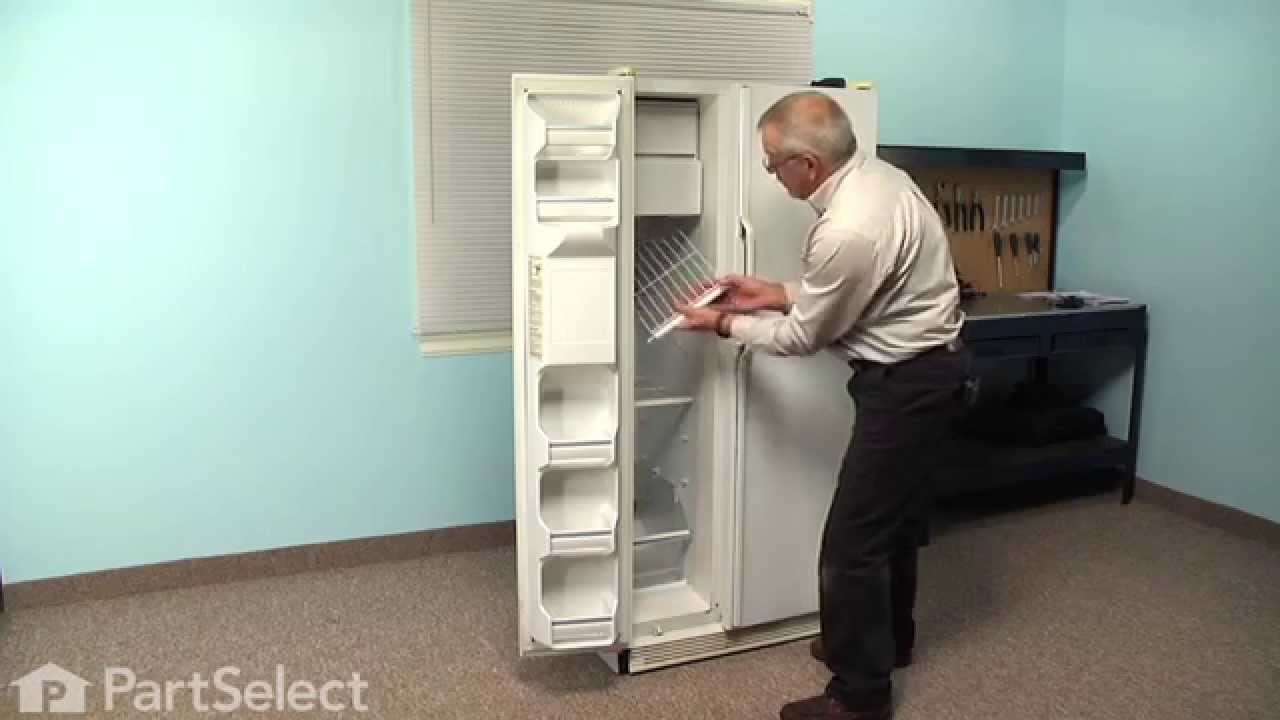
This part assembly has 2 functions: The defrost heater keeps the cooling coils from frosting over and the thermostat senses that the heat near the cooling coils has reached the desired temperature.
How Buying OEM Parts Can Save You Time and Money
Troubleshooting
This part fixes the following symptoms:
Fridge too warm | Freezer section too warm | Freezer not defrosting
Keep searches simple. Use keywords, e.g. "leaking", "pump", "broken" or "fit".
Sorry, we couldn't find any existing reviews that matched. Try using some different or simpler keywords.
★★★★★
★★★★★
Scott L - April 2, 2020
Verified Purchase
Exact OEM Part received with in a few days coming from Minnesota. I had watched your video so I had the refrigerator disassembled and the coils defrosted and heaters & sensor went in quickly & easily. It repaired the warm refrigerator issue. Thank you.
Great, perfect, exact, genuine GE OEM Part that fixed the warm refrigerator issue.
★★★★★
★★★★★
Elora C - September 11, 2018
Verified Purchase
Perfect part, easily replaced by my son
The part was here in no time and freezer was fixed and working perfectly. Had ordered the one part but both came so was able to fix both.
★★★★★
★★★★★
Jeffrey S - August 30, 2018
Verified Purchase
thanks
fast,works
★★★★★
★★★★★
Paul P - August 7, 2018
Verified Purchase
Refrigerator works like new
The part arrived promptly and the instructions for installation were easy to follow. The old appliance works great.
★★★★★
★★★★★
Ralph J - June 7, 2018
Verified Purchase
Exact replacement, fits, works perfectly.
Measure your heater lengths and match length on the grids on the catalog pictures provided. There are 2 sizes and you want to get the right width. I replaced the timer while I was at it, but clearly the heater coil was broken and this part was the key to the fix. I like the simple mechanical refrigerators and am delaying buying a new circuit board one as long as I can keep this old one running.
★★★★★
★★★★★
Robert N - May 9, 2018
Verified Purchase
Lower heater doesn't seem to defrost
Installed the new part after removing the ice buildup and old part. Confirmed old heater had opened up and was no longer working. Installed the new part, worked great, fridge cooled right down. After ~ 3 or 4 weeks the fridge began to get warm again and when opening up the back of the freezer, the lower evap coils had ice buildup - I confirmed the new heaters were working as I opened up the back of the freezer during a defrost cycle and both heaters were hot. Any ideas?
< Prev
1
Next >
Customer Repair Stories
Average Repair Rating: 3.6 / 5.0, 22 reviews.
What's this?
Sort by:
< Prev
1
2
3
Next >
Search filter:
Clear Filter
Your search term must have 3 or more characters.
Keep searches simple. Use keywords, e.g. "leaking", "pump", "broken" or "fit".
Sorry, we couldn't find any existing installation instruction that matched.
Ice would build up on freezer floor about 1" thick every week, which then had to be removed.
The repair was fairly easy and took about one hour all together. I replaced the defrost heater with thermostat and the defrost timer. If you are having the same problem with ice build up don't forget to use a blow dryer to melt all of the ice for an easier replacement of the defrost heaters with thermostat. Make sure that you melt all of
... Read morethe ice in the drip pan below the heaters. You must also make sure that the drain hole in the middle of the drip pan is totally defrosted and you should blow air through the drain hole with a compressor to make sure that there is no blockage in that line that goes under the refrigerator and into a drain pan where it will evaporate by means of the compressor fan. If this line is not cleared, even after you replaced the broken heaters, the ice will return as the water has no place to drain.
Read less
William from SAYVILLE, NY
Difficulty Level:
Easy
Total Repair Time:
30 - 60 mins
Tools:
Nutdriver, Screw drivers
2 of 2 peoplefound this instruction helpful.
Was this instruction helpful to you?
Thank you for voting!
Frost billed up in freezer
I watched the video on YouTube and followed the instructions. It was an easy repair. Thanks for the video.
Walter from CUDAHY, WI
Difficulty Level:
Really Easy
Total Repair Time:
30 - 60 mins
Tools:
Nutdriver, Screw drivers
1 personfound this instruction helpful.
Was this instruction helpful to you?
Thank you for voting!
Freezer Frosted up, refrigerator warm.
I noticed the top defroster wire had shorted out. What I think happened was the Defrost Timer failed 1st, the the ice grew in the freezer till it contacted the wire on the top defrost heater causing it to short out. So 1st I unplugged the refrigerator and unloaded the freezer into a deep freeze I have. I also took a couple plastic milk
... Read more bottles filled with water and froze them in the deep freezer. I used them to keep the refrigerator section and food there cool while I waited for the parts and for the cooling cooling evaporators to thaw. Once I received that parts, I disassemble the freezer, removed ice maker, shelves, etc. to get to the defrost heaters. I replaced the defrost heaters(very straight forward). On the right side of the metal shroud, the gasket was missing so I used a door sweep from Home Depot and 5 small round head bolts with lock washers(round head bolt toward evaporator) to seal along the right side. It is critical that the airflow be correct else the cooling and defrosting will not work right. Reassembled the rest of the freezer pieces I had removed. Then I replaced the defrost timer in the refrigerator section following the "parts select" video. Note: On my refrigerator, the timer, air temp valves and shroud come out as 1 piece. The video on the unit showed them as 2. No problem. You just take out 1 screw on the top back and gently work the piece out. Follow the instructions to rotate the timer past the loud click. I added 45 degrees after the loud click. Reassembled. Applied power. All has been working correctly without issue. For $130 in parts, and a couple hours of my time, refrigerator repaired and again working great vs shelling out $2,000+ for a new one. How did I know it was fixable ? As long as the cooling is working as evidenced by the frost buildup on the evaporator, it is repairable. If your cooling is dead, the refrigerator is dead. Yearly, I use a scuba tank to blow the dust off the condenser coils. If the heat exchange on the condenser coils is impacted by buildup of dust, dirt, hair, etc., it makes the compressor work that much harder and longer and leads to burnout and premature failure. This refrigerator is 23 years old and again going strong.
Read less
Daniel from Westlake, OH
Difficulty Level:
Easy
Total Repair Time:
1- 2 hours
Tools:
Nutdriver, Pliers, Screw drivers
1 personfound this instruction helpful.
Was this instruction helpful to you?
Thank you for voting!
Refrigerator was warm and freezer was still cool. Removed back panel in freezer to find it frozen solid!! Thawed it out using a hair dryer, worked for a couple of days but it quickly was frozen yet again.
Removed back panel from freezer by removing a few screws.. Unplugged refrigerator as not get shocked.. removed old heaters and thermostat and replaced with new ones and it's been working perfectly!!
Sherrie from Midville, GA
Difficulty Level:
Easy
Total Repair Time:
Less than 15 mins
Tools:
Pliers, Screw drivers
6 of 8 peoplefound this instruction helpful.
Was this instruction helpful to you?
Thank you for voting!
freezer wall frozen, defrosting food
At first I replaced the defrost timer and thought the refrigerator was fixed. Big mistake. It took about a month to realize it was not fixed. Again I defrosted the ice off the evaporator and then I ordered new defrost heaters and a defrost thermostat. It was easy to replace the heaters and defrost thermostat. Only used a phillips screwdri
... Read morever and some tie straps to hold back the wiring to the heaters. The defrost thermostat was held on by a clip and was easy to install. Was done in about 20 minutes and the refrigerator was back in operation. So far no problems.
Read less
Donald from St. Louis, MO
Difficulty Level:
Easy
Total Repair Time:
15 - 30 mins
Tools:
Screw drivers
2 of 4 peoplefound this instruction helpful.
Was this instruction helpful to you?
Thank you for voting!
freezer coils iced up
ordered defrost timer and heater/sensor kit which came on time......removed temp selector panel at top of fridge side by removing top screw and slid unit out of slot. replaced defrost timer and reassembled. replaced heaters and sensor located behind rear panel in freezer. reassembled and presto...all good total time 30 minutes
The refrigerator was leaking water from the freezer section.
First remove all food from the freezer section, disconnect the power to the refrigerator and then remove all the shelves in the freezer.
Then remove the back panel inside the freezer by taking out the screws holding it in and then simply lifting it out. A Philips screwdriver and 1/4" driver was needed.
After the pane
... Read morel is removed, you can see the defrost heater screwed to the refrigerator coils. It's in two sections wired together. One section is screwed to the bottom of the coil and the top section is screwed half way up the coils.
Unplug the wires and thermostat (coming from the defrost heater) from the wire assembly located above the coils.
Next, remove the screws holding the old defrost heater (there are two screws for each element of the defroster)and lift the heater out. Pay close attention as to how the old heater is situated in the freezer in order to put the new one in the same way.
Attach the new heater by putting the bottom element on first and replacing the two screws to secure it. Be careful to keep the wires from tangling and attach the top element the same way.
Next, carefully connect the wires and thermostat from the heater back to the wire assembly the same way they were connected from the old defrost heater.
Place the panel back in place in the back of the freezer section, replace the shelves, and connect the power. You're finished!!
P.S. Don't forget to put the food back in the freezer.
Read less
Joe from Summerton, SC
Difficulty Level:
Easy
Total Repair Time:
15 - 30 mins
Tools:
Nutdriver, Screw drivers
14 of 17 peoplefound this instruction helpful.
Was this instruction helpful to you?
Thank you for voting!
Ice forming in back of freezer would not keep refrigerator cold
removed all the shelves and empty ice maker. Take back panel off (6 screws). Use hair drier to defrost ice off of the coils. Remove old heaters and thermostat (4 screws, thermostat clamps on). Replace with new one and put it all back together. Easy!
david from hot springs, AR
Difficulty Level:
Easy
Total Repair Time:
30 - 60 mins
Tools:
Screw drivers
0 of 3 peoplefound this instruction helpful.
Was this instruction helpful to you?
Thank you for voting!
Burnt out heater defront unit
1. Turned unit off and removed freezer shelving 2. Removed 5 screws on back pannel to expose heaters 3. Deforsted coils with a hair dryer and removed ice cubes 4. Compaired new defrost harness to the existing 5. Removed 4 screws holding the defective harness 6. Installed new heater harness with 4 screws and elec.
... Read moreplug 7. Reinstalled back pannel and shelving 8. Turned unit back on
Read less
Fred from Martinez, CA
Difficulty Level:
Really Easy
Total Repair Time:
15 - 30 mins
Tools:
Screw drivers
8 of 8 peoplefound this instruction helpful.
Was this instruction helpful to you?
Thank you for voting!
Fridge/Freezer would not cool to proper temp
Unplugged powercord. Removed the racks in the freezer. Removed the back panel. Noticed ice was completly covering the cooling coils. Defrosted the cooling coils. Removed the thermostat. Removed the screws holding the Defrost Heaters. Removed Defrost Heaters and installed new ones. Clipped on the new Thermostat. Replaced back cove
... Read morer. Put the racks back in. Plug the powercord back in. I purchased Freezer/Fridge thermostats to keep an eye on actuall temps.
Read less
Don from boyd, WI
Difficulty Level:
Really Easy
Total Repair Time:
15 - 30 mins
Tools:
Screw drivers
0 of 3 peoplefound this instruction helpful.
Was this instruction helpful to you?
Thank you for voting!
< Prev
1
2
3
Next >
Questions and Answers
Ask our experts a question about this part and we'll get back to you as soon as possible!
4 questions answered by our experts.
Sort by:
< Prev
1
Next >
Search filter:
Clear Filter
Your search term must have 3 or more characters.
Keep searches simple. Use keywords, e.g. "leaking", "pump", "broken" or "fit".
Sorry, we couldn't find any existing answers that matched.Try using some different or simpler keywords, or submit your new question by using the "Ask a Question" button above!
Perry
May 28, 2019
Not clear on how to re-mount these and it seems that the bottom heater is too far away from the evaporator coils. It has good continuity and heats up during defrost cycle but isn’t defrosting the coils. The upper one is between the coils and is working well to defrost the upper part of the coils but the water from them drips and freezes on the bottom coils. I need to see exactly how these are suppose to be mounted if possible. Thank you!
For model number 363.9534711
Hello Perry, Thank you for the question. Here is a link to How to Video that may help. Good luck with the repair!
https://www.youtube.com/watch?v=fb8iz56hcEo&t=4s
3 people found this helpful.
Was this helpful?
Thank you for voting!
Tom
May 6, 2019
Thank you for responding to my earlier question. I have replaced the start relay and overload about a year ago, and the temperature control is working. Would the run capacitor affect refrigerant flow?
For model number TFX25CRBB BB
Hi Tom, thank you for your follow up question. It can, the run capacitor helps run the compressor which provides the freon into the tubing and up through your appliance. However that part can be tested with a multi meter to double check if it is working or not. When testing the part it should deflect to 0 ohms and then return to infinite ohms of resistance to be working correctly. I hope that helps. Good luck with your repair.
2 people found this helpful.
Was this helpful?
Thank you for voting!
Tom
May 6, 2019
Evap coils were freezing up. I replaced the two defrost heaters, thermostat cut-out for heaters, and defrost timer. I also replaced evaporator fan motor, but transferred over the original evap fan blade. I am still occasionally get ice-up on the lower evaporator coil section. I verified the resistance of the two heaters (they put out different amounts of heat) and they are up to spec. What could be causing my on-going icing? It takes about a month before the lower coil ices up. Any help is appreciated.
For model number TFX25CRBBBB
Hi Tom, thank you for your question. It seems like you have changed out the parts that generally cause that issue. Those parts being the defrost timer, defrost thermostat, and the defrost heater. You may need to check to see if perhaps your temperature switch is working correctly and that it is not set too low. If that part is fine you could go on to check the run capacitor and start relay on your compressor as well. I hope that helps. Good luck with your repair.
Was this helpful?
Thank you for voting!
Patricia
August 29, 2019
If I am ordering the defrost heater with thermostat should I also order the control/timer WR9X489? Can I have shipped to receive tomorrow?
For model number TPX24BRYEBB
Hi Patricia,
Thank you for your question. If it is just the defrost heater with thermostat that is not working, then you do not need to replace the timer. If you are unsure which part is causing the issue, you will need to test the parts with a multimeter. Here is a link to one of our videos on YouTube that you may reference on how to use one, https://www.youtube.com/watch?v=bWC44fHn0As. We do offer next business day shipping. If the order is placed before 4pm EST Mondays to Fridays, it will be delivered on the next business day. If the order is placed on a Friday before 4pm EST, the order will be delivered on the following Monday unless that Monday is a holiday then it will be delivered on Tuesday. I hope this helps. Thank you and have a great day!
Was this helpful?
Thank you for voting!
< Prev
1
Next >
✖
Ask a Question
Ask our experts a question on this part and we'll respond as soon as we can.