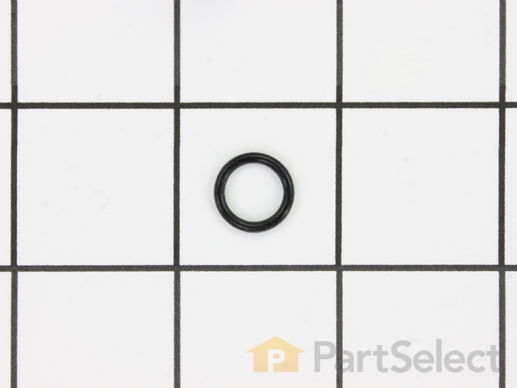
Part Location Diagram of WE1M461 GE Retainer O-Ring
See part 3127 in the diagram
Replacing your General Electric Dryer Retainer O-Ring
( Grid squares measure 1x1 inch )
Customer Service Representative

Get in touch, we're here to help!

Daily 8am - 9pm EST

customerservice@partselect.com

Retainer O-Ring WE1M461

★★★★★
★★★★★
1 Review

Rated by 6 customers 

Easy 

30 - 60 mins 

Ratings submitted by customers like you who bought this part.

$ 9.01
  In Stock
Get FREE EconoShip on orders over $100! T&C apply

Get this part fast! Average delivery time for in-stock parts via standard shipping: 1.8 days.

PartSelect Number PS266776
Manufacturer Part Number WE1M461
Manufactured by GE
Product Description

Retainer O-Ring Specifications

This is a replacement O-ring for the drum bearing retainer on your dryer. The drum bearing is found at the back of the dryer drum. The O-ring is designed to create a seal on the drum bearing. The O-ring is made of rubber, and can occasionally wear down and break. If you notice that your dryer drum bearing is worn while you’re replacing the O-ring, you should consider replacing it as well. This product is sold individually, and is an OEM part from the manufacturer.
How Buying OEM Parts Can Save You Time and Money

How Buying OEM Parts Can Save You Time and Money

Part Videos

Replacing your General Electric Dryer Retainer O-Ring

Replacing your General Electric Dryer Retainer O-Ring
Troubleshooting
This part fixes the following symptoms:
Noisy
This part works with the following products:
Dryer, Washer Dryer Combo.
This part works with the following products:
General Electric, Hotpoint, Kenmore.
Part# WE1M461 replaces these:
AP2621539, 877501, WE01M0461
Back to Top
Customer Reviews
Average Rating:
★★★★★
★★★★★
1 Review
5.0
Filter By Rating:
  • 5 Stars
    1
  • 4 Stars
    0
  • 3 Stars
    0
  • 2 Stars
    0
  • 1 Star
    0
Sort by:
  • 1
Sorry, we couldn't find any existing reviews that matched. Try using some different or simpler keywords.
  • 1
Customer Repair Stories
 Average Repair Rating: 2.9 / 5.0, 6 reviews. What's this?
Sort by:
  • 1
Sorry, we couldn't find any existing installation instruction that matched.
Loud sqeeking.
I followed some simple instructions from GE. It was really easy and I even found some spare change inside the cabinet which my wife took off my hands. :/
Other Parts Used:
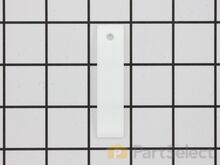
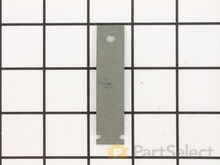
Drum Bearing Slide - Green (Sold individually) Front Drum Bearing Drum Bearing Slide - White (Sold individually) Drum Bearing Sleeve Retainer O-Ring
  • Kevin from HENDERSON, NV
  • Difficulty Level:
    Really Easy
  • Total Repair Time:
    30 - 60 mins
  • Tools:
    Nutdriver, Screw drivers
2 of 3 people found this instruction helpful.
Was this instruction helpful to you?
Thank you for voting!
Noisy like a chain rattling inside
Disconnect Power from the Dryer
Remove 2 screws that held the top on the dryer.
Removed the 2 screw that held the front on the dryer.
Unhooked the belt from the tensioner and motor pulley.
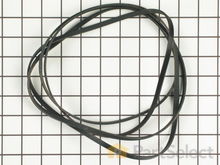
Pulled the drum out. Removed the belt.
Removed the three screws that held the bearing assembly
on the back of the drum.
Other Parts Used:
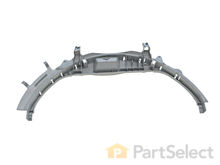
Drum Bearing Sleeve Retainer O-Ring Bearing Retainer
  • Kerry from New Martinsville, WV
  • Difficulty Level:
    A Bit Difficult
  • Total Repair Time:
    30 - 60 mins
  • Tools:
    Pliers, Screw drivers, Socket set
23 of 39 people found this instruction helpful.
Was this instruction helpful to you?
Thank you for voting!
Loud noise
Unplugged dry cord . Removed top and front cover. Removed drum to replace rear Bearing. Reinstalled drum replaced front bearings and sleeve. Reinstalled both covers and plugged in.
Other Parts Used:
Front Drum Bearing Drum Bearing Slide - Green (Sold individually) Drum Bearing Sleeve Retainer O-Ring Drum Bearing Slide - White (Sold individually)
  • Aaron from Needville, TX
  • Difficulty Level:
    Easy
  • Total Repair Time:
    15 - 30 mins
  • Tools:
    Screw drivers
17 of 29 people found this instruction helpful.
Was this instruction helpful to you?
Thank you for voting!
Very loud squeeks coming from dryer
I had to remove all screws from the back of the dryer, control panel, and one side. Pulled top off. Took out two screws that held front door panel on. Disconnected 3 wires into door and completely removed door panel. Disconneted pink wire from heating element then slide belt off drum as I removed the drum. Pulled off the old completly worn out drum bearing sleeve and replaced it. Replaced drum slides as some were worn through. Had a little trouble getting belt back on when I reconnected everything but for 50 dollars in parts and shipping I have working dryer, so I would say it was well worth the effort.
Other Parts Used:
Drum Bearing Slide - Green (Sold individually) Drum Bearing Sleeve Retainer O-Ring Drum Bearing Slide - White (Sold individually)
  • Gretchen from Port Republic, VA
  • Difficulty Level:
    A Bit Difficult
  • Total Repair Time:
    1- 2 hours
  • Tools:
    Pliers, Screw drivers
22 of 44 people found this instruction helpful.
Was this instruction helpful to you?
Thank you for voting!
Noisy running, slow turning dryer
I took off the top panel and ran the dryer. I watched as the drum turned more and more slowly until it stopped. I turned it off, and unplugged it.
I took off the front panel, simply swinging it to the left like a gate so I didn't have to disconnect any wires, then pulled out the drum. I should have taken the belt off the pulley idler first!
Got the drum out and could see the broken idler wheel and the groove on the drum's back post for the O-ring. There is a silicon sheath that goes on this back post - don't lose it if it is still good or you'll have to buy another.
Getting the idler wheel off the stem was as simple as using the pliers to turn the nut until it came off. I put the new one on, then put the nut back on. I adjusted the position of the idler pulley so that the belt would not be out of line with the pulley on the motor - I just eye-balled it.
I slipped the belt around the drum, put the silicon sheath back on the drum post, then put the o-ring in the groove on the post.
Put the drum back in the dryer, lining up the post to go back in the hole was a challenge.
Then, getting the belt back on the pulley needed a little muscle to apply the tension needed to allow the belt to get into place. I had one hand in each opening on each side of the drum and did it by feel.
I put the front panel back on and did a test run. The drum was turning with force now, not slowing down nor easy to stop by applying resistance with my hand. It was also much quieter.
Put on the top panel and done!
Other Parts Used:
Retainer O-Ring Idler Pulley Wheel
  • Laura from Sonora, CA
  • Difficulty Level:
    A Bit Difficult
  • Total Repair Time:
    30 - 60 mins
  • Tools:
    Pliers, Screw drivers
26 of 50 people found this instruction helpful.
Was this instruction helpful to you?
Thank you for voting!
Faint Squeek after dryer had been running for an hour or so
It makes it real easy if you have two people!! Put the dryer on it back--You'll need to protect the floor and the warm air exhaust of the dryer.
Remove the two screws that secure the top--they are located on the inside upper portion of where the door seats on the front panel. Remove the top
Remove the front by removing two screws near the top--one on each side
Remove the belt from the idler pulley--note how it comes off
Lift drum out of dryer
Use the torx bit to remove the bearing
If you got the kit it comes w/ the bearing housing--you'll need to disconnect a couple of the wiring harnesses holding the heater--replace the bearing housing
This is the perfect time to remove all dust bunnies
Re-install everything in reverse order
Other Parts Used:
Rear Drum Bearing Kit Retainer O-Ring Idler Pulley Wheel
  • Stephanie from Cicero, IN
  • Difficulty Level:
    Easy
  • Total Repair Time:
    1- 2 hours
  • Tools:
    Pliers, Screw drivers
24 of 39 people found this instruction helpful.
Was this instruction helpful to you?
Thank you for voting!
  • 1
Questions and Answers

Ask our experts a question about this part and we'll get back to you as soon as possible!

1 question answered by our experts.
Sort by:
  • 1
Sorry, we couldn't find any existing answers that matched.Try using some different or simpler keywords, or submit your new question by using the "Ask a Question" button above!
Mary
January 4, 2023
Dryer tumbler makes loud noise when spinning
For model number DX450EA1WW
PartSelect logo
Hello Mary, thank you for contacting us. The most likely solution is replacing the rear drum kit, part number PS267529. Customer service is available 7 days a week if you require assistance placing an order. Thanks again for reaching out!

Was this helpful?
Thank you for voting!
Related Parts:
  • 1
You May Also Need ?
Model Cross Reference
This part works with the following models:
PartSelect Number: PS266776
Manufacturer Part Number: WE1M461
Brand
Model Number
Description
Kenmore
2661532513
Washer Dryer Combo - HOME LAUNDRY COMBO
General Electric
633616
Dryer
General Electric
633617
Dryer
General Electric
653616
Dryer
General Electric
653617
Dryer
General Electric
662310
Dryer
General Electric
662311
Dryer
General Electric
662410
Dryer
General Electric
662411
Dryer
General Electric
662412
Dryer
General Electric
663616
Dryer
General Electric
663617
Dryer
General Electric
664110
Dryer
General Electric
664210
Dryer
General Electric
664211
Dryer
General Electric
664616
Dryer
General Electric
664617
Dryer
General Electric
672410
Dryer
General Electric
672411
Dryer
General Electric
672412
Dryer
General Electric
672510
Dryer
General Electric
672511
Dryer
General Electric
672512
Dryer
General Electric
672710
Dryer
General Electric
672711
Dryer
General Electric
672712
Dryer
General Electric
672810
Dryer
General Electric
672811
Dryer
General Electric
672812
Dryer
General Electric
674310
Dryer
Customer Service Representative

Get in touch, we're here to help!

Daily 8am - 9pm EST

Contact Customer Service