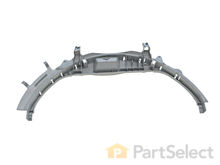
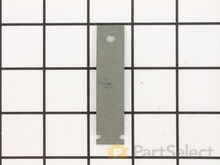
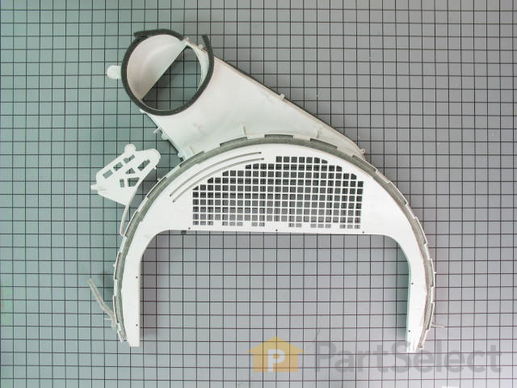
Part Location Diagram of WE14X25080 GE Dryer Lint Chute Assembly
See part 311 in the diagram
Replacing your General Electric Dryer Dryer Lint Chute Assembly
( Grid squares measure 1x1 inch )
Customer Service Representative

Get in touch, we're here to help!

Daily 8am - 9pm EST

customerservice@partselect.com

Dryer Lint Chute Assembly WE14X25080

 Fits your NWSR473EV0WW!
★★★★★
★★★★★
17 Reviews

Rated by 21 customers 

Really Easy 

30 - 60 mins 

Ratings submitted by customers like you who bought this part.

$ 108.72
  In Stock
Get FREE EconoShip on orders over $100! T&C apply

Get this part fast! Average delivery time for in-stock parts via standard shipping: 1.8 days.

 Fits your NWSR473EV0WW!
PartSelect Number PS11763093
Manufacturer Part Number WE14X25080
Manufactured by GE
Product Description

Dryer Lint Chute Assembly Specifications

The lint chute assembly houses the lint filter and channels exhaust air from the drum to the blower wheel.
How Buying OEM Parts Can Save You Time and Money

How Buying OEM Parts Can Save You Time and Money

Part Videos

Replacing your General Electric Dryer Dryer Lint Chute Assembly

Replacing your General Electric Dryer Dryer Lint Chute Assembly
Troubleshooting
This part fixes the following symptoms:
Noisy | Marks left on clothes
This part works with the following products:
Dryer.
This part works with the following products:
General Electric, Hotpoint.
Part# WE14X25080 replaces these:
AP6032647, WE14M0076, WE14M0079, WE14M0092, WE14M76, WE14M79, WE14M92, WE14X20425, WE14X21334
Back to Top
Customer Reviews
Average Rating:
★★★★★
★★★★★
17 Reviews
4.9
Filter By Rating:
  • 5 Stars
    15
  • 4 Stars
    2
  • 3 Stars
    0
  • 2 Stars
    0
  • 1 Star
    0
Sort by:
  • 1
  • 2
Sorry, we couldn't find any existing reviews that matched. Try using some different or simpler keywords.
  • 1
  • 2
Customer Repair Stories
 Average Repair Rating: 3.6 / 5.0, 21 reviews. What's this?
Sort by:
  • 1
  • 2
  • 3
Sorry, we couldn't find any existing installation instruction that matched.
Drum bearing and Lint Chute plastic was cracked.
The video of the dryer lint chute assembly showed the man without gloves. I didn’t wear gloves. When I disconnected the wire from the front panel assembly, my hand jerked and hit the side of the panel. It must have been razor blade sharp, because I got a deep cut. Advise people to wear gloves to protect hands from sharp metal.
Other Parts Used:
Dryer Lint Chute Assembly Front Drum Bearing
  • Jason from CYPRESS, TX
  • Difficulty Level:
    Really Easy
  • Total Repair Time:
    30 - 60 mins
1 person found this instruction helpful.
Was this instruction helpful to you?
Thank you for voting!
Broken piece
Snap out the broken part. Snap in the new part. Use caution with the wires, but don’t have to disconnect them.
  • Kevin from GALES FERRY, CT
  • Difficulty Level:
    Really Easy
  • Total Repair Time:
    Less than 15 mins
  • Tools:
    Screw drivers
1 person found this instruction helpful.
Was this instruction helpful to you?
Thank you for voting!
Loud scrapping sqeaks
Diagnostics, ordered front and back bearing. Added the belt because I was there. Parts came quickly. disassembled, shot photos of wire assemblies. Unprepared for element and lint trap housing failure as the heating element was only 1/2 functional, made followup ordered which included the green and white shims. Note, front bearing replacement does not come with wear shims, disappointing. Very inexpensive and should just be part of replacement package. Reassembled in reverse order, tricky part was the belt reinstall. New light made the repair complete.
Other Parts Used:
Duct Felt Seal Dryer Lint Chute Assembly Light Bulb Drum Bearing Slide - Green (Sold individually) Heating Element and Housing
  • Matthew from AUBURN, WA
  • Difficulty Level:
    Easy
  • Total Repair Time:
    1- 2 hours
  • Tools:
    Pliers, Screw drivers, Socket set
2 of 2 people found this instruction helpful.
Was this instruction helpful to you?
Thank you for voting!
Dryer was making a loud noise when running.
I am a 55 year old woman who likes to repair household items. I followed You Tube instructions and did it all by myself. A few screws to get the top off and a two more to remove the front piece. Trap duct assembly was cracked and falling apart. Pulling off the old was fairly easy. I watched the You Tube instructions on my Ipad so I could rewind and watch as I did it. The hardest part was I dropped one of the screws when placing the front of the dryer back on and had to find another one that was the same size. Luckily I have lots of old screws in my tool box, If you like to do small simple repairs to save some money this is an easy one.
Other Parts Used:
Dryer Lint Chute Assembly Drum Bearing Slide - Green (Sold individually) Front Drum Bearing Drum Bearing Slide - White (Sold individually)
  • Robbin from COLUMBUS, OH
  • Difficulty Level:
    Easy
  • Total Repair Time:
    15 - 30 mins
  • Tools:
    Screw drivers
2 of 3 people found this instruction helpful.
Was this instruction helpful to you?
Thank you for voting!
Very noisy operation
Very easy! Removed old parts, and installed new parts in reverse order. Dryer was running, and sounded like a new appliance in 35 minutes!
Other Parts Used:
TOP BEARING Dryer Lint Chute Assembly Duct Felt Seal Drum Glide Bearing - White (Sold individually) Drum Bearing Slide
  • Larry from LAS VEGAS, NV
  • Difficulty Level:
    Really Easy
  • Total Repair Time:
    30 - 60 mins
  • Tools:
    Screw drivers
4 of 6 people found this instruction helpful.
Was this instruction helpful to you?
Thank you for voting!
Dryer making a loud squeaking noise and had a crack in housing that would catch clothing and twist it up into a ball.
The repair went very well, parts fit perfect. Now there isn't anymore complaints.
Other Parts Used:
Dryer Lint Chute Assembly Drum Bearing Slide - Green (Sold individually) Drive Belt Front Drum Bearing Drum Bearing Slide - White (Sold individually)
  • Steven from GOSHEN, IN
  • Difficulty Level:
    Easy
  • Total Repair Time:
    30 - 60 mins
  • Tools:
    Screw drivers
2 of 2 people found this instruction helpful.
Was this instruction helpful to you?
Thank you for voting!
My last phase of repairs of minor items.
if your unit has over 6,000 hours of operations, one needs to remove the front panel and inspect the sliders that the drum rides on. The video were very helpful to replace the sliders. Unfortunately, my dryer had over 10,000 hours of operations over a 30 years period, hence a major repair costing over $200.00 dollars. The drum sliders were gone, hence the drum eat through the plastic guides. More so, the drum started to eat away the front panel. If the dryer is eating your closes and making a noise, one is looking at a $200.00 repair job. Hence check the sliders early will save one $$$$.
  • Edward from EDGEWATER, FL
  • Difficulty Level:
    Really Easy
  • Total Repair Time:
    Less than 15 mins
1 person found this instruction helpful.
Was this instruction helpful to you?
Thank you for voting!
a lot
started with replacing the belt and tension pulley which I purchased from another source. I found your videos on line and they are great. easy to follow. Realized I needed the bottom vent assembly and your prices were better than my local supplier. It was easy to replace thanks to your video. It was nice that you included it in the final order status. The only problems. Did not know the duct felt seal was included with the new duct assembly. I ordered the wrong bearing slides, web site showed both green and white for my model. I now realize I should replace the upper bearing housing. Can I return the unused parts, unopened and have that put as a credit to my next order? Thanks
  • Craig from HOPKINS, MI
  • Difficulty Level:
    Very Easy
  • Total Repair Time:
    15 - 30 mins
  • Tools:
    Pliers, Screw drivers
2 of 3 people found this instruction helpful.
Was this instruction helpful to you?
Thank you for voting!
Dryer became very noisy when you turned it on to run
I watched the repair video 3 times to make sure I was comfortable to do the repair.the video was very helpful.thank you ! Everything went well and the dryer runs great.
Other Parts Used:
Dryer Lint Chute Assembly Drum Bearing Slide - Green (Sold individually) Front Drum Bearing Drum Bearing Slide - White (Sold individually)
  • Jeff from GREEN BAY, WI
  • Difficulty Level:
    Very Easy
  • Total Repair Time:
    15 - 30 mins
  • Tools:
    Screw drivers
1 person found this instruction helpful.
Was this instruction helpful to you?
Thank you for voting!
metal on metal swealing
removed rhe control panel, 4 torx screws. removed top of unit 2 philips screws , lifted out of the way ro get to front panel . 2 more torx screws ro get front panel off then juat a matter of changing out worn parts & reassembling dryer unit took maybe an hour thing runs great now
Other Parts Used:
Dryer Lint Chute Assembly Front Drum Bearing
  • KURT from CEDAR RAPIDS, IA
  • Difficulty Level:
    Really Easy
  • Total Repair Time:
    30 - 60 mins
1 person found this instruction helpful.
Was this instruction helpful to you?
Thank you for voting!
  • 1
  • 2
  • 3
Questions and Answers

Be the first to ask our experts a question about this part!
You May Also Need ?
Model Cross Reference
This part works with the following models:
PartSelect Number: PS11763093
Manufacturer Part Number: WE14X25080
Brand
Model Number
Description
General Electric
62160T3WB
Dryer
General Electric
62160T5WB
Dryer
General Electric
62261T0WW
Dryer
General Electric
62261T3WW
Dryer
General Electric
633615
Dryer
General Electric
633616
Dryer
General Electric
633617
Dryer
General Electric
63361T0WW
Dryer
General Electric
63361T3WW
Dryer
General Electric
63361T5WW
Dryer
General Electric
65300T0WB
Dryer
General Electric
65300T3WB
Dryer
General Electric
653615
Dryer
General Electric
653616
Dryer
General Electric
653617
Dryer
General Electric
65361T0WW
Dryer
General Electric
65361T3WW
Dryer
General Electric
65361T5WW
Dryer
General Electric
65371T0WW
Dryer
General Electric
65371T3WW
Dryer
General Electric
65371T5WW
Dryer
General Electric
662310
Dryer
General Electric
662311
Dryer
General Electric
662410
Dryer
General Electric
662411
Dryer
General Electric
662412
Dryer
General Electric
663615
Dryer
General Electric
663616
Dryer
General Electric
663617
Dryer
General Electric
66361T3WW
Dryer
Customer Service Representative

Get in touch, we're here to help!

Daily 8am - 9pm EST

Contact Customer Service