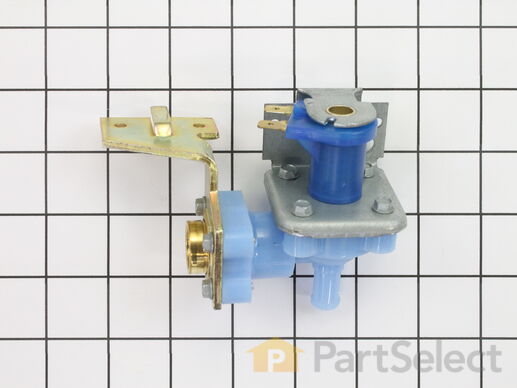
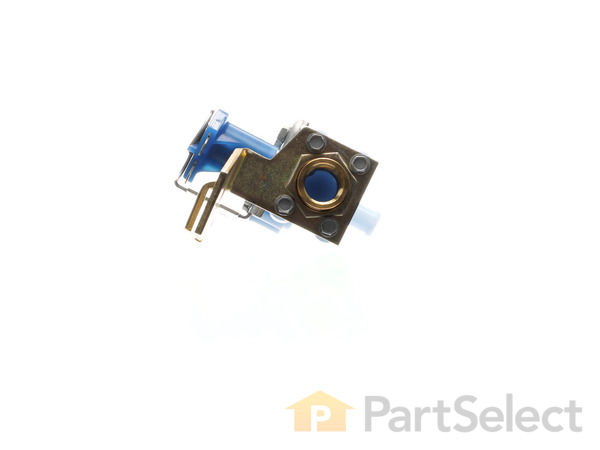
Part Location Diagram of WD15X93 GE Water Inlet Valve
See part 1206 in the diagram
( Grid squares measure 1x1 inch )
Customer Service Representative

Get in touch, we're here to help!

Daily 8am - 9pm EST

customerservice@partselect.com

Water Inlet Valve WD15X93

 Fits your HDA2020Z04BB!
★★★★★
★★★★★
8 Reviews

Rated by 8 customers 

Easy 

30 - 60 mins 

Ratings submitted by customers like you who bought this part.

$ 57.50
  In Stock
Get FREE EconoShip on orders over $100! T&C apply

Get this part fast! Average delivery time for in-stock parts via standard shipping: 1.8 days.

 Fits your HDA2020Z04BB!
PartSelect Number PS259411
Manufacturer Part Number WD15X93
Manufactured by GE
Product Description

Water Inlet Valve Specifications

This water inlet valve is specially designed for those dishwashers that fit under the counter from 1974 To Present. The valve should be located behind the lower kickplate panel in either the right or left corner. The attaching solenoids on the valve open and close according to the desired amount of water needed.
How Buying OEM Parts Can Save You Time and Money

How Buying OEM Parts Can Save You Time and Money

Troubleshooting
This part fixes the following symptoms:
Will not fill with water | Leaking | Not cleaning dishes properly | Not draining
This part works with the following products:
Dishwasher.
This part works with the following products:
General Electric, Hotpoint, Kenmore, Amana.
Part# WD15X93 replaces these:
AP2039339, 3310, WD15X93, WD15X0040, WD15X0046, WD15X0050, WD15X0052, WD15X0053, WD15X0057, WD15X0059, WD15X0066, WD15X0067, WD15X0072, WD15X0073, WD15X0076, WD15X0077, WD15X0078, WD15X0079, WD15X0080, WD15X0082 , WD15X0084, WD15X0085, WD15X0086, WD15X0087, WD15X0088, WD15X0089, WD15X0090, WD15X0091, WD15X0092, WD15X0093, WD15X0095, WD15X40, WD15X46, WD15X50, WD15X5033, WD15X5050, WD15X5052, WD15X5091, WD15X5093, WD15X5093R, WD15X52, WD15X53, WD15X57, WD15X59, WD15X66, WD15X67, WD15X72, WD15X73, WD15X76, WD15X77, WD15X78, WD15X79, WD15X80, WD15X82, WD15X84, WD15X85, WD15X86, WD15X87, WD15X88, WD15X89, WD15X90, WD15X91, WD15X92, WD15X93R, WD15X95, WD21X0127, WD21X0145, WD21X0536, WD21X127, WD21X145, WD21X536 Show less
Back to Top
Customer Reviews
Average Rating:
★★★★★
★★★★★
8 Reviews
4.6
Filter By Rating:
  • 5 Stars
    6
  • 4 Stars
    1
  • 3 Stars
    1
  • 2 Stars
    0
  • 1 Star
    0
Sort by:
  • 1
Sorry, we couldn't find any existing reviews that matched. Try using some different or simpler keywords.
  • 1
Customer Repair Stories
 Average Repair Rating: 3.5 / 5.0, 8 reviews. What's this?
Sort by:
  • 1
Sorry, we couldn't find any existing installation instruction that matched.
water valve was bad
very easy like you said
  • keith from crescent, FL
  • Difficulty Level:
    Really Easy
  • Total Repair Time:
    30 - 60 mins
  • Tools:
    Nutdriver, Pliers
2 of 5 people found this instruction helpful.
Was this instruction helpful to you?
Thank you for voting!
Kenmore Dishwasher not cleaning good, have more pressure now, but still not cleaning as good.
Remove lower panels, turn off hot water supply, Turn off breaker to dishwasher. notice how power connector is orientated and how valve is mounted to chassis of dishwasher and remove Molex connector which supplies power to valve. The power to the valve is 120VAC when the timer gets to the appropiate cycle I measured the valve with no connector attached with DVM set to Diode or ohms setting and got about .825. I measured the NEW part and measure about the same. Have towel under valve hoses for small amount of water will come out. remove small diameter hose , inlet water supply, remove 2 screws holding part with nutdriver to remove valve which exposes the black hose attached to valve. Hose has a hose clamp, use pliers to remove. good time to check and clean hoses. I unwrapped a coat hanger to run through the hoses for debris. to INSTALL reverse the above. clean water away from floor with towel. Turn on hot water supply, check for leaks, I did not have any leaks. Turn on breaker. You can stick a stubby screwdriver into the door close switch of front door which enables you to turn on (swing arm) dishwasher with door open to check water pressure. I have a great deal more water pressure and water from jets spray much higher than before. Old valve was clearly bad, but solenoid of valve still worked, which sucks in the arm when energized. I used a DVM on the 2 wire connector on valve to check for 120vac when cycle turns it on-measured good. I still don't have quite the same cleaning as before. It is 80% better, but something is still not right. My wife put in one of those pot cleaners (red) mesh plastic thingy on top rack--and found pieces of red mesh plastic in debris area, cleaned it out as best I could removing the 2 covers, but not sure valve is opening there or debris is clogged in there which sends pieces of food, etc. through hose to garbage disposal. Hose wasn't clogged. Cleaning better but wife is still saying not as good. The Pump is running good, cleaned dust and dirt out of pump with vacuum. 10 years old, thinking of removing dishwasher from counter and checking the pump area or change it.
  • lawrence from gonzales, LA
  • Difficulty Level:
    A Bit Difficult
  • Total Repair Time:
    1- 2 hours
  • Tools:
    Nutdriver, Pliers, Screw drivers, Socket set, Wrench (Adjustable), Wrench set
2 of 6 people found this instruction helpful.
Was this instruction helpful to you?
Thank you for voting!
no a/c
removed relay and replaced, found moth cacoon inside relay. Goodman a/c not3m no goodman in list
  • joseph from wall, NJ
  • Difficulty Level:
    Really Easy
  • Total Repair Time:
    15 - 30 mins
  • Tools:
    Screw drivers, Socket set
3 of 5 people found this instruction helpful.
Was this instruction helpful to you?
Thank you for voting!
Little/no water coming in & dirty dishes
1. Remove access panel under door. 2.Shut off hot water.3. Shut off electric to washer.4. Disconnect water line from water inlet valve.5. Remove small outlet water line from valve. Replace valve & reconnect. OR !!! 1.Take solenoid valve & bracket off of original inlet valve 2. Pull out white plastic diaphragm cover. 3. Remove diaphragm & clean out water holes with a pin. 4. Reassemble valve. 5. Reinstall original water inlet valve & save $27.00
  • William from Polson, MT
  • Difficulty Level:
    Really Easy
  • Total Repair Time:
    30 - 60 mins
  • Tools:
    Pliers, Socket set, Wrench (Adjustable)
15 of 17 people found this instruction helpful.
Was this instruction helpful to you?
Thank you for voting!
No water during wash cycle.
Shut off water, disconnect power,remove
Faulty valve,install replacement part.
  • Jason from Porterfield, WI
  • Difficulty Level:
    Easy
  • Total Repair Time:
    30 - 60 mins
  • Tools:
    Nutdriver, Screw drivers
5 of 10 people found this instruction helpful.
Was this instruction helpful to you?
Thank you for voting!
water valve was leaking and vent cover needed replaced
changed water valve and removed door cover and replaced the vent cover parts was easy to find on your web site and delivery was very quick within 3 days very satisfied with your service.
Other Parts Used:
VENT PAD Water Inlet Valve
  • Robert from Mineral Wells, WV
  • Difficulty Level:
    Easy
  • Total Repair Time:
    15 - 30 mins
  • Tools:
    Nutdriver, Screw drivers
10 of 14 people found this instruction helpful.
Was this instruction helpful to you?
Thank you for voting!
Thanks for sending the correct part. You guys did a great job.
Just put the part on.
  • Albert from Dallas, TX
  • Difficulty Level:
    Really Easy
  • Total Repair Time:
    30 - 60 mins
  • Tools:
    Nutdriver, Pliers, Socket set, Wrench set
4 of 4 people found this instruction helpful.
Was this instruction helpful to you?
Thank you for voting!
Insufficient fill water, dishes not getting clean (valve diaphram had ruptured)
1. Remove lower cover skirt.
2. Shut of water at undersink valve.
3. Unplug power cord or turn off circuit breaker.
4. Disconnect water supply line from fill valve.
5. Unplug the electrical connector from the valve.
6. Remove the 2 valve mounting bracket screws.
7. With loose valve in hand, rotate to gain access to allow release of outlet hose clamp for hose removal.
8. Remove brass fitting from old valve and install on new valve. Use teflon tape on the pipe threads only.

Install new valve by reversing the procedure.
  • Don from Mount Vernon, IL
  • Difficulty Level:
    Easy
  • Total Repair Time:
    30 - 60 mins
  • Tools:
    Nutdriver, Screw drivers, Wrench set
71 of 77 people found this instruction helpful.
Was this instruction helpful to you?
Thank you for voting!
  • 1
Questions and Answers

Ask our experts a question about this part and we'll get back to you as soon as possible!

3 questions answered by our experts.
Sort by:
  • 1
Sorry, we couldn't find any existing answers that matched.Try using some different or simpler keywords, or submit your new question by using the "Ask a Question" button above!
Tim
May 4, 2018
Is this part difficult to install? When was this model manufactured? Are there directions to install?
For model number GSD500P-45BA
PartSelect logo
Hello Tim, thank you for your question. This part is a very easy part to install. We have directions on our site, provided by other customers, that give steps on how they installed the part. There are also lots of installation videos online. Unfortunately, we do not have the date of manufacturing for your appliance. I hope this information helps!

2 people found this helpful.

Was this helpful?
Thank you for voting!
Don Brunner
November 3, 2017
Is the mounting bracket for this water inlet valve available as a separate part? I have replaced the valve but still have a slight leak; I think the "plate" isn't fitting against the o-ring properly.
For model number GSD650T-60WB
PartSelect logo
Hello Don, Thanks for your question. We show that the mounting bracket is only available with the entire water inlet valve assembly. I hope this helps.

1 person found this helpful.

Was this helpful?
Thank you for voting!
Liz
August 20, 2022
Will replacing the inlet valve stop the dishwasher from filling when it is not running
For model number Gsd500x-73ba
PartSelect logo
Hello Liz, thank you for your inquiry. As the problem of the dishwasher filling when it is not running is mostly caused by a faulty water inlet valve, it is highly likely that replacing it would solve the problem. However, sometimes it is also caused by a damaged float switch part number PS260235 and dishwasher float part number PS259159, so you might also want to look into that. Please do not hesitate to ask any more questions that you might have. Customer service is available 7 days a week if you need help with purchasing.

Was this helpful?
Thank you for voting!
Related Parts:
  • 1
Model Cross Reference
This part works with the following models:
PartSelect Number: PS259411
Manufacturer Part Number: WD15X93
Brand
Model Number
Description
General Electric
1200L02
Dishwasher - DISHWASHER
Kenmore
18385
Dishwasher - DISHWASHER
General Electric
3000B10
Dishwasher - DISHWASHER
General Electric
3000W10
Dishwasher - DISHWASHER
Kenmore
361402891
Dishwasher - Kenmore Dishwasher Model 36.1402891 (361402891, 36 1402891) Parts
Kenmore
3631401190
Dishwasher
Kenmore
3631401191
Dishwasher
Kenmore
3631401590
Dishwasher
Kenmore
3631401591
Dishwasher
Kenmore
3631401592
Dishwasher
Kenmore
3631401890
Dishwasher
Kenmore
3631401891
Dishwasher
Kenmore
3631401892
Dishwasher
Kenmore
3631402190
Dishwasher
Kenmore
3631402191
Dishwasher
Kenmore
3631402192
Dishwasher
Kenmore
3631402590
Dishwasher
Kenmore
3631402591
Dishwasher
Kenmore
3631402592
Dishwasher
Kenmore
3631402890
Dishwasher
Kenmore
3631402891
Dishwasher
Kenmore
3631402892
Dishwasher
Kenmore
3631404193
Dishwasher
Kenmore
3631404194
Dishwasher
Kenmore
3631404196
Dishwasher
Kenmore
3631404197
Dishwasher
Kenmore
3631404593
Dishwasher
Kenmore
3631404594
Dishwasher
Kenmore
3631404595
Dishwasher
Kenmore
3631404596
Dishwasher
Customer Service Representative

Get in touch, we're here to help!

Daily 8am - 9pm EST

Contact Customer Service