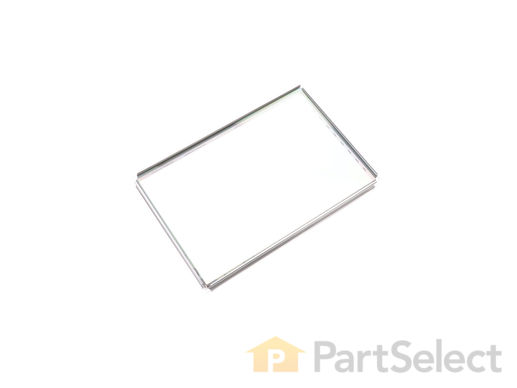
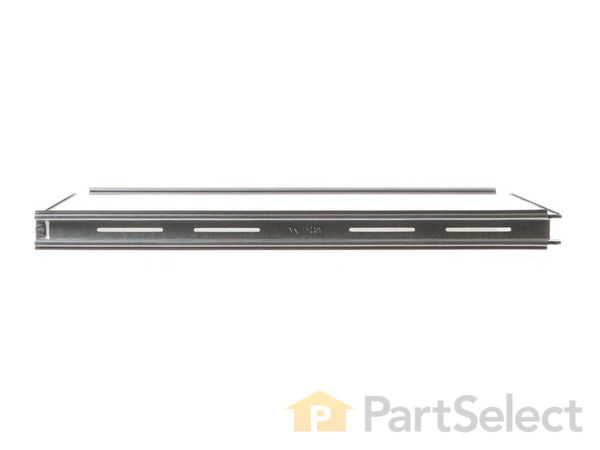
Part Location Diagram of WB55T10067 GE Inner Door Window Kit
See part 338 in the diagram
( Grid squares measure 1x1 inch )
Customer Service Representative

Get in touch, we're here to help!

Daily 8am - 9pm EST

customerservice@partselect.com

Inner Door Window Kit WB55T10067

 Fits your JB940AB4AA!
★★★★★
★★★★★
5 Reviews

Rated by 7 customers 

Easy 

30 - 60 mins 

Ratings submitted by customers like you who bought this part.

$ 250.98
  In Stock
Get FREE EconoShip on orders over $100! T&C apply

Get this part fast! Average delivery time for in-stock parts via standard shipping: 1.8 days.

 Fits your JB940AB4AA!
PartSelect Number PS250750
Manufacturer Part Number WB55T10067
Manufactured by GE
Troubleshooting
This part works with the following products:
Range.
This part works with the following products:
General Electric, Kenmore.
Part# WB55T10067 replaces these:
AP3188858, 911623, WB55T10067, WB55T10055, WB55T10064, WB55T10069, WB55T10107
Back to Top
Customer Reviews
Average Rating:
★★★★★
★★★★★
5 Reviews
3.4
Filter By Rating:
  • 5 Stars
    3
  • 4 Stars
    0
  • 3 Stars
    0
  • 2 Stars
    0
  • 1 Star
    2
Sort by:
  • 1
Sorry, we couldn't find any existing reviews that matched. Try using some different or simpler keywords.
  • 1
Customer Repair Stories
 Average Repair Rating: 3.1 / 5.0, 7 reviews. What's this?
Sort by:
  • 1
Sorry, we couldn't find any existing installation instruction that matched.
oven glass was cracked
The repair went very well. The second repair comnt to remove the hinge screws was a good correction from the first description. I had to go to that parts diagram to realize that the the two metal sleaves were insulation spacers for the two top screws.
  • David from Chespeake, VA
  • Difficulty Level:
    Easy
  • Total Repair Time:
    1- 2 hours
  • Tools:
    Nutdriver, Screw drivers
1 of 2 people found this instruction helpful.
Was this instruction helpful to you?
Thank you for voting!
Still can't get1 hindge in. inner window broken
Got door off no problem used screw drive to release locks and lifted door off. Took 3 1//4 screws out the 2 3" long screws out to separate door half's took screws of hinges and then8 1/4 inch screws of sheet metal that covered window. Replaced window and reverse what I did taking apart. Still having trouble getting 1 hinge to connect to stove. Help would be appreciated.
  • Chuck from Sunbury, OH
  • Difficulty Level:
    Difficult
  • Total Repair Time:
    30 - 60 mins
  • Tools:
    Nutdriver, Screw drivers, Wrench set
1 of 2 people found this instruction helpful.
Was this instruction helpful to you?
Thank you for voting!
Part Number PS250750 Inner oven glass
Charles from Sharon MA 1/14/09 has a pretty good description of what needs to be done. My model must be a little different than Charles, so I'll just tell you about the differences.

The locks that hold the hinges in place on the oven had to be flipped DOWN not UP. They are small rectangular metal brackets with a little open "notch" on the top where you can stick a small screwdriver to pry them down.

I found that I DID have to remove the six small screws (three on each hinge) that hold the hinges in place as they also went through both the inner and outer door panels.

Note that the glass assembly has a vented frame. Note that there are vents on the TOP of the frame but not the bottom - i.e. heat rises. Take care not to put the glass assembly in upside down.
  • Robert from Longmeadow, MA
  • Difficulty Level:
    Easy
  • Total Repair Time:
    30 - 60 mins
  • Tools:
    Nutdriver, Screw drivers, Socket set
26 of 27 people found this instruction helpful.
Was this instruction helpful to you?
Thank you for voting!
Interior glass cracked due to heat
First we confirmed that the part delivered was the correct piece needed. We unscrewed the interior panel of the door and separated the insulation from the two pieces so the old glass frame could be removed. The rope type gasket gave us some trouble as it was difficult to stage the insulation, glass frame and rope at one time. Once we got the pieces in place it was a breeze to screw the panel back in just in time to make pies for our Thanksgiving dinner.
  • suzanne from brighton, MI
  • Difficulty Level:
    A Bit Difficult
  • Total Repair Time:
    30 - 60 mins
  • Tools:
    Screw drivers
5 of 7 people found this instruction helpful.
Was this instruction helpful to you?
Thank you for voting!
Broken interior oven window
It took a bit of head scratching to remove the oven door. I had read another user saying he'd removed the hinge screws unneccessarily, so I left them alone. I eventually was able to locate the locks on each hinge. Once they were disengaged, it was a simple matter to lift off the door. After that, I removed all the screws (except the hinge screws) and took the door apart. Once it was disassembled, I found two loose triangular pieces, about 1 1/2" long. I later discovered these were spacers for the two top srews. They were placed on end, and the top screws passed through them. All in all, a relatively simple repair, which absolutely amazed my wife, landlord, faily, etc.
  • George from Bowie, MD
  • Difficulty Level:
    Easy
  • Total Repair Time:
    15 - 30 mins
  • Tools:
    Nutdriver, Screw drivers
3 of 4 people found this instruction helpful.
Was this instruction helpful to you?
Thank you for voting!
Inner glass window of oven cracked
1. Removed the oven door -- this is a little tricky -- you need to lift to small metal covers on the hinges, then pull the door up and out from the broil (half open position). Replace the door the same way. It is important to insert the hinges with the door in the "broil" position, and after verifying that the door is aligned and closes normally -- then lift hinge covers to lock in place.

2. After door is removed the glass assembly can be removed and replaced by unscrewing two long (2-3 inch long) screws at the top. And three hex head screws at the bottom of the door. Note -- there is no need to removed the six screws (3 either side) on th ebottom of the door -- because these only hold the hinges to the door. The other 5 screws that you do need to remove actually hold the two halves of the door together.

3. Replace glass assembly and reassemble.

It is not so hard but you need "star" screwdrivers for the long screws... (not philips -- but 6-pointed stars), and a socket wrench is useful for the bottom 3 hex head screws...

If I were to do again it would only take me 15 minutes.... but I messed up by removing the hinges unnecessarily so it took me an hour.
  • Charles from Sharon, MA
  • Difficulty Level:
    Easy
  • Total Repair Time:
    30 - 60 mins
  • Tools:
    Nutdriver, Screw drivers, Socket set
57 of 60 people found this instruction helpful.
Was this instruction helpful to you?
Thank you for voting!
shatter inner window glass
Removed fasteners holding door assembly together. Cleaned out broken glass. Placed new glass frame. Reinstalled fasteners
  • Ed from Kingston, PA
  • Difficulty Level:
    Really Easy
  • Total Repair Time:
    15 - 30 mins
  • Tools:
    Socket set
2 of 5 people found this instruction helpful.
Was this instruction helpful to you?
Thank you for voting!
  • 1
Questions and Answers

Ask our experts a question about this part and we'll get back to you as soon as possible!

1 question answered by our experts.
Sort by:
  • 1
Sorry, we couldn't find any existing answers that matched.Try using some different or simpler keywords, or submit your new question by using the "Ask a Question" button above!
Crystal
November 27, 2017
Is it possible to just get the glass for the inner door rather than the whole inner door glass window kit? I wasn't expecting it to cost quite that much to just replace the glass on the inside of the oven door.
For model number JBP35ED1BB
PartSelect logo
Hi Crystal, Thank you for the question. Very sorry the inner door glass is only sold as part of the kit. Hope this helps!

Was this helpful?
Thank you for voting!
  • 1
Model Cross Reference
This part works with the following models:
PartSelect Number: PS250750
Manufacturer Part Number: WB55T10067
Brand
Model Number
Description
General Electric
15891
Range - Electric Range
General Electric
15891 1
Range
General Electric
158911
Range
Kenmore
91192712020
Range
Kenmore
91192714020
Range
Kenmore
91192812300
Range
Kenmore
91192812301
Range
Kenmore
91192814300
Range
Kenmore
91192814301
Range
Kenmore
91193410010
Range
Kenmore
91193411000
Range
Kenmore
91193411002
Range
Kenmore
91193412000
Range
Kenmore
91193417000
Range
Kenmore
91193418000
Range
Kenmore
91193418002
Range
Kenmore
91193512010
Range
Kenmore
91193514010
Range
Kenmore
91193600010
Range
Kenmore
91193601000
Range
Kenmore
91193601002
Range
Kenmore
91193602000
Range
Kenmore
91193602002
Range
Kenmore
91193604010
Range
Kenmore
91193607000
Range
Kenmore
91193607002
Range
Kenmore
91193608000
Range
Kenmore
91193608002
Range
Kenmore
91193609020
Range
Kenmore
91193612010
Range
Customer Service Representative

Get in touch, we're here to help!

Daily 8am - 9pm EST

Contact Customer Service