This is a large dual haliant element with a limiter or sensor for glass cooktops and freestanding ranges. It is a 2500-watt part. The inner diameter measures 9 inches, while the outer diameter measures 10 inches. If there is no heat generated from your element, you may need to replace this part. You may also need to check your socket or infinite switch. It is located under the glass cooktop of your appliance. Be sure to unplug or cut the circuit breaker to your appliance before starting this repair. Before replacing this part, be sure your appliance is getting enough power. If it is receiving less than the required 220 volts of alternating current, the surface element will not work.
Keep searches simple. Use keywords, e.g. "leaking", "pump", "broken" or "fit".
Sorry, we couldn't find any existing reviews that matched. Try using some different or simpler keywords.
★★★★★
★★★★★
Daniel R - October 25, 2022
Verified Purchase
Worked great
Great condition
★★★★★
★★★★★
Kathryn F B - October 3, 2022
Verified Purchase
not bad, easier with 2 people or a good way to prop up the lid
Part worked and came fast
★★★★★
★★★★★
Nathan J - May 20, 2020
Verified Purchase
Easy repair!
The part was delivered quickly and was well packaged to prevent damage in transit. The replacement was quick and easy.
★★★★★
★★★★★
Kristi H - February 27, 2019
Verified Purchase
Easy repair & works perfectly
Easy & my stove burner works now!
Thank u!
★★★★★
★★★★★
Wesley B - February 13, 2019
Verified Purchase
Stove repair went well.
I followed the instructions that had been posted by another person who had done the same repair previously. It took about one half hour and stove is now working well. One note. Be careful not to let the clips fall down between the over and side of stove when removing the old burner,
★★★★★
★★★★★
Charles O - January 18, 2019
Verified Purchase
Great Product
Arrived timely and works like a champ!! Makes the wife happy ... as men know, if momma isn't happy, nobody's happy.
★★★★★
★★★★★
Mark B - January 10, 2019
Verified Purchase
easy, shipped as promised.
easy repair. youtube shows how. it helps to have a helper to hold the stove top up.
★★★★★
★★★★★
Mark M - January 3, 2019
Verified Purchase
Perfect fit 5 min. Install
Well packaged and in new condition.
★★★★★
★★★★★
Ed F - November 27, 2018
Verified Purchase
Easier to replace than anticipated
I followed the replacement instructions that came with the order and it took me about 15 minutes total. In fact, I spent more time trying to find a 1/4" hex bit to remove the two screws than the repair took!
★★★★★
★★★★★
FAY S - November 14, 2018
Verified Purchase
Easiest repair ever.
Burner had been out for a couple of years. All fixed now. Delivery fast. Repair worked out fast. Very pleased.
< Prev
1
2
Next >
Customer Repair Stories
Average Repair Rating: 4.0 / 5.0, 27 reviews.
What's this?
Sort by:
< Prev
1
2
3
Next >
Search filter:
Clear Filter
Your search term must have 3 or more characters.
Keep searches simple. Use keywords, e.g. "leaking", "pump", "broken" or "fit".
Sorry, we couldn't find any existing installation instruction that matched.
Inside burner would no longer heat
I went online and ordered the part after reading other people's repair experiences, confident that I could do it because the part was quite pricey. First, be sure you're circuit breaker to your range is off. Next, open the oven door and locate and remove two screws with a socket, that are just under the top surface which will allow you to
... Read more lift up the glass top which is actually hinged...no need to pull the range out. Securely prop up the glass surface area and the burners are exposed. With a marker, mark where each color wire goes on the burner you are going to remove and also mark where the two holding brackets are. This way you can reference the locations to connect to the new one. Carefully remove the wires and brackets and install new burner with brackets and connections. Close up the top, replace two screws, turn on breaker, and if there were no other faulty components,it'll work great. P.S Be gentle getting the very snug wires off. Good Luck
Read less
John from CHARLESTOWN, NH
Difficulty Level:
Easy
Total Repair Time:
15 - 30 mins
Tools:
Screw drivers, Socket set
2 of 2 peoplefound this instruction helpful.
Was this instruction helpful to you?
Thank you for voting!
Repair was slow, due to replacement part was incorrect. Original part had two spring loaded spacers, & holes for them to sit in. The replacement part did not have holes. I was able to drill two holes to make it work.
Turned off power. Opened range door, removed 2 screws that held top in place. Took a photo of the existing wiring for reference. Removed old burner. Be careful with spacers & springs. If dropped, they will be hard to locate in the insulation. Replaced wiring connectors & verified proper location with photo. Closed cover, replaced 2 scr
... Read moreews & turned on circuit breaker.
Read less
Victor from FAYETTEVILLE, GA
Difficulty Level:
A Bit Difficult
Total Repair Time:
30 - 60 mins
Tools:
Pliers, Screw drivers, Socket set
1 personfound this instruction helpful.
Was this instruction helpful to you?
Thank you for voting!
inner element not working
opened oven door and removed two 1/4 " screws from range top. lifted range top and propped open like a car hood with a 1" diam dowel rod. marked on new element the wire color locations from old element and removed wires. removed the two small screws and clips that hold the element to the range top and removed element. Matched where the
... Read more mounting screws locate to the new element. Installed new element in reverse order.
Read less
Michael from BAY CITY, MI
Difficulty Level:
Really Easy
Total Repair Time:
Less than 15 mins
Tools:
Nutdriver, Pliers, Screw drivers
1 personfound this instruction helpful.
Was this instruction helpful to you?
Thank you for voting!
Small element in center burned into(inoperative
1.Move range in position to access electrical wall disconnect and unplug. 2.Remove two 5/16 screws (located under top fwd. edge of cook top, Lift entire top assy up from front and prop with appropriate device(short 2x4 about18 inches long works well) 3.Remove two small phillips screws securing two metallic keeper devices holding burner a
... Read moressy in place. This should allow burner assy to be removed.4.Disconnect electrical spade connectors from ceramic terminal blocks on old burner assy.CAUTION: [SPADE CONNECTORS FIT TIGHTLY DO NOT PULL ON WIRES USE PRYING FORCE WITH FLAT SCREWDRIVER DIRECTLY ON TERMINAL].Remove connectors one at a time re-connecting to same location on new assy. Reassemble in reverse order.
Read less
Douglas from Gravette, AR
Difficulty Level:
Easy
Total Repair Time:
30 - 60 mins
Tools:
Nutdriver, Screw drivers
1 personfound this instruction helpful.
Was this instruction helpful to you?
Thank you for voting!
Small burner of Dual Burner no longer would work.
Pull out Range and unplug from wall receptacle. Open Range door and remove 2 hex head screws with pliers. Screws located at top inside of range door opening. They hold the burner top in place. Slowly lift front of top burner section up and at same time slightly lifting back of burner section since it rests on 2 pivots. Prop front of
... Read moreburner section open, tilted back, with a piece of 2X4 maybe 2 1/2 ft. long. Make sure the 2X4 is located at the front/middle of range [resting on insulation] and at front middle of burner top to keep it opened firmly and balanced. You have about 5 or 6 wire clips to remove from elec. posts. Use pliers to gently remove clips. Tag the wires with tape to remember which wires go onto the new burner. Or take a close up picture with your phone to remember which wires go where. There are 2 philips head screws holding clips that hold the burner in place. The clips are slipped into a slot to help hold them in place. Mark the 2 slots so that when you remove the clips you will remember which slots to put them back into. You will need to hold the burner with one hand while you are removing the last clip as it could just fall out. Remove old burner and install new burner at same angle as was the old burner. You will have to make sure that the 2 clips are in the slotted openings first as you can not put them in place after the burner is installed in the opening. Reinstall the 2 screws into the 2 clips. Hold the electrical pole fittings with one hand while you gently reattach the electrical clips with a set of pliers. You may need to wiggle the clips back and forth to get them on securely. Remove the 2X4 and gently lower the burner top. The hardest part is now you have to slightly lift the back of the burner top while the front is lifted up and maneuver the back to drop down over the 2 pivots. Then the burner top will drop down in place so that the 2 screws in the range door opening can be reinstalled. I don't know of an easy way of making the top of the burner section fall down over the pivots except trial and error. Maybe use a flashlight to look back where the pivots are located while the top is propped open. That may help you visually to see what you are trying to do.
Read less
Jerry L from Palmetto, FL
Difficulty Level:
Easy
Total Repair Time:
15 - 30 mins
Tools:
Pliers, Screw drivers, Wrench (Adjustable)
1 personfound this instruction helpful.
Was this instruction helpful to you?
Thank you for voting!
Element would not respond to changes in temperature setting
Turn off power to cook top. Remove 2 screws that hold the cook top to countertop. Lift complete cook top from counter and place diagonally across opening. Remove 10 screws that hold glass top to the component cabinet. Make a diagram of wiring to element. Disconnect wires. Remove 2 mounting brackets from bottom of old element and posi
... Read moretion them on new element and screw tight. Wire new element as diagrammed earlier. Replace glass top on component cabinet and reinstall 10 screws. Place unit back into counter opening and secure with 2 straps. Turn power back on. Stand back and enjoy your accomplishment.
Read less
douglas from chance, VA
Difficulty Level:
Easy
Total Repair Time:
15 - 30 mins
Tools:
Nutdriver, Pliers, Screw drivers
3 of 5 peoplefound this instruction helpful.
Was this instruction helpful to you?
Thank you for voting!
The center element of the 2-stage electric burner failed.
The cooktop is just set in the counter with no fasteners. I shut off the power and lifted the unit out. Ten small screws held the top to the body. After removal, I took a picture to have a wiring reference. I disconnected five wires with push-on terminals, then removed two Tinnerman nuts with needle-nose pliers. The failed burner was
... Read more free to remove. There were two mounting ears on the bottom of the burner at positions 12 and 48 as stamped on the bottom. I transferred the mounting ears to the new burner, one screw each. I then positioned the new burner and secured with the two Tinnerman nuts, replaced the five wires, screwed the top back on and slipped the unit into the counter. Done.
Read less
Robert from Cinnaminson, NJ
Difficulty Level:
Easy
Total Repair Time:
30 - 60 mins
Tools:
Pliers, Screw drivers
2 of 4 peoplefound this instruction helpful.
Was this instruction helpful to you?
Thank you for voting!
The dual burnner had somthing drop on it and it went out
I pulled out the range from the wall unplugged it from the wall then i opened the oven door and removed the two small screws on the front off the range and lifted the glass top and supported it with a 1/2" X 18inc wooden dowel, then i removed the two burner retaining screws with a small Phillips screw driver and removed the wires from the
... Read more burner, then i replaced the burner with the new one and reconnected the wires and placed the burner in to the two retaining clips and then tightened the two screws then i removed the wooden dowel and installed the two screws on the front bottom side on the range then i plugged in the range in and tested the burner then put the range back against the wall.
Read less
Thad from Layton, UT
Difficulty Level:
A Bit Difficult
Total Repair Time:
15 - 30 mins
Tools:
Screw drivers
3 of 3 peoplefound this instruction helpful.
Was this instruction helpful to you?
Thank you for voting!
larger area of burner won't heat.
Shut the power.pull out stove .remove parts to check switch wiring for damage .then disconnected the oven vent 2scews, lifted the glass top 2scews.then lowered the ft. bracket that holds the two ft. burners to the glass.I could see a break or burnout of the outer part of the element.I'm an auto tech/mech this is simple.
Very simple repair. Remove two screws to lift the range top. Then remove the two screws holding the element in place. Disconnect the wires from the old element, connect the wires to the new element. Reverse the procedure and you are done. Total time is anywhere from 15 to 30 minutes.
Kevin from Leominster, MA
Difficulty Level:
Easy
Total Repair Time:
15 - 30 mins
Tools:
Nutdriver, Screw drivers
2 of 2 peoplefound this instruction helpful.
Was this instruction helpful to you?
Thank you for voting!
< Prev
1
2
3
Next >
Questions and Answers
Ask our experts a question about this part and we'll get back to you as soon as possible!
7 questions answered by our experts.
Sort by:
< Prev
1
Next >
Search filter:
Clear Filter
Your search term must have 3 or more characters.
Keep searches simple. Use keywords, e.g. "leaking", "pump", "broken" or "fit".
Sorry, we couldn't find any existing answers that matched.Try using some different or simpler keywords, or submit your new question by using the "Ask a Question" button above!
Dave
May 11, 2023
Dual Radiant Element 9 " always turns on to highest heat. Replace Element and/ or Surface Element Switch ? Thanks
For model number JP350AOVIAA
Hi Dave, thank you for reaching out. Based on our understanding of the issue, we would suggest you replace the switch infinite control, part number PS12342205, to fix this issue. We hope this solves your issue!
My front dual element burner is not heating at all while the other three elements on the stove top are working. The coils themselves have continuity, but there is a heat sensing element on these burners as well, and I don't know if that element is bad will it shut down the whole burner or not. How do I determine if it's the element that needs replacing or the switch that needs replacing?
For model number J P350T0C1WW
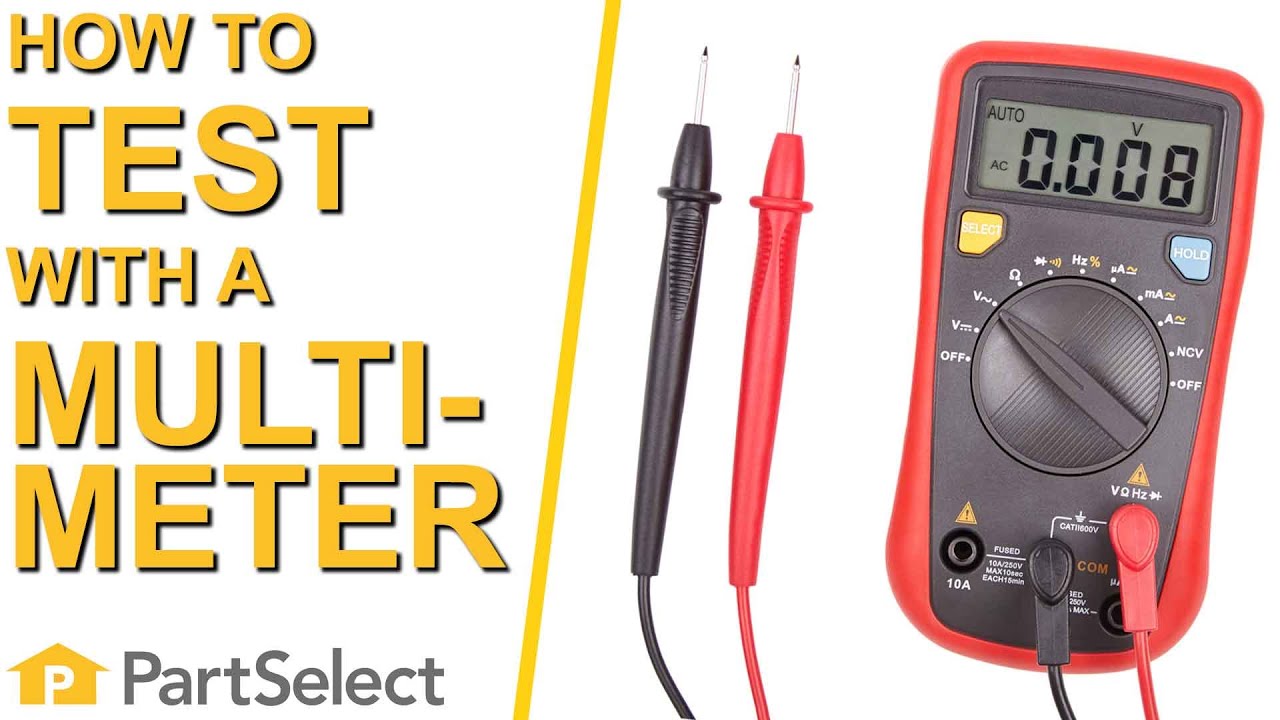
Hello Skip, Thank you for your inquiry. You can test both of these parts with a multimeter. If you are unfamiliar with how a multimeter functions, we have videos available to assist you. We hope this helps.
Was this helpful?
Thank you for voting!
Sharon
July 12, 2021
Will this fit a GE profile cooktop burner element for front right
Hello Sharon, thank you for contacting us, In order for us to locate the correct parts and repair information we will require the model number of the unit. Once you have located the model number please feel free to resubmit the question and we will be happy to help you. We are looking forward to hearing from you!
Was this helpful?
Thank you for voting!
Rich
November 22, 2021
What is the part number for the front rt dual burner? Has that part number changed.
For model number JP350B0C1BB
Hello Rich, Thank you for contacting us. We have researched the model you have provided and have found the part you are looking for is PartSelect Number PS16225972. If you need help placing an order, customer service is open 7 days a week. Please feel free to give us a call. We look forward to hearing from you!
Looking for the right front dual burner element can you give me the part no needed to replace it. Thanks
For model number JBP660K4CC
Hello Ronald, thank you for contacting us. We have researched the model you have provided and have found that the part you are looking for is part number PS1016539. If you would like assistance placing an order, please contact customer service. Good luck with your repair!
Was this helpful?
Thank you for voting!
Carol
October 31, 2022
The front right dual burner goes nuts. It will go high on low or just stay on high no matter where you set it.
For model number JP350w0v1ww
Hello Carol, thank you for your inquiry. According to our research, we would recommend checking the Surface Element Switch, part number PS236392. If it is faulty replace it with a new one. This switch cycles power to the element to control its heat. If that does not help, then the issue is likely to be with the Dual Radiant Element, part number PS1016539. We hope this solves your problem!
The large dual burner on the right side of the cook top doesn't heat correctly. The smaller inside burner works fine but the outside burner doesn't heat continually it comes on and goes off intermittently. This burner was replaced once before when it didn't work at all by an appliance repair guy. This time I want to do it myself to save money. Do I only need to replace the burner with part #PS1016539 or will I need additional parts to fix this problem?
For model number JP989BCBB
Hi Donna, thank you for your inquiry. According to our research, you only need to replace this burner to fix the issue. We hope this helps! If you need help placing an order, customer service is open 7 days a week. Thanks again for your great question.
Was this helpful?
Thank you for voting!
< Prev
1
Next >
✖
Ask a Question
Ask our experts a question on this part and we'll respond as soon as we can.